Mini Quilt Patterns, TQC “July” Postcard Pattern Review
Mini quilt patterns. Temecula Quilt Company’s “July” mini quilt free pattern review. Tips and tricks for beginners to complete successfully.
These mini quilts are a great way to improve your piecing and patchwork skills. Takes less time to make than a throw or bed quilt. Wonderful projects to use up your scrap fabrics and play with mixing and matching fabrics. Plus it’s a great way to create art for your home or office. Also, this mini quilt pattern would be a great quilted placemat too!
MAKE SURE YOU CHECK THESE OUT!
After you read this post, make sure you also check out Learn How to Quilt for Absolute Beginners. It’s jam packed with information to make your first quilt. It also has links and resources that are so helpful when you’re first learning. There’s lots of free quilt patterns that are great for beginners and all skill levels too. So make sure you check this out, seriously don’t forget!
Make sure you grab a copy of my free Quilt Planning Journal. It’s filled with graph paper and note pages to help you design at least 4 quilt or sewing projects! Use it to jot down ideas, fabrics, patterns and inspiration all in one place. Or create your own patterns and share with others. Pin in fabric swatches, photos of your finished quilts and enjoy your creative process!
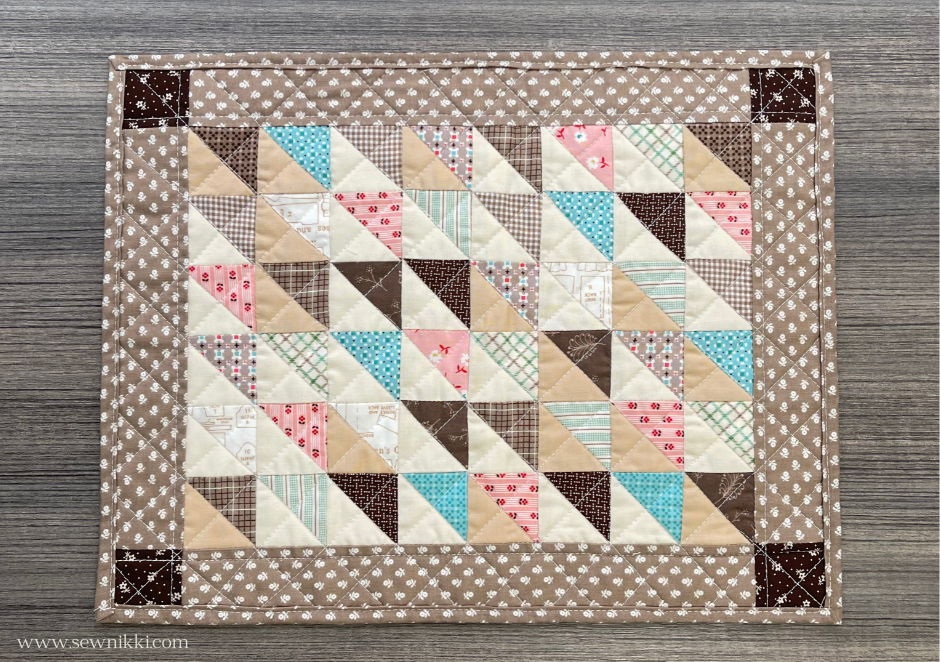
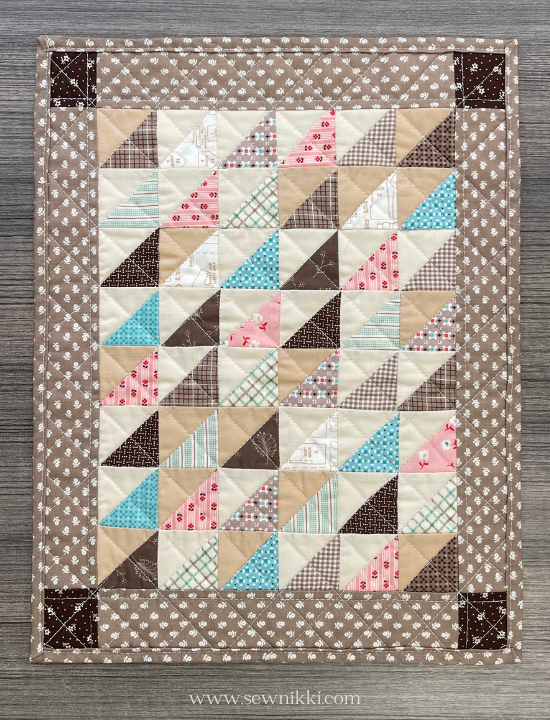
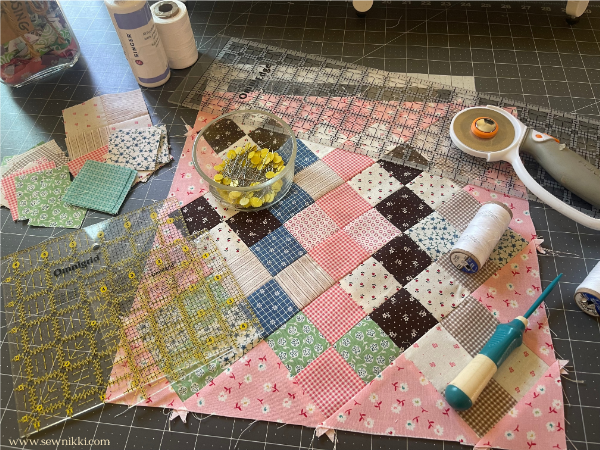
This adorable mini quilt is made using 48 – 2″ half square triangles, 4 – 2″ side borders and 4 – 2″ cornerstones. The hardest part of this quilt project is selecting your fabrics and making sure it’s squared up before adding the binding. You also get to practice using binding that is only 1 1/4″ wide and not double folding it. Better than the smaller width binding was being able to go wild quilting and not having to deal with my quilt dragging and being large. It was heaven and so relaxing.
Mini Quilt Patterns – TQC July Mini Quilt
Materials Needed
1/4 yard background fabric OR 24 – 2.5″ light background squares
1/4 yard print fabric OR 24 – 2.5″ variety of print squares
1 fat quarter for backing OR muslin for backing
Batting, thread, backing fabric, iron
Rotary cutter, cutting mat, sewing pins
Let’s move onto the instructions.
Make 48 half square triangles using 2.5″ light square and 2.5″ print square. Note: I used Kona Natural for most of my light squares but also threw in some light square of Kona Khaki to add interest.

Making half-square triangles per the pattern. Place one main and one background fabric right sides together. Draw line down the center.

Sew 1/4″ seam allowance down both sides of the line. Then cut with rotary cutter on the line to form two units. Square up each with ruler to 2″.

Make sure the diagonal line is lined up where the fabrics intersect. Make sure you can read your ruler. If you can’t read your ruler, go buy one that your brain understands.
Sew Rows
Sewing rows, making sure the seams are nested, using a 1/4″ seam allowance. Complete all the rows. Total of 8 rows, each row will have 6 half-square triangles.

Review Placement Is Correct
Lay all your units on your cutting mat to make sure you have them facing the right direction. Pay special attention to the half square triangles to ensure you have the right one placed in each spot. You want the half square triangles all facing the same direction.
Sew Rows Together
Sew the rows together, again, paying special attention to the seams and nesting. Place sewing pins at each seam to hold the fabric in place. Remove the pin right before you sew that section.

Use your stiletto to hold the fabric down at the seam. Stilettos are a must for patchwork piecing. It’s an extension of your hand but won’t get hurt if the needle accidentally hits it. It’s better than the sewing needle hitting your finger, trust me.
Add Border With Cornerstones
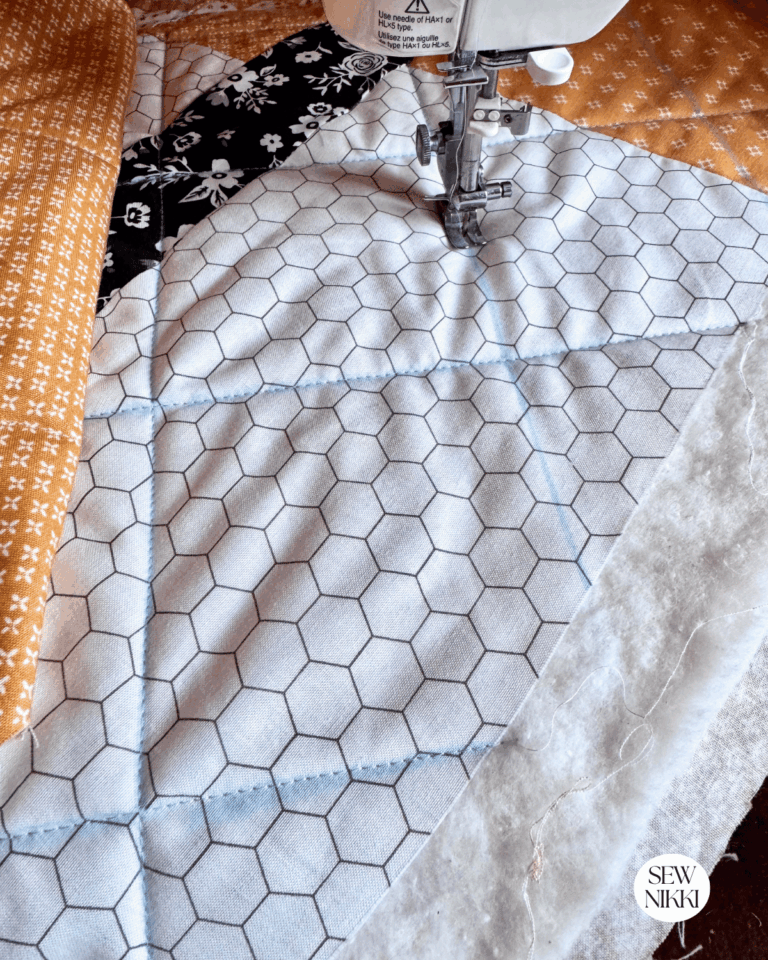
Follow the pattern and attach the border. Make a quilt sandwich and machine quilt with straight lines or to your personal preference.
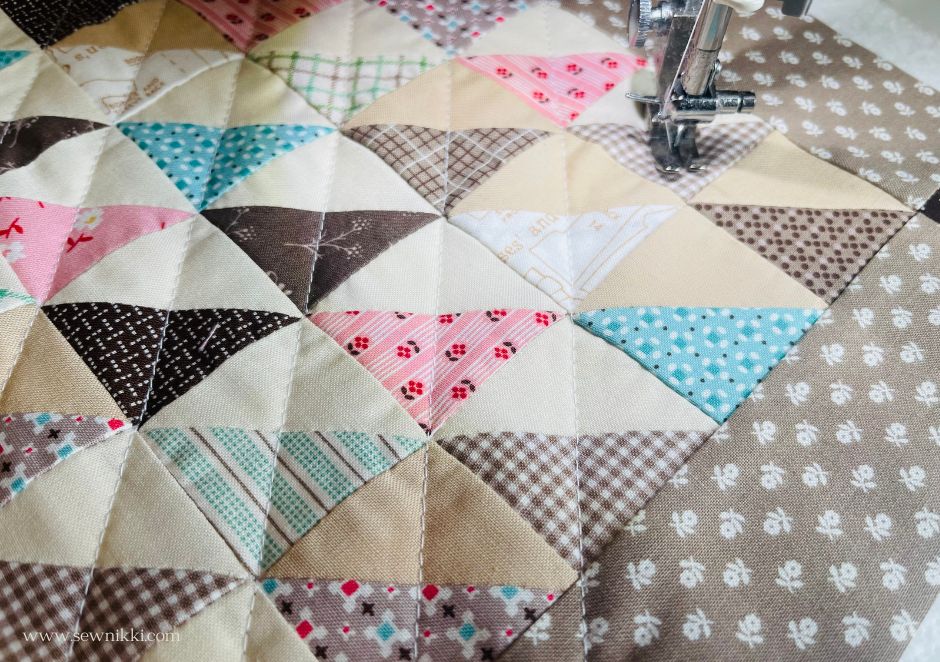
Quilting this was one of the best parts. Chose to do diagonal lines in both directions for a pretty machine quilt pattern.
Add Binding
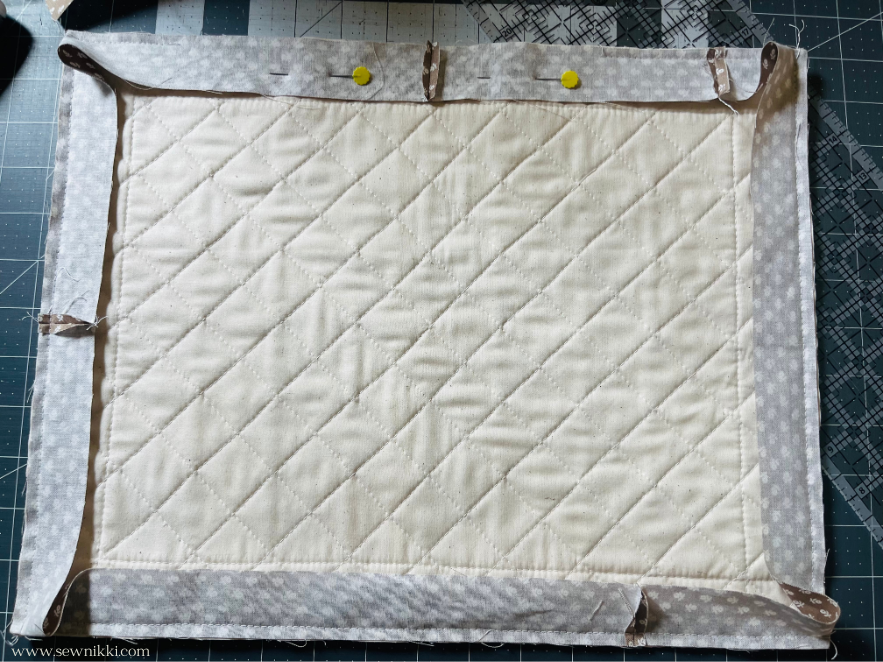
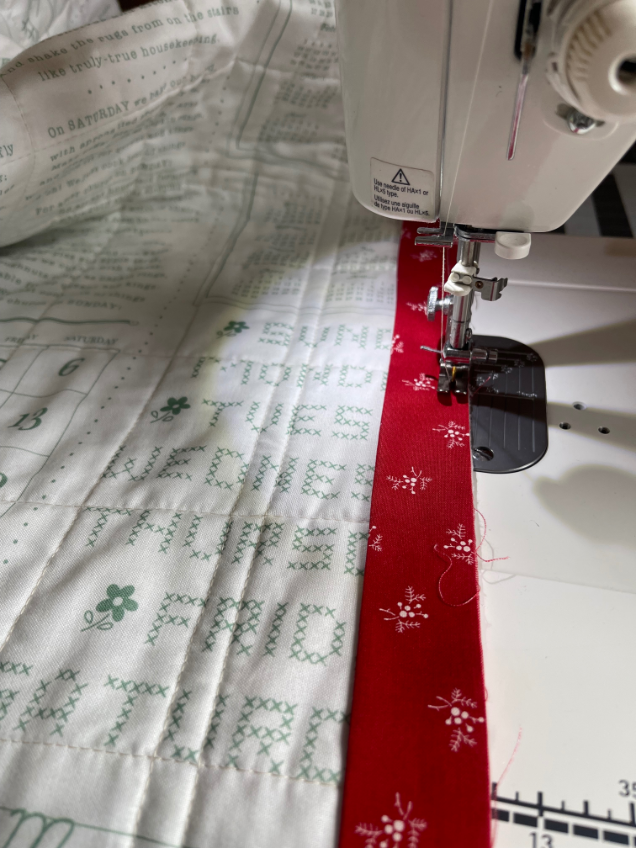
This mini quilt uses a 1.5″ wide binding, single layer fabric to attach. Attach binding on the backside of quilt. Turn quilt, press binding and then turn corners up. Press again with iron. Double fold binding and pin to quilt top. Take to sewing machine and finish.
Next, you want to join the binding. Fold both binding strips over, leave 1/4″ space between both. Then make a crease in both strip on the fold, unfold and lay your quilting ruler on binding. Line up the 1/4″ to the crease and cut with rotary blade or scissors. Repeat for both strips. Join binding on machine, fold quilt over so you can fit under sewing needle. Use 1/4″ seam allowance. Pin binding in place and finish attaching on machine.
Mini Quilt Patterns – Temecula Quilt Company
Temecula Quilt Company sells their own fabric, notions, patterns and quilt kits. Firstly, their unique patterns that look especially beautiful when made with civil war reproduction fabrics. Additionally, the civil war reproductions are so stunning due to the richness of the hues and give the quilt a vintage look and feel. Here is the link to the TQC July free mini quilt pattern used in this review.
Mini Quilt Patterns – Postcard Bundles
Then I discovered the mini quilts and their postcard bundles. You can purchase the pattern bundle, which they call postcards, there is a pattern for every month. Isn’t that a clever idea! Over Memorial Day 2023, they reposted a free mini quilt pattern from a previous year’s post card bundle. All you need to do is provide your email address and they email you a free pattern. To get your copy of the free pattern, go to Temecula Quilt Company
Mini Quilt Patterns – How To Display
TQC consistently shows clever ways to display the finished mini quilts on the wall that are worth checking out too. One example of a wall hanging is to use a yard stick which you may still be able to purchase from them with their name on them and dark patina. Wooden child size hangers and a vintage desk organizer/mail sorter was used to display the mini’s. As you know, I have a new office at work and want to have some of my quilts on the wall. Not only did I find mini quilt patterns and inspiration but clever ways to attach them to the walls.
How Pattern Reviews Help You
On this blog you will find How-To’s, Free Patterns and Pattern Review so you can sew, quilt, crochet and repeat! Why pattern reviews? I’m an intermediate beginner after 3 years of weekend quilting. I can share beginner friendly advice and tips for completing quilts successfully. Because quilting is not cheap and takes a lot of time. So it’s important to pick a pattern that you can actually finish.
Additionally, It’s hard to know what to quilt when you are just starting out. Some quilt patterns look easy but contain advanced techniques that not every beginner can successfully do. That’s where I can help. Before you start a new quilt, check back here to the blog and see what patterns are reviewed and give one a try. I’ll test the pattern, give you my review and tips, then you have all the info to make it or not. I want to help the beginners find patterns they can finish. You know the best quilt is a finished quilt.
Suggested Quilting Supplies For Beginners
Here are some quilting tools and supplies I recommend. I make a small commission if you purchase through the links, this helps to support this free content. For more info, check out Supplies for Beginners (Best Tools To Start).
Rotary Mat Cutting Mat (Self-Healing Mat)
28 mm Rotary Cutter Replacement Blades
45 mm Rotary Cutter with Sharp Blade (start with this one)
45 mm Rotary Cutter Replacement Blades (start with this one)
60 mm Rotary Cutter Replacement Blades
4.5″ Square Ruler for half square triangles
12.5″ Square Ruler for blocks
SAVE THIS PIN FOR LATER!

This post contains ads and affiliate links, which means I make a small commission at no extra cost to you. While the ads are annoying, it helps keep this blog going. See my full disclosure here.
About Sew Nikki
If this is your first time stopping by, welcome! I’m Nikki, a maker obsessed with quilting, crochet, and all things fabric. Here, you’ll find easy-to-follow patterns, helpful tutorials, and plenty of inspiration for your next handmade project. Grab your fabric (or yarn), and let’s create something beautiful together!
If you still haven’t checked out Temecula Quilt Company’s blog and website, please do so. Even though they don’t have their brick and mortar store anymore, they still sell online. I just ordered the postage bundle for 2023. Better late than never!
Follow me on social media (Pinterest, Instagram, Facebook and Twitter) so you get notifications when I post new patterns and tutorials.
Want to learn how to crochet? Then check out this post, How to Learn How to Crochet – Guide for Beginners.


Great instructions and beautiful photography! Can’t wait to try this out! Thanks for sharing!
This is on my bucket list to do is to make a quilt! This detailed post will be helpful to me 🙂 Thank you for sharing!
Beautiful mini quilt! Thank you for sharing your reviews for us beginners!!