How to Quilt on a Regular Sewing Machine
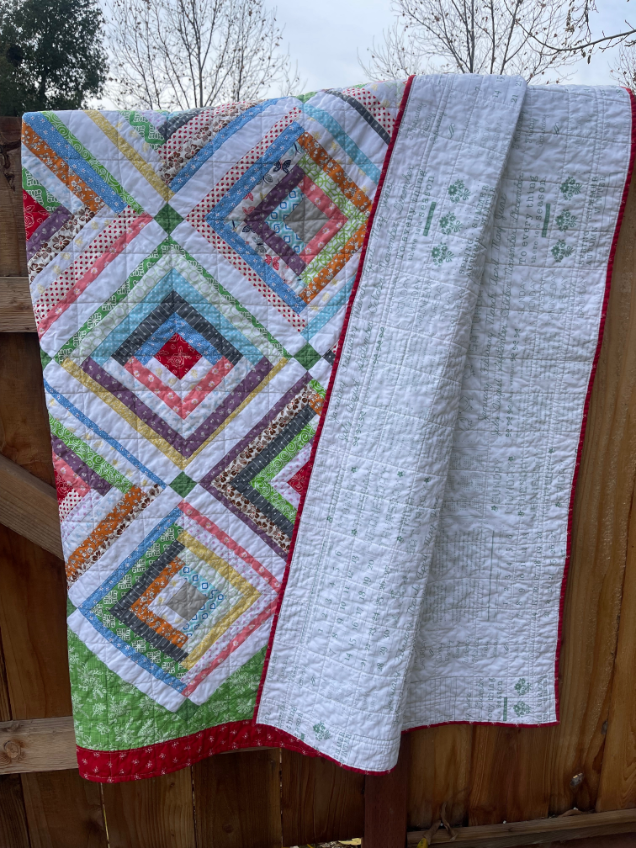
How to quilt on a regular sewing machine tutorial. Beginner friendly guide to turn your quilt top into a finished quilt on your own domestic sewing machine. Quilting large quilts can be a daunting task, especially when you’re working with a regular sewing machine. However, with the right techniques and a systematic approach, you can achieve professional looking results. In this guide, I’ll walk you through the entire process of machine quilting with straight lines, providing detailed steps and tips to ensure your success. This beautiful quilt was done with straight line machine quilting.
The best part of straight line quilting is that the process will be the same no matter what size quilt. You will follow these same steps for a throw, full, twin, queen or king size quilt.
QUILT TOP
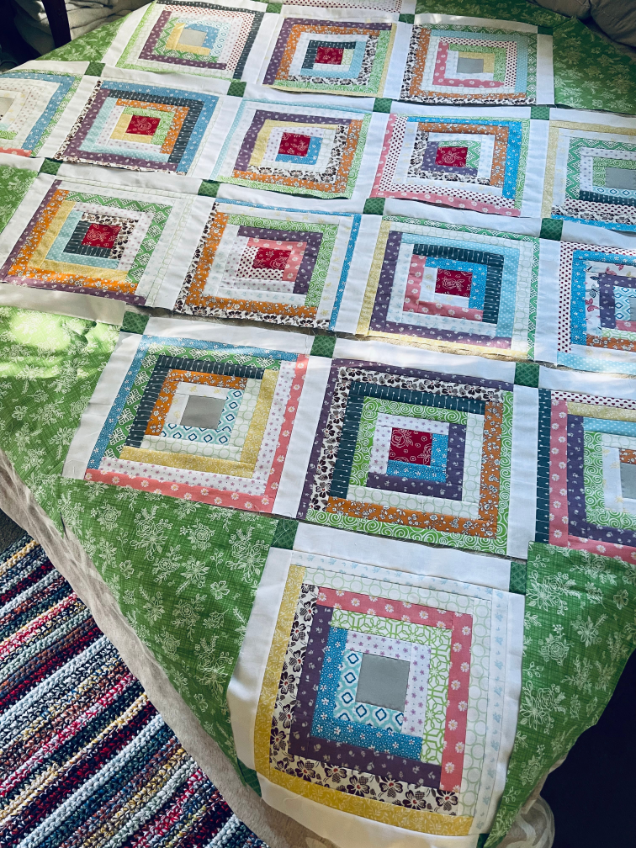
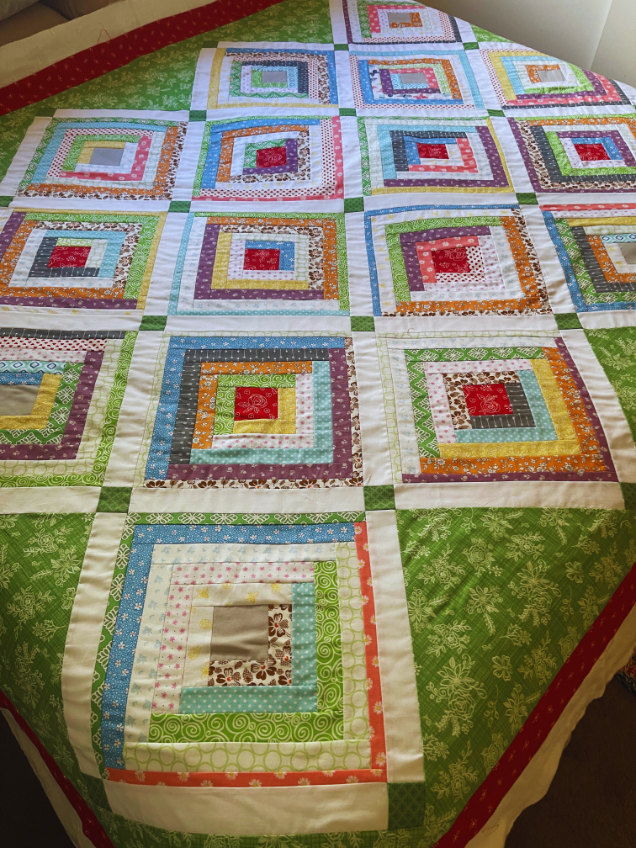
A quilt top is the front of your quilt. Most quilt tops are made by following a quilting pattern or by selecting a quilt block and making enough blocks to get to your desired size. When you’ve made enough quilt blocks you can add sashing or simple border to complete your quilt top.
Click here for my free Log Cabin On-Point quilt pattern shown above.
BACKING FABRIC
Backing fabric is for the back of your quilt. and you may need to sew two pieces together to make it big enough to cover the quilt top. Take you one large piece of backing fabric, cut in half with rotary cutter, sew both halves together using quarter inch seam allowance.
Backing fabric does come in wider sizes, 108″ and 120″. 108″ wide fabric will have no problem covering a queen size quilt top but may not be wide enough for a king size quilt. Make sure you check the bolt that the fabric is on to see what width it is. 120″ width will cover king size quilts up to 115″ with a little extra. If you use a wider backing, you only need half the amount.
BEST BACKING FABRIC FOR BEGINNERS
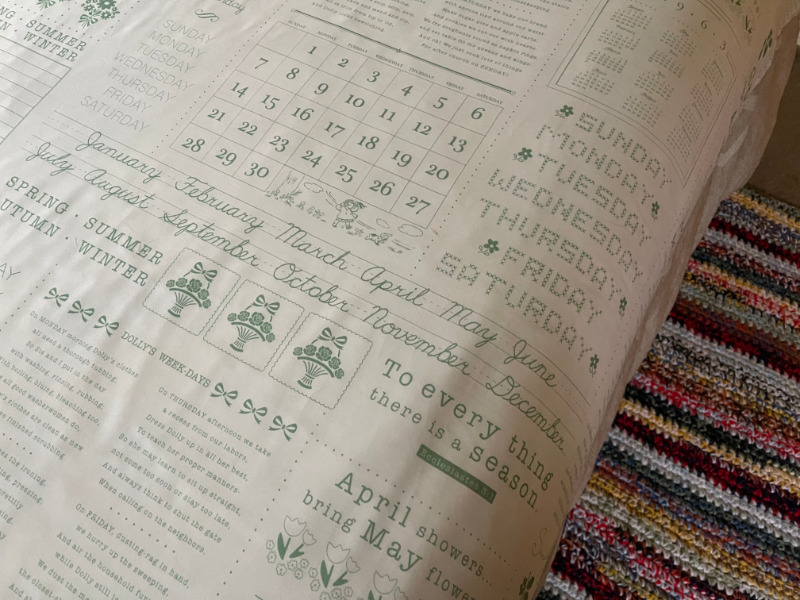
There are lots of options for backing fabric. However, a lot of people say the best fabric for beginners is a print fabric. Why? Because a print fabric will hide your beginner straight line quilting stitches until you get better with practice. If you use a solid fabric then your quilting stitches will not have anywhere to hide.
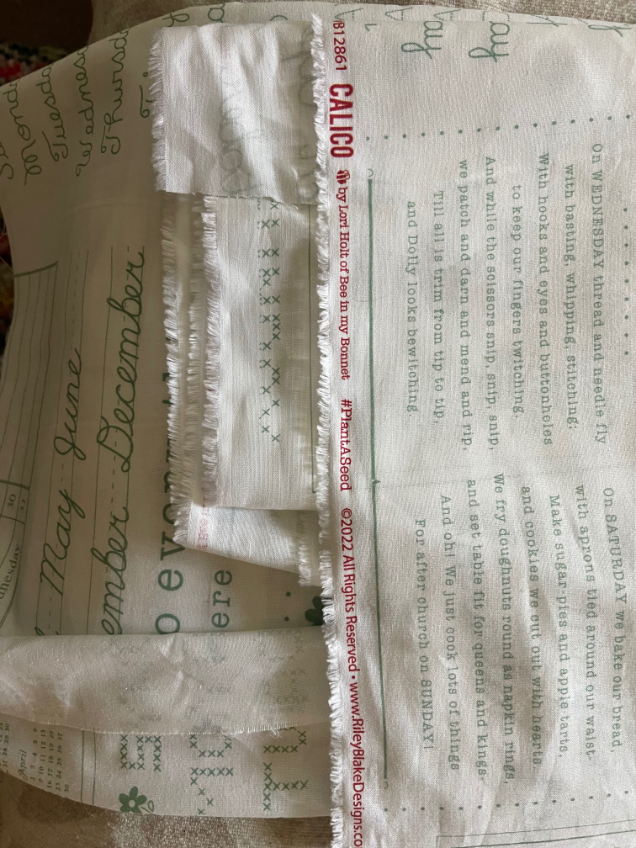
If you use standard fabric, you will need to sew your backing piece to make it big enough to cover your quilt top. Just use scissors to cut away excess fabric. Go to your local quilt shop to see their selection of 108″ and 120″ width fabrics. For more info, check out Best Fabric for Quilting – How to Shop Like a Pro! and Pieced Quilt Backing Ideas – Super Simple Backs.
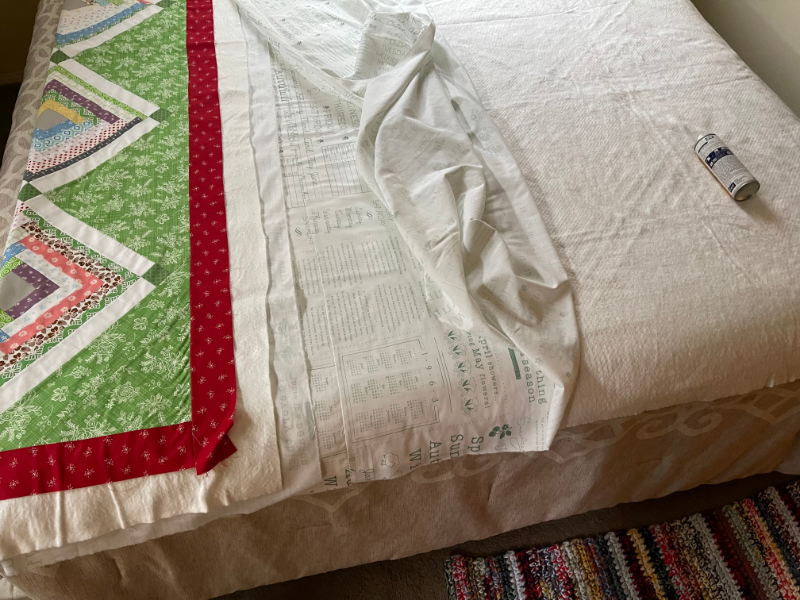
QUILT SANDWICH
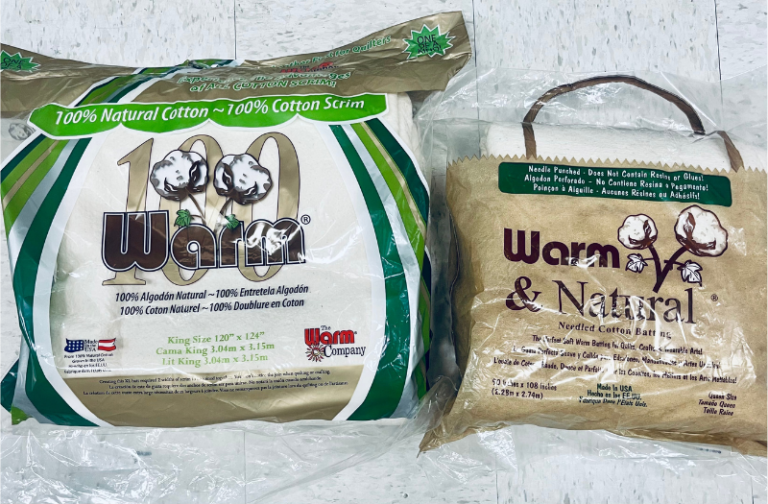
A quilt sandwich is two layers of fabric with quilt batting in the middle for a total of three quilt layers. To make a quilt sandwich you will need to baste it on a flat surface. I have a small sewing space so my personal preference is to baste on my king size bed. There are different ways to baste a quilt: basting spray or safety pins.
The favorite method is spray basting, that’s what I use for my own quilts but try both and see which one you like better. After you spray the quilt top to the quilt batting, flip and spray the quilt backing fabric to the quilt batting. You now have a quilt sandwich. Next step is to take to your ironing board or large table and smooth out any creases then let it dry until the next day for best results. For more info on basting, check out How to Baste a Quilt: Beginner Spray Basting Tutorial or How to Sandwich a Quilt Step-By-Step Tutorial.
Make sure you check this out!
After you read this post, make sure you also check out How To Learn How To Quilt: Beginner Quilting Guide. It’s jam packed with even more information, links and resources that are so helpful when you’re first learning. It also has a section with free quilt patterns that are great for beginners. So make sure you check this out, seriously don’t forget!
Grab a copy of my Quilt Planning Journal, filled with graph paper and some note pages to help you design at least 4 quilts or sewing projects! I have been using mine for a little while and already I am jotting down ideas as I see them and reminders about websites where I have seen some ‘must have’ fabric, so I think this can be so much more than just a design book. Pin in fabric swatches, photos of your finished quilts and enjoy your creative process!
How to quilt on a regular sewing machine
Selecting the Right Quilting Design: Choose a quilting design that complements your quilt’s overall aesthetic. Whether it’s straight-line quilting, free-motion quilting, or a combination of both, plan your design ahead to ensure a cohesive and visually appealing result.
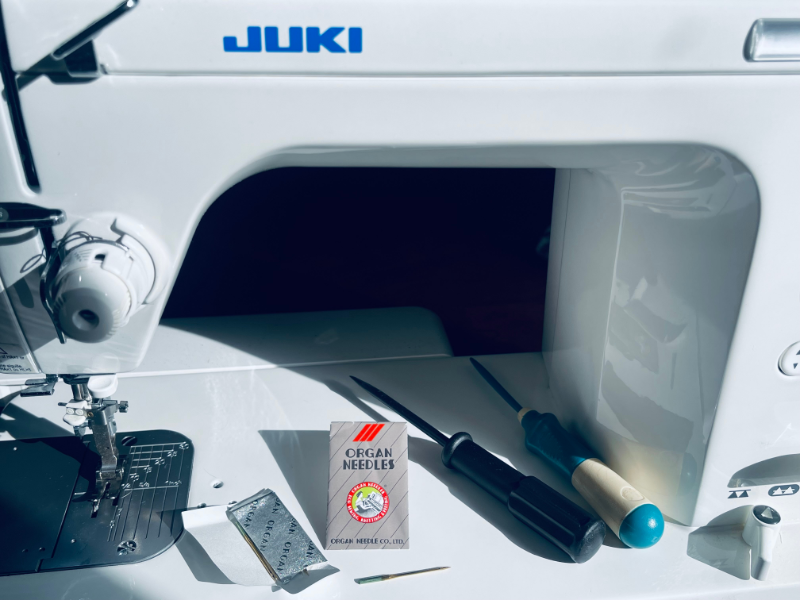
Choosing the Right Supplies: Before you start quilting, gather all the necessary supplies. Ensure you have a walking foot, quilting needles, high-quality thread, and an extension table for your sewing machine.
Sewing Space: A large quilting space is ideal for managing the bulk of a big quilt. If you have a small sewing space like me, try using your ironing board in lieu of a large quilting table. Move the ironing board forward or backwards as needed so the quilt doesn’t drag while quilting. It’s like having a large table to quilt but it’s actually an ironing board!
Adjusting Tension and Stitch Length: Proper tension and stitch length are crucial for successful machine quilting. Test your machine settings on a quilt sandwich to ensure that the stitches are even and the tension is balanced. Make adjustments as needed. I use a stitch length of 3.5 when quilting, you don’t want a super tight stitch.
Throat Space: The throat space, or the distance between the needle and the machine’s body, is crucial for handling larger quilt projects. A machine with a generous throat space provides more room to maneuver your quilt, reducing the likelihood of bunching or puckering during machine quilting.
Adjust Presser Foot Pressure: You want to raise your pressure for your foot all the way up. Your machine should have a dial to the far left that adjusts the pressure of the presser foot. Review your manual if you aren’t sure where that is or how it works. Check the stitch on the back side of the quilt after you have stitched a few inches of your first quilt line. If fabric is bunching, the presser foot needs to be lifted, it’s too tight on the basted quilt.
Needle Down Function: The needle down function is a valuable asset for machine quilting. It allows you to stop with the needle in the down position, keeping your work in place when pivoting or adjusting fabric. This feature contributes to precise quilting, especially for intricate designs.
Extension Table: Investing in or having an extension table for your sewing machine can significantly enhance your quilting experience. A larger working surface provides better support for your quilt, reducing drag and improving overall control.
Quilting Feet and Accessories: Explore the quilting feet and accessories available for your sewing machine. Quilting feet, such as the walking foot or quilting guide foot, are designed to make machine quilting more accessible. Additionally, a quilting guide can help maintain even spacing between stitches.
Bobbin Thread: Make sure the thread in your bobbin is the same as the top thread.
How to Quilt on a Regular Sewing Machine Tutorial
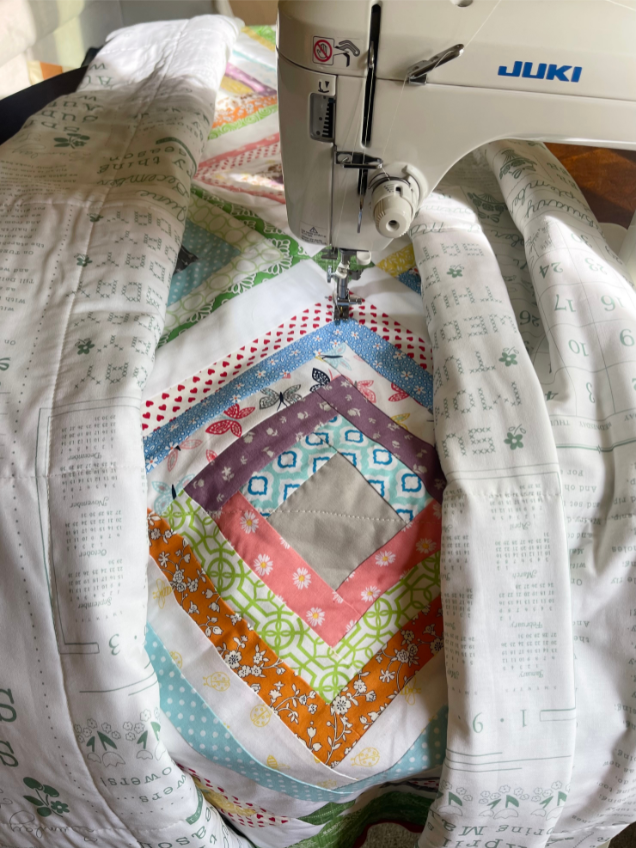
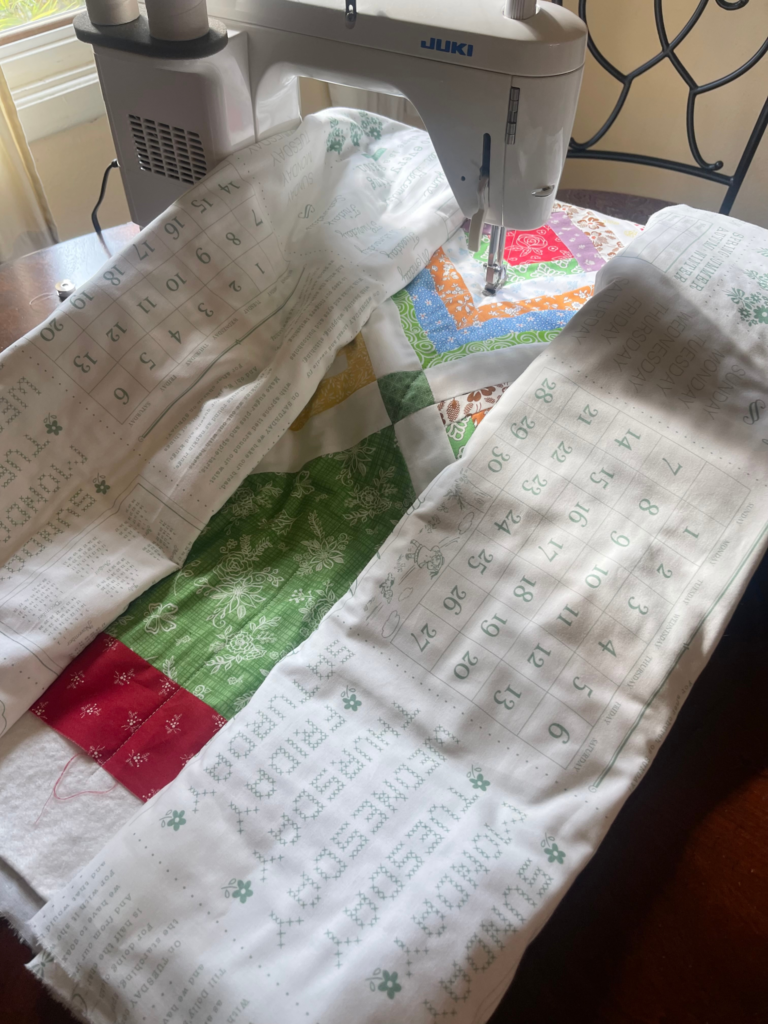
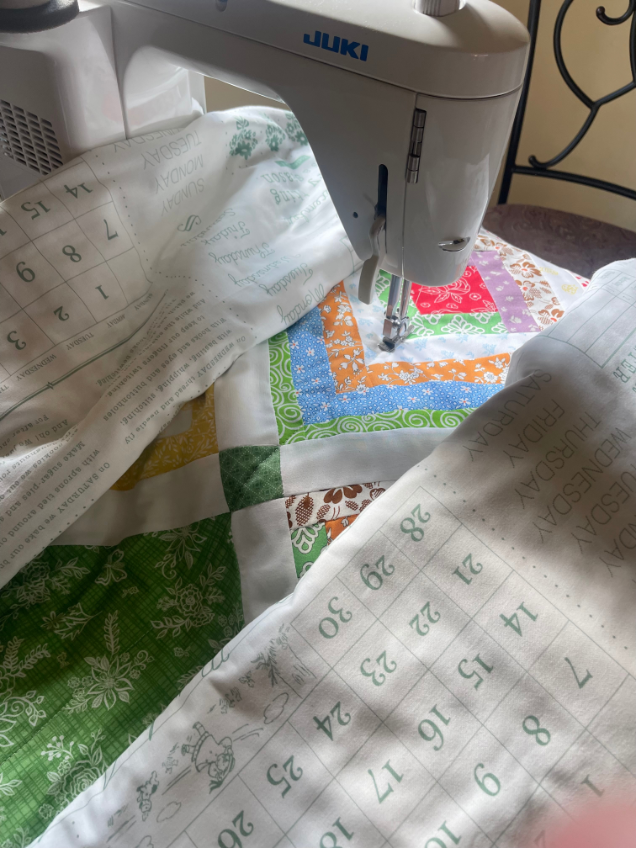
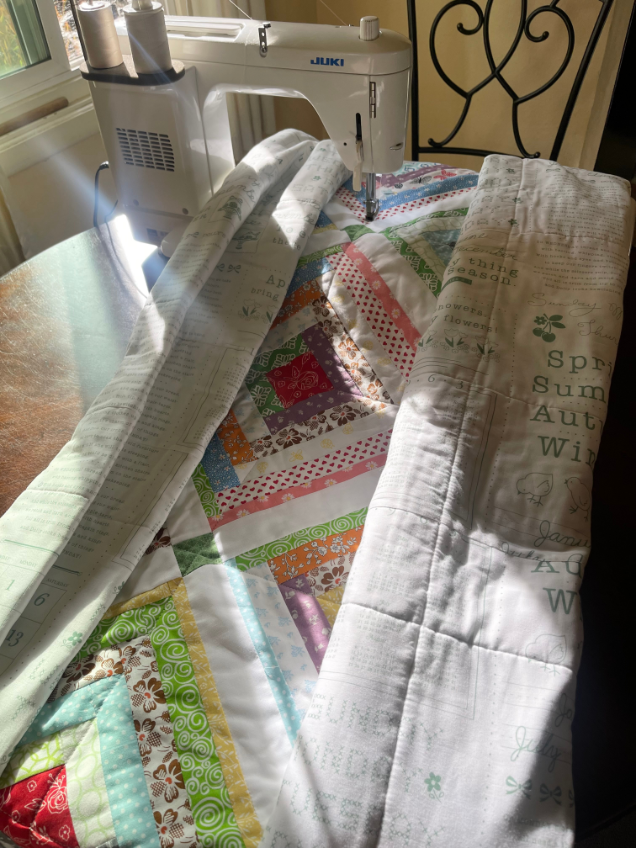
To begin, you need to find the middle of your quilt sandwich and roll both sides towards the middle until the right roll will fit in your sewing machine throat. This is the section on your sewing machine between the section where the hand turn dial is and where you sew (where the needle is).
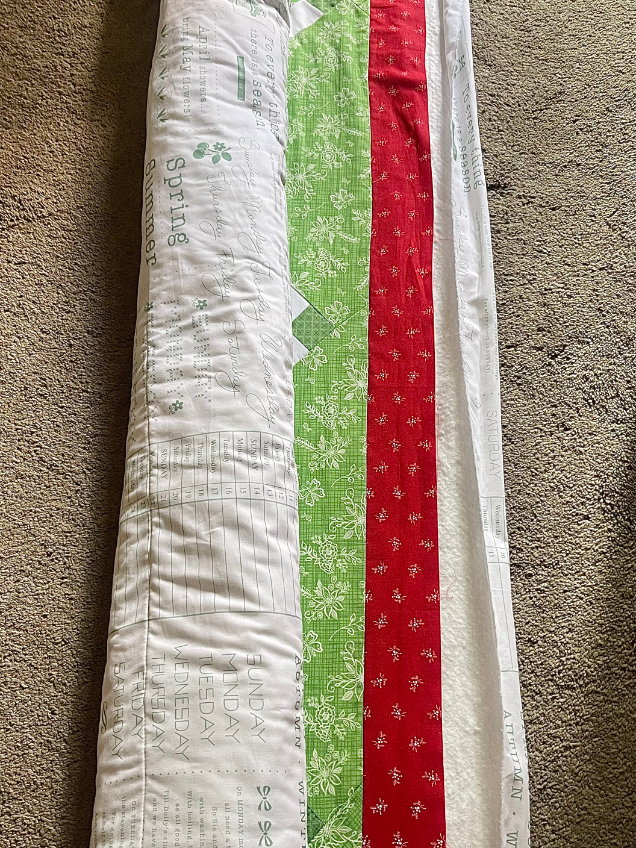
You will begin quilting in the middle section of the quilt and working your way to the right until done, rolling up on the left side and unrolling the right side as needed.
Start at the top of the quilt just before the quilt top begins (your walking foot should be sitting on the backing fabric with batting only on top of it. First line that you quilt will be in the middle section of the quilt. Start in the middle of the quilt, right side facing up, and with stitch length set to 3 or 3.5, sewing machine’s feed dogs are up in the standard position (and not lowered for free motion quilting).
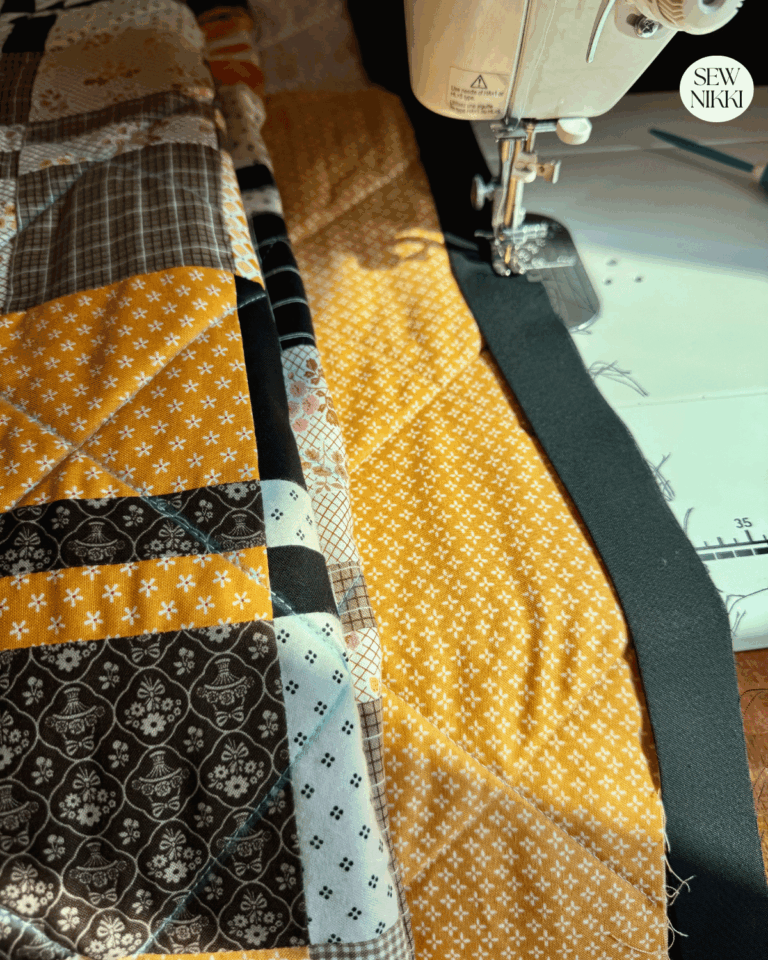
Straight Line Quilting
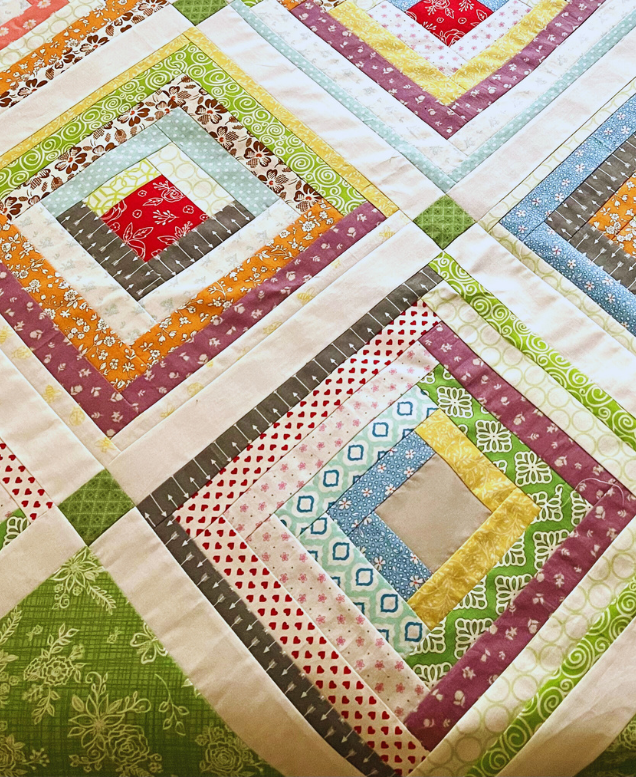
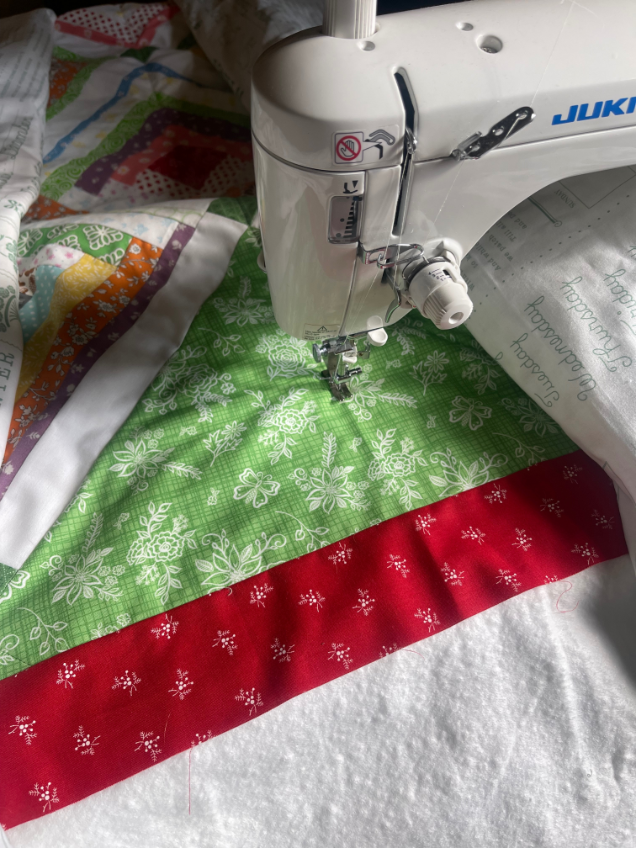
I’m quilting a log cabin quilt that has 12″ quilt blocks and sashing. It’s also an On-Point quilt and it took some time before I figured out how I would quilt straight lines for the design. Following the points in the blocks, sew a straight line directly down the center of the block as shown below.
I just eye ball it because there are no quilt police judging me. However, you could use a chalk marker or heat erasable fabric marker and straight quilting ruler to mark your sew line before you stitch. Just follow the marked line and wash quilt when done to remove any chalk markings or iron to remove the heat erasable markings.
Each block has 7 quilting lines sewn through it both vertically and horizontally. Three quilting lines will go through the cornerstones in the middle of the block and the sides of the block with two more quilting lines sewn in between the sides and middle of the block. These are just quilting design suggestions, be creative and plan out your own quilting design!
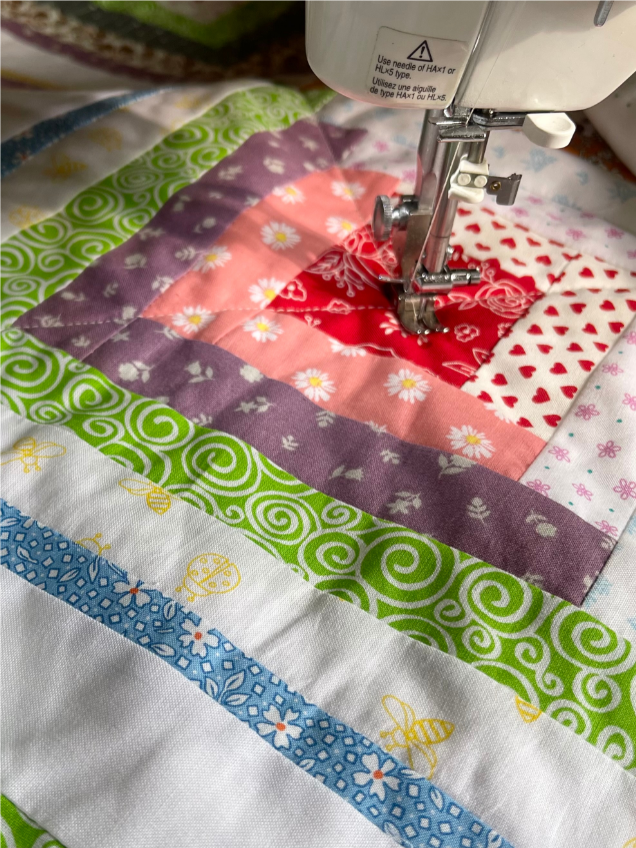
Line up your presser foot or walking foot so that it will go through the middle of the block and sew a straight stich from the top of the quilt all the way off the bottom of the quilt. Start you quilting stitch just before the quilt top, your walking foot will be sitting on the batting only and then sew into the quilt top.
For this quilt with blocks, I decided to only partially quilt in both directions and then went back to fill in the additional quilting lines. I like to tack down my quilt so it doesn’t shift around on the sides and in the corners. Then I can have fun when I go back to repeat the process all over again and really fill in the quilt blocks with those additional straight lines.
I started in the middle of the quilt, and used straight line to quilt through the cornerstones and middle or sides of each block moving to the right until done. Then flipped the quilt so I could complete the other side, always working from the center to the right. Rolling and unrolling on the floor after each straight line was quilted on machine.
Now Quilt in Opposite Direction
Now it’s time to turn it and the other direction and repeat the steps above. Take your quilt sandwich and unroll it. Now we are going to quilt in the other direction. Again, find the middle of the quilt and roll up both sides so that it will fit in your sewing machine throat.
It’s time to finish quilting those two other quilt lines through the blocks. Follow the steps above, starting on the batting before your quilt top begins.
Follow the marked line or use your eye balls again to line up the needle, then sew a straight stitch all the way to the bottom of the quilt top. Make sure you start and stop sewing a little before the quilt top and a little after the quilt top ends. You want to quilt on the entire quilt top so you don’t mess any portion of it.
Repeat the process above working one side of quilt and then flipping in the other direction to complete quilting both horizontally and vertically until done. If you make any mistakes, use a seam ripper and redo.
BEGINNER QUILTING SUPPLIES
Here are some quilting tools and supplies I recommend. I make a small commission if you purchase through the links, this helps to support this free content. For more info, check out Supplies for Beginners (Best Tools To Start).
Rotary Mat Cutting Mat (Self-Healing Mat)
28 mm Rotary Cutter Replacement Blades
45 mm Rotary Cutter with Sharp Blade (start with this one)
45 mm Rotary Cutter Replacement Blades (start with this one)
60 mm Rotary Cutter Replacement Blades
4.5″ Square Ruler for half square triangles
12.5″ Square Ruler for blocks
SAVE THIS PIN FOR LATER!

This post contains ads and affiliate links, which means I make a small commission at no extra cost to you. While the ads are annoying, it helps keep this blog going. See my full disclosure here.
ABOUT SEW NIKKI
If this is your first time stopping by, welcome! I’m Nikki, a maker obsessed with quilting, crochet, and all things fabric. Here, you’ll find easy-to-follow patterns, helpful tutorials, and plenty of inspiration for your next handmade project. Grab your fabric (or yarn), and let’s create something beautiful together!
Quilting large quilts on a regular sewing machine is undoubtedly a challenging but rewarding endeavor. By following this guide, you’ll be equipped with the knowledge and techniques needed to tackle even the most ambitious quilting projects. Remember, patience and practice are key—enjoy the process, and soon you’ll be creating beautiful machine-quilted projects that reflect your unique style.
Follow me on social media (Pinterest, Instagram, Facebook and Twitter) so you get notifications when I post new patterns and tutorials.
Want to learn how to crochet? Then check out this post, How to Learn How to Crochet – Guide for Beginners.


I love quiltlin, and this is a great tutorial!
Thank you for all the wonderful instructions and info! Beautiful work!
Great post! It makes me want to get back on my sewing machine! Thanks for the encouragement!
This is awesome! I am new to sewing, but would love to do a quilt some day!