How To Make Half Square Triangles – Easy Formula Chart
Today we’re diving into the fascinating world of half square triangles (HSTs) – a fundamental building block in quilting. Whether you’re a beginner or an experienced quilter, mastering HSTs opens up a world of creative possibilities. In this post, we’ll explore different methods, all simple and foolproof to create perfect half square triangles. Plus there’s an easy-to-follow formula chart! So, grab your favorite fabrics and let’s get started!

Understanding the Basics: The HST Formula and Measurement Chart
Before we dive into the techniques, let’s get familiar with the formula to calculate the fabric square size needed for your desired finished HST size. These formulas will help you determine the size of fabric squares you need to start with to achieve your desired finished HST size. The formula is simple:
Fabric Square Size to Cut = Finished HST Size + .5 inch
Here’s a handy chart for various finished HST sizes:
| Finished HST Size | Fabric Square Size to Cut | Yield per Pair of Squares |
|---|---|---|
| 1″ | 1.5″ | 2 |
| 1.5″ | 2″ | 2 |
| 2″ | 2.5″ | 2 |
| 2.5″ | 3″ | 2 |
| 3″ | 3.5″ | 2 |
| 3.5″ | 4″ | 2 |
| 4″ | 4.5″ | 2 |
| 4.5″ | 5″ | 2 |
| 5″ | 5.5″ | 2 |
| 5.5″ | 6″ | 2 |
| 6″ | 6.5″ | 2 |
| 6.5″ | 7″ | 2 |
| 7″ | 7.5″ | 2 |
| 7.5″ | 8″ | 2 |
| 8″ | 8.5″ | 2 |
| 8.5″ | 9″ | 2 |
| 9″ | 9.5″ | 2 |
| 9.5″ | 10″ | 2 |
| 10″ | 10.5″ | 2 |
Note: The sizes mentioned in the chart represent the finished half square triangles. To calculate the fabric square size to cut, add .5 inches to your desired finished HST size. For example, if you want 3-inch finished HSTs, cut your starting squares of fabric to 3.5 inches.
Pro Tip: If you are really new at piecing fabric or new to quilting, add another 1/4 inch to the unfinished size to give you some extra fabric. In other words, instead of adding the .5 inches you should add .75 inches to your starting squares to give you some room for error.
Feel free to refer to the formula and measurement chart above for exact size to use to get the finished size you want when planning your next half-square triangle quilt project. This chart is for basic method only.
Supplies Needed
Having these basic items will set you up for successful HST-making adventures. Here is the list of essential materials for making half square triangles (HSTs):
- Fabric:
- Contrasting quilting cotton fabrics.
- Cutting Tools:
- Rotary cutter, quilting ruler, self-healing cutting mat.
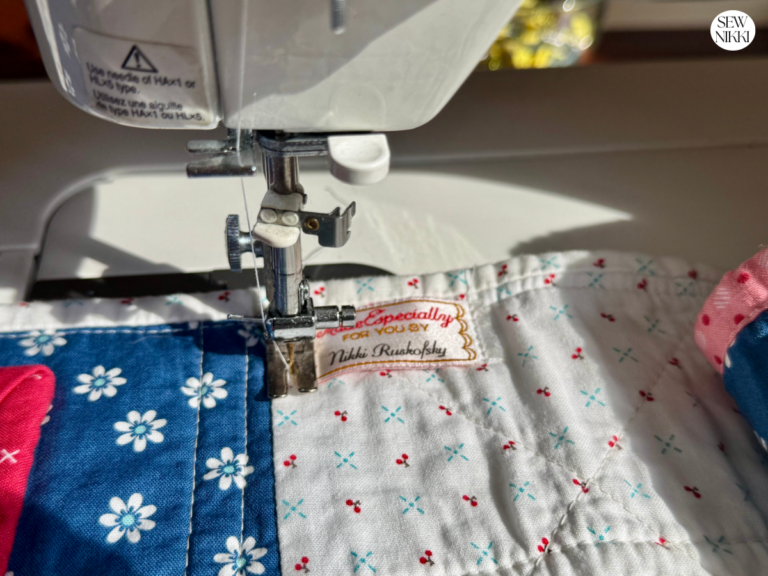
- Sewing Supplies:
- Sewing machine, 100% cotton thread.
- Marking Tools:
- Fabric marker or quilting pencil.
- Pressing Tools:
- Steam iron, ironing board.
- Optional but Handy:
- Spray starch, seam ripper.
Note: Precut layer cakes are great fabric options for the methods that make multiple units. The 5 inch charm square precuts are great for beginners when making the basic half square triangle. Scrap fabric is most commonly used for the basic method as well. Need help with shopping for fabric? Check out, Best Fabric for Quilting – How to Shop Like a Pro!
MAKE SURE YOU CHECK THESE OUT!
After you read this post, make sure you also check out Learn How to Quilt for Absolute Beginners. It’s jam packed with information to make your first quilt. It also has links and resources that are so helpful when you’re first learning. There’s lots of free quilt patterns that are great for beginners and all skill levels too. So make sure you check this out, seriously don’t forget!
Make sure you grab a copy of my free Quilt Planning Journal. It’s filled with graph paper and note pages to help you design at least 4 quilt or sewing projects! Use it to jot down ideas, fabrics, patterns and inspiration all in one place. Or create your own patterns and share with others. Pin in fabric swatches, photos of your finished quilts and enjoy your creative process!
How to Make Half Square Triangles
Half Square Triangles, often referred to as HSTs, are versatile quilt blocks made by sewing two triangles together to form a square. Here’s how to create them:
Method 1: Basic Half-Square Triangles (HSTs)
Select two squares of fabric using the formula chart above. (Again, we are using 5 inch squares for this tutorial).

Match Squares: First, place the square on top of each other, right side facing down. Make sure they match up and are the same size squares.

Make Diagonal Line: Using your fabric marker or pencil, draw a diagonal line from one corner to the opposite corner on the wrong side of one of the squares. This line will guide your sewing.
Joining Squares: Sew a quarter inch seam on both sides of the drawn line, the diagonal line you marked on one square.

Cutting Triangles: After sewing, cut the square in half by cutting on the marked diagonal line to separate the squares into two triangles.

Pressing: Press the HSTs open with iron and ironing board or finger press but not preferred. When ironing, make sure you are setting the seams first, then pressing fabric towards the darker one.

You should now have two HSTs!

Squaring Up: Square up both HST units with a square quilting ruler (either 4.5 inch or 6 inch). Trim the unfinished HST units one at a time. Find the diagonal line in your ruler and line it up to the seam in the middle of the triangle.

Next step is to find the 4.5 inch horizontal lines and the vertical lines on the square ruler. Trim the first two sides including any dog ears, then flip the square 90 degrees and repeat for the last two sides. Trim all sides using rotary cutter, cutting mat and your choice of square quilting ruler. Don’t forget to trim the dog ears too.

Pro Tip: Buy rulers that work for you! There are only useful if you can read them. Everyone’s brain works differently so get the ruler that you can read, has diagonal lines and you are able to clearly see the fabric when underneath the ruler. Make sure you can see the horizontal lines and vertical lines clearly. Square rulers come in lots of different sizes, the most important thing is that you can read and understand your rulers.
How to Make Multiple HST’s
Method 2: Magic 8 Half Square Triangles
- Start with a larger square (at least 2⅞” larger than your finished HST size).
- Draw two diagonal lines from corner to corner on the wrong side of lighter colored square. the lines will cross in the middle forming an “X”.
- Follow the same diagonal cut method as in Method 1 to create eight triangles from a single pair.
- Sew a quarter-inch seam on both sides of the marked diagonal line. You will sew a total of four seam lines.
- Cut along each marked line, then cut again along the horizontal line and finally on the vertical line to reveal eight perfect HSTs.
Method 3: Four at a Time Half Square Triangles
- Begin with two fabric squares, each at least 1 1/4″ larger than your desired finished HST size.
- Place the squares right sides together.
- Sew a quarter-inch seam all the way around the perimeter of the stacked squares.
- Cut a diagonal line from corner to corner, do this twice to create four HSTs.
- Press the units open and trim if necessary for precise squares. Note: There are bias edges on these units so try not to stretch the fabric, just press if possible.
Tips and Tricks

Precision is Key: Accurate cutting and consistent seam allowances are vital. Consider investing in a rotary cutter, acrylic ruler, and self-healing cutting mat for precise cuts every time.
Pressing Matters: Press your seams open or towards the darker fabric to reduce bulk and ensure your quilt lies flat.
Test Your Seam Allowance: Sew a test block and measure your HSTs. Adjust your seam allowance if needed to achieve the desired finished size.
Starch Your Fabric: Starching your fabric before cutting and sewing helps prevent stretching and distortion, resulting in more accurate blocks.
Practice Makes Perfect: Don’t be discouraged if your first few attempts aren’t perfect. Quilting is an art that improves with practice. Keep experimenting and trying new techniques.
Remember, half square triangles are the building blocks for countless quilt patterns. Mastering these techniques opens the door to endless creative possibilities. So, grab your fabrics, follow these steps, and start your quilting journey with confidence!
Pattern Designs With HST Blocks
Now that you have made half-square triangle units, you can take those units and make different blocks and designs. Here are some we will cover in another post.

The Classic Pinwheel – Arrange four HSTs to form a pinwheel design. The contrast between the triangles creates an eye-catching pattern.
Flying Geese – Place two HSTs at the base and one HST on top, resembling a flock of geese in flight. This design creates a sense of movement and direction in your quilt.
Hourglass – Simply rotate two HSTs so that their light and dark sides meet in the center. This design gives you a beautiful hourglass effect.
Chevron – Stack HSTs to create zigzagging chevrons. Vary the color placement to achieve dynamic visual effects.
Diamond Star – Combine HSTs with solid squares and other triangles to form a diamond star. This design radiates elegance and sophistication.
Mosaic Patterns – By arranging HSTs in a myriad of color combinations, you can create intricate mosaic-like designs that are both striking and unique.
Barn Quilt Blocks – Use HSTs to replicate traditional barn quilt patterns, turning your quilt into a piece of art.
BEGINNER QUILTING SUPPLIES
Here are some quilting tools and supplies I recommend. I make a small commission if you purchase through the links, this helps to support this free content. For more info, check out Supplies for Beginners (Best Tools To Start).
Rotary Mat Cutting Mat (Self-Healing Mat)
28 mm Rotary Cutter Replacement Blades
45 mm Rotary Cutter with Sharp Blade (start with this one)
45 mm Rotary Cutter Replacement Blades (start with this one)
60 mm Rotary Cutter Replacement Blades
4.5″ Square Ruler for half square triangles
12.5″ Square Ruler for blocks
SAVE THIS PIN FOR LATER!

This post contains ads and affiliate links, which means I make a small commission at no extra cost to you. While the ads are annoying, it helps keep this blog going. See my full disclosure here.
ABOUT SEW NIKKI
If this is your first time stopping by, welcome! I’m Nikki, a maker obsessed with quilting, crochet, and all things fabric. Here, you’ll find easy-to-follow patterns, helpful tutorials, and plenty of inspiration for your next handmade project. Grab your fabric (or yarn), and let’s create something beautiful together!
Follow me on social media (Pinterest, Instagram, Facebook and Twitter) so you get notifications when I post new patterns and tutorials.
Want to learn how to crochet? Then check out this post, How to Learn How to Crochet – Guide for Beginners.