Carpenter’s Wheel Quilt Pattern (Only $75 to Make)
Hello friend, in today’s post I’ll be sharing my free Carpenter’s Wheel quilt pattern and how I made this for $75 (not including my time of course). That’s the cost of fabric for quilt top and backing, small can of 505 basting spray and Warm and Natural Cotton batting. Everything was purchased at Joann’s craft store. Finished quilt measures 60″ x 60″.

This free lap size version is called Wheeling, featuring one large block for the entire quilt. It’s beginner friendly and super easy to make. You can change the entire look of this quilt by playing with the color placement and it consists of squares and half square triangles. How simple is that!
Craft Store Fabric
I don’t buy fabric at craft stores for quilting as a general rule, this is due to the poor quality of fabric at the craft stores. I’m not being rude or mean with this comment, it’s just a fact that the fabric at craft stores is on the lower end of quality. But I needed to make a sample of my new pattern and the Labor Day Sales were too good to pass up at Joann’s. Plus this quilt is going to my granddaughter’s and she loves everything I make for her. Bless her little heart.

But the more I thought about it, could I be wrong about craft store fabric? Was I being a fabric snob without knowing it? Maybe it’s like Red Heart Super Saver yarn that I crochet with. It’s cheap (I mean affordable), not nice to crochet with but is soft once you wash it. I must say that the sale fabrics do not have great colors, feel stiff but not thin. I don’t think it was thin but it had a texture I wasn’t used to. It wasn’t as nice to sew with either which is a shame because the regular price is the same as what you would pay for a regular priced older fabric at fabric store.
I still think I was able to get good fabrics that play nicely with each other. Come to think of it, I only decided on Joanne’s when I saw the doggie fabric and the holiday traffic was too bad to go to my favorite fabric store in Anaheim. I was being lazy, now I remember!
What is the Carpenter’s Wheel?
The Carpenter’s Wheel block is a traditional quilt pattern that dates back to the 1800s. It’s made up of triangles, squares, and diamonds, which combine to create a large, striking wheel shape. The design looks intricate, but with the right techniques, you’ll have it pieced together in no time. Why the name “Wheeling”? When I made this lap size quilt, the way the block spun out reminds me of a wheel in motion.

Make sure you check this out!
After you read this post, make sure you also check out Learn How To Quilt for Absolute Beginners. It’s jam packed with even more information, links and resources that are so helpful when you’re first learning. It also has a section with free quilt patterns that are great for beginners. So make sure you check this out, seriously don’t forget!
Grab a copy of my Quilt Planning Journal, filled with graph paper and some note pages to help you design at least 4 quilts or sewing projects! I have been using mine for a little while and already jotting down ideas, reminders about websites, and fabric options. I think this can be so much more than just a design book. Pin in fabric swatches, photos of your finished quilts and enjoy your creative process!
Carpenter’s Wheel Quilt Pattern – Detailed Instructions
This quilt is perfect for confident beginners or intermediate quilters looking to try something new. It’s made with solid squares and half square triangle (HST) to create the design. It’s a unique pattern because you aren’t creating a ton of quilt blocks and sewing them together. Rather, you create one quilt block for the Carpenter’s Star and build around it with solid and HST units.
Materials You’ll Need:
For a lap-size quilt (approximately 60″ x 70″):
- 1 yard dark fabric
- 1 yard medium fabric
- 1/2 yard border fabric
- 2 1/4 yards background fabric (neutral or light colored for contrast)
- 1/2 yard binding fabric
- 4 yards backing fabric
- Twin Batting
These cutting instructions below are for two at a time half-square triangles (HSTs). Quilt top finishes at approximately 60″ x 60″.
Cutting Instructions:
- Background Fabric: Cut (32) 6” squares and (16) 6.5” squares (for HSTs)
- A Fabric: Cut (16) 6.5” squares
- B Fabric: Cut (16) 6.5” squares
- Sashing Fabric: Cut 2.5″ strips by width of fabric and 4 – 2.5″ x 6″
- Binding Fabric: Cut 2.5” strips by the width of fabric.
- Backing Fabric: 4 yards, cut into 2-2 yard sections and sewn together
You will need to make the following units:
Background Squares – 32 Plain Fabric Block
Fabric A and Fabric B – 16 Half Square Triangle Blocks
Background Fabric and Fabric A (main) – 16 Half Square Triangle Blocks
Background Fabric and Fabric B (accent) – 16 Half Square Triangle Blocks
Make Half-Square Triangles (HSTs)
You will make three different HST blocks. 16 HST with background and Fabric A. 16 HST with background and Fabric B. Lastly, 16 HST with Fabric A and Fabric B.

Draw a diagonal line on the back of the background squares, and sew 1/4” on either side of the line. Cut along the line and press open. Trim to 6” square.

Layout the Carpenter’s Wheel
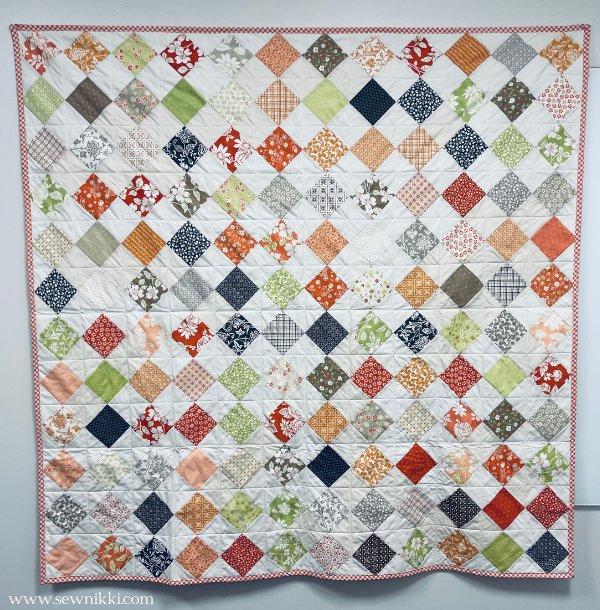
Lay out the squares as shown in the picture below. Please note you can use long strips of the background for the borders but I preferred to use squares and sew them together while adding the small sashing border 2.5″ x 6″.
Once you have the blocks laid out, you will sew it into three sections: middle section and two side borders. This was how my brain pieced the sashing strip into the quilt top. There are lot of variations to my method. Use the method you feel works best if you are an experienced quilter. Newbies should follow my instructions below.
Sewing into 3 sections or panels
Sew together the center quilt top. Sew blocks together to create rows using 1/4 inch seam allowance and making sure you nest your seams. Make sure you sew the sashing strip to the bottom of the first row and to the top of the last row.

Next, sew your border blocks together to create two side sections or panels. Don’t forget to attach the sashing border after the top square and before the bottom square. Then attach the sashing strip to the side of each border panel. One panel should have sashing strip on the right of the blocks, the second panel should have sashing strip on the left of the blocks. See photo below.
Now that you have 3 panels done, attach the borders to the left side, paying special attention to where the sashing strip needs to be. Make sure you are attaching border panels to the correct side of the quilt top.
Finally, attach the second border panel to the opposite side of the quilt top. Once done, your quilt top is done. Want to make the quilt top bigger? Add another border to all sides of quilt top to turn it into a twin size quilt.
Get the digital pattern.
Just download and print the pattern so you have it handy. Get your copy here.
Quilt Tips
Tips for lining up blocks on opposite sides of the side panels. With you two sections flipped right sides facing each other, grab your sewing pins. Start by pinning the first block and the last block. Adjust the sashing strip and ensure it’s laying nice and flat. the seam line on one panel should line up to the seam on the other panel.
You’re not lining up seam line to seam line. Rather you are lining up seam line to stitch line (depending on which section or panel you are looking at). Hope this helps and makes sense.

If using a long background piece, you don’t need to worry about lining up but I liked the look and that’s why I used blocks for the borders.
Need it bigger?
Right now your quilt top is 60″ x 60″. This is a lap size quilt. If you want to make it bigger, consider adding another border. You can add 6″, 6.5″ or 7″ border. This sample does not have a separate border.
Quilting and Finishing
With your quilt top complete, it’s time to assemble the quilt sandwich and start quilting! Layer your quilt top, batting, and backing, then baste the layers together using quilt basting spray or pins.
Now, it’s time to quilt as desired – whether you prefer simple straight-line quilting or intricate free-motion designs, the choice is yours! Finally, finish with binding and your done.

Now it’s time to quilt as desired. I always love to do diagonal straight line machine quilting on my home sewing machine but for this quilt I just followed the seam lines but 1/2 inch from seams instead of 1/4 inch from seam lines. If you are a new quilter and need to machine quilt with straight lines, check out these straight line machine quilting designs for ideas and inspiration.
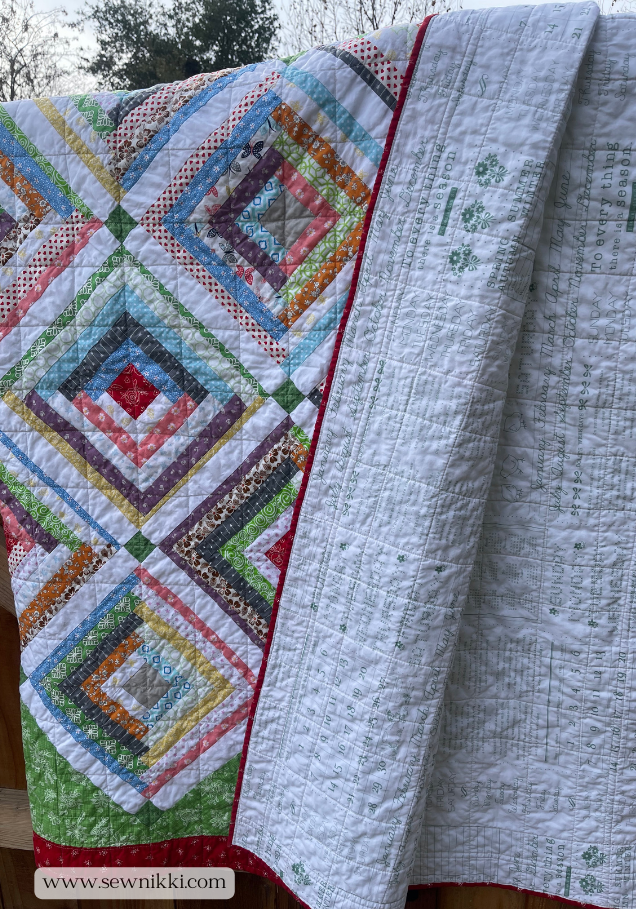
Quick note: this was only the second time I used flannel backing fabric without a walking foot when machine quilting. That was a mistake as you can see my fabric was puckering, big time. I really needed to add my walking foot. Don’t make the same mistake I did, slow down and have a foot that grabs the top fabric and the bottom fabric. Very important.
Finally, bind your quilt using your 2.5” strips, and you’re done! If you want to make a larger quilt, increase the size of your blocks. Don’t forget to increase both sizes, plain square and half square triangle squares.

Sew Nikki Free Resources
Quilt Patterns
Crochet Blanket Patterns
Suggested Quilt Tutorials
How to Quilt on a Regular Sewing Machine
Best Fabric for Quilting: How to Shop Like a Pro!
Beginner Spray Basting Tutorial
How to Sew a Quilt Together – Quilting for Beginners
How to Sew Quilt Squares Together
Joining Quilt Binding Ends for Beginners
How to Cut Fabric for Quilting- Easy and Accurate
How Wide to Cut Quilt Binding & Make Easy Strips
Pieced Quilt Backing Ideas – Super Simple Backs
How to Select Quilt Backing Fabric for Your Quilt Top
Where to Find FREE Ruby Star Society Quilt Patterns
BEGINNER SUPPLIES
Here are some quilting tools and supplies I recommend. I make a small commission if you purchase through the links, this helps to support this free content. For more info, check out Supplies for Beginners (Best Tools To Start).
Rotary Mat Cutting Mat (Self-Healing Mat)
28 mm Rotary Cutter Replacement Blades
45 mm Rotary Cutter with Sharp Blade (start with this one)
45 mm Rotary Cutter Replacement Blades (start with this one)
60 mm Rotary Cutter Replacement Blades
4.5″ Square Ruler for half square triangles
12.5″ Square Ruler for blocks
SAVE THIS PIN FOR LATER!

ABOUT SEW NIKKI
If this is your first time stopping by, welcome! Your place for free crochet, sewing and quilt patterns for beginner to intermediate skill levels. Want a digital pattern? We have those too! Plus tutorials to walk you through how to make each item from start to finish.
Follow me on social media (Pinterest, Instagram, Facebook and Twitter) so you get notifications when I post new patterns and tutorials.
Looking for your next quilt project? Then head on over to my free “Pattern Index”. It’s a page dedicated to all of my free patterns separated by categories for crochet, sewing and quilting.
If you prefer an ad-free printable version, head over to my shop and browse the Digital Patterns. These are instant digital downloads you print yourself.
This post contains ads and affiliate links, which means I make a small commission at no extra cost to you. See my full disclosure here.