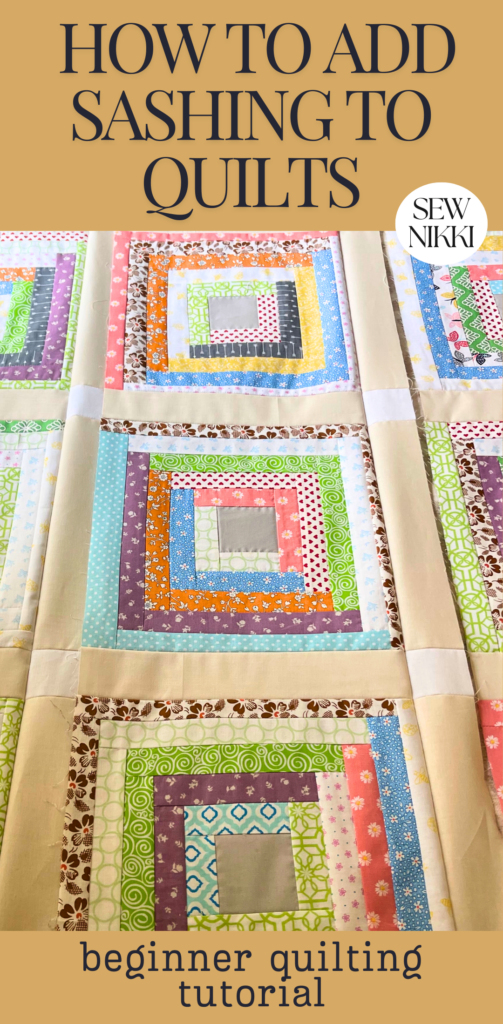
How to Make Quilt With Sashing and Cornerstones
How to make quilt with sashing and cornerstones. If you are new to quilting, welcome to my blog. I’m a regular gal who learned how to sew and quilt by watching YouTube videos. Just sharing my quilting stories and projects with you. Today I’m sharing how I added sashing and cornerstones to my log cabin blocks.
Today I’m adding sashing and cornerstones to my first log cabin quilt. Hold on, it’s actually going to be my first wedding quilt too! My best friends daughter is getting hitched in June and times a ticking for me to finish this. So exciting, so stressful, I got this, hope it turns out nice. So let’s start with how I made the quilt blocks.
MAKE SURE YOU CHECK THESE OUT!
After you read this post, make sure you also check out Learn How to Quilt for Absolute Beginners. It’s jam packed with information to make your first quilt. It also has links and resources that are so helpful when you’re first learning. There’s lots of free quilt patterns that are great for beginners and all skill levels too. So make sure you check this out, seriously don’t forget!
Make sure you grab a copy of my free Quilt Planning Journal. It’s filled with graph paper and note pages to help you design at least 4 quilt or sewing projects! Use it to jot down ideas, fabrics, patterns and inspiration all in one place. Or create your own patterns and share with others. Pin in fabric swatches, photos of your finished quilts and enjoy your creative process!
Log Cabin Quilt Block Instructions
Last year I wrote a blog on how to make a beautiful log cabin block. You can click here for the full tutorial with written and picture instructions.
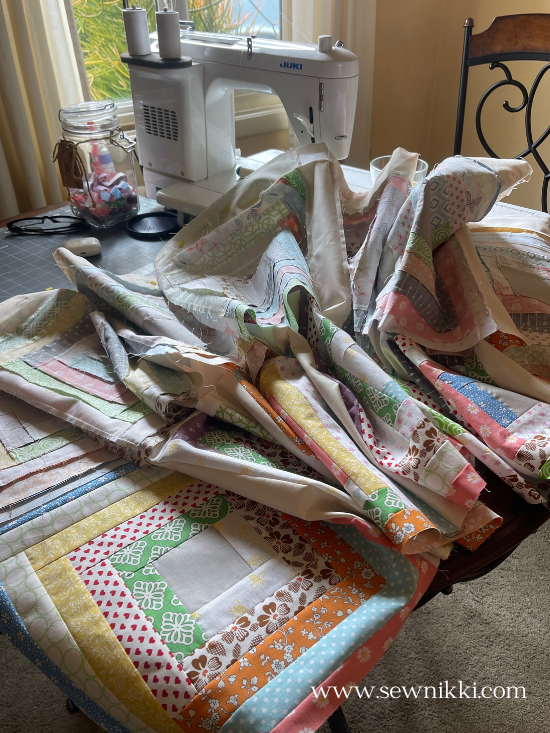
I’ve been slowing using up the fabric and making massive amounts of blocks until all the fabric is gone. I’m trying to see how many quilts and projects I can do with these blocks! I’m going to try to get a table runner or pillows out of it too.
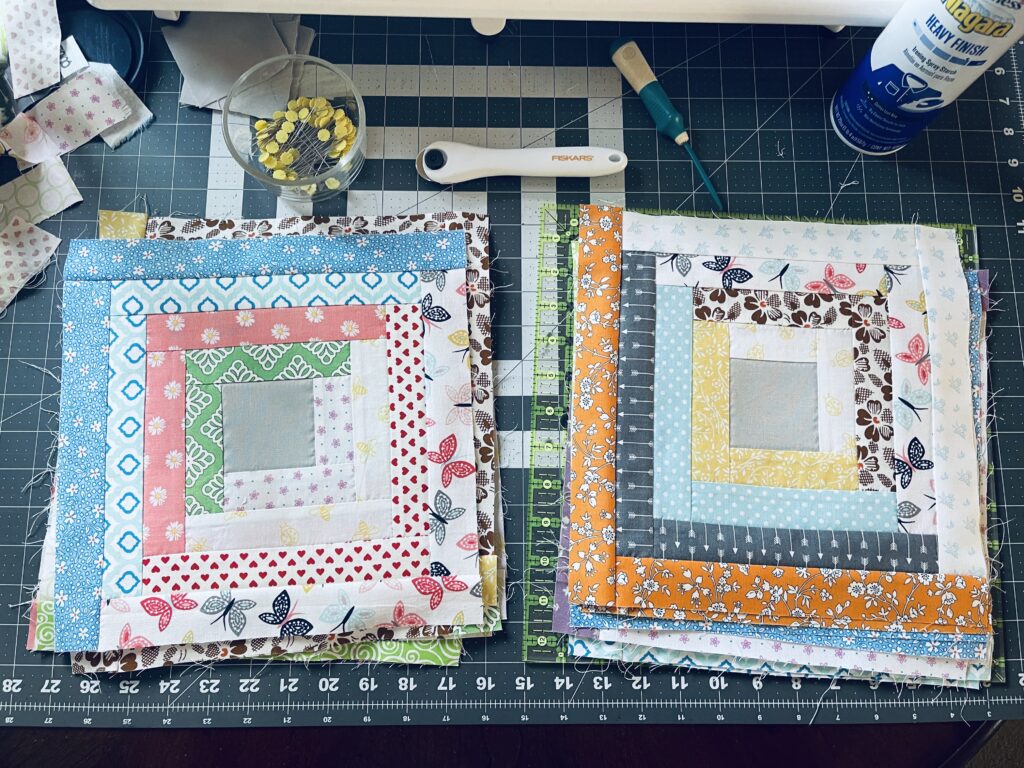
Now for this project, I wanted a slightly larger quilt block so I have 5 strips on all sides of the block. I have made over 60 blocks. Make sure you square up all the blocks when done. I have one block ruler that is 12.5″ so that’s what I used. Each finished and squared up block is 12.5″.
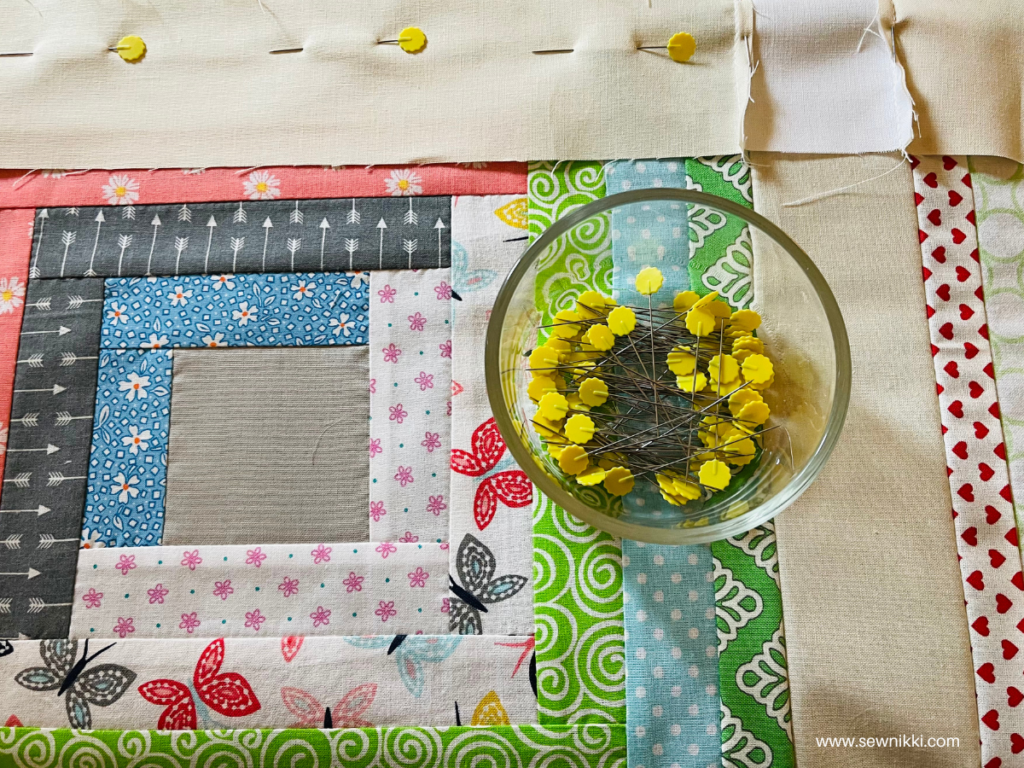
Using sashing is a great way to intentionally add a specific color to a quilt when that color is not included in the quilt blocks. For example: this is going to be a gift, the person who is getting this gift likes beige and my log cabin blocks are colorful. I knew that I wanted to tie beige or a neutral color into the quilt but it’s too late to add to the blocks. The only other place to add it would be in the sashing and white seemed like a great neutral color to use for the cornerstones.
Head to the fabric store
I took some log cabin blocks to the fabric store and laid them on top of fabrics for sashing and backing. It’s so important to buy fabric in person. You need to touch fabric to make sure it’s 100% cotton. Cotton fabric will not stretch when you pull it on the bolt. Some fabrics look like cotton but are not 100% cotton.
I never realized how many shades of beige there are. Kona Cotton is my go to brand so I was comparing fabric in bone, neutral and tan. I also looked at Riley Blake Cotton in neutral. Incredibly, the two neutrals were not the same color. Different brand, different colors even if the name is the same.
I shopped in the wide (108″ wide) fabric section to pick a fabric for my quilt backing. King size quilts really need the wide backing fabric. It’s less work, easier to attach and I take the amount I need for the backing and divide by 2 than add a half yard for good measure. I lay down my quilt top or a block from the quilt top onto the wide fabrics to see if any go with my project. I bought a dark grey fabric with beige flower bouquets on it. The beige is close the the sashing color and white goes with everything.
Want more info, check out Best Fabric for Quilting – How to Shop Like a Pro!
Quilt books are your friend
I’ve been using a quilting book that was gifted to me by a co-worker this past Christmas. It’s a thick book and contains 1,000 block patterns with instructions and yardage information to recreate on your own sewing machine. But the best part was the last section on settings and yardage. This last section was like the holy grail for how to lay out your blocks to give it different looks and create different quilt sizes. It spells out how many blocks to use and how to arrange them in order to make a throw or twin/queen/king size quilts. These books give new ideas when you keep making the same type and style of quilt. It put a spark back into my quilting for sure.
It also includes how much fabric you need for each arrangement which is AWESOME. I always guess and end up buying too much fabric or not enough. It’s so much easier finishing a quilt top when you have a book that shows you exactly what to do, what it will look like and how much fabric to buy. Here’s the link to the quilt book I used in case you want to buy it. Quiltmaker’s 1,000 Blocks Book
Sewing Supplies Used
Assorted fabric for log cabin blocks, grab 10 fat quarter size fabrics
5 yards Riley Blake Fabric Neutral Cotton fabric (for sashing and border)
4 yards white cotton fabric (for cornerstone and extra row of sashing)
5 yards 108″ width backing fabric – buy at your local fabric store, see what the selection is and chose a fabric that will go with the fabric in the blocks.
Quilt Block Ruler 12-1/2″ x 12-1/2″ or larger
Omnigrid Omnigrip 5in x 20in Rectangle Ruler
3 Coats & Clark Machine Quilt Cotton Thread (White)
1 Warm & White King Size Cotton Batting – it’s best to use white batting and not beige batting when you use a lot of solid white in your quilt
1 large can 505 Fabric Adhesive Spray – to secure your quilt top and backing to the batting
Iron and ironing board
How to Make Quilt – Arrange Your Blocks
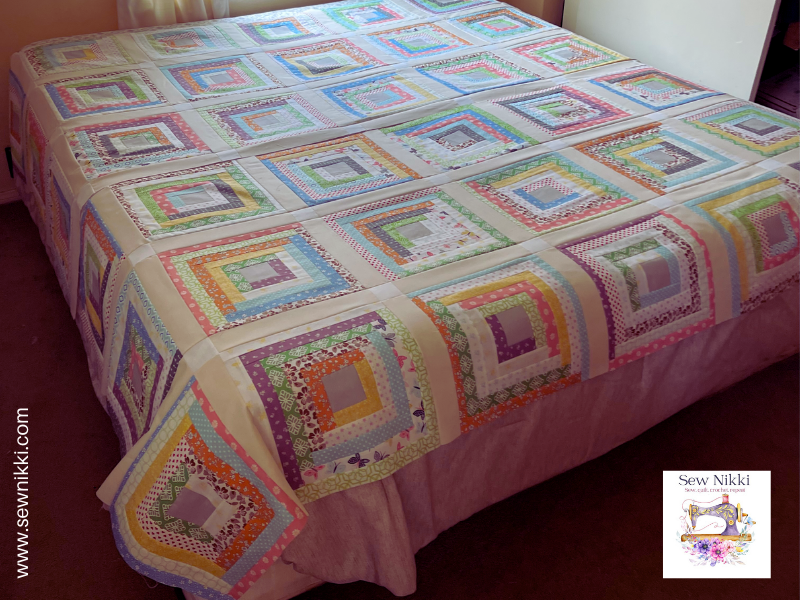
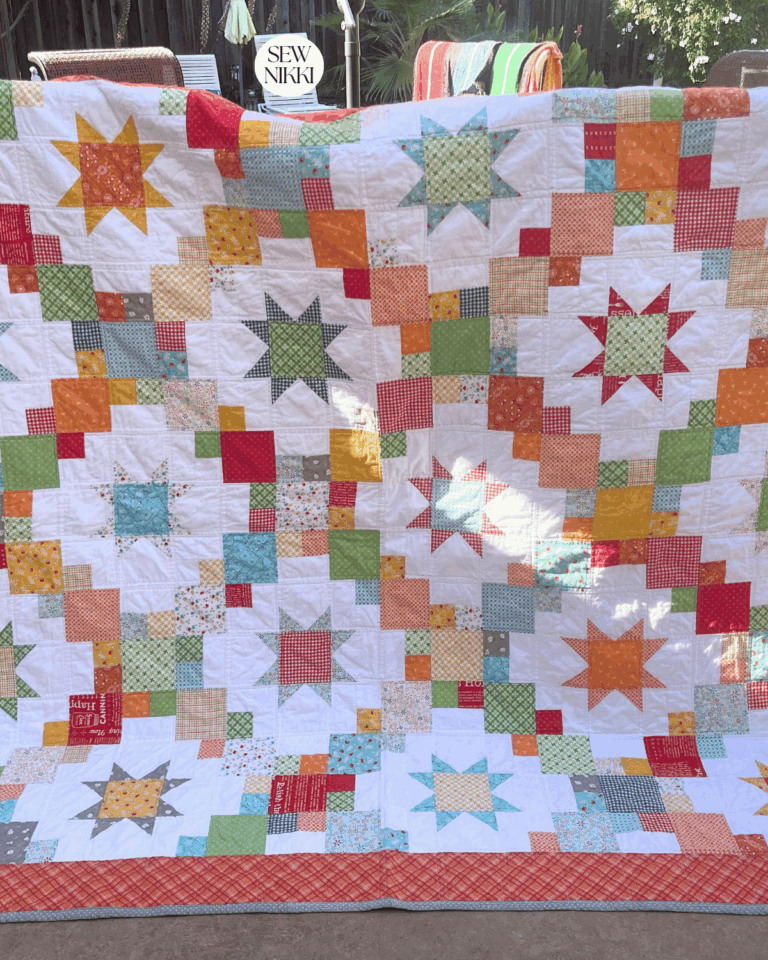
The block arrangement I selected uses sashing and cornerstones to join the blocks together and form a quilt top. I followed the instructions for the king size quilt and altered it slightly at the end. There are 6 rows with 7 blocks each. I want sashing around the entire quilt top, the book didn’t include that step. I also added a border with cornerstones to tie my backing fabric into the quilt top.

Layout the quilt blocks
Following the king size settings picture, I took my quilt blocks and headed over to the bed. I have a king size bed so this was perfect. If you have a smaller bed, I still recommend laying blocks on your bed even though some will hang over. You need to lay it out on a bed to help with block placement.

Lay out the blocks on your bed so that you have 6 rows beginning at the top of the bed going towards the foot of bed. Each row should have 7 blocks. 5 blocks will lay on top of the bed, 2 blocks will hang over each side.
Review block color placement
Once I had my blocks on the bed, I moved some around to make sure the colors on the blocks were not next to each other. I also paid attention to the colors of the fabric. I looked at the blocks with the dark gray strip and the dark purple strip and made sure those blocks were not all together in one part of the quilt but spread out. Also made sure that blocks with the same color fabric on the edges were not next to each other. These blocks were all scrappy, meaning the fabric placement on blocks is random.
Making sure that the prettiest blocks were on top of the bed, while the blocks that were not as pretty hung over the side of the bed. I used the blocks with the lightest and brightest colors on the top. Also tried to use the blocks with the darker colors for the side of the bed where the quilt hangs over. Now let’s move on the the sashing instructions below.
Instructions
Iron your fabric before cutting. Leave the fabric folded in half and iron it. You will have a crease due to the fold but don’t worry about that. Just iron it out later because it doubles your cut and saves time. Every time you cut the folded fabric you will get two pieces of cut fabric. Using a rotary cutter and quilting ruler, cut 2.5″ by WOF (width of fabric) strips as shown below. For more info, check out, How to Cut Fabric for Quilting (Easy and Accurate).
Cut 30 strips, then sub cut info 13.5″ 9 (block width) x 2.5″ rectangles. You can get three rectangle cuts from one strip. You will need a total of 97 – 13.5″ x 2.5″ rectangles. I used just under three yards of fabric for this.
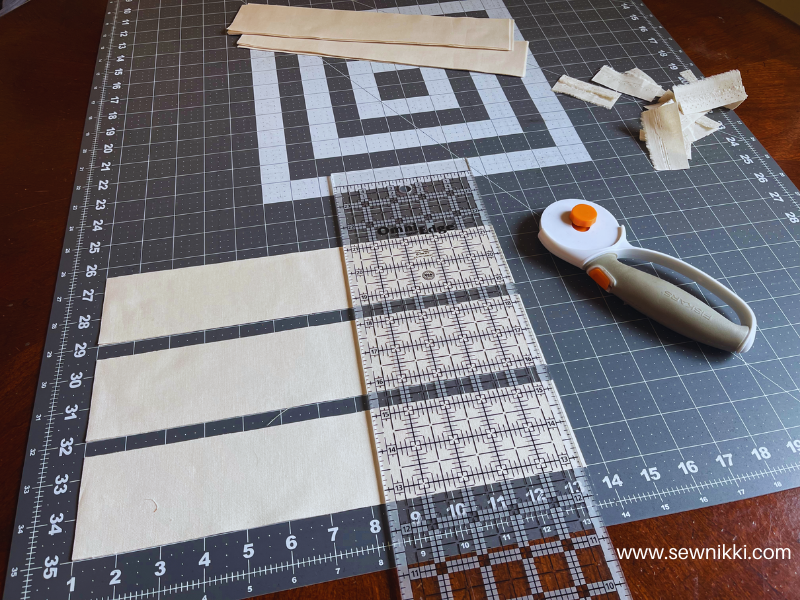
Next, cut your cornerstone fabric into 2.5″ x WOF strips. Sub cut into 2.5″ squares. You will need a total of 56 – 2.5″ squares.
My finished block was 12.5″ on all sides so my rectangular pieces were cut to 12.5″ x 2.5″. If your finished block is 12″ then your rectangle pieces should be cut to 12″ x 2.5″. If your finished block is 15″ then you may think about widening the sashing. Maybe make them 15″ x 3″. Once you know this technique you will feel more comfortable experimenting with your work.
Attaching sashing
Return to the rows laid out on your bed. Row 1 should be placed starting at the left side of your bed/head board. Create 6 rows with 7 blocks in each. Take two pins and stick it into the first square to mark the top left corn of your quilt top. Stick a pin in the top left corner block in each row before attaching sashing strips.
Take each row and stack it into a pile. The block from the left side of bed should be on top and the block from the far right of the bed should be on the bottom of the pile.
Take the first row stack to the sewing machine. Attach a sash to the the left side of block. Then add sashing to the right side of that same block.
Then attach the next block, then add sashing to the right side of the same block and continue until row is complete. Lay completed rows on bed until all rows have side sashing on the left and right sides of the blocks.
We are not ironing until the entire quilt top is done. I do not iron rows in between connecting them. It’s easier to line up the seams when fabric is pliable and not ironed.
Make strips with cornerstones
Make 7 strips using 7 – 12.5″ x 2.5″ rectangles and 6 – 2.5″ squares. Start and end each strip with rectangle. Make 2 strips using 6 – 12.5″ x 2.5″ rectangles and 7 – 2.5″ squares. Add a strip on the top of the first row then lay the row back on the bed. Make sure a pin is in the top left hand corner of first square.
When you pin the sashing onto the row, start pinning at the first cornerstone seam. Line up the two cornerstone seams and pin, Then go back and pin in the top left corner of first block (avoiding the pin to hold it’s place) and also add pins to secure sashing.
Fabric will stretch a little, make sure the fabric is lined up at seams, then make sure fabric goes all the way to both ends. If you are having to stretch your fabric real tight, you are doing something wrong. Recheck your rectangle measurement.
Connecting rows
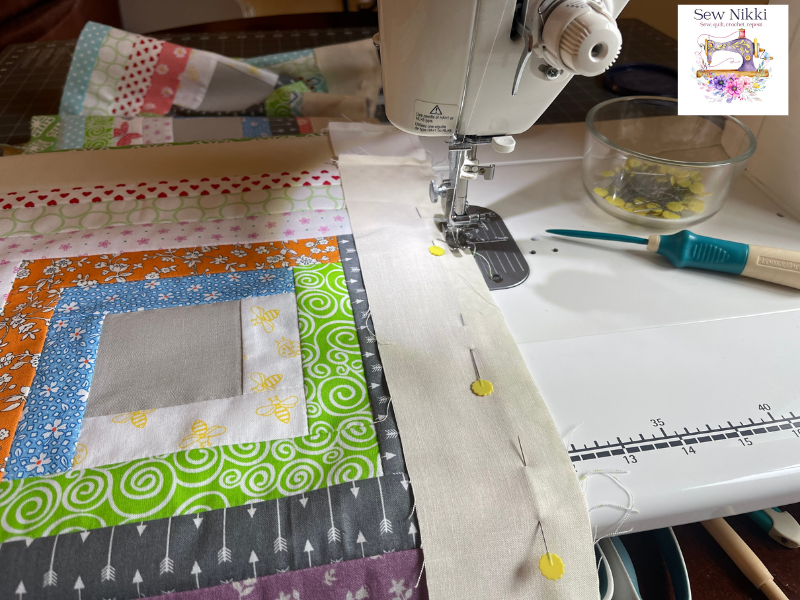
Connect rows 1 and 2. It’s easier to sew on the sashing fabric than the log cabin blocks due to no seams on sashing. Whenever possible, sew on the sashing side. You can flip it over to do this, that’s where the pins in the left upper corner help you know which way is up.

It’s easy to get your rows mixed up and turned around. The pin trick helps me every time. Then connect row 3. Follow same process for connecting rows 4 and 5. Then connecting row 6. You should have two pieces (rows 1-3 and rows 4-6).
Connect those two sections together. Lay back down on bed. Now take your strips that have corners on both ends and attach one at a time to both sides. For more info, check out How to Sew a Quilt Together – Quilting For Beginners.

Iron quilt top
According to my quilt book, the quilt is done and you can take to the ironing board and press it out. I’m adding one more border, a white border with some of my backing fabric as cornerstones to tie the backing with the quilt top. When you are done with the quilt top, press with iron really good. Baste, quilt and bind to complete.
Basting
Layer your quilt by placing the backing fabric, batting, and quilt top together. Use pins, clips or spray baste to secure the layers and ensure they are smooth and flat. Check out this post for a full tutorial on how to baste your quilt and prepare it for machine quilting, How to Sandwich a Quilt Step-by-Step Tutorial.
You can also check out, Pieced Quilt Backing Ideas – Super Simple Backs for ideas on how to be creative on the back side of your quilt.
Machine Quilting
Start quilting from the center and work your way outward, following your chosen pattern or design. Check out these posts for more info, How to Machine Quilt With Walking Foot For Beginners and How to Sew a Quilt Together – Quilting For Beginners.
Binding
Cut binding strips from your chosen fabric and sew them around the edges of your quilt to finish it. Miter the corners for a neat look. Check out these posts on everything binding: How Wide to Cut Quilt Binding & Make Easy Strips, Beginner Series – How to Join Quilt Binding Ends and How to Bind a Quilt – Easy Single Fold Binding.
Tips For Beginners
Always ask this question when you are making a quilt for someone
Whenever I make a quilt for someone, I ask them what their color palette is. Some people will tell me the color palette for their home which is sometimes different from their favorite color. Others will tell me what colors they love to wear. Eventually I get the info I need to select the fabric.
The main reason I decided to use sashing and cornerstones for this project it is because I wanted to get the color beige in this project. Beige is the color palette of the person I’m giving this to. The log cabin blocks are not beige but really colorful. So by adding sashing that is the preferred color, it gets that color in and lightens it up a lot.
How to select a quilt design
Every time I make a quilt for someone, I find out what colors they like and then select the fabric and the overall design. I choose the design by watching YouTube videos and checking out quilt books at the craft store. I’m always thumbing through books to see all the different designs. Then I go home and try to recreate what I saw in the book from memory or buy the book.
You can also use the quilt book above to make blocks that are all the same size, arrange them and connect with different techniques. Once you learn several techniques you can make lots of different and beautiful quilts.
Get a quilt encyclopedia book
The possibilities are endless when you have a quilt book. As a new quilter, it’s hard to start sewing when you don’t know what you want to sew.

Books are loaded with useful information. They provide you with all the information you need to create your own designs. Books provide you with block designs, instructions, cutting measurements and fabric required. When you follow the steps you will have a finished top.
Beginner Supplies
Here are some quilting tools and supplies I recommend. I make a small commission if you purchase through the links, this helps to support this free content. For more info, check out Supplies for Beginners (Best Tools To Start).
Rotary Mat Cutting Mat (Self-Healing Mat)
28 mm Rotary Cutter Replacement Blades
45 mm Rotary Cutter with Sharp Blade (start with this one)
45 mm Rotary Cutter Replacement Blades (start with this one)
60 mm Rotary Cutter Replacement Blades
4.5″ Square Ruler for half square triangles
12.5″ Square Ruler for blocks
SAVE THIS PIN FOR LATER!
This post contains ads and affiliate links, which means I make a small commission at no extra cost to you. While the ads are annoying, it helps keep this blog going. See my full disclosure here.
About Sew Nikki
If this is your first time stopping by, welcome! I’m Nikki, a maker obsessed with quilting, crochet, and all things fabric. Here, you’ll find easy-to-follow patterns, helpful tutorials, and plenty of inspiration for your next handmade project. Grab your fabric (or yarn), and let’s create something beautiful together!
Follow me on social media (Pinterest, Instagram, Facebook and Twitter) so you get notifications when I post new patterns and tutorials.
Want to learn how to crochet? Then check out this post, How to Learn How to Crochet – Guide for Beginners.


Hey Nikki, I love this quilt. This pattern is 1 of my favorites. Thank you for your instructions, they are very thorough.
Thanks Baker. It’s not done yet but it’s getting there!
WONDERFUL instructions! Great job!
Thanks Barbara-Sue!
That quilt is beautiful! The precision it takes to make quilts like that blows me away. I can’t even imagine being able to focus for that long haha… I hope some day I can learn this beautiful art!
Thanks Julie
I love your quilt!! I’m blessed to have two crafty aunts who do a lot of quilting and gift me beautiful things for Christmas. Learning how to quilt is on my To-Do list. Until then, I’m enjoying living vicariously through you!
Hi Rebekah, thanks for the sweet words. You can totally do it but in the meantime keep living vicariously through me and your wonderful aunties!
What a beautiful quilt and love the pattern you’ve chosen! Fantastic tips and steps along the way as well!
Thanks Charlene!
I love quilting at least the sewing part lol. I’ll keep this in mind for future projects!
Thanks Rebecca. Love your website name!
This is such a great tutorial. I can’t wait to use it for my next quilt.
Thank you Julia!