How to Make Stunningly Beautiful Log Cabin Quilt Block
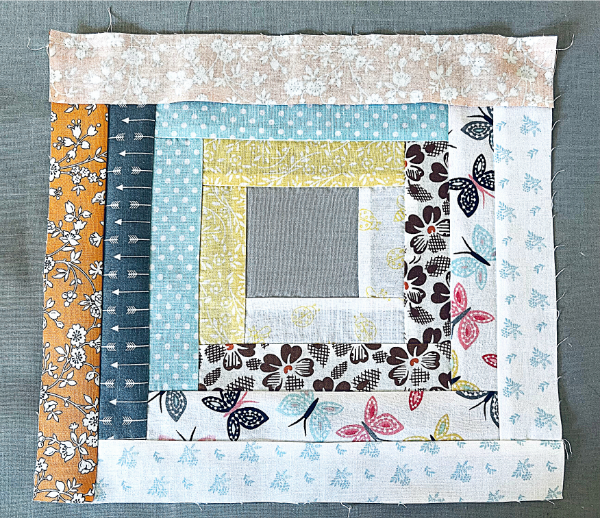
Today I’m going to show you how to make this stunningly beautiful Log Cabin quilt block. You will be given written fabric requirements, materials needed, suggested amount of fabric and best of all I have step by step picture instructions too! Stay with me as I show you how to make one of the prettiest, most charming, and spectacular blocks ever.
How to make one of the prettiest, most charming and spectacular blocks ever. Use one 3″ by 3″ square and 1 1/2″ strips of assorted lengths in light and dark fabrics. I’ll give you the exact fabric measurements down below along with step by step picture instructions. Now here’s a little about this block below.
Log Cabin Quilt Block
A traditional Log Cabin block starts with a square and then the square has two sides of matching light colored fabric and the other two sides of matching dark color fabric which gives the block contrast. You are the person who is making this so do whatever you want to do. If unsure, make one block and audition it to see if you like it. Creating is all about trial and error so be brave, have no fear because you got this! Now let’s talk about what you need to make this.
Log Cabin Quilt Block – Materials Needed
There are two main items you will need besides a sewing machine, quilting thread, ruler, rotary cutter and iron. It’s a good assortment of fabric and fabric starch. This block uses 4 dark and 4 light fabrics in each but you can keep going to your desired block size. Just remember to use the same number of dark and light fabrics for each block.
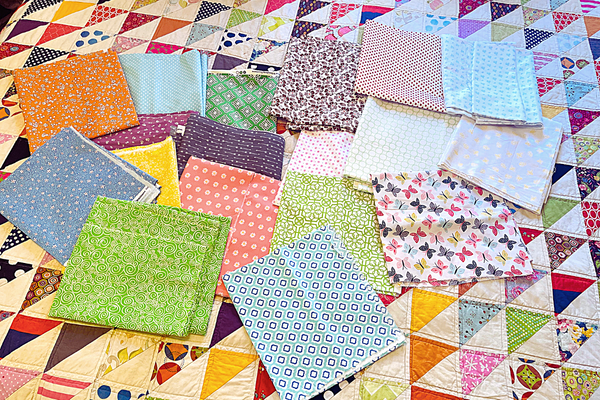
Colorful quilts are my favorite but this is your project so pick what you like as as many fabrics as you like and can afford! I recommend buying one yard of each fabric. My quilt will be using 18 fabrics total, 10 dark and 8 light.
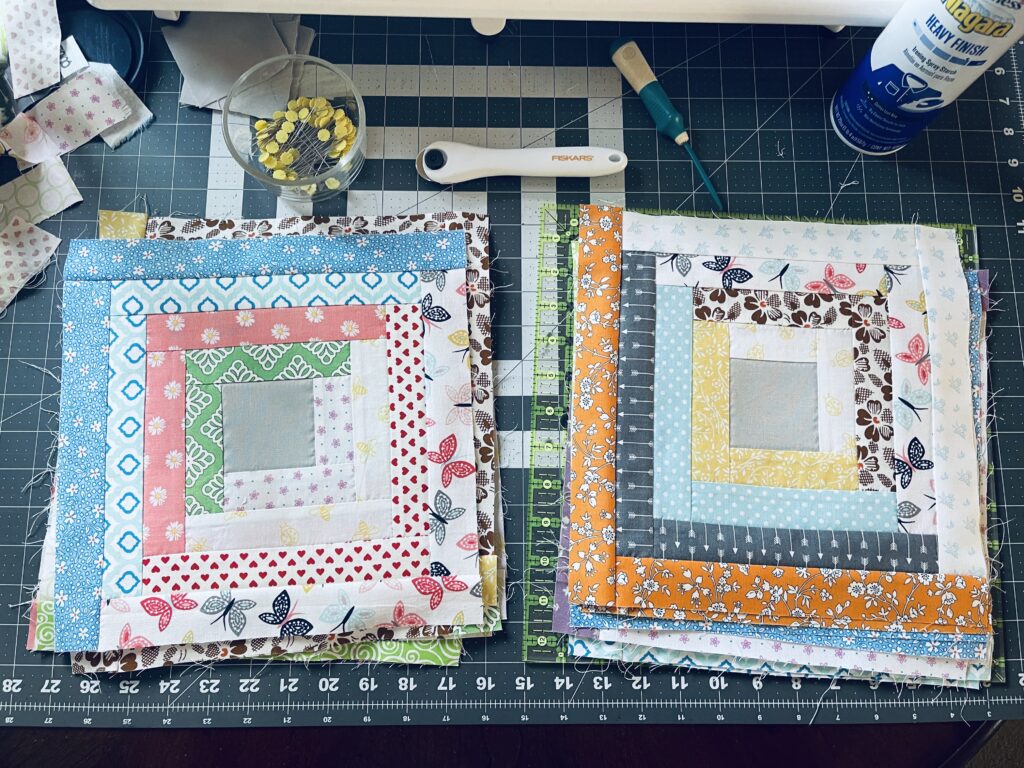
Here are the products I used for this block and some are featured in my photos. Please note that fabric used was not included in my list below because it was bought at local fabric stores in discount bins or on sale with coupons.
Products Used:
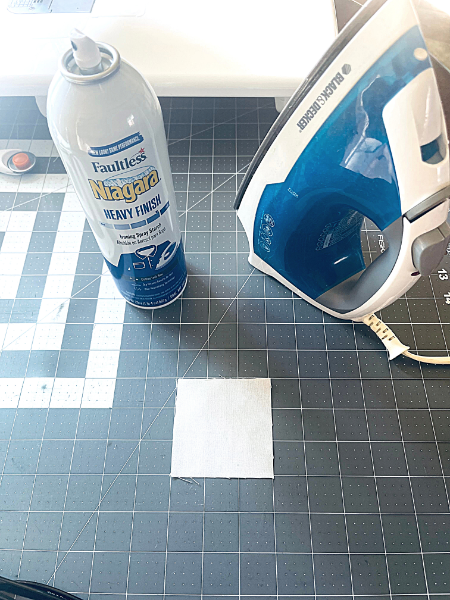
Niagara Heavy Finish Spray Starch
JUKI TL-2000Qi Sewing and Quilting Machine
Coats & Clark Inc. Machine Qlt Ctn Winter White
Fiskars Classic Stick Rotary Cutter, 45mm
Fiskars Crafts Folding Cutting Mat, 18 x 24, Grey
Prym 0.60 x 50 mm Quilters Flat Flower Pins, Silver/Yellow, One Size
Pyrex Simply Store 6-Pc Glass Food Storage Container Set with Lid
Log Cabin Quilt Block – Make Fabric Strips
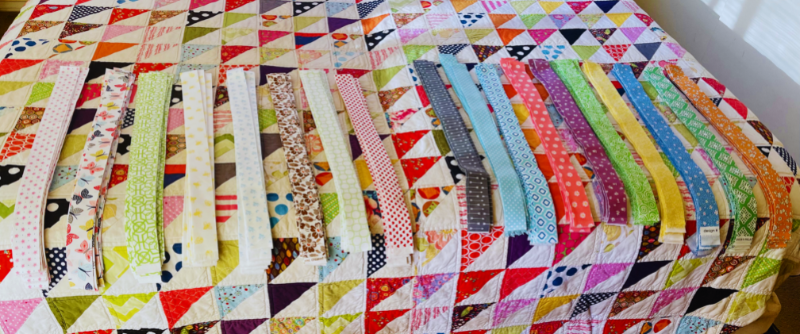
Get our your ironing board, iron and starch. Press the fabric and fold in half so your selvage edge shows on the outside then fold over. Cut 1 1/2″ strips for each fabric.
MAKE SURE YOU CHECK THESE OUT!
After you read this post, make sure you also check out Learn How to Quilt for Absolute Beginners. It’s jam packed with information to make your first quilt. It also has links and resources that are so helpful when you’re first learning. There’s lots of free quilt patterns that are great for beginners and all skill levels too. So make sure you check this out, seriously don’t forget!
Make sure you grab a copy of my free Quilt Planning Journal. It’s filled with graph paper and note pages to help you design at least 4 quilt or sewing projects! Use it to jot down ideas, fabrics, patterns and inspiration all in one place. Or create your own patterns and share with others. Pin in fabric swatches, photos of your finished quilts and enjoy your creative process!
Log Cabin Quilt Block – Instructions
Are you done ironing and cutting your fabric into 1 1/2″ strips? Awesome, now here are the fabric lengths for each set of strips. Simply follow these step by step picture instructions and repeat the process to make this stunningly beautiful Log Cabin quilt block.
Fabric Requirements:
One 3″ x 3″ square – solid color of your choice
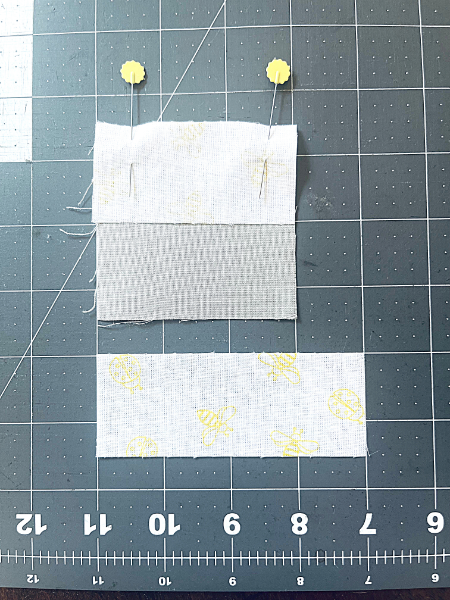
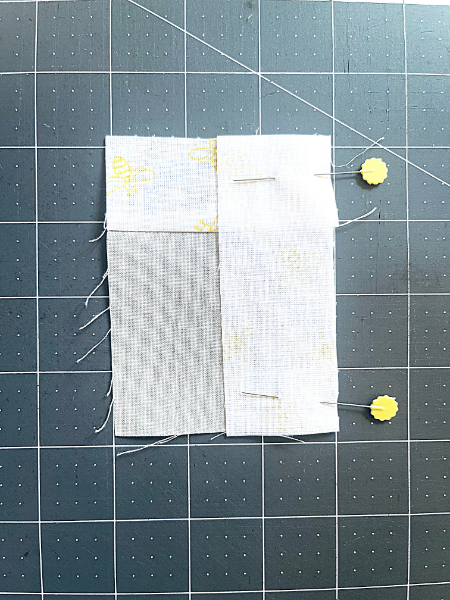
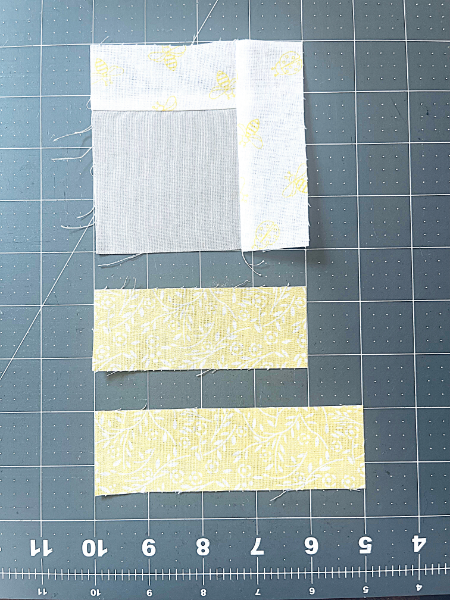
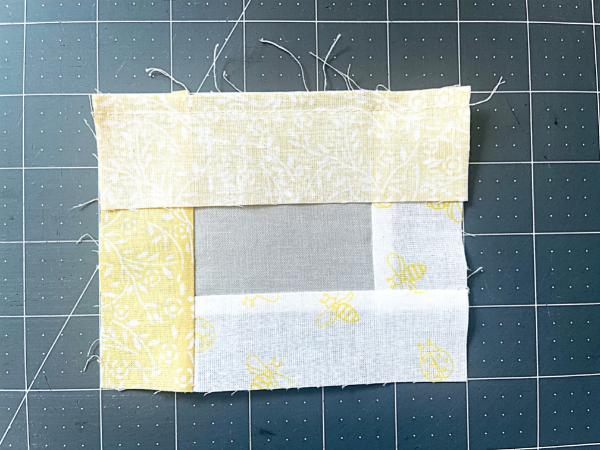
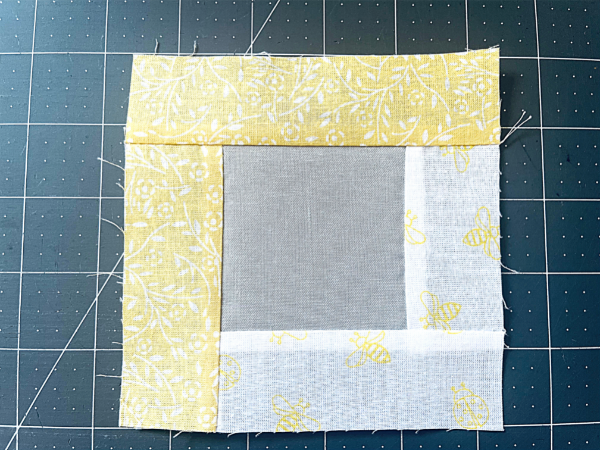
First set of strips, light fabric. One strip 3″ x 1 1/2″. One strip 4″ x 1 1/2″.
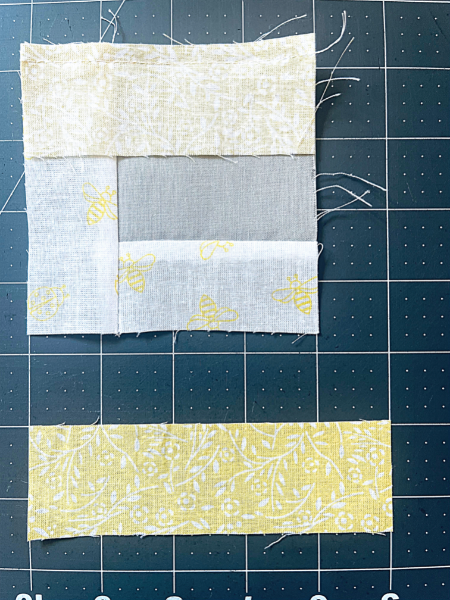
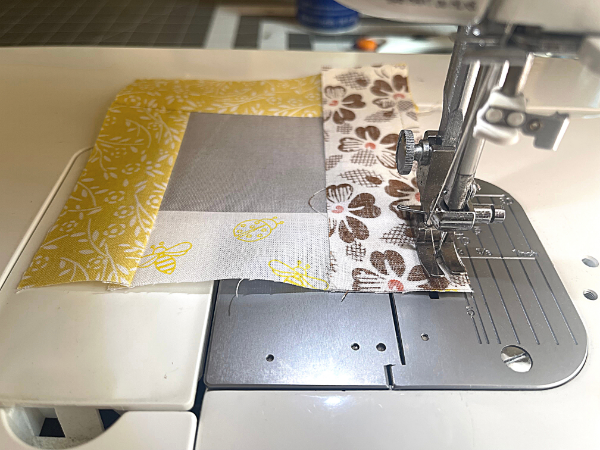
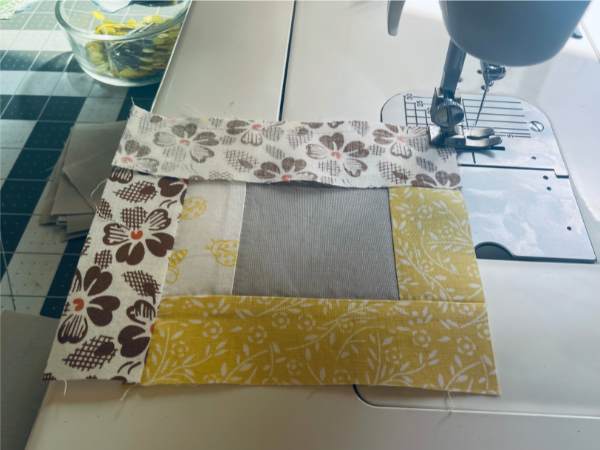
Second set of strips, dark fabric. One strip 4″ x 1 1/2″. One strip 5″ x 1 1/2″.
Third set of strips, light fabric. One strip 5″ x 1 1/2″. One strip 6″ x 1 1/2″.
Fourth set of strips, dark fabric. One strip 6″ x 1 1/2″. One strip 7″ x 1 1/2″.
Fifth set of strips, light fabric. One strip 7″ x 1 1/2″. One strip 8″ x 1 1/2″.
Sixth set of strips, dark fabric. One strip 8″ x 1 1/2″. One strip 9″ x 1 1/2″.
Seventh set of strips, light fabric. One strip 9″ x 1 1/2″. One strip 10″ x 1 1/2″.
Eight set of strips, dark fabric. One strip 10″ x 1 1/2″. One strip 11″ x 1 1/2″.
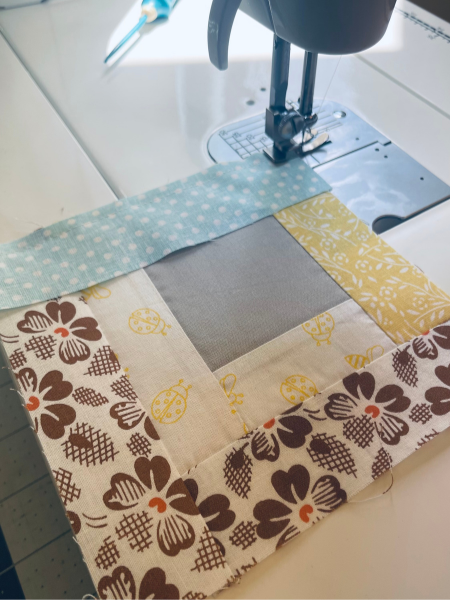
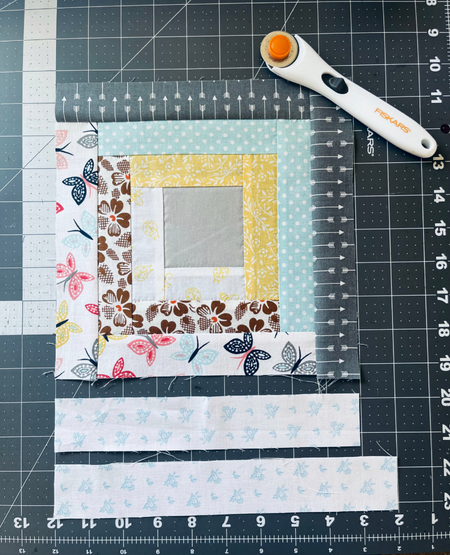
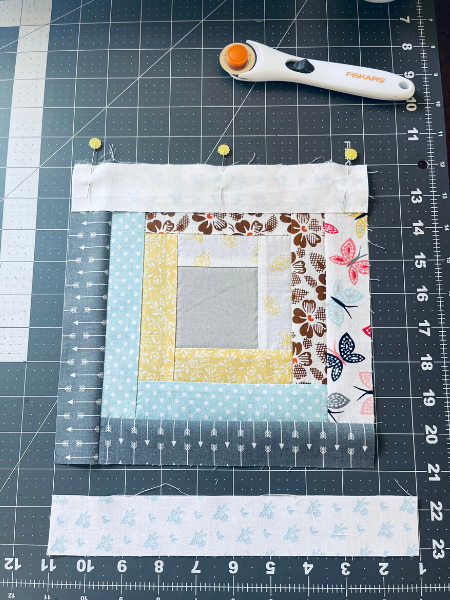
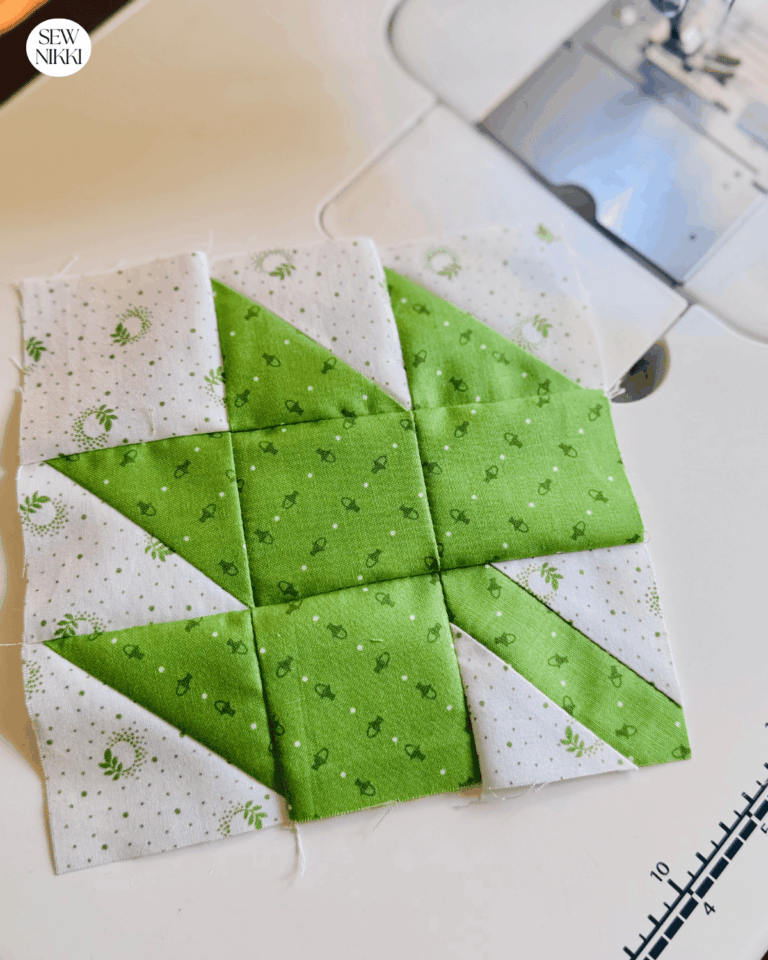
Pictures for First Set of Strips – Log Cabin Quilt Block


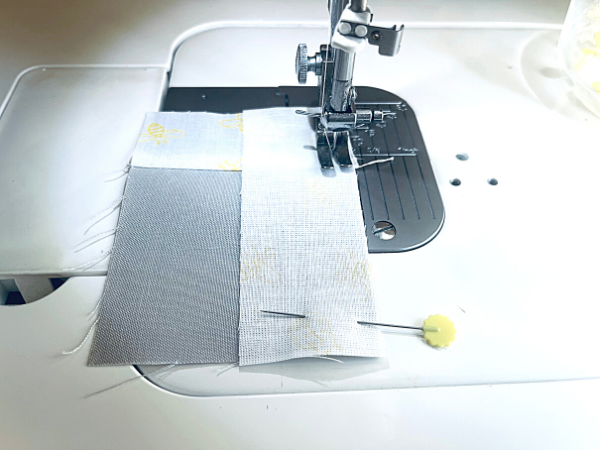
Pictures for Second Set of Strips – Log Cabin Quilt Block
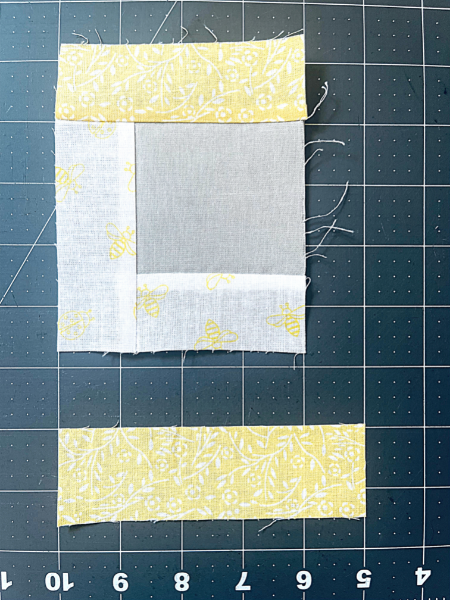
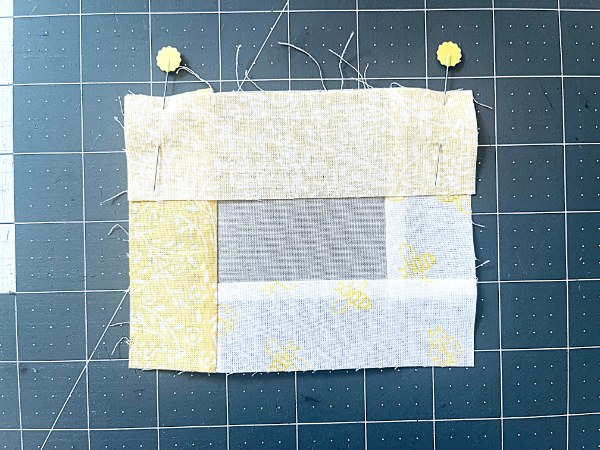
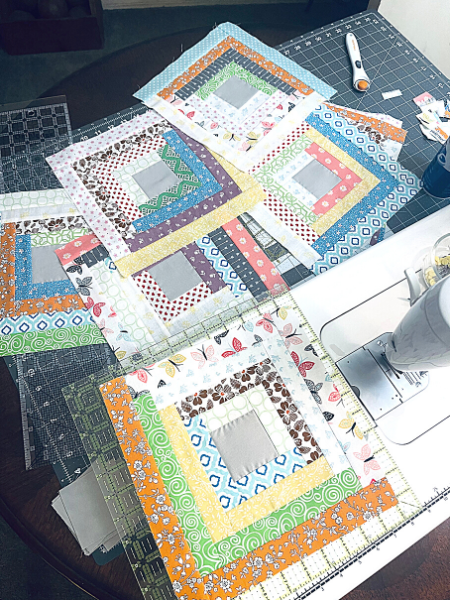
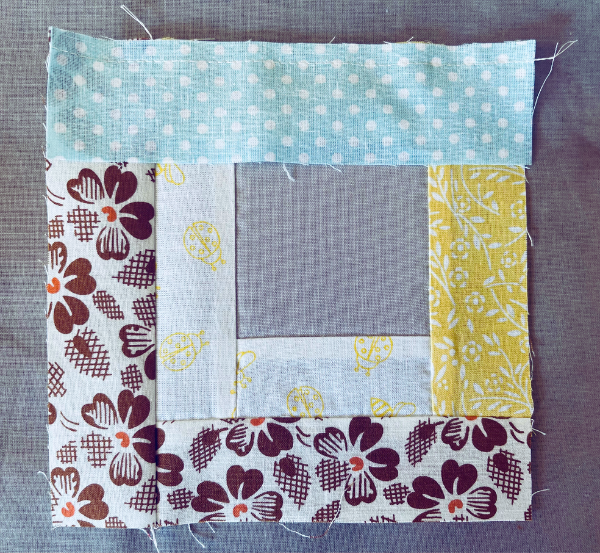
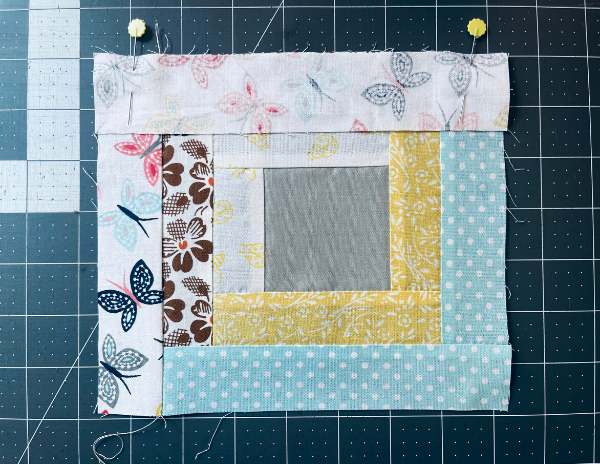
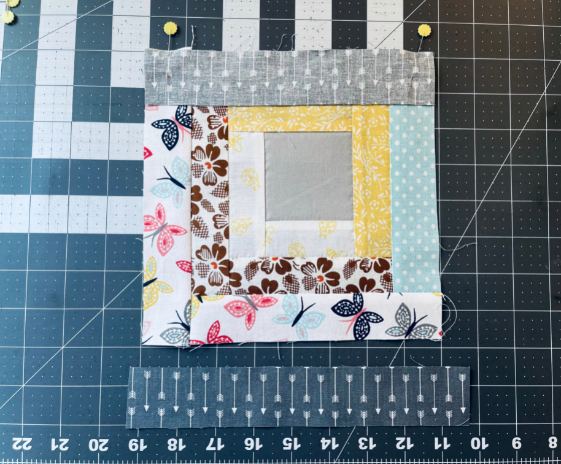
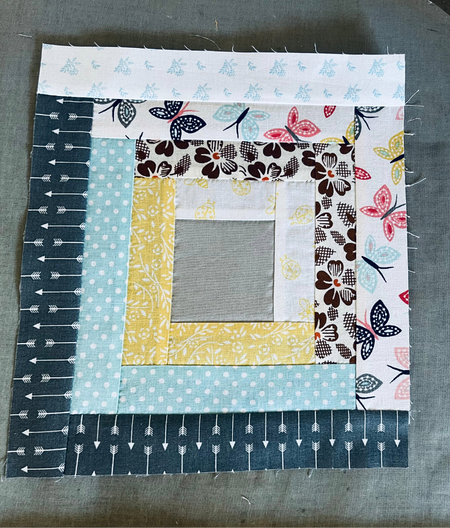
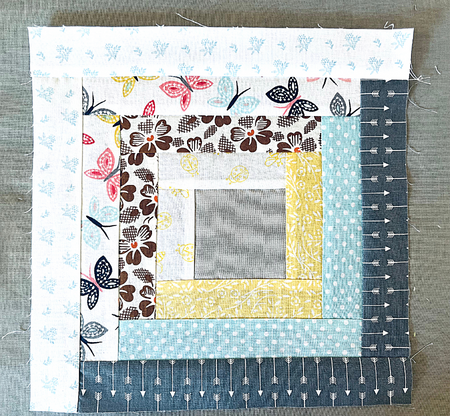
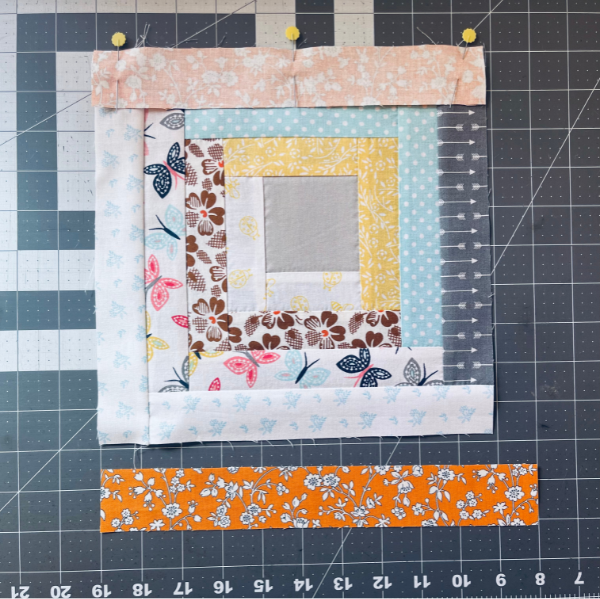
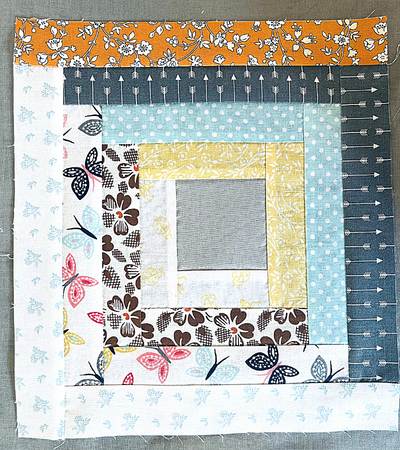
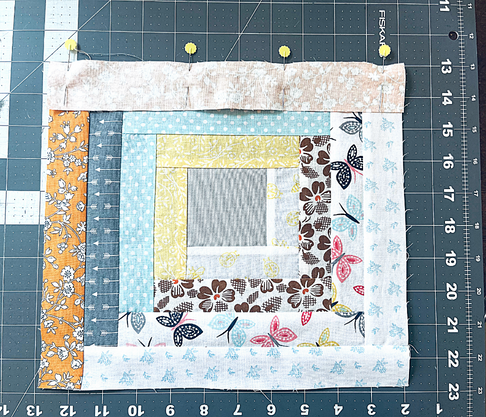
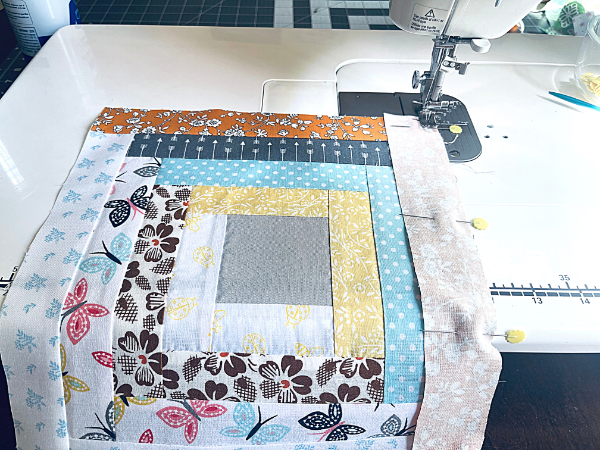
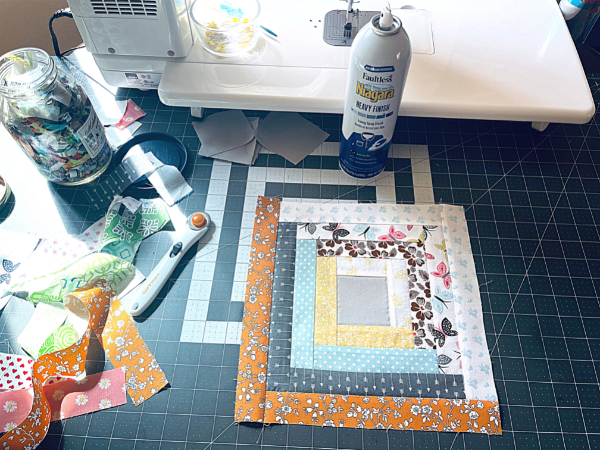
Log Cabin Quilt Block – Additional Photos
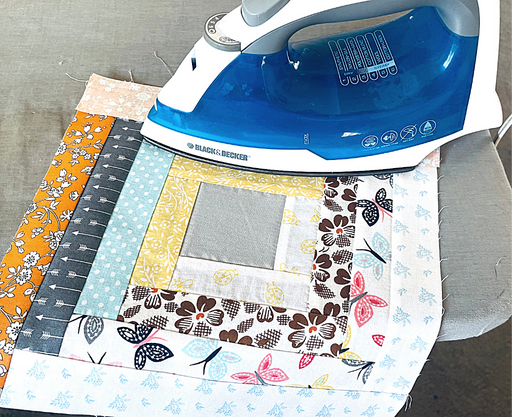
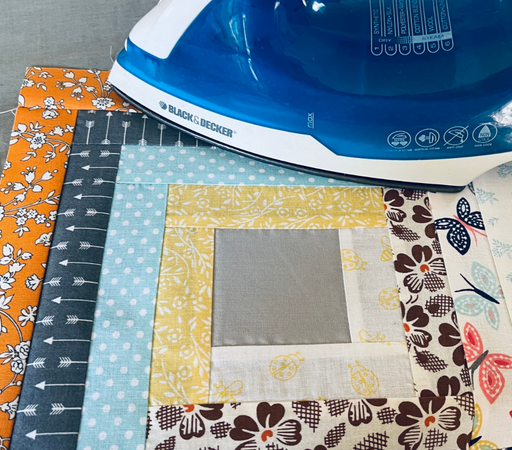
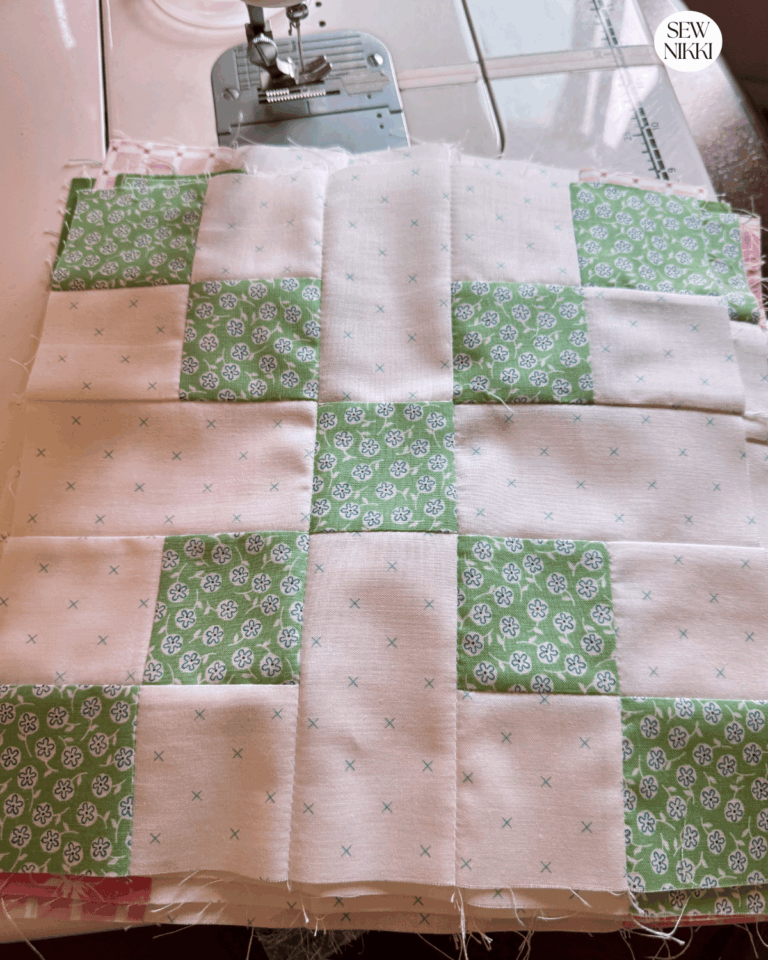
I hope you liked the step by step picture tutorials above for the first and second set of strips. I noticed that I did not take pictures of each step to complete one entire block but here are more pictures that may help if you are a visual learner. Put on some music, take a deep breath and have fun with this. If you are stressing out then step away and come back to it. This is supposed to be fun!
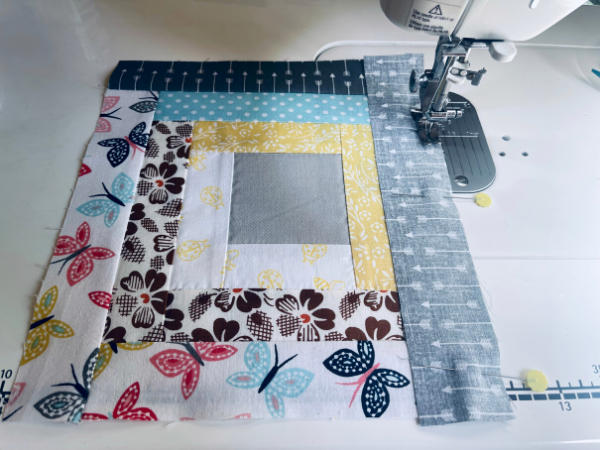
Pro tips: Use starch every time you iron. Press your block with iron and starch after every piece you sew on, it will make the patchwork stiffer which makes for a cleaner stitch.
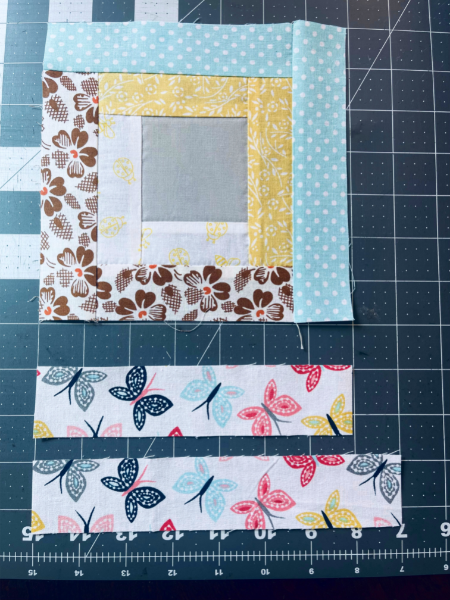
Third Set of Strips
Fourth Set of Strips


Fifth Set of Strips
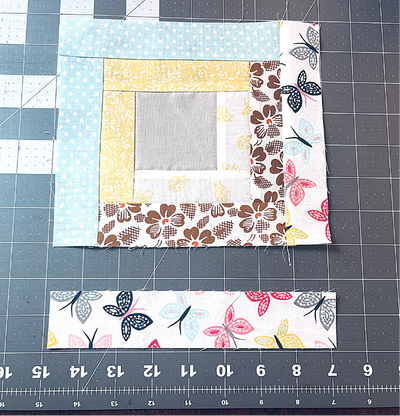

Sixth Set of Strips

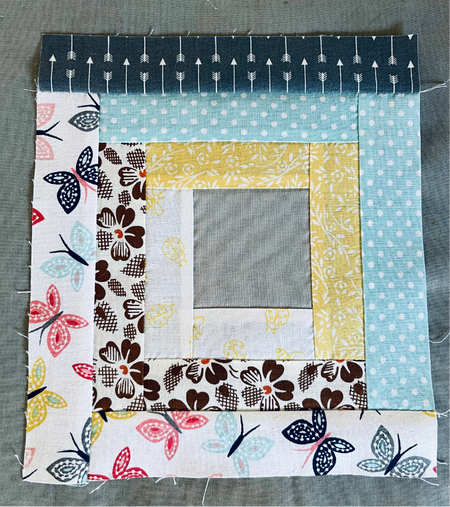
Seventh Set of Strips


Eighth Set of Strips
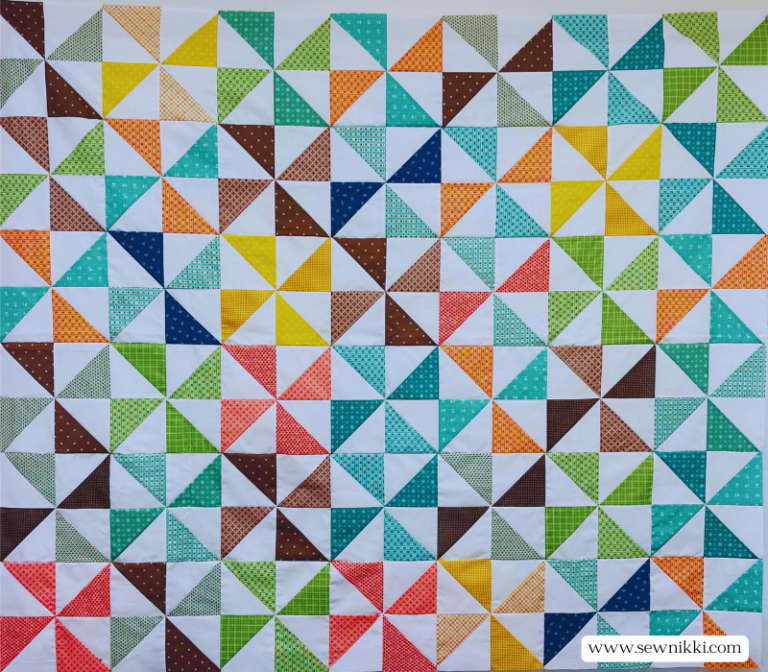
Log Quilt Layouts
Now that you have learned how to make the basic block, here are four free patterns you can try. Each log cabin block has a different layout.
Log Cabin Quilt Block – Beginner Quilting Supplies
Here are some quilting tools and supplies I recommend. I make a small commission if you purchase through the links, this helps to support this free content. For more info, check out Supplies for Beginners (Best Tools To Start).
Rotary Mat Cutting Mat (Self-Healing Mat)
28 mm Rotary Cutter Replacement Blades
45 mm Rotary Cutter with Sharp Blade (start with this one)
45 mm Rotary Cutter Replacement Blades (start with this one)
60 mm Rotary Cutter Replacement Blades
4.5″ Square Ruler for half square triangles
12.5″ Square Ruler for blocks
This post contains ads and affiliate links, which means I make a small commission at no extra cost to you. While the ads are annoying, it helps keep this blog going. See my full disclosure here.
About Sew Nikki
If this is your first time stopping by, welcome! I’m Nikki, a maker obsessed with quilting, crochet, and all things fabric. Here, you’ll find easy-to-follow patterns, helpful tutorials, and plenty of inspiration for your next handmade project. Grab your fabric (or yarn), and let’s create something beautiful together!
Follow me on social media (Pinterest, Instagram, Facebook and Twitter) so you get notifications when I post new patterns and tutorials.
Want to learn how to crochet? Then check out this post, How to Learn How to Crochet – Guide for Beginners.
This is awesome, Nikki! You have shown each step, from start to finish, so beautifully… I’ve never made a quilt, but feel as though I could by following your instructions 1 step at a time!!
Looking forward to following you & your creative adventures
Thank you, glad you liked this post.