Quilt As You Go Patterns: Table Runner Free Pattern
Today I’m sharing my free table runner pattern using the quilt-as-you-go (QAYG) method. If you’re new to quilting, a table runner is an excellent beginner project. In this tutorial, I’ll show you how to make an easy string quilt table runner using the quilt as you go technique. Easy and quick project you can complete in a few hours, perfect for beginners or any skill level.

The quilt-as-you-go (QAYG) method starts with backing fabric and batting, as you sew the fabric onto the front of the quilt top, it’s also quilting it at the same time. You quilt as you attach the fabric pieces to the quilt top, that’s why it’s called quilt as you go.
You will sew your strips together while attaching it to the batting and backing at the same time. The best part is that there is no need to quilt after your done. Plus the backing and batting (or quilt sandwich) is already completed as well so it saves a ton of time.
But rest assured, you can always add extra quilting lines or designs if you like. The complete layered quilt project works up fast. Free pattern and step-by-step tutorial below. Let’s get started on this QAYG quilt project.
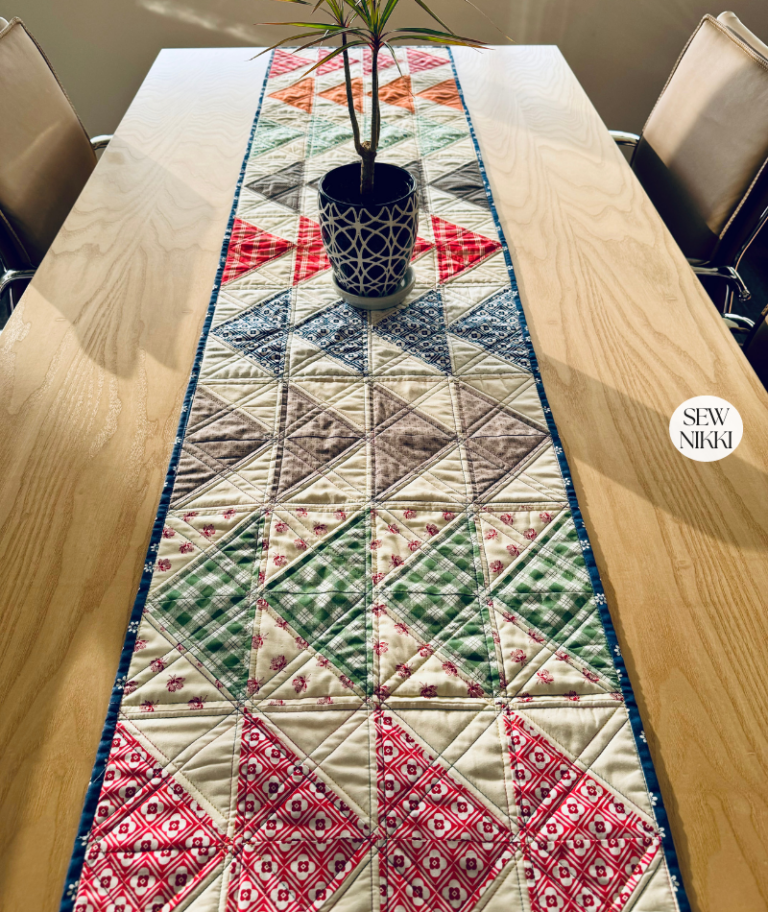
Full quilt measures 63.5″ x 12.5″ using single fold binding. Did I mention this is a reversible quilt? The back looks just as beautiful as the front.
Quilt As You Go Table Runner Pattern – Fabric
This easy quilt-as-you-go quilt table runner is made with fabric strips in widths of 6″, 3.5″ and 2.5″ by 13″. The complete list of fabrics used in my sample and included in the cutting instructions below. All fabric pictured is from different Lori Holt fabric lines by Riley Blake Designs purchased in the discount section of my local fabric store. This sewing project does contain background fabric, they are just low volume strips for contrast.
Want to know WHERE and HOW to shop for the best fabric at the best prices? Check out Best Fabric For Quilting – How to Shop Like a Pro! By the way, fat quarters or scrap strips are excellent choices as well.
MAKE SURE YOU CHECK THIS OUT!
After you read this post, make sure you also check out Learn How to Quilt for Absolute Beginners. It’s jam packed with information to make your first quilt. It also has links and resources that are so helpful when you’re first learning. There’s lots of free quilt patterns that are great for beginners and all skill levels too. So make sure you check this out, seriously don’t forget!
Grab a copy of my free Quilt Planning Journal. It’s filled with graph paper and note pages to help you design at least 4 quilt or sewing projects! Pin in fabric swatches, photos of your finished quilts and enjoy your creative process!
Quilt As You Go Patterns – Supplies Needed

Supplies You Will Need
- Fabric Strips: Strips of fabrics in various colors and patterns for a vibrant look, about a 1 1/2 yards of fabric total for front of quilt and contrast backing.
- Backing Fabric: You will be using two backing fabrics, about 1/2 yard for the main backing fabric.
- Batting: A piece of batting to fit backing fabric, 64″ x 13″.
- Binding Strips: Fabric strips for binding the edges of the table runner, about 1/2 yard of fabric.
- Thread: Select a thread color that complements your fabric.
- Rotary Cutter and Mat: These tools are essential for precise cutting.
- Quilting Ruler: Make sure your ruler has clear measurements for accurate cuts.
- Iron and Ironing Board: Necessary for pressing seams.
- Sewing Machine: A standard sewing machine will work perfectly.
- Straight Pins: For pinning your work before attaching with home machine.
- Quilting Pins or Basting Spray: To secure the layers of your quilt sandwich.
- Iron and Ironing Board: To press your fabric and quilt as you go.

Background fabrics and cutting instructions:
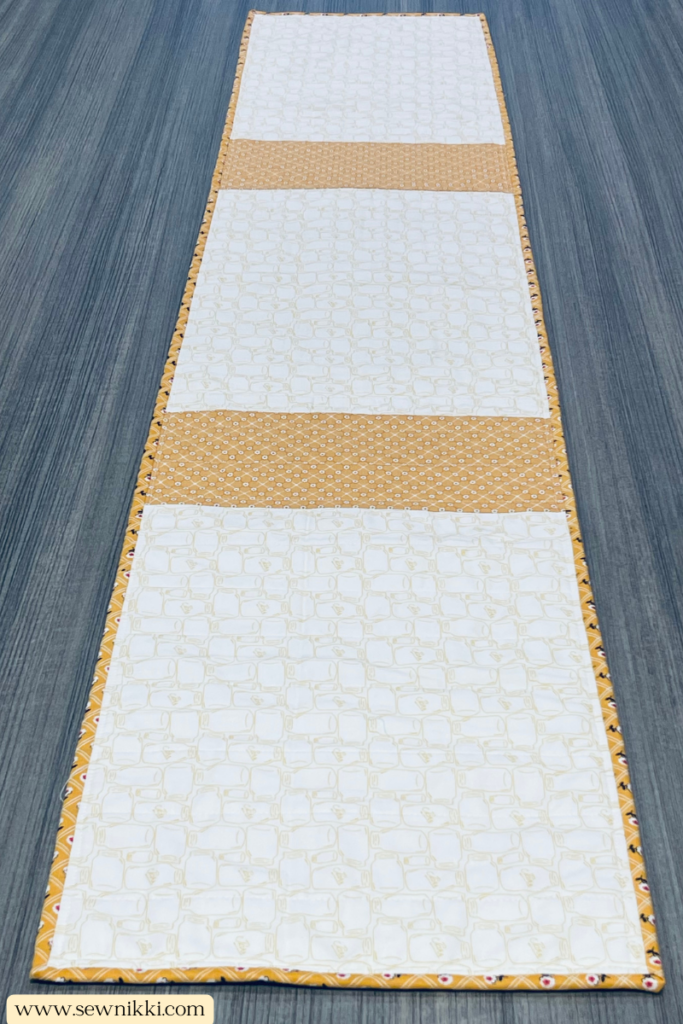
- Bee Basics Backgrounds Yellow Jars: 3 – 18.5″ x 13″ pieces.
- Bee Plaids Daisy Sunflower: 3 – 6″ x 13″ pieces. (Use 2 pieces for the back of the quilt, 1 piece for the center of the front of the quilt.)

Quilt top fabrics and cutting instructions:
- Bee Ginghams Tina Butterscotch: 3 – 2.5″ x 13″ strips.
- Flea Market Cottage Polka: 2 – 2.5″ x 13″ strips.
- Home Town Tea Dye Butterfield: 5 – 2.5″ x 13″ strips.
- Bee Backgrounds Pewter Stitched Circles: 4 – 3″ x 13″ strips.
- Prairie Daisy Rose Heirloom: 4 – 2.5″ x 13″ strips.
- Bee Backings & Borders Aqua Chick: 3 – 2.5″ x 13″ strips.
- Prairie Schoolhouse Red Keepsake: 4 – 3″ x 13″ strips.

Single fold binding fabric Prairie Daisy Rose Heirloom cut into 4 – 2″ by WOF (width of fabric strips).
If you are new to quilting and want to know how to cut fabric for quilting then check out How to Cut Fabric For Quilting Easy and Accurate.
Finished quilt-as-you-go table runner measures 63.5″ x 12.5″, the perfect size for a full side dining room table.
Striped Table Runner Quilt As You Go – Free Pattern
Step 1: Prepare Fabric Strips
Cut your fabric strips to the desired width (usually 2.5 inches) and varying lengths. You can choose a specific color scheme or go for a random mix of fabrics for a scrappy look.

Step 2: Prepare the Batting and Backing
Cut your batting and backing fabric to the measurements above. Take one 18.5″ x 13″ main backing fabric and attach 1 – 6″ x 13″ contrasting backing to the 13″ side using a 1/4″ seam allowance. Then attach 1 – 18.5″ x 13″ main backing to that (see photo below for layout). Next, attach 1 – 6″ x 13″ contrasting backing fabric to that. Finally, attach the last 18.5″ x 13″ main backing to complete. Always using a 1/4″ seam allowance to attach.

Now we need to attach the completed (untrimmed) backing to the batting. Lay the backing fabric down on a flat surface, right side down. Place the batting on top after you have trimmed it to fit the backing. Flip it over now to the backing fabric is facing upwards. Use basting spray to attach backing to batting. For more information on basting, check out How To Sandwich a Quilt Step-By-Step Tutorial.
Step 3: Begin Quilting
Start in the middle of the quilt top. Place the only 1 – 6″ x 13″ strip of fabric on the quilt top, in the center. Pin it in place.

Step 4: Quilt the First Strip
Sew along the center of the fabric strip (6″ x 13″ strip), securing it to the batting. You can quilt additional lines on either side of the first seam for added stability and decorative effect.

Step 5: Add More Strips
Take your next fabric strip (2.5″ or 3″ strips), place it right sides together with the first strip, aligning the raw edges. Sew along the edge with a 1/4 inch seam allowance.

Flip the second strip open and press with iron.

Step 6: Continue Quilting
Repeat the process of adding fabric strips. Each strip should be placed right sides together with the previous strip, sewn along the edge, flipped open, and pressed. Continue until you’ve covered one side of the batting with fabric strips.

Repeat the process on the second half of the batting with fabric strips until all the batting is covered.
Step 7: Time to Quilt – Machine Quilting Designs
Now is the time to add more quilting designs, if desired, before you attach the binding. Be creative and have fun or stop now and attach binding. You can continue quilting using the straight stitch, stitch in the ditch or try free motion quilting.
For more information on domestic machine straight-line quilting designs, check out How To Machine Quilt with Walking Foot For Beginners.
Step 8: Square It Up
After you are done quilting, it’s time to square up your quilt and trim off the excess batting and fabric. Flip the table runner over so the backing is facing you. Use the backing as you guide, then square up as needed. Doesn’t matter which side you start on but do the top and bottom first, then sides. Or do sides first, then top and bottom. Use the seam line and the quilting ruler lines to trim the same amount off from all sides.

For more info, check out How To Sew a Quilt Together – Quilting For Beginners.
Step 9: Add Binding
Prepare your binding strips, sew them together to create one long strip, and bind the edges of the table runner using your preferred binding method, whether it’s machine binding or hand binding.

SINGLE FOLD BINDING
For the binding used in this sample, take the 4 – 2″ x WOF strips and sew them together to form one continuous binding strip. You can use a variety of bindings on your quilt projects but I tend to use single fold binding on small items such as this. Not sure which binding you like best, then check out How Wide to Cut Quilt Binding & Make Easy Strip.

Attach the single fold binding to the raw edge of the quilt top (starting on back of quilt), join ends, flip and finish on front side, mitering the corners for a polished look.

For more information on how to attaching quilt binding, check out How to Bind a Quilt – Easy Single Fold Binding and How to Join Quilt Binding Ends: Beginner Series. Give your table runner a final press, and you’re done!
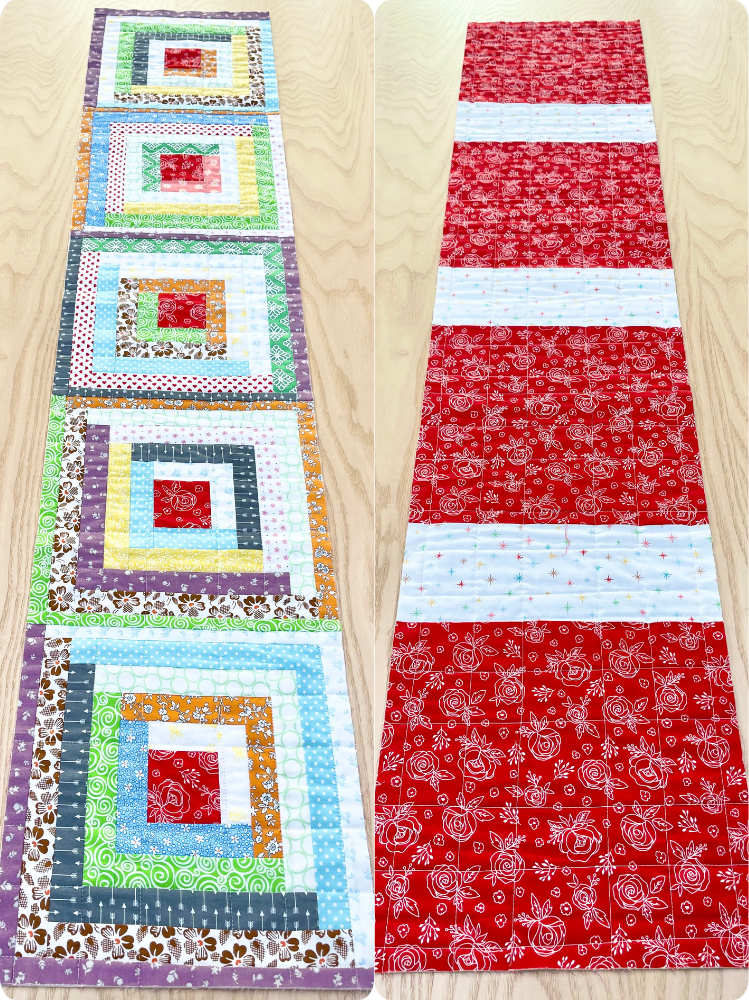
More Table Runner Patterns
SAVE THIS PIN!

If You’re New Here
I’m really glad you found your way here.
If you’re new to quilting, then welcome. The learning curve is fast, and yes, you will face challenges. But I’ve got you. If I can do it, so can you!
Here’s where to go next:
- Learn to Quilt Page – every step of making and finishing a quilt
- Free Pattern Index – all my free patterns in one place
- Digital, ad-free patterns – clean, printable, and beginner-friendly
My blog is built for the home sewist and quilter who wants to make a quilt from start to finish all by themselves. Take a full tour of this blog so you know your way around. Subscribe to the newsletter so you don’t miss out on new patterns or tutorials. And follow me on Pinterest, Instagram and Facebook.
ABOUT SEW NIKKI
If this is your first time stopping by, welcome! Your place for free crochet, sewing and quilt patterns for beginner to intermediate skill levels. Want a digital pattern? We have those too! Plus tutorials to walk you through how to make each item from start to finish.
Follow me on social media (Pinterest, Instagram, Facebook and Twitter) so you get notifications when I post new patterns and tutorials.
Looking for your next quilt project? Then head on over to my free “Pattern Index”. It’s a page dedicated to all of my free patterns separated by categories for crochet, sewing and quilting.
If you prefer an ad-free printable version, head over to my shop and browse the Digital Patterns. These are instant digital downloads you print yourself.
This post contains ads and affiliate links, which means I make a small commission at no extra cost to you. See my full disclosure here.