How to Bind a Quilt – Easy Single Fold Binding
How to bind a quilt. Beginner quilt tutorial on how to bind your quilt with single fold binding. Step-by step instructions and pictures for getting your quilt done!
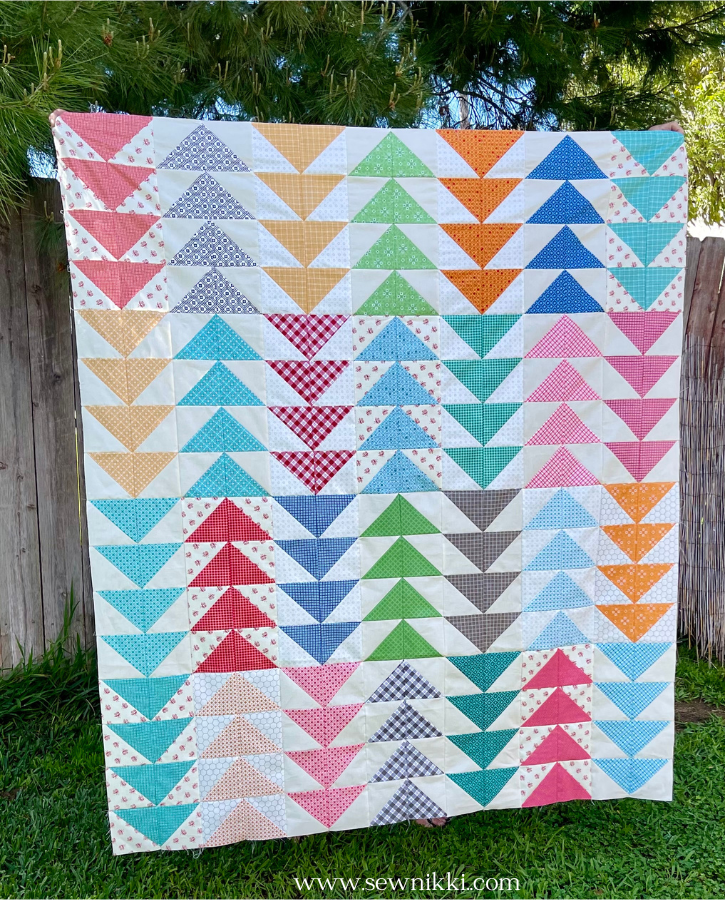
Lately I’ve been making mini quilts to create a collage for my wall. This tutorial will show how I attached binding to that project. Because this is a paid pattern, I can’t share pattern specifics but can certainly show you the process and share the link to the TQC Shoofly Pie pattern if you would like to purchase it yourself.
If this is your first quilt, you’ve come to the right place. When I was a new quilter, attaching the quilt binding was something I dreaded the most. That’s not the case anymore because I have the skills and confidence that get me across the finish line with a completed quilt. In fact, attaching the binding is one of my favorite parts because when I’m done, so is my quilt!
Let me show you how to sew binding on a quilt like a pro and have fun while you are doing it. I’m going to show you how I sewed binding on a mini quilt pattern I just finished from Temecula Quilt Company. It’s a mini quilt but the steps for binding are the same no matter what size your quilt project is. I also want to show you how cute my mini quilt turned out.
MAKE SURE YOU CHECK THESE OUT!
After you read this post, make sure you also check out Learn How to Quilt for Absolute Beginners. It’s jam packed with information to make your first quilt. It also has links and resources that are so helpful when you’re first learning. There’s lots of free quilt patterns that are great for beginners and all skill levels too. So make sure you check this out, seriously don’t forget!
Make sure you grab a copy of my free Quilt Planning Journal. It’s filled with graph paper and note pages to help you design at least 4 quilt or sewing projects! Use it to jot down ideas, fabrics, patterns and inspiration all in one place. Or create your own patterns and share with others. Pin in fabric swatches, photos of your finished quilts and enjoy your creative process!
Beginner Quilting Supplies
Here are some quilting tools and supplies I recommend. I make a small commission if you purchase through the links, this helps to support this free content. For more info, check out Supplies for Beginners (Best Tools To Start).
Rotary Mat Cutting Mat (Self-Healing Mat)
28 mm Rotary Cutter Replacement Blades
45 mm Rotary Cutter with Sharp Blade (start with this one)
45 mm Rotary Cutter Replacement Blades (start with this one)
60 mm Rotary Cutter Replacement Blades
4.5″ Square Ruler for half square triangles
12.5″ Square Ruler for blocks
SAVE THIS PIN FOR LATER!

This post contains ads and affiliate links, which means I make a small commission at no extra cost to you. While the ads are annoying, it helps keep this blog going. See my full disclosure here.
How To Bind A Quilt – Instructions
Quilt Top
First step is to finish your quilt top. When that’s done, take it to the iron and press it before you make the quilt sandwich.

Baste and Machine Quilt
Make a quilt sandwich. First thing is take the front of the quilt and the back of the quilt both facing right sides outward with quilt batting in the middle. Adhere all three layers with 505 basting spray or quilt pins (they look like safety pins but are curved).
Quilt on sewing machine with straight stitches using a walking foot as desired. You could also free motion quilt with the free motion quilting foot, feed dogs in down position. Start in the middle and quilt as you like.
Square Up Quilt
Square up the quilt corners with a square quilting ruler. Place the corner of the square ruler in each quilt top corner. Make beginning cuts in both corners, do this for all four sides. Then take your straight ruler and finish trimming. Now add the binding.
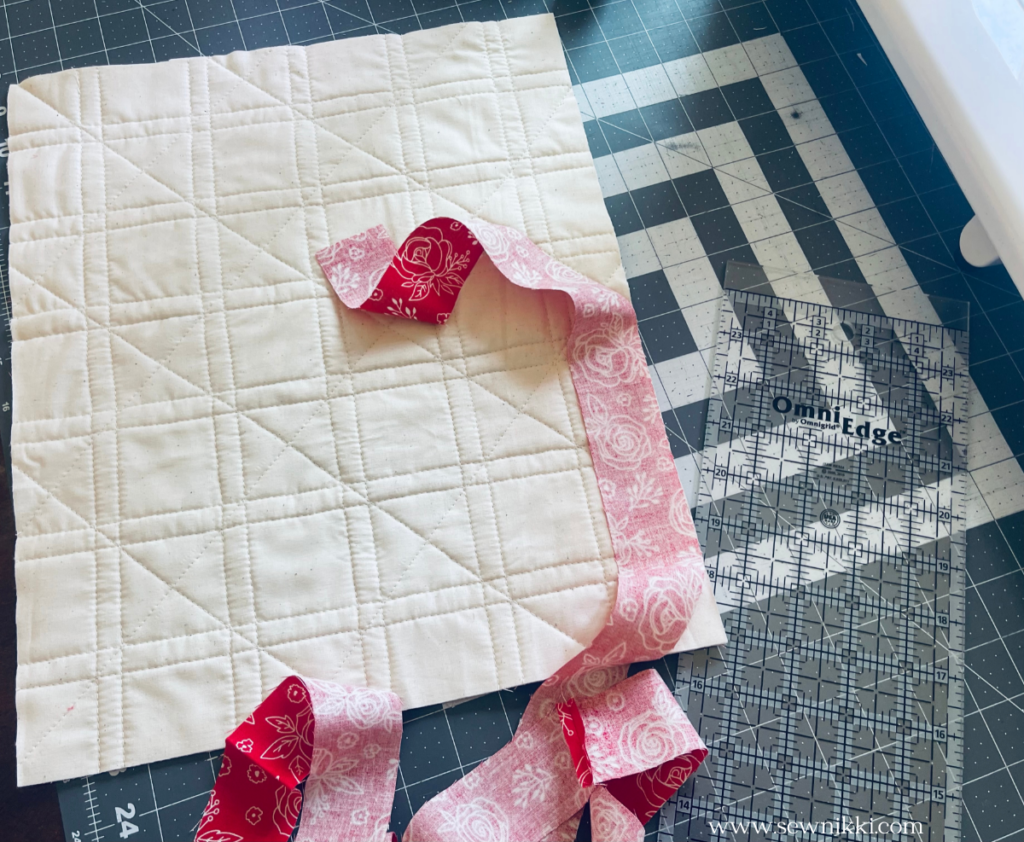
Make Binding Strip
Connecting Binding Strips With Straight Seam
Follow the pattern instructions for binding width. Cut strips in that width by the width of fabric. Cut as many strips as you need in order to go all the way around your quilt project with 15 extra inches. Connect binding strips with a straight seam. After you have cut your strips of fabric, take them to the sewing machine. Place straight edges of two ends of the strips with right sides facing each other and sew together with quarter inch (1/4″) seam allowance. Continue adding the smaller strips until you have all fabric strips in one continuous binding strip that will go around the perimeter of your quilt with extra for the corners and finishing off when quilting.
Length of Binding
The total length of your quilt binding will depend on how many width of fabric strips you need to go around the perimeter of the quilt for your project plus a little extra for good measure. Note: When you are adding binding at sewing machine to finish your quilt, you want extra binding for the last step of quilting. This last step is when you trim off the excess binding and do the final join on the quilt. You want extra binding in order to be able to sew it while it’s partially quilted.
Single Fold Binding Instructions
Take your long binding strip to the ironing board and press the seams open where you connected the binding. Do not fold the binding over and press. You only do that for double fold binding. Take your binding and quilt to the sewing machine and next step is to attach with machine.
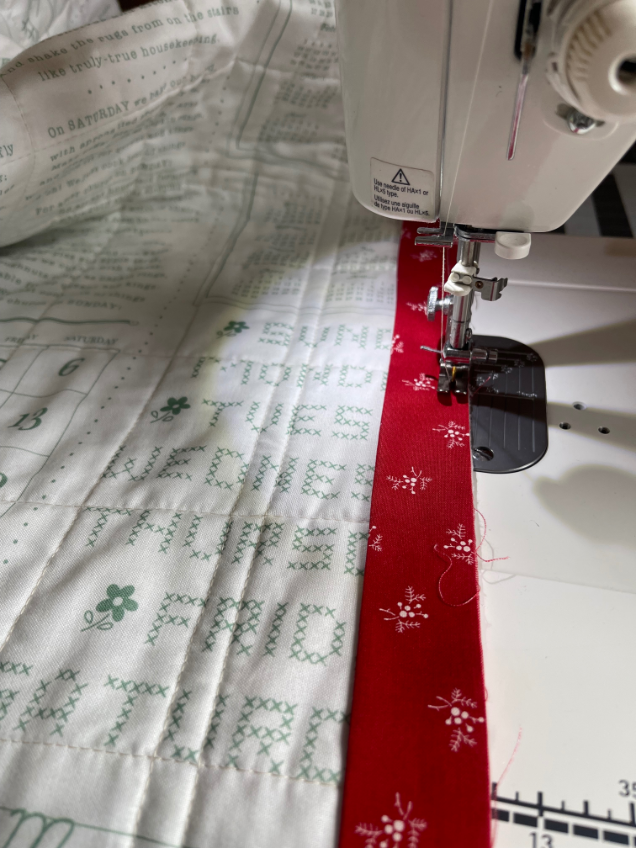
Attaching The Binding
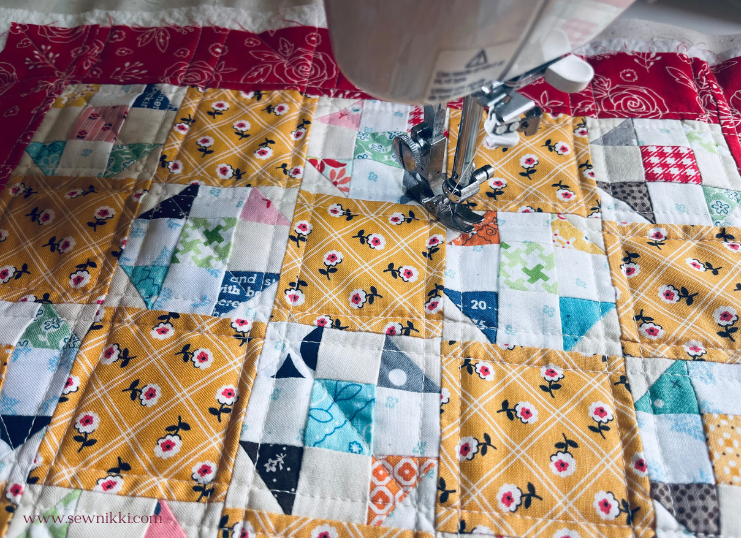
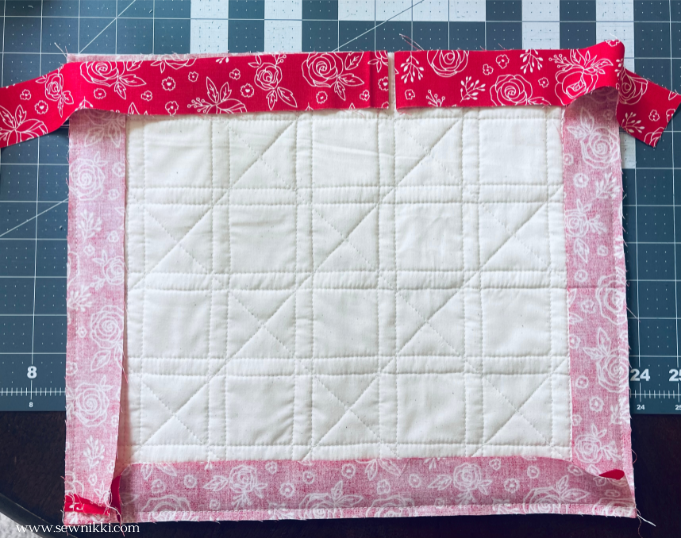
Lay your binding strip in the middle section with folded raw edges facing toward raw edges of the quilt. Leave 7 extra inches of binding and then beginning sewing. Needle position should be down, place presser foot to the edge of the quilt top with binding lined up underneath. The folded edge of your binding strip should be lined up to the right edge of your quilt.
Set your stitch length to three (3) and begin attaching binding with straight stitching line down the quilt length. Always use a quarter inch seam. Stop sewing when you are 1/4″ before the end of the quilt. Sew off the quilt with a right angle and cut thread as pictured below.

How To Bind A Quilt – Quilt Corner
Miter the corner by pulling binding up and to the right in a 90-degree angle (it will be a right angle). Use a right 90-degree angle to miter the corner. Place binding on quilt top to repeat the process until get to the side you started on.

Stop attaching the binding when you are 15 inches from the beginning of the binding strip and cut thread. (Note: This 15 inch measurement is for throws and bed quilts. When making smaller projects, just have extra binding strip at the beginning and end with room to join by machine.) Make sure you leave enough room for you to attach the binding ends on your sewing machine. Remove quilt from machine and lay on a flat surface, preferably your cutting mat.
Joining The Ends
Fold both binding pieces in half and leaving 1/4″ gap between both ends of your binding. Press a crease in the fabric to mark 1/4″.
Take your ruler and line up the 1/4 inch seam line to the crease in the fabric and cut. Make sure you are cutting the correct side of the fabric.
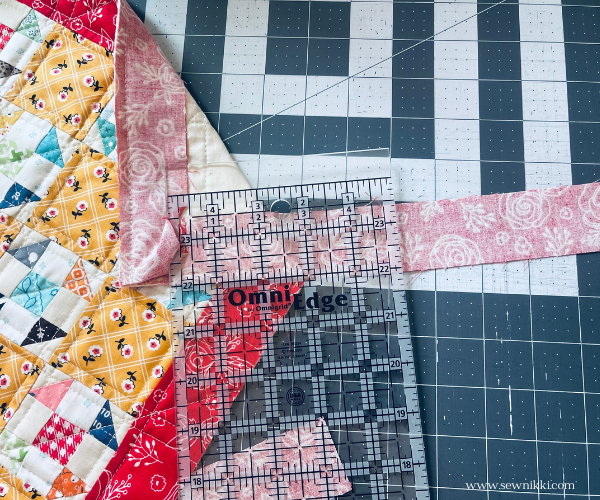
Next, take both end of binding, right sides facing each other and use sewing pins to pin together.
Fold your quilt in half or over itself so that you can squeeze the binding under the needles and join the strips of binding together.
Finger press the seam in middle and gently fold the finding back into a double-fold binding and do a fit check. Full tutorial on how to join binding ends and attach for beginners here.

Press Binding With Iron
Take quilt to ironing board, backing fabric facing upwards and iron out the binding so it’s nice and crisp. Turn quilt over and press the binding on the front side. Take quilt back to sewing machine, quilt top facing upwards and find the middle of the quilt side. Fold the binding into place, pulling it to the left but not stretching it out of shape.
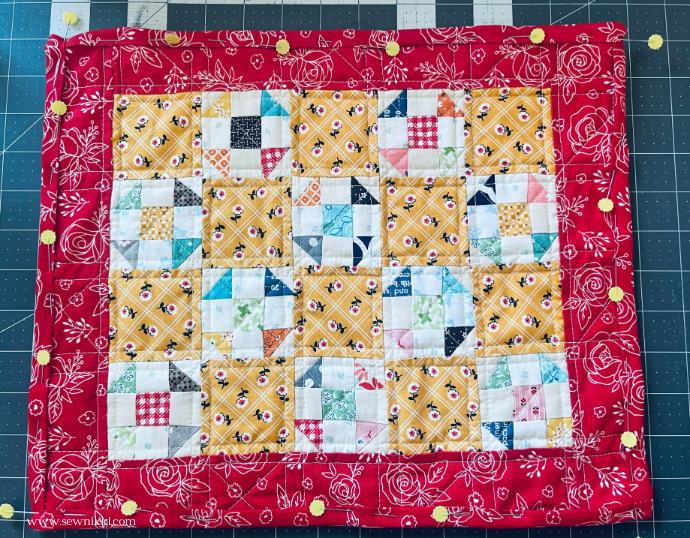
Finish Binding The Other Side of Quilt
Now we need to finish attaching the binding to the next side of the quilt. This is the final step to the quilting process. There are two ways you can finish the binding. The traditional method is to hand sewing the binding on the last side. However, the fastest way is machine binding. This tutorial will cover machine binding.
Turn the quilt over so the front side of the quilt is facing upwards. Start by folding the binding over to the front side. Then, fold binding in half then onto quilt top and secure with sewing pins.
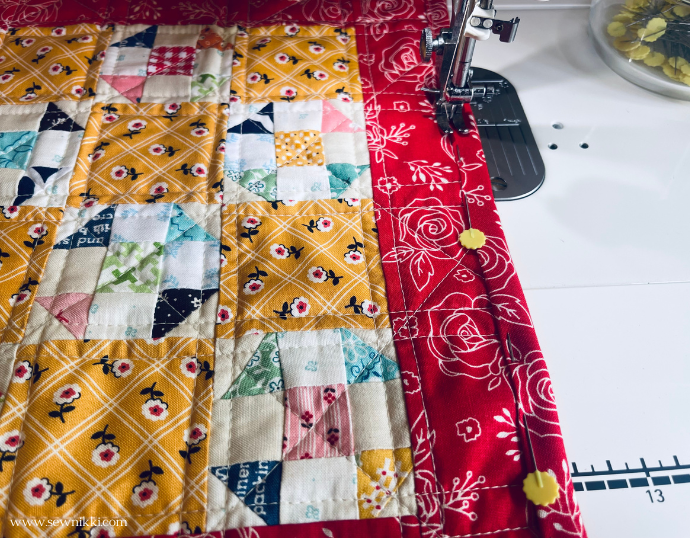
Take to sewing machine but this time line up the left side of your presser foot to the left side of the binding and get stitch as close to the left edge as possible to complete.
Make sure you don’t start on a binding seam. Place you needle down and sew with straight stitching or decorative stitches to secure binding to front of quilt. This time line your pressure foot to the left side of the binding strip to attach. Keep your needle as far to the left as possible without going off the left edge. Back stitch when you get to your starting place and cut your threads. Congratulation, you completed your quilt!
Quilting Tips
Bobbin Thread
The bobbin thread can be any color you want when you attaching it to the first side. However, the thread will show when you attach to the final side. You can match your thread to the binding fabric or just keep the same thread that you used when you completed the actual quilting. It’s completely up to you. It is best to always use the same color thread in your bobbin as you use in the top thread.
Stitch Length
Binding stitches. Use a straight stitch, with a stitch length of 3. If you machine is struggling to stitch through both layers of binding and the quilt, then adjust to 3.5.
About Sew Nikki
If this is your first time stopping by, welcome! I’m Nikki, a maker obsessed with quilting, crochet, and all things fabric. Here, you’ll find easy-to-follow patterns, helpful tutorials, and plenty of inspiration for your next handmade project. Grab your fabric (or yarn), and let’s create something beautiful together!
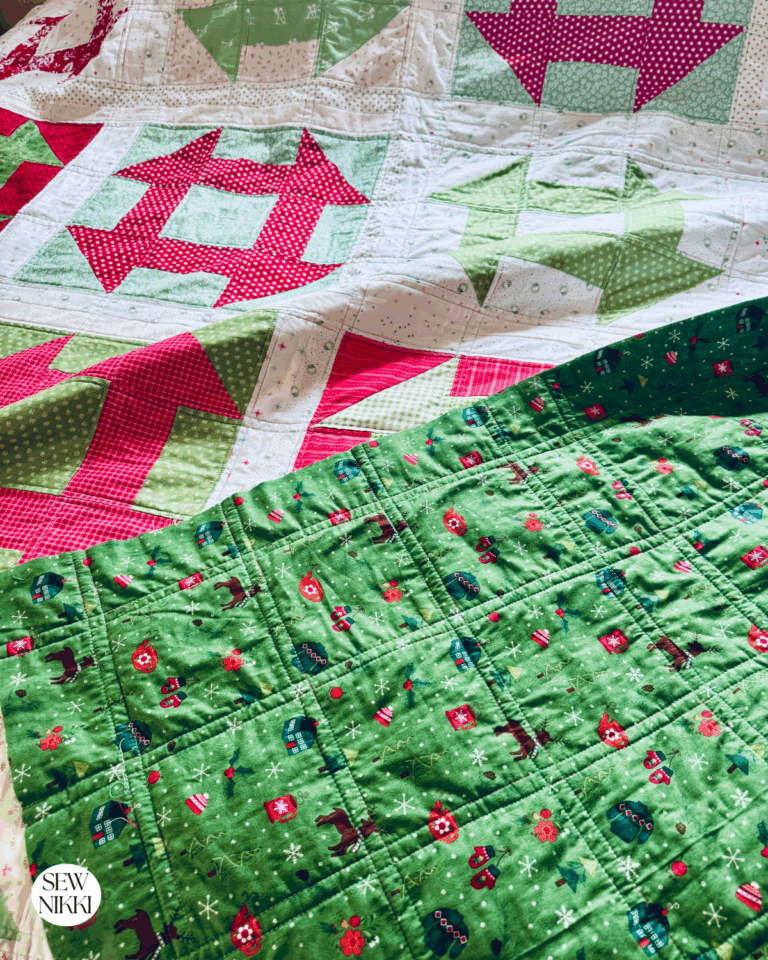
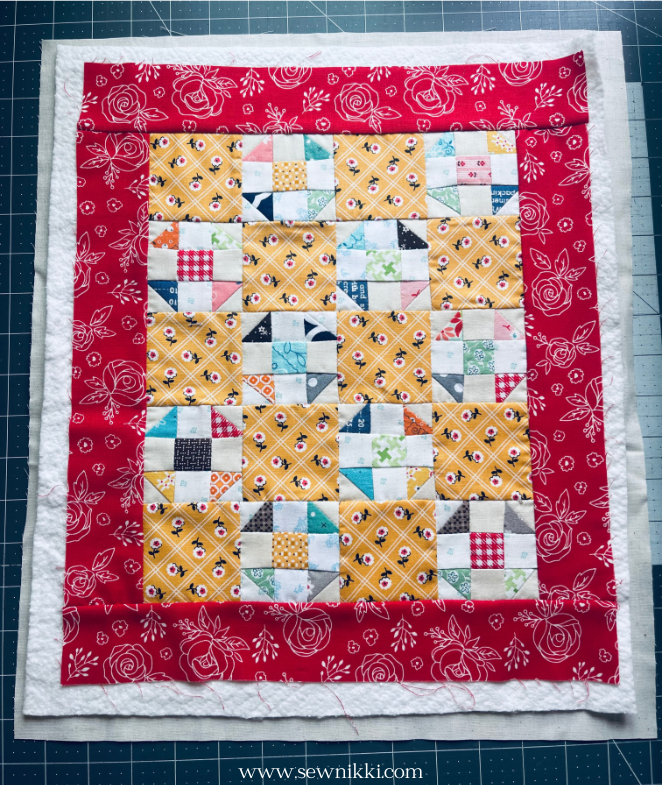
Here are front and back side photos of my finished mini quilt. Isn’t she the sweetest thing ever!
Follow me on social media (Pinterest, Instagram, Facebook and Twitter) so you get notifications when I post new patterns and tutorials.
Want to learn how to crochet? Then check out this post, How to Learn How to Crochet – Guide for Beginners.