How to Make DIY Sewing Machine Cover (Free Pattern)
Are you tired of dust gathering on your beloved sewing machine between projects? Want to add a touch of flair to your sewing space while keeping your machine protected? Well, you’re in luck because today, I’ve got the perfect solution for you: a DIY sewing machine cover that’s not only practical but also super stylish! Plus, I’m throwing in a free pattern to make it even easier for you to get started on this fun and functional project. So let’s dive right in and learn how to whip up your very own sewing machine cover!
If you’re looking for free sewing machine cover patterns, look no further. In this blog post, I’ve got the cutest cover for any machine. Keeps pesky dust out of your machine and a free tutorial to walk you through it. You can customize my pattern to fit your sewing machine, plus it has some denim work on the side panels to send it into the cute zone. You know you want one, so let’s get started.
MAKE SURE YOU CHECK THESE OUT!
After you read this post, make sure you also check out Learn How to Quilt for Absolute Beginners. It’s jam packed with information to make your first quilt. It also has links and resources that are so helpful when you’re first learning. There’s lots of free quilt patterns that are great for beginners and all skill levels too. So make sure you check this out, seriously don’t forget!
Make sure you grab a copy of my free Quilt Planning Journal. It’s filled with graph paper and note pages to help you design at least 4 quilt or sewing projects! Use it to jot down ideas, fabrics, patterns and inspiration all in one place. Or create your own patterns and share with others. Pin in fabric swatches, photos of your finished quilts and enjoy your creative process!
Sewing Machine Cover – Free Tutorial
Treat this project like a quilt but in 3 pieces. Front, back and middle. Each has a quilt top, batting and backing fabric. You will make the two main pieces, then make the middle. It’s really easy, don’t be intimidated.
You will use measuring tape to measure your machine. Once you have the measurements, cut the fabrics into the sizes you need. Hold off of cutting the middle until you complete the front and back pieces. The reason for this, you will trim up the front and back panels so they are the same size after quilting. You will measure around both sides and bottom to get your length for the middle section.
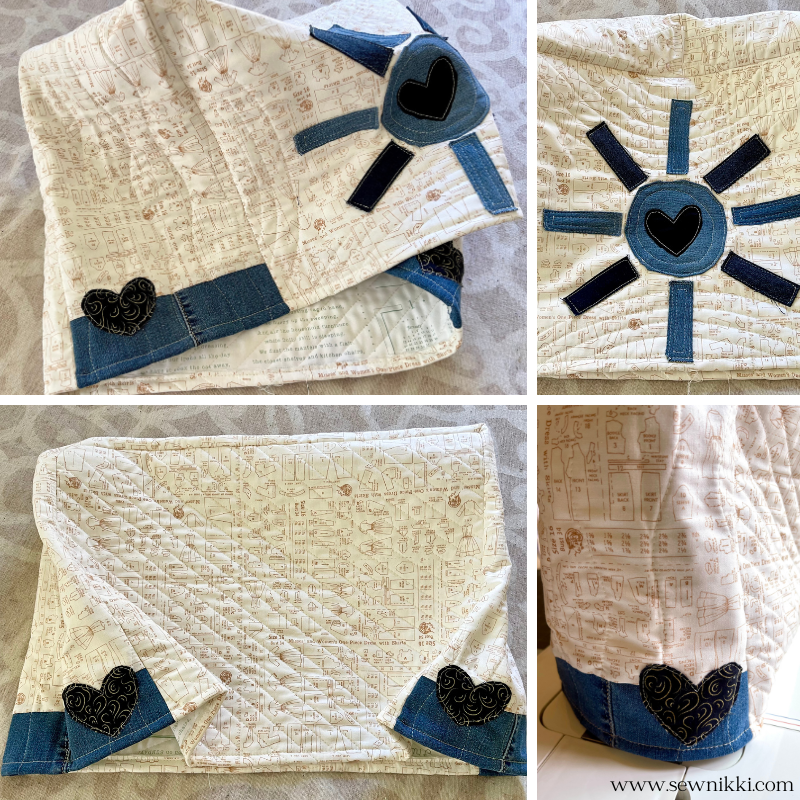
Then repeat the process with the middle section. Trim the fabric front and backing, make a quilt sandwich, quilt as desired, add denim and raw applique hearts. Trim up and then start attaching the middle section to the front and back panels one at a time. Turn inside out, fold raw edge bottom under 1/4″ and top stitch to complete. It’s that easy.

Materials
Let’s make this simple cover. Before we get started, let’s gather the materials you’ll need for this project:
- 2 yards – 1 yards of main fabric and 1 yard of backing fabric.
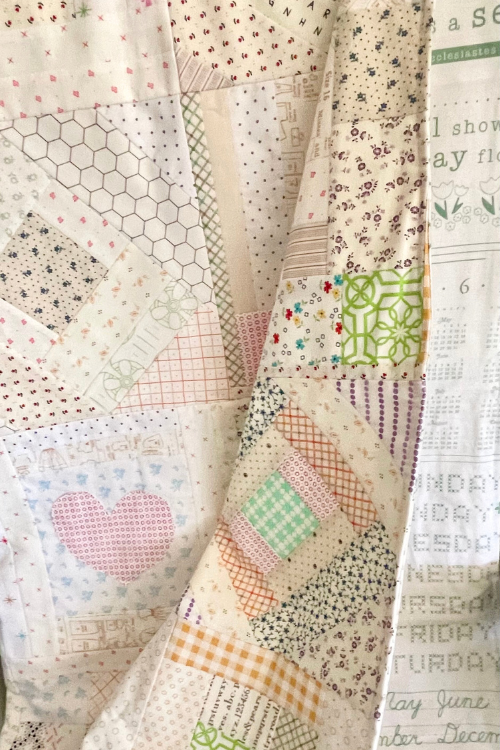
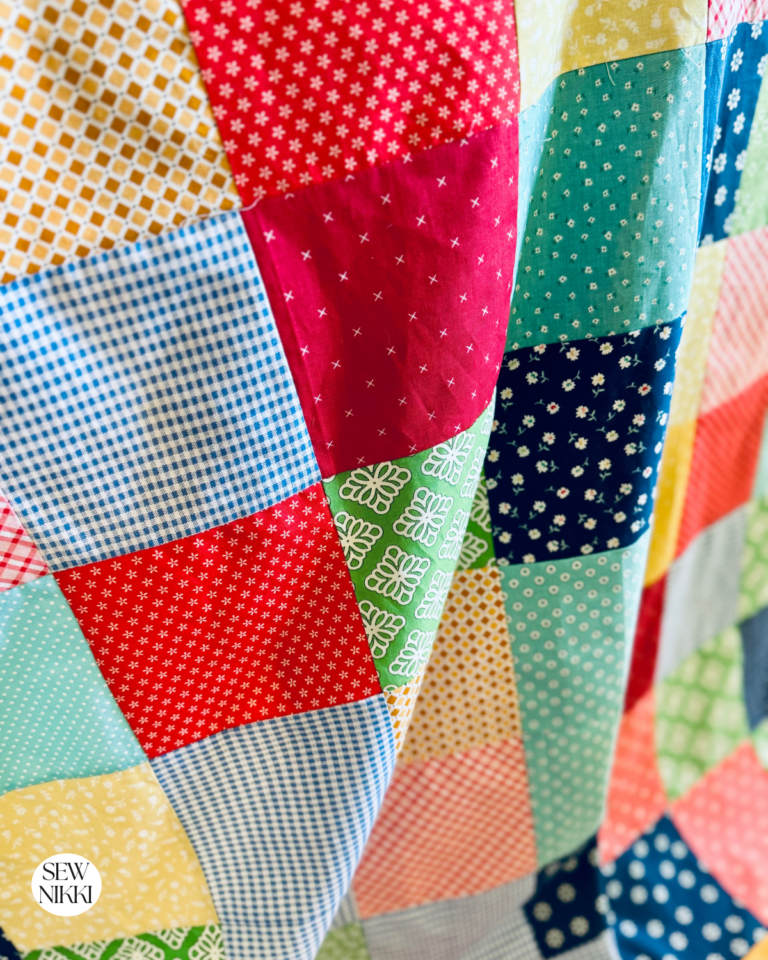
- I’m using the Bee Backgrounds Vintage Sewing Patterns by Lori Holt for the front, and Calico Heirloom Cottage Days by Lori Holt for the backing. Both of these were bought in the discount rack at my local fabric store for $3.49/yard.
- Quilt Batting
- Scrap fabrics and old denim jeans
Fabric Panels
You will be making two side panels (front and back of sewing machine) and one middle panel (one side that goes up and over the top of the machine). Each panel will be sewn up like a quilt. You will need quilt top fabric, backing fabric and batting. Each panel has quilting on it but you can omit this step if you like.

Take Sewing Machine Measurements
Take the measuring tape to your machine and measure the front and side of the machine. The front side will be what you face when you are sewing on your machine. The side will be where the cord plugs into your machine.
Measure the height and width of the front panel. This is the side you face when sewing. The opposite side is the back panel. They will be the same size.
Now measure the side of the machine, you only need the width for now. This is where you plug in the cord. This is the middle panel. We will measure the length when the front and back panels are quilted and squared up.
Cut Fabric and Batting
Cut fabric and batting for the front and back panel. Spray baste to make a quilt sandwich and quilt as desired. Place front and back panel on top of each other and trim to the same size.
Make Middle Panel
To make the middle panel, you need to measure the front panel. Start at the bottom of one side, over the top and down the other side then use this measurement. This is the length for your middle panel plus the width you took earlier.

If you want to add denim, use a 3″ long strip by the width for both sides of the middle panel. Subtract 6″ from the fabric length, attach the denim (mine were 6″ wide x 3″ long) pieces to both ends of the middle panel.

Cut the fabrics and batting, spray baste and quilt as desired.
Adding Denim Sunshine
I used a glass Pyrex storage bowl and traced the bottom for the center of the sun. I used fabric scissors to cut the piece out of my denim and left 1/4″ around my drawn line. Turn the fabric in by 1/4″ so the raw edges are tucked in, pin in place.

Sew in place, about 1/8″ from the edge of the denim. Repeat the process for the rays of sunshine denim strips. The rays are folded in half and then attached to the panel. Use decorative stitching as desired.
Attaching Panels
It’s time to start sewing everything together to form our sewing machine cover. Take the middle panel and front panel. Pin in place, right sides together, wrong side will be facing upwards. Start at the bottom of one side and work your way around. Attach using 1/4 inch seam allowance.

Repeat the process to attach the back panel. Turn right side out when done and use a chopstick or gadget to turn out the corners really nice. Also press your chopstick along the seams on all sides to give it a nice finish. Press with iron.

Finishing Border
Fold the bottom edge under 1/5 inch and pin. Topstitch along the folded edges to secure.

And there you have it – a stylish and practical sewing machine cover that’s sure to keep your machine protected and looking so darn cute! I absolutely love how this turned out. There are lots of free sewing patterns to choose from, I hope you try this one. With the free pattern provided, you can easily whip up this project in no time and add a touch of handmade charm to your sewing space.
Get the digital pattern.
Get the instant download pattern from my shop here.
I hope you enjoy making this easy sewing machine cover pattern. It really adds a homemade vibe to my sewing table, love the denim sun too!

SAVE THIS PIN FOR LATER!

This post contains ads and affiliate links, which means I make a small commission at no extra cost to you. While the ads are annoying, it helps keep this blog going. See my full disclosure here.
ABOUT SEW NIKKI
Welcome to Sew Nikki! Your place for free crochet, sewing and quilt patterns for beginner to intermediate skill levels. Want a digital pattern? We have those too! Plus tutorials to walk you through how to make each item from start to finish.
If you’ve never used a sewing machine cover, here’s some reasons why it’s a good idea. If you have a new machine, you will want to keep it in mint condition. That means keeping pesky dust from getting in all the nooks and cranny’s of your machine. You want a protective cover against dust but also sunlight and other harmful particles. This works great as a serger cover pattern too, just follow the instructions above for customizing this for your machine..
My little sewing room (more like sewing corner in the family room) looks so charming with this vintage sewing pattern fabric with denim sunshine dust cover. All cotton fabric, all charm, all the time. I. LOVE. IT.
Follow me on social media (Pinterest, Instagram, Facebook and Twitter) so you get notifications when I post new patterns and tutorials.
Want to learn how to crochet? Then check out this post, How to Learn How to Crochet – Guide for Beginners.

Such an informative post about making a sewing machine cover. And there’s after pattern. Thank you!
How cute is that fabric! Thank you for a great tutorial. Now we don’t have to store it in the box.