How to Sew a Double Sided Patchwork Blanket
If you’re looking for a simple, fun sewing project that combines the charm of quilting with the ease of blanket making, I have the project for you. This tutorial on how to sew a double sided blanket shows step by step instructions with a full patchwork pattern. It’s a simple charm pack quilt but without the hassle of batting or binding.

It’s lightweight, versatile, and ideal for a baby blanket, to wrap around you on chilly evenings, or just a cozy blanket to cover you while watching your favorite sports team. Plus, you can customize it with any fabrics you love, from quilting cotton to soft fleece fabrics. Finished size measures 60″ x 65″ for this double-sided blanket.
The Easy Beginner-Friendly Quilt Without Batting or Binding!
Recently, I made patchwork curtain panels for my sewing room. It’s a great way to use up all those pieces of fabrics that are leftover from other quilt projects. This whole blanket was such fun to make, it’s basically a double-sided quilt but you don’t include batting and you join the quilt top and backing a little different. You will use 1/4 inch seam allowance when making the quilt top and then 1/2 inch seam allowance when you join the two layers. It’s just two layers of fabric joined together. The type of fabric I always use is quilting cotton but a piece of fleece for the backing fabric would be really warm and cozy. I’m just not a fan of fleece, it’s harder to sew
MAKE SURE YOU CHECK THIS OUT!
After you read this post, make sure you also check out Learn How To Quilt for Absolute Beginners. It’s jam packed with even more information, links and resources that are so helpful when you’re first learning. It also has a section with free quilt patterns that are great for beginners. So make sure you check this out, seriously don’t forget!
Grab a copy of my Quilt Planning Journal, filled with graph paper and some note pages to help you design at least 4 quilts or sewing projects! Pin in fabric swatches, photos of your finished quilts and enjoy your creative process!
How to Sew a Double Sided Blanket – Patchwork Pattern

Materials
Main fabric: Charm pack square (5″ x 5″ squares). Pick something you love! For my blanket, I used 100% cotton quilting fabric that was leftover from a quilt project.
Backing fabric (optional): Backing fabric or back of blanket. I used 100% cotton fabric and pieced yardage together because I didn’t have enough of one to cover the entire front. Plus the pieced back adds more personality and charm.
Soft Tape Measure: Accurate measurements are key!
Sharp Scissors: For cutting your fabric.
Straight Pins: To keep everything in place before sewing.

Instructions
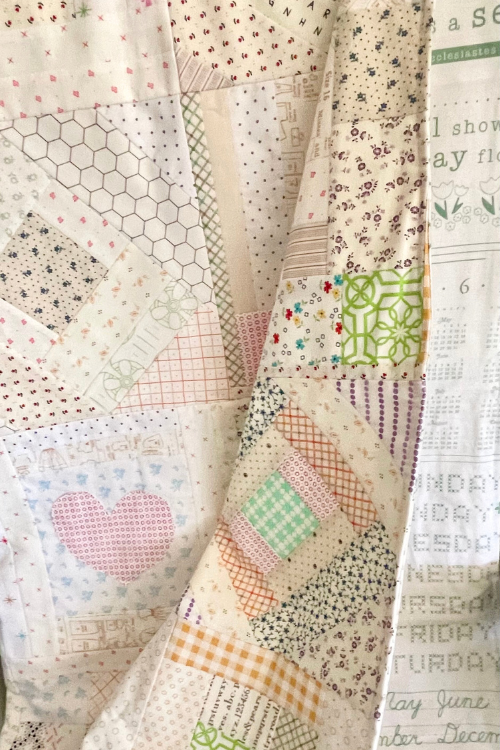
Plan Your Layout
- Arrange 12 rows of 13 squares each for the quilt top (front).
- Play with the placement of colors and patterns until you love how it looks.
Sew the Rows
- Take the first row and place the first two squares right sides together. Sew along one side with a 1/4 inch seam allowance.
- Add the next square in the row, continuing until all 13 squares are sewn together.
- Press the seams to one side (alternating directions for each row to help the seams nest later).
- Repeat for all 12 rows.

Join the Rows
- Pin or clip the rows together, nesting your seams really well.
- Sew each row to the next with a 1/4 inch seam allowance.
- Press seams open or to one side.

Prepare the Backing
- If using a single piece of fabric: Cut to 64″ x 69″.
- If piecing the backing: Sew your fabric pieces together, then trim with a pair of scissors to the same size as the quilt top (front).

Assemble the Blanket
- Place the patchwork front and backing right sides together, aligning all edges.
- Pin or clip around the edges, leaving a 12 to 15″ opening on one side for turning it out.
- Sew around the edges with a 1/2 inch seam allowance, backstitching at the opening to secure.

Turn and Finish
- Carefully turn the blanket right side out through the opening.
- Push out the corners gently with a blunt tool. This will give you nice square corners, pushing the fabric out to create a point.
- Fold the raw edges of the opening inward and pin.
- Topstitch around the entire blanket, 1/2 inch from the edge, closing the opening as you sew.
- Add second topstitch around the entire blanket, 1/4 inch from the edge (optional).

Finishing Touches
Secure curtain panel layers:
- The last step is to secure the front panel to the backing panel. If you don’t do this step, it will be very tough to wash these curtains because they will bunch up. You can machine stitch lines or a pattern to secure going from edge to edge. Another way is the hand tie the curtains using embroidery thread or cotton/acrylic yarn.
- To hand tie curtains, take a yarn needle that has a point to go through fabric. Thread your yarn through the yarn needle and insert into curtain, then go back through the other side about 1/4″ from where you inserted thread needle. Tie the yarn into a knot, then knot once more tie. Trim yarn 1/4″ from knots. Repeat across curtain panel until you are satisfied.

Get the digital pattern.
Get the instant download pattern from my shop here.
How to Sew a Double Sided Blanket – Sewing Tips
Match your fabrics: Choose colors and patterns that complement your personal style for both the front and backing.
Nest seams: Alternating seam directions helps seams lie flatter when joining rows.
Use fleece backing: This adds warmth and softness without the bulk of batting.
Optional quilting: Add straight line stitches diagonally, horizontally, or both across the blanket to secure the layers.
Crochet Edging: Add a blanket stitch around the edge of the entire blanket with a crochet needle and cotton yarn. Punch through fabric 1/4 inch from edge. Then switch to a crochet hook and add a crochet border. Perfect for baby shower gifts.

You may also like these tutorials from the blog:
How to Sew a Handbag with Recycled Jeans
Simple Curtain DIY – Patchwork with Rod Pocket
How to Make a Pieced Quilt Backing
How Much Fabric for a Pillowcase
Make Heat Proof Recycled Denim Potholders
Learn to Sew – Conquering Your Fears as a Beginner
How to Sew a Pillowcase With Flap in 15 Minutes
SAVE THIS PIN FOR LATER!

This post contains ads and affiliate links, which means I make a small commission at no extra cost to you. While the ads are annoying, it helps keep this blog going. See my full disclosure here.
About Sew Nikki
Welcome to Sew Nikki! Your place for free crochet, sewing and quilt patterns for beginner to intermediate skill levels. Want a digital pattern? We have those too! Plus tutorials to walk you through how to make each item from start to finish.
This project is beginner-friendly, fast, and customizable. Whether you stick with charm squares or mix in scraps for a scrappy-chic look, your double-sided patchwork blanket is sure to impress!
Share your creations with me on Instagram or Pinterest using #SewNikkiDIY – I can’t wait to see what you make!
Follow me on social media (Pinterest, Instagram, Facebook and Twitter) so you get notifications when I post new patterns and tutorials.
Want to learn how to crochet? Then check out this post, How to Learn How to Crochet – Guide for Beginners.