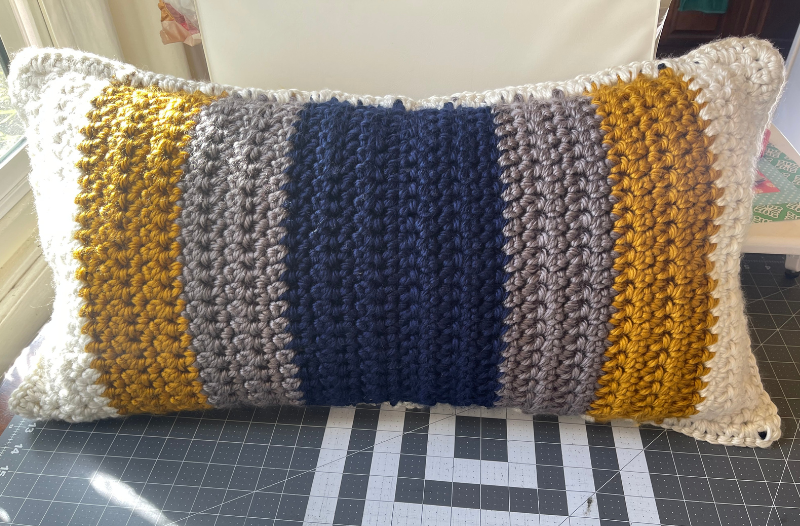
How to Make Crochet Pillow Cover – Lumbar Crochet Pillow
Today I’m going to walk you through the steps of how to make a lumbar crochet pillow cover. I created this easy pattern that only has a total of 80 rows all using the fun and EASY extended single crochet stitch and single crochet stitch to join. You’re gonna love how fast you can whip up this pillow!
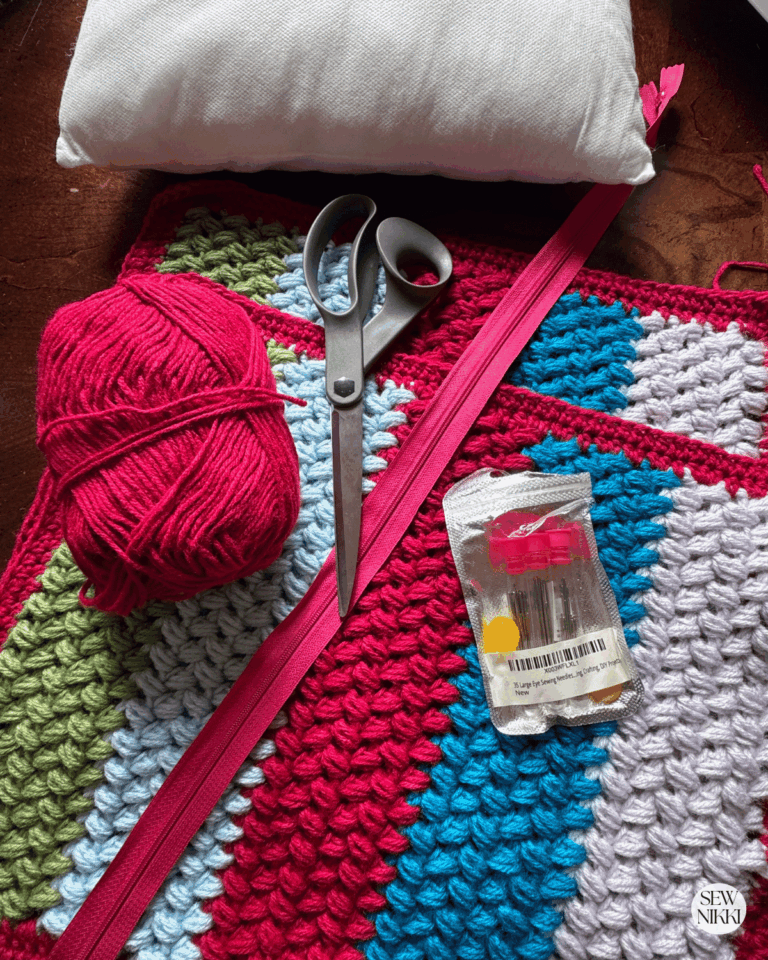
Lumbar Crochet Pillow Cover – Materials Needed
The materials are very common and you should be able to go to your local craft store or shop online to purchase. This lumbar pillow cover can be made in just a day and you will be proud to put it on your bed, couch, chair or gift to someone special.
You will need 8 skeins of super bulky 6 ply yarn, M crochet hook, yarn needle and lumbar pillow insert. I’ve listed the products that I used below but you can use any super bulky 6 ply yarn you want. The package will tell you what the ply is on the label, look for the number 6.:
- 2 skeins Big Twist Mello (Taupe)
- 2 skeins Big Twist Mello (Navy)
- 2 skeins Big Twist Mello (Mustard)
- 2 skeins Lion Brand Hometown (Houston Cream)
- Size M crochet hook
- Yarn needle
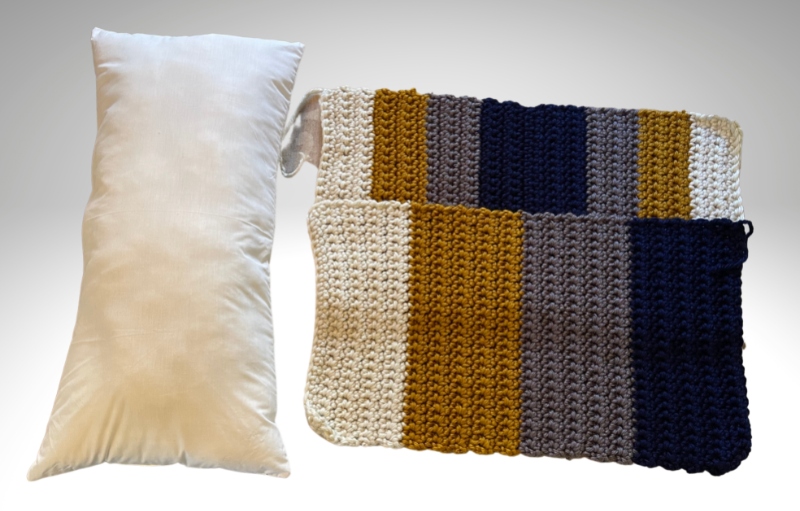
- Lumbar Pillow Insert 14″ x 28″
This post contains ads and affiliate links, which means I make a small commission at no extra cost to you. While the ads may seem annoying, it helps keep this blog going. See my full disclosure here.
Lumbar Crochet Pillow Cover – Stitch Instructions
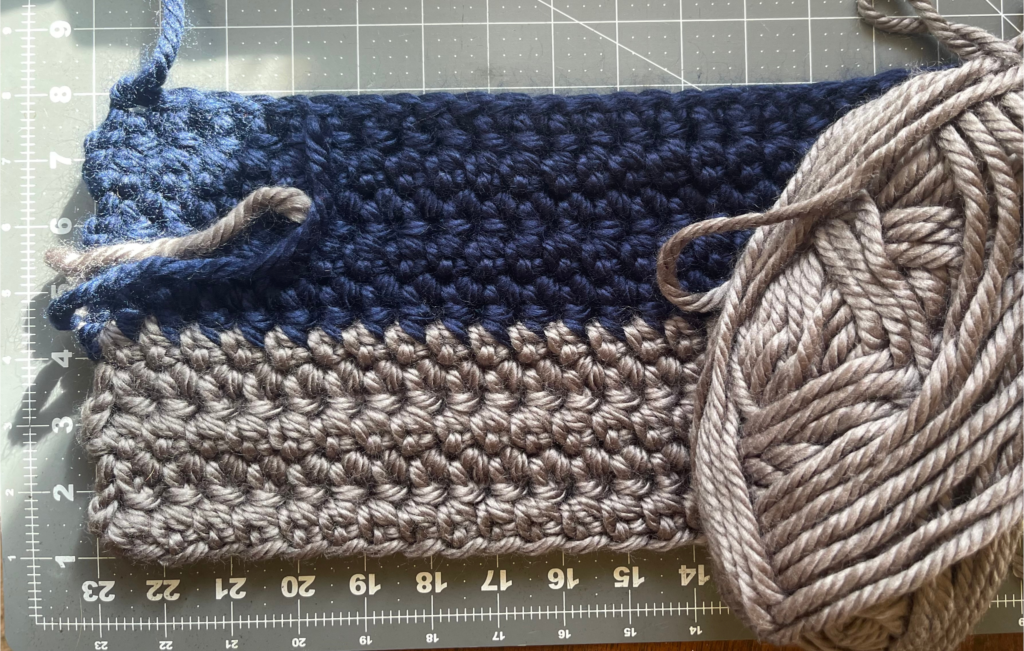
To make this crochet pillow cover, you will be making two separate pieces and then connecting them together with the pillow insert stuffed in the middle. Again, this pattern uses only two stitches. For the two pillow pieces, the only stitch you will use for every stitch in every row is the extended single crochet, the abbreviation for this stitch is (esc).
Extended single crochet instructions: To extend a single crochet, you start like a normal single crochet, but pull through only one loop on the hook, creating a chain stitch, then yarn over and pull through both loops on the hook.
Here are links to some really good YouTube tutorials for the extended single crochet if you want to check one or some out before you begin.
Make sure you check this out!
After you read this post, make sure you also check out Learn To Crochet for Absolute Beginner’s. It’s jam packed with even more information, links and resources that are so helpful when you’re first learning. It also has a section with free patterns that are great for beginners. So make sure you check this out, seriously don’t forget!
Grab the Shell Stitch Afghan crochet pattern, my free gift to you when you subscribe to my newsletter. Click the link below for your copy.
Lumbar Crochet Pillow Cover – Free Pattern
I created this easy pattern that it only 40 rows for the front piece and 40 rows for the back piece all using the fun and EASY extended single crochet stitch. Pattern is in US terminology, not UK.
Pattern Abbreviations (US):
sc = single crochet
esc = extended single crochet
Gauge:
For starting chain gauge. 7 sc = 4″
5 rows should measure 14″ in length and 4″ in width
Lumbar Crochet Pillow Cover Pattern
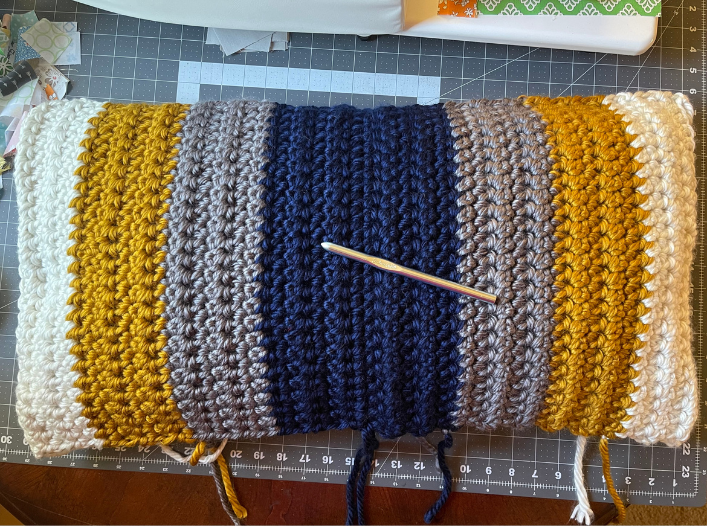
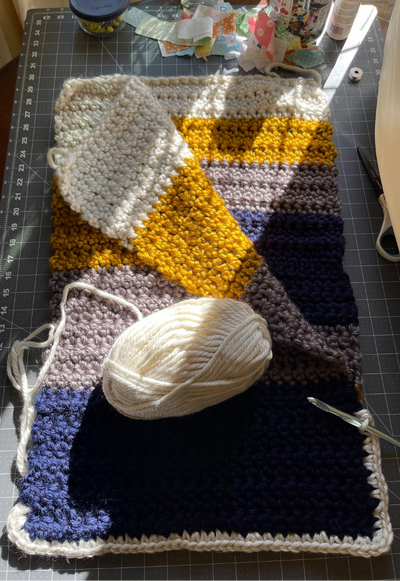
For this pattern you will crochet one front and one back pillow cover for a total of two pieces. Once both pieces are done, you will crochet on the outside of the pillow cover to attach.
Front Pillow Cover:
Row 1: (Houston Cream) make a slip knot, chain 25 sc, chain 1, turn.
Rows 2 – 5: (Houston Cream) esc in each stitch for a total of 25, chain 1, turn. Repeat 4 times but in the last stitch in row 5, change yarn to Mustard, then chain 1, turn.
Rows 6 – 10: (Mustard) esc in each stitch for a total of 25, chain 1, turn. Repeat 4 times but in the last stitch in row 10, change yarn to Taupe, then chain 1, turn.
Rows 11 – 15: (Taupe) esc in each stitch for a total of 25, chain 1, turn. Repeat 4 times but in the last stitch in row 15, change yarn to Navy, then chain 1, turn.
Rows 16 – 25: (Navy) esc in each stitch for a total of 25, chain 1, turn. Repeat 9 times but in the last stitch in row 25, change yarn to Taupe, then chain 1, turn.
Rows 26 – 30: (Taupe) esc in each stitch for a total of 25, chain 1, turn. Repeat 4 times but in the last stitch in row 30, change yarn to Mustard, then chain 1, turn.
Rows 31 – 35: (Mustard) esc in each stitch for a total of 25, chain 1, turn. Repeat 4 times but in the last stitch in row 35, change yarn to Houston Cream, then chain 1, turn.
Rows 36 – 40: (Houston Cream) esc in each stitch for a total of 25, chain 1, turn. Repeat 4 times but on the last stitch chain 1 and tie off. Your front pillow cover is all done.
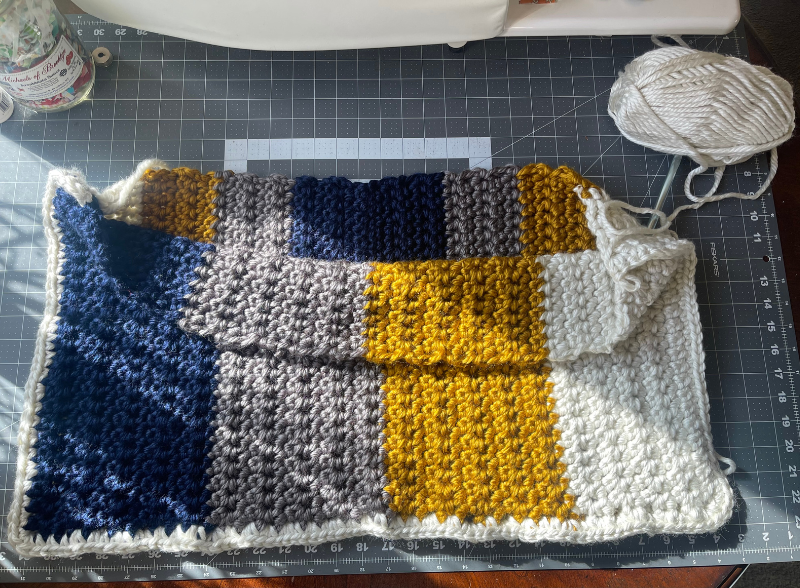
Back Pillow Cover

Row 1: (Houston Cream) make a slip knot, chain 25 sc, chain 1, turn.
Rows 2 – 10: (Houston Cream) esc in each stitch for a total of 25, chain 1, turn. Repeat 8 times but in the last stitch in row 10, change yarn to Mustard, then chain 1, turn.
Rows 11 – 20: (Mustard) esc in each stitch for a total of 25, chain 1, turn. Repeat 9 times but in the last stitch in row 20, change yarn to Taupe, then chain 1, turn.
Rows 21 – 30: (Taupe) esc in each stitch for a total of 25, chain 1, turn. Repeat 9 times but in the last stitch in row 30, change yarn to Navy, then chain 1, turn.
Rows 31 – 40: (Navy) esc in each stitch for a total of 25, chain 1, turn. Repeat 9 times but on the last stitch chain 1 and tie off. Your back pillow cover is all done.
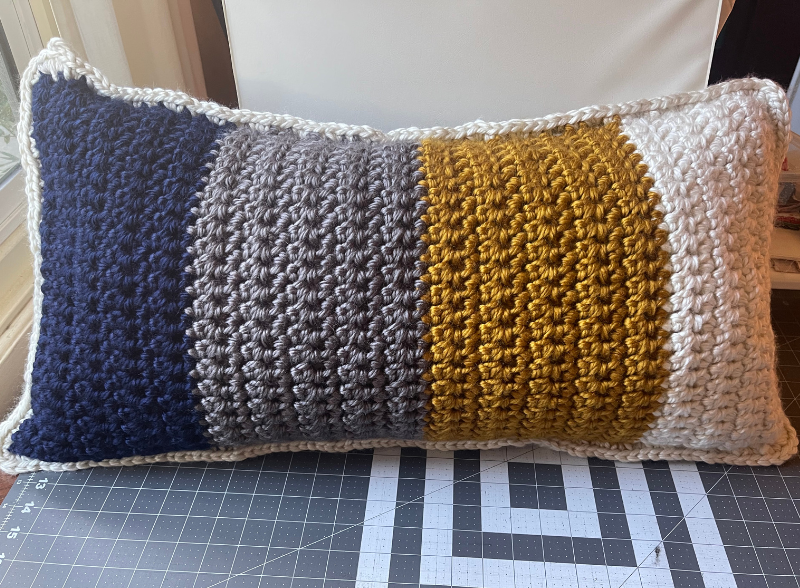
Joining Front and Back Covers
Double knot every where you changed yarns and use the yarn needle to weave in the tail ends. Next, lay the back cover wrong side facing away from you and the front cover laying right side facing you. You want to lay the covers on top of each other and join three sides by using a single crochet stitch on the outside of the pillow covers to join. See pictures below.
You also want to crochet three single crochets into all the corners to round out the border evenly.
Once you have three sides joined, take the pillow insert and stuff it into the pillow cover. Make sure you get the corners of the insert stuffed all the way into the cover corners.
Final step is to join the last side of the pillow cover to complete. This super bulky yarn will stretch to fit, so don’t be afraid to pull it into shape if needed.

Take the yarn needle to weave tail ends into pillow cover. Fluff out the pillow and enjoy!
Get the digital pattern.
Get the instant download pattern from my shop here.
About Sew Nikki
Welcome to Sew Nikki! Your place for free crochet, sewing and quilt patterns for beginner to intermediate skill levels. Want a digital pattern? We have those too! Plus tutorials to walk you through how to make each item from start to finish.
Feel free to share your finished projects in the comments below or tag me on social media! I can’t wait to see your work!
Follow me on social media (Pinterest, Instagram, Facebook and Twitter) so you get notifications when I post new patterns and tutorials.
Want to learn how to quilt? Then check out this post, Learn How to Quilt for Absolute Beginner’s.
This post contains ads and affiliate links, which means I make a small commission at no extra cost to you. While the ads are annoying, it helps keep this blog going. See my full disclosure here.


That turned out nice. I like the color pallet you used too.
Thanks Kim, glad you liked the colors!
Great tutorial! Love the colors! Thanks!
Thank you!
I’m going to learn to crochet, and this pillow tutorial may have just been what finally made up my mind. It looks so beautiful!!
Thanks Natasha, crocheting is fun.