How to Crochet a Pillow With Zipper (Free Pattern)
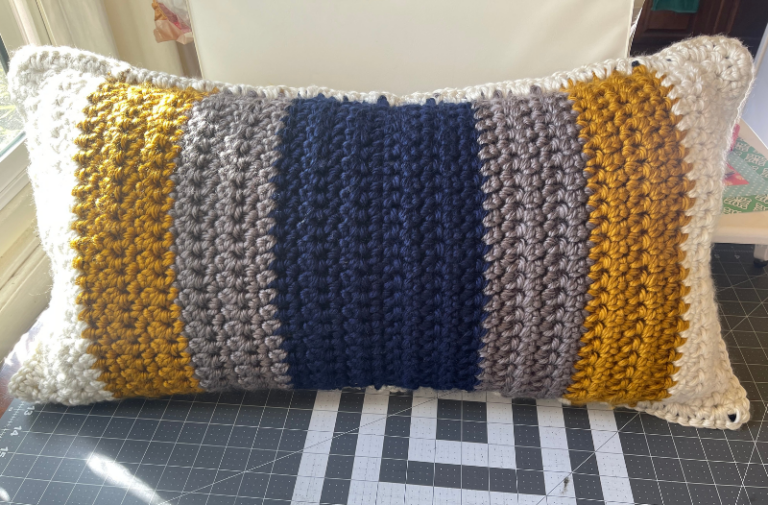
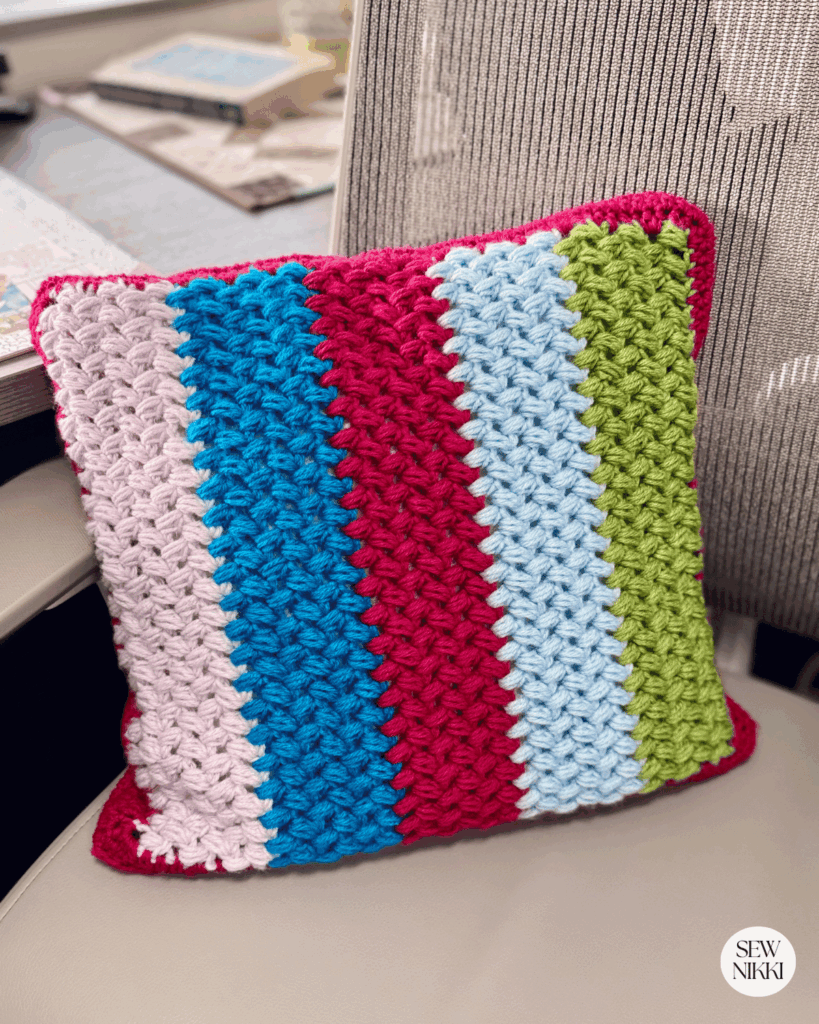
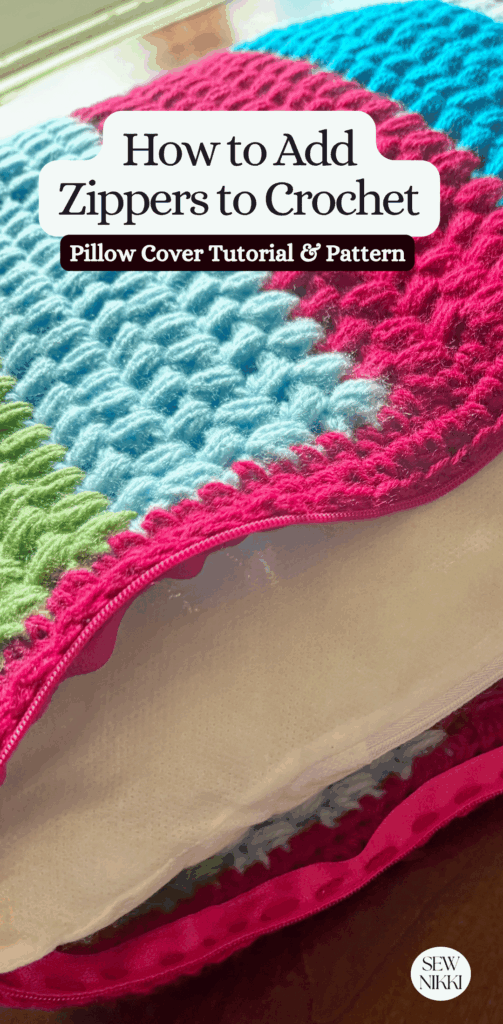
Learning how to crochet a pillow with zipper is one of the best crochet projects if you want a clean finish. A zipper makes your crochet pillow cover easy to remove, wash, and swap out for different seasons in your living room. This easy crochet pillow pattern uses the bean crochet stitch with five colors of yarn and a simple zipper finish that looks almost invisible once the pillow is done.
This is beginner friendly if you already know basic crochet stitches like single crochet, half double crochet, slip stitch, and chain stitch. The best part is that you only need two back panels and a zipper to make your own decorative pillows that actually look store bought instead of homemade in the bad way.
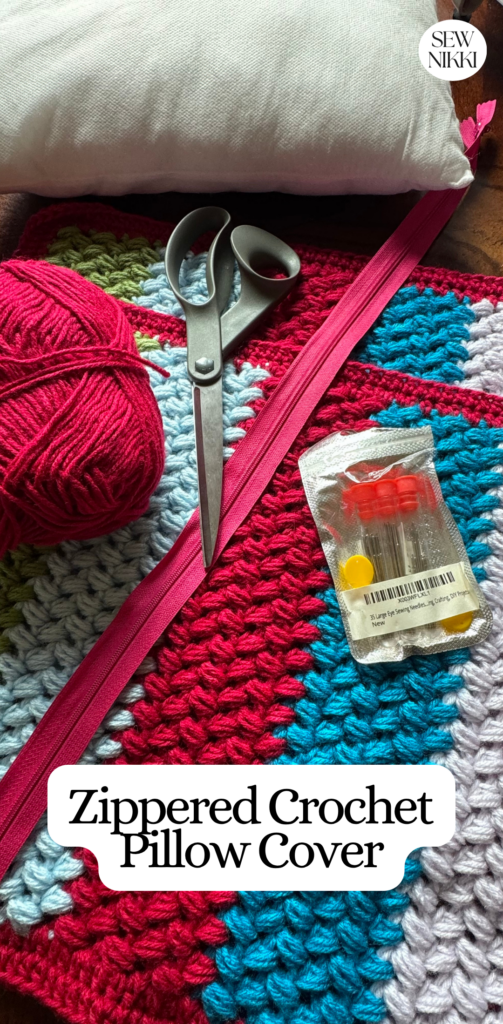
Materials for My Sample Pillow
For my sample crochet pillow cover pattern, I used:
- 14 inch pillow form or pillow insert
- I crochet hook
- One skein each of Loops & Threads Impeccable Yarn in:
- Thread needle (with needle threader)
- Yarn needle
- Scissors
This yarn weight works really well for crochet throw pillows because it gives the bean stitch pattern enough structure without making the pillow stiff. The color changes every 6 rows also make this crochet pillow design look bright and clean without needing complicated color work.
Make sure you check this out!
After you read this post, make sure you also check out Learn To Crochet for Absolute Beginner’s. It’s jam packed with even more information, links and resources that are so helpful when you’re first learning. It also has a section with free patterns that are great for beginners. So make sure you check this out, seriously don’t forget!
Grab the Shell Stitch Afghan crochet pattern, my free gift to you when you subscribe to my newsletter. Click the link below for your copy.
How to Crochet a Pillow With Zipper
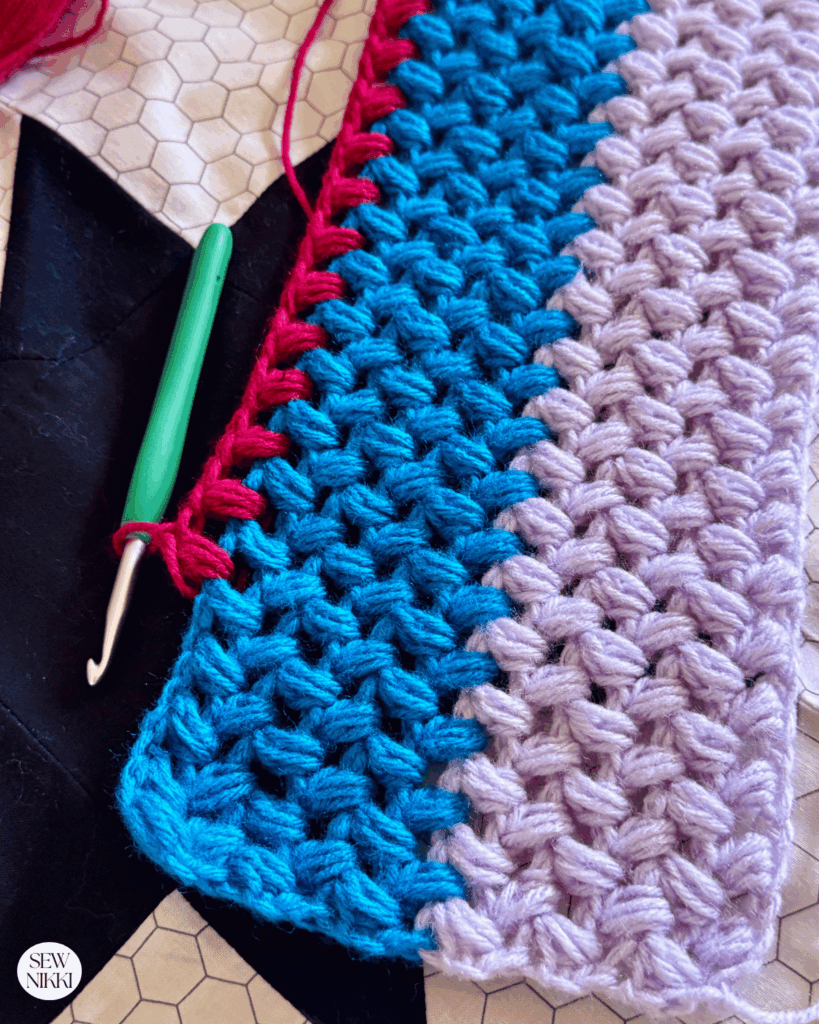
This simple crochet pillow pattern is made with an odd number foundation chain. For this square pillow, chain 47 for the chain row. The bean stitch pattern gives the crochet cushion cover a thick and cozy texture without using chunky yarn or complicated stitches.
Skill Level
Easy to intermediate
How to Crochet the Basic Bean Stitch
Here are the written instructions in US terms for the basic bean stitch.
Start with an odd number chain. For this 14″ pillow, make a foundation chain of 47.
Row 1
- Insert hook into the 3rd ch from hook.
- Yarn over and pull up a loop.
- Yarn over and insert hook into the same stitch again.
- Pull up another loop.
- Yarn over and insert hook one more time into the same stitch.
- Pull up loop. You should now have six loops on your hook.
- Yarn over and pull through all loops.
- Chain 1 to close the stitch.
That is your first bean stitch.
Skip the next chain and work the next bean stitch into the following chain. Repeat across the row until the last stitch. Work a half double crochet into the last stitch.
Chain 1. Turn your work.
Row 2
Work the first bean stitch in the first chain space. Continue across the previous row by placing bean stitches in the chain space beside each bean. Finish with a half double crochet in the chain at the end of the row.
Turn your work sideways to find the chain located on the side of the bean stitch from the previous row. Insert your hook there to keep your work straight.

Repeat row 2 until you reach the desired length.
The first stitch and last stitch matter a lot with this pattern. If your sides start looking crooked, you are probably missing the side of the row or skipping the last bean stitch.
Crochet 6 bean stitch rows for each yarn color. You should have 30 rows total not including the foundation row.
Change colors and continue the stitch pattern for 6 rows per color. You will use 5 different colors total. This great way of changing colors gives crochet throw pillows a striped look without making the project too busy.
Keep working until the panel fits your pillow form. Make two matching panels for the front and back panels.
The bean stitch creates a textured crochet pillow cover pattern that’s gorgeous but not too firm. This stitch does eat up yarn but not as bad as a bobble or popcorn stitch.
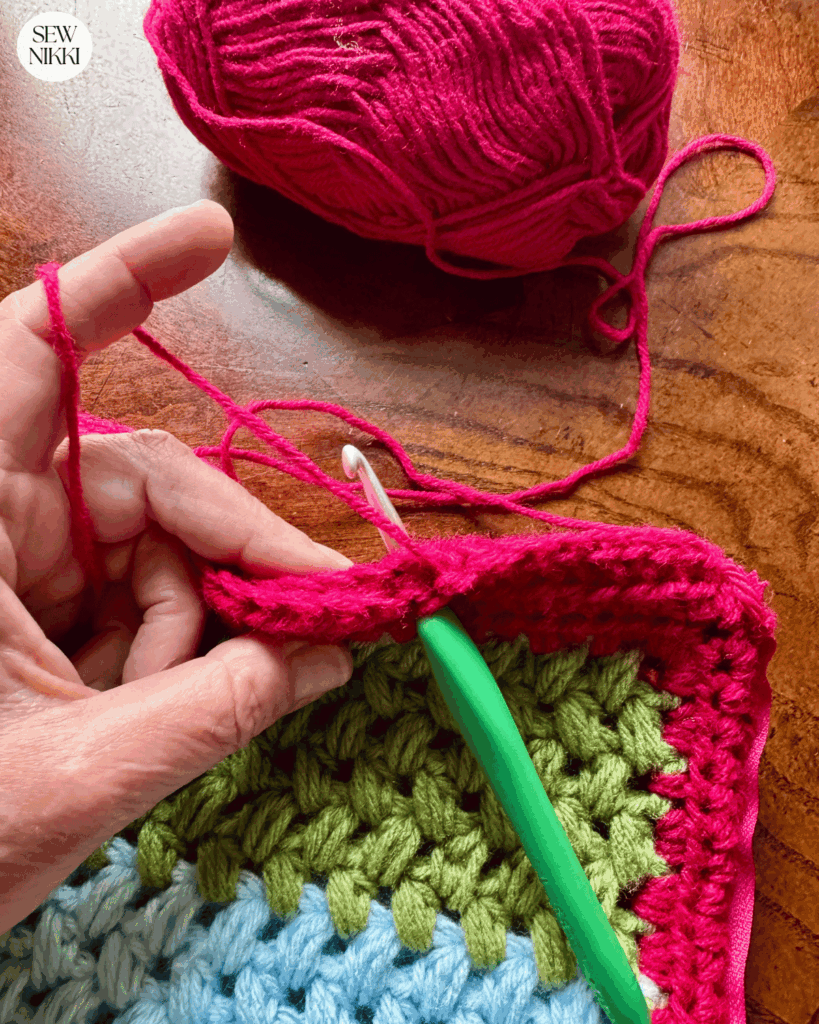
Border Around Both Panels
After both panels are complete, work a half double crochet border all the way around each panel two times.
Do a fit check and make sure both panels cover the pillow entirely. If you need to adjust, remove or add a border round to get to your desired size.
Work evenly around the sides and corners. Use a slip stitch or sl st to join each round.
The border helps the zipper attach easier and keeps the crochet pillow design looking clean and straight.
How to Use a Needle Threader With Yarn
If you are using a sharp darning needle with a tiny eye, getting thick yarn through it can feel impossible. A needle threader makes it much easier and saves your patience. I’m using a 2.2″ needle that is linked in the materials. Yarn needle won’t work for this portion.
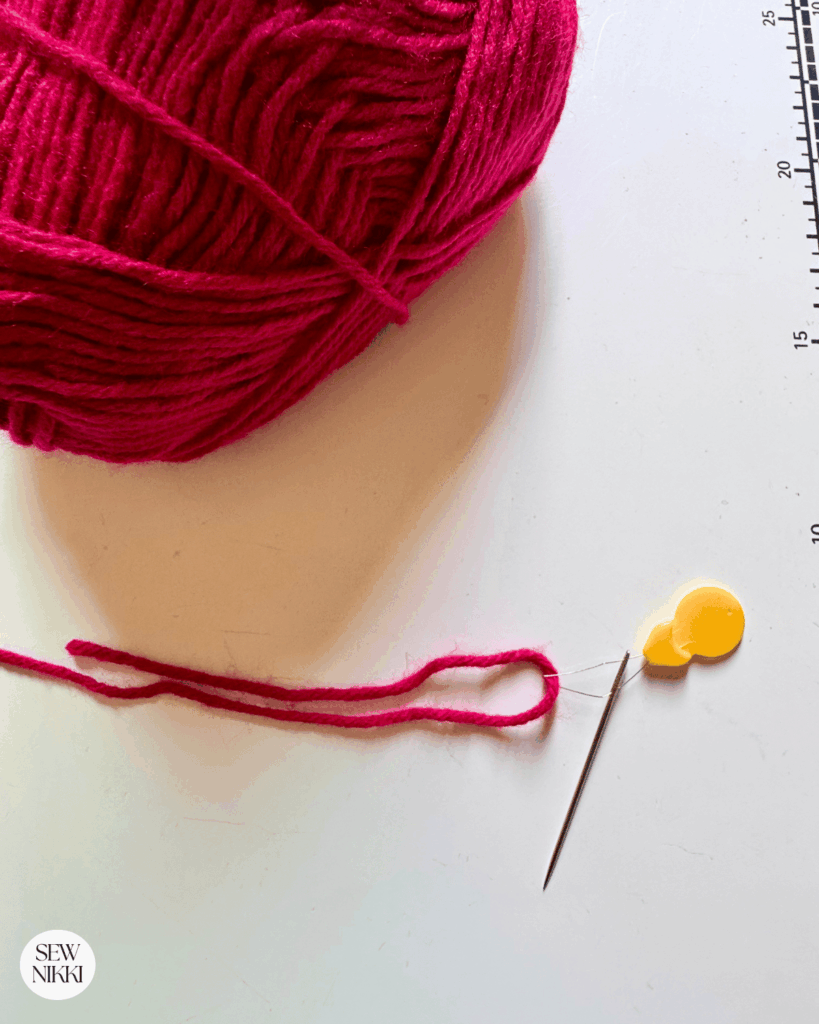
Push the thin wire part of the needle threader through the eye of the needle first.
Next, place the yarn through the wire loop.
Pull the needle threader back through the needle eye. The yarn will slide right through with it.
This is a great way to thread yarn without shredding it or fighting with the needle for ten minutes like the rest of us did before figuring this out.
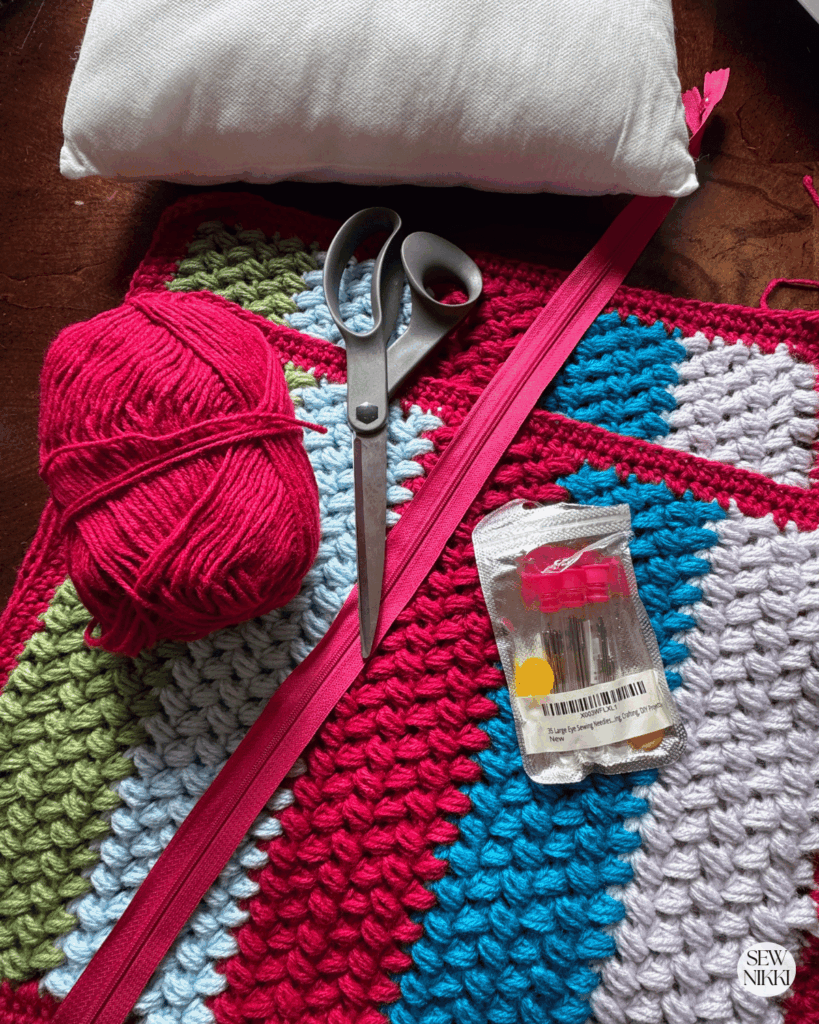
Adding the Zipper to Your Crochet Pillow Cover Pattern
This is where people usually panic, but honestly, attaching a zipper is easier than trying to hand sew a crooked opening shut later.
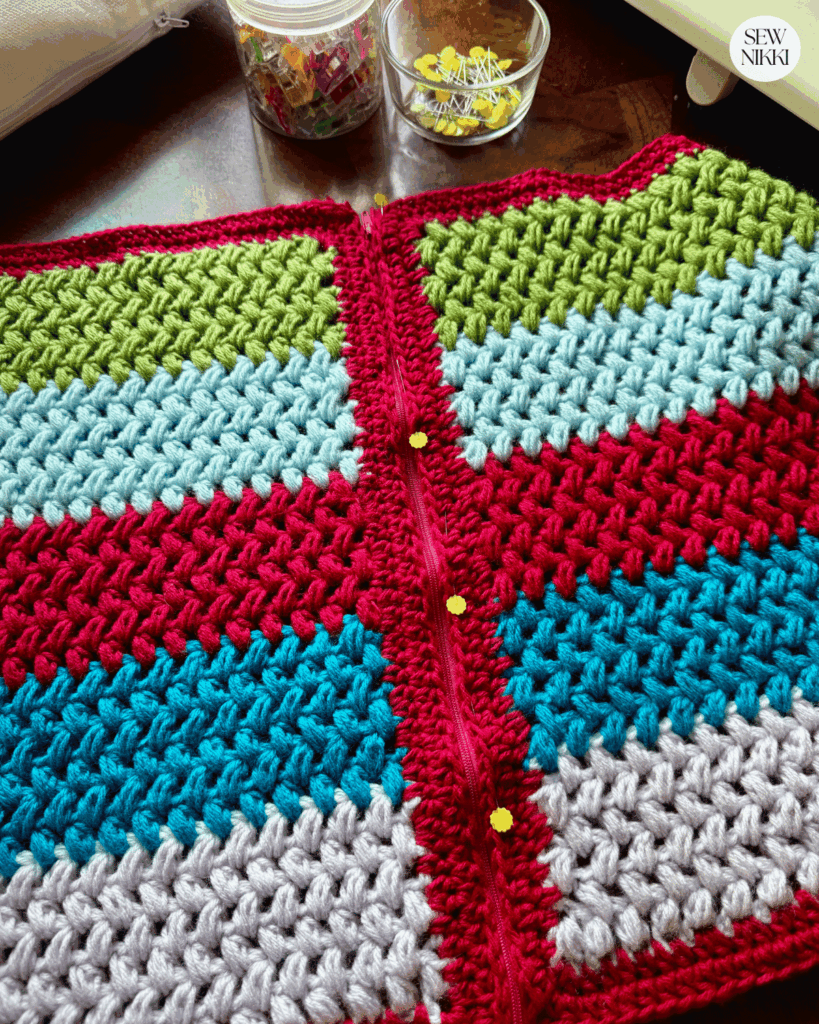
Lay the zipper flat against the bottom edge of one panel. Using a thread needle and yarn, attach the bottom of the pillow panels directly to the zipper. Sew as close to the zipper as possible so the zipper becomes almost invisible.
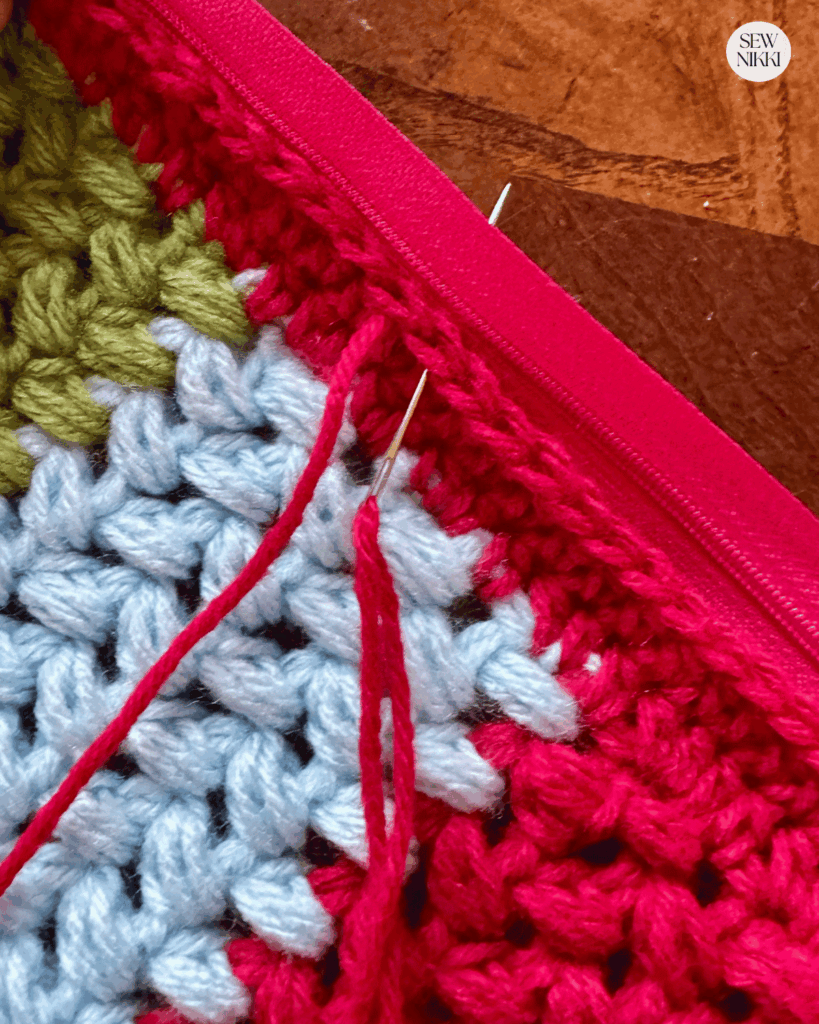
Repeat for the second panel. I use sewing pins to secure second panel to the zipper. Also making sure to line up the colors from both panels so they are the same.
Slide the zipper foot down to make it easier to attach the second side.
Trim the zipper if needed after attaching it.
Closing the Pillow
Before joining the rest of the way around the pillow, pull the zipper halfway open.
This step matters. Forgetting to open the zipper first is basically a crochet rite of passage.
Place the wrong sides together.
Using single crochet, join the sides and top by working through the chains from both panels. Continue around the last side until fully closed.
Fasten off and weave in the remaining yarn tails.
Turn the pillow right side out through the zipper opening and insert your pillow stuffing or pillow insert.
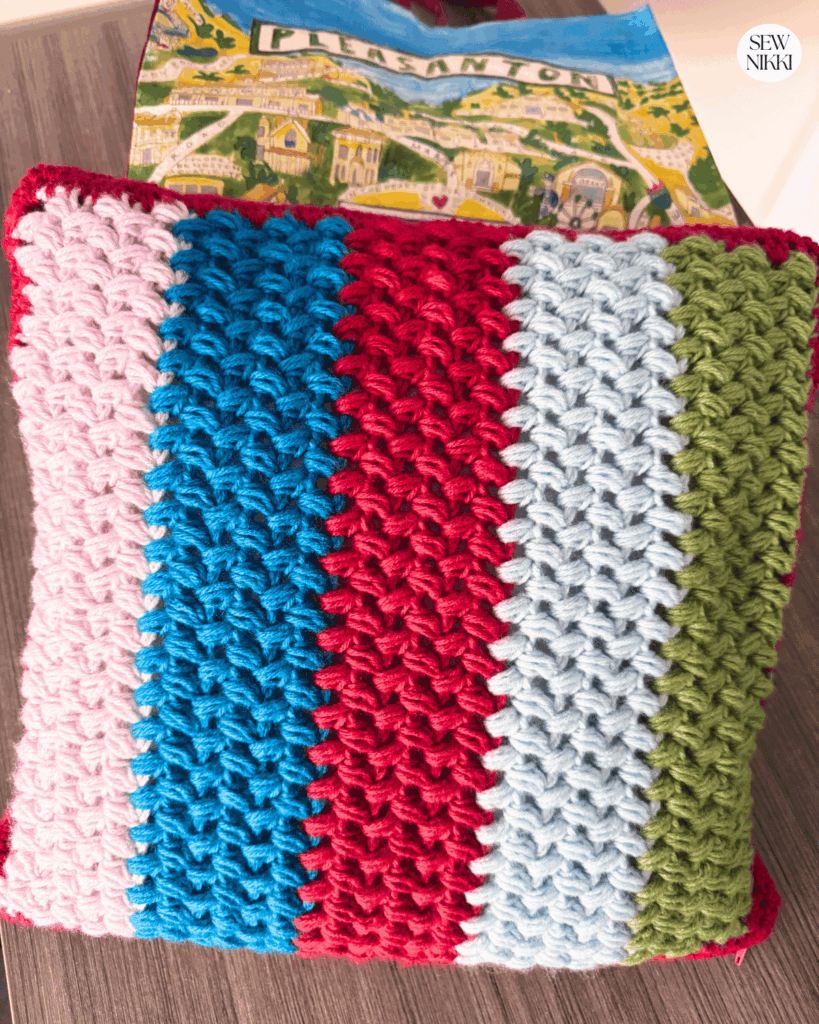
Now you have a crochet cushion cover that looks polished, soft, and handmade in the best way.
Get the digital pattern.
Get the instant detailed pattern here.
More Crochet Patterns You May Like
If you enjoy free crochet pillow patterns and cozy home decor projects, you may also like these patterns from my site:
You can also learn more about the bean stitch and crochet pillows here:
- Bean Stitch Tutorial from Hope Corner Farm Crochet
- Adding Zipper to Crochet Project from The Stitch Sessions
Save This Project!
ABOUT SEW NIKKI
Welcome to Sew Nikki. Your place for free crochet, sewing and quilt patterns for beginner to intermediate skill levels. Want a digital pattern? We have those too! Plus tutorials to walk you through how to make each item from start to finish.
For more crochet tutorial & patterns, check out The Pattern Index.
Follow me on social media (Pinterest, Instagram, Facebook and Twitter) so you get notifications when I post new patterns and tutorials.
This post contains ads and affiliate links, which means I make a small commission at no extra cost to you. While the ads are annoying, it helps keep this blog going. See my full disclosure here.