Reverse Blanket Stitch Crochet Lap Blanket Free Pattern
This Reverse Blanket Stitch Crochet Lap Blanket Free Pattern is about to be your new go to. If you love bold stripes, cozy texture, and a stitch that looks fancy but is secretly simple. Lap blankets are a perfect size to take away the chill when it’s not freezing. A cozy blanket without being too hot on your body.
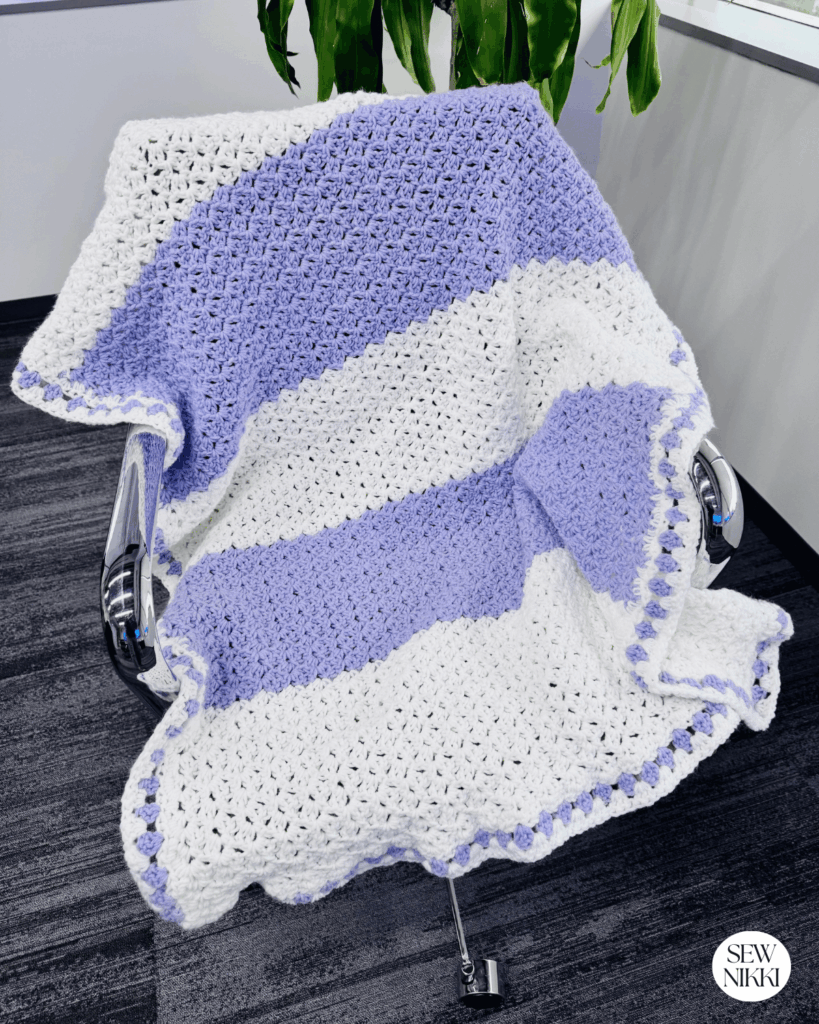
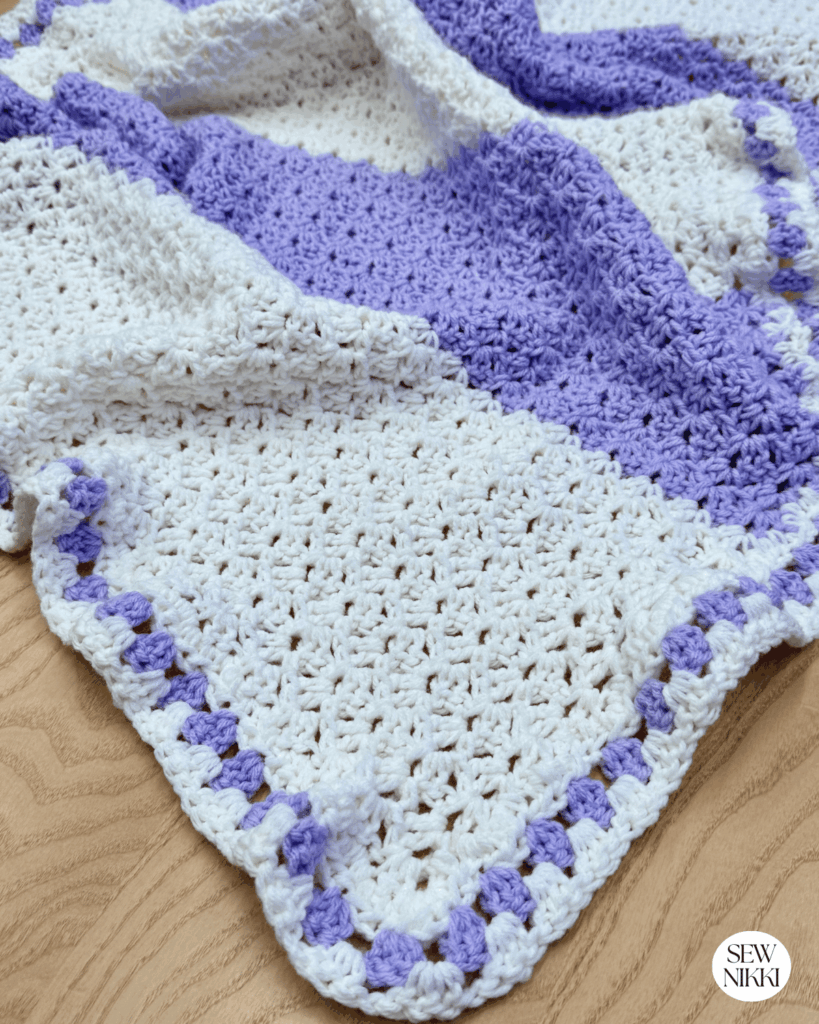
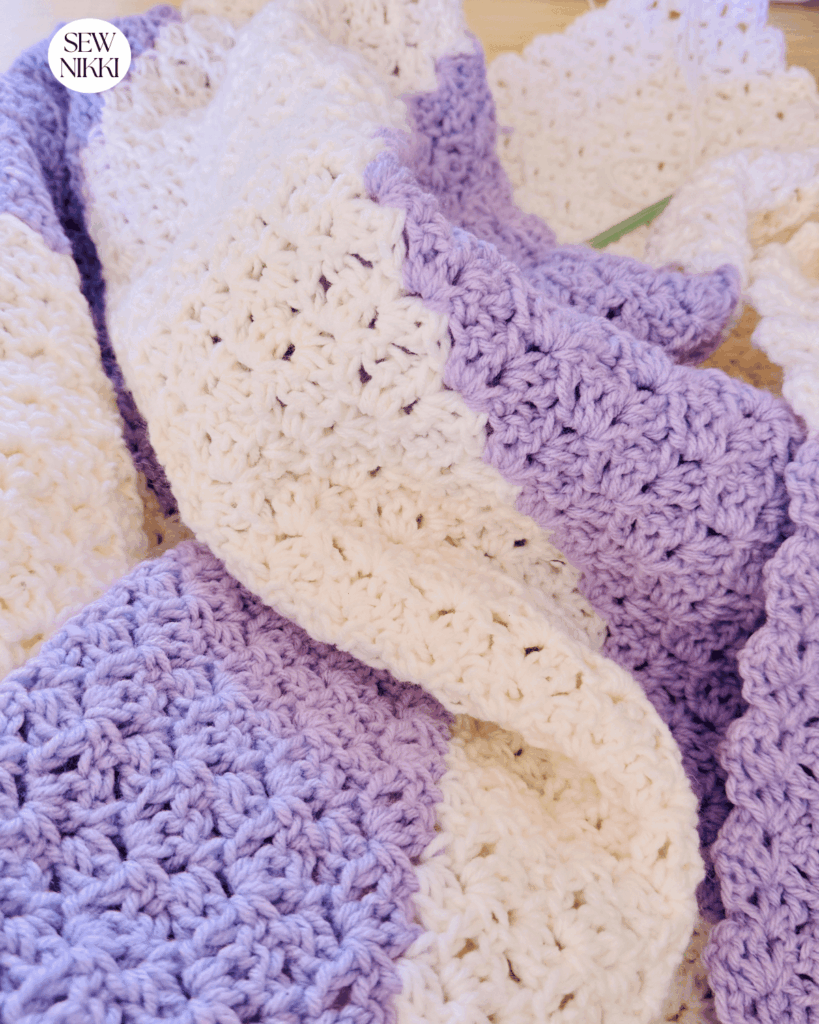
I made this lap blanket using two large skeins of yarn, chunky blocks of color, and finished it with a granny stripe border that gives it that vintage cottage vibe (without feeling dated). It’s soft, lightweight, and perfect for couch surfing, car rides with grandkids, or even as a crib blanket.
The free pattern is below, plus there’s a digital download available if you prefer a printable version without ads. Small blankets are a quick win and don’t require a gauge swatch. Try my simple patterns using basic stitches but with great texture.
Why You’ll Love This Pattern
- Big, bold color sections (no fussy striping every two rows)
- Lightweight but warm
- Uses simple stitches (DC, SC, CH)
- Easy repeat (multiples of 4)
- Customizable size
- Granny stitch border for that finished look
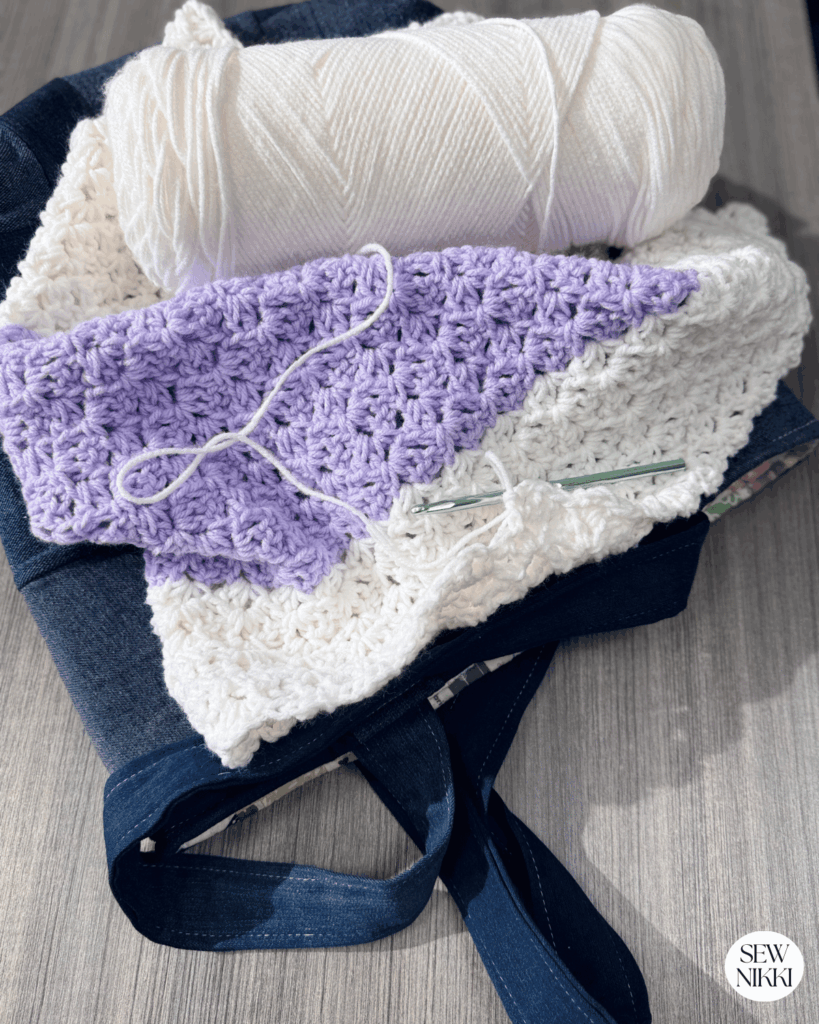
I used 4-ply yarn with a J crochet hook and intentionally kept my stitches loose so the blanket wouldn’t feel heavy or dense. That’s the secret. If you size down your hook, this stitch can get thick fast. The looser tension gives it drape and softness, perfect for a lap blanket.
If you’re newer to reading patterns or want to brush up on crochet basics, this crochet stitch guide is very helpful.
What Is the Reverse Blanket Stitch?
The reverse blanket stitch creates small clusters made of:
- 2 Double Crochets
- Chain 2
- 1 Single Crochet
All worked into the same space.
It builds texture without being bulky. The pattern works in multiples of 4, make it the right size for your needs.
If you’ve made my:
Rectangle Granny Square Blanket
You will have no problem at all with this crochet lap blanket free pattern. Piece of cake!
Make sure you check this out!
After you read this post, make sure you also check out Learn To Crochet for Absolute Beginner’s. It’s jam packed with even more information, links and resources that are so helpful when you’re first learning. It also has a section with free patterns that are great for beginners. So make sure you check this out, seriously don’t forget!
Grab the Shell Stitch Afghan crochet pattern, my free gift to you when you subscribe to my newsletter. Click the link below for your copy.
Reverse Blanket Stitch Blanket Pattern
Materials
- 1 Caron One Pound Lilac (4 ply) Worsted Weight Yarn
- 1 Threads and Loops White (4 ply) Worsted Weight Yarn
- J/6.00 Crochet Hook
- Scissors
- Yarn Needle
Finished Size: 33.5″ x 47″
Abbreviations
- CH – Chain
- CH-3 SP – Chain-3 Space
- SC – Single Crochet
- DC – Double Crochet
- HDC – Half Double Crochet
- SL ST – Slip Stitch
- SK ST – Skip Stitch
- SP – Space
- ST / STs – Stitch / Stitches

Stitch Pattern
Multiples of 4
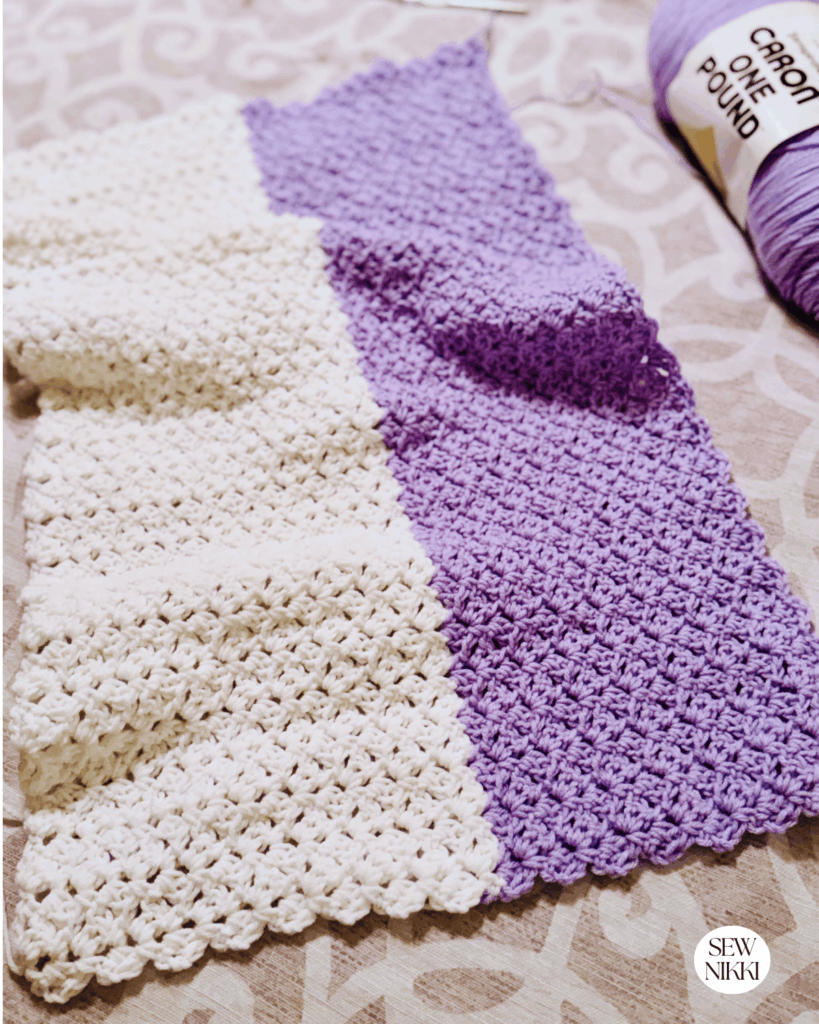
Foundation Chain (White): CH 108, turn work.
1 Row (White): DC in 3rd CH from hook (counts as first DC), CH 2, SC in same chain. SK 2, (2 DC, CH 2, SC) in next stitch, SK 2. Repeat (2 DC, CH 2, SC), SK 2 to end of row, CH 2, turn.
2 – 17 Rows (White): 2 DC in first CH SP from row below, CH 2, SC in same chain space. SK 3 STs. Repeat across row. CH 2, turn.
18 – 34 Rows (Lilac): Repeat row 2 instructions.
35 -51 Rows (White): Repeat row 2 instructions
52 – 68 Rows (Lilac): Repeat row 2 instructions.
69 – 77 Rows (White): Repeat row 2 instructions. Do NOT tie off.
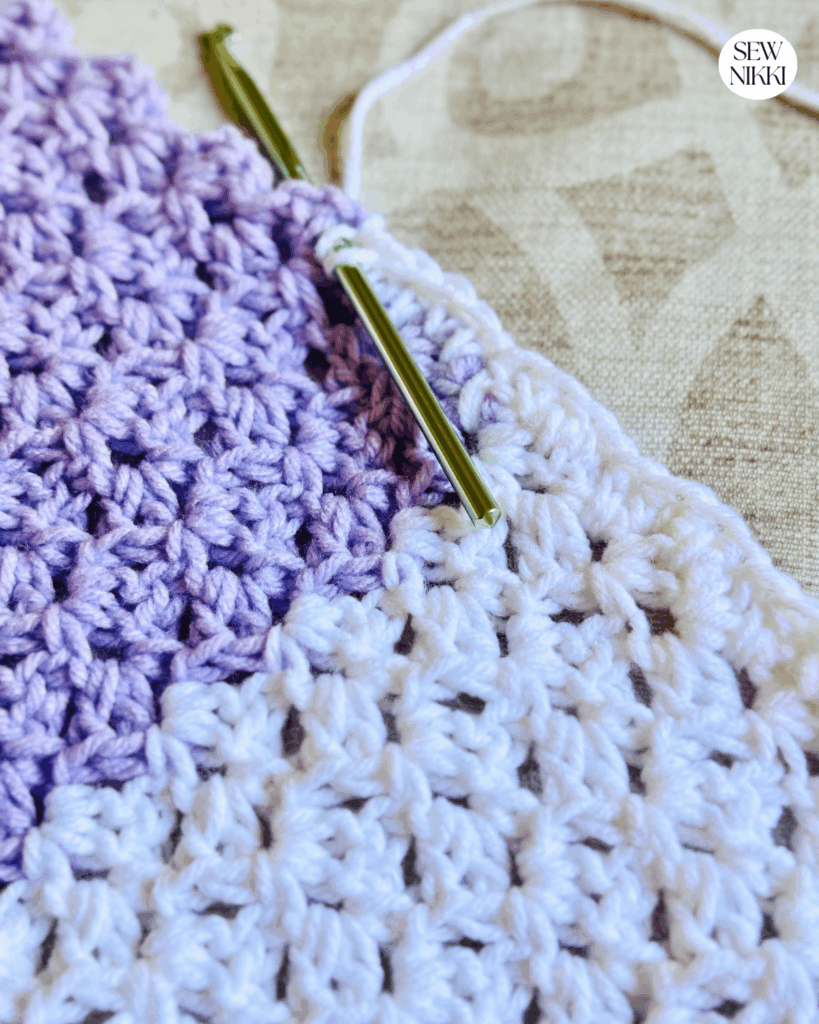
Granny Stitch Border
Before starting the border, weave in all yarn tails. We’re continuing with white.
78 Row (White): HDC around entire blanket border. Place hook into chain spaces and through blanket stitch when needed. In each corner, place 4 HDC stitches.
79 Row (Lilac): Attach lilac anywhere, CH 3 (counts as DC), 2 DC in same stitch (3 DC cluster total). SK 2
3 DC in next stitch. Repeat around corners but CH 1 after 3 DC cluster before corner. And CH 1 after 3 DC cluster after corner. If you cannot SK 2 before corner, SK 1. Corners are where you adjust stitch count. That’s just how crochet borders work. SL ST into top of beginning DC. Tie off and cut yarn.
80 Row (White): Attach white in a CH-3 SP, CH 3 (counts as DC). Move to next CH-3 SP
3 and insert 3 DC, repeat around blanket. Place 2 DC next to starting DC, SL ST into top of beginning DC. Tie off and cut yarn.
Repeat the border rows as many times as you like, rotating colors.
Pro tip: This is an easy way to make your lap blanket larger without adjusting the main body.

How to Adjust the Size
Since the stitch is worked in multiples of 4, simply:
- Add or subtract foundation chains in multiples of 4
- Add more stripe sections
- Make the border wider
Want a crib blanket? Keep as is.
Want a throw? Add 2 or 3 more color sections.
Save This Project
Pin this tutorial so you can come back to it later.
More Patterns Like This
Granny Handbag for a day running errands
Retro Granny Stripe Poncho if you want something cute to wear
Granny Ripple Blanket to see how texture changes with tension
Get the digital pattern.
Get the instant ad-free pdf pattern here.
Why I Use a J Hook with 4 Ply Yarn
Let’s be real. This stitch can get dense.
Using a J hook with 4 ply yarn keeps it:
- Airy
- Flexible
- Soft
- Not stiff
If you crochet tight, consider going up another hook size or two. The difference in drape is huge.
Best Uses for This Lap Blanket
- Couch blanket for binge watching
- Car blanket for kids or grandkids
- Lightweight baby blanket
- Gift for new mom
- Holiday color variations
- Charity blankets
It folds small enough to toss in the car but still keeps you warm.

Color Ideas
- Cream + Sage
- Navy + Mustard
- Blush + Ivory
- Taupe + Dusty Blue
Or keep it classic like white and lilac.
Big blocks of color make this look modern instead of busy.
Beginner Friendly?
Yes, it uses basic crochet stitches and very easy. The border will be more challenging, you need to be able to read crochet patterns. The Craft Yarn Council has a great post on this, check it out.
You should know:
- Chain
- Single crochet
- Double crochet
- Slip stitch
- Basic border work
If you’ve made my granny projects or beginner blankets, you’re ready for this.
Common Mistakes to Avoid
- Skipping wrong number of stitches
- Crocheting too tight
- Not weaving in ends before border
And remember, borders are forgiving. Corners are where you “make it work.” When you make the foundation row for your borders on the outside edges, most of the time you will not be working in the crochet stitches from the rows. You will be making a space through the blanket to form your border and that’s OK. That’s crochet.
Crochet Lap Blanket Free Pattern
This easy crochet lap blanket pattern hits that sweet spot between:
- Textured but not complicated
- Bold but not loud
- Cozy but not heavy
- Perfect for new crocheters
The reverse blanket stitch gives beautiful structure. The granny stripe border softens it. The loose tension keeps it from turning into cardboard.
If you’re looking for a lap blanket that feels handmade without screaming “homemade,” this is it.
Make one for your couch, one for the car and one for a baby or small grandchild.
Then make another in different colors.
You’ll get into the rhythm quickly and once you do, it’s hard to stop.
ABOUT SEW NIKKI
Welcome to Sew Nikki. Your place for free crochet, sewing and quilt patterns for beginner to intermediate skill levels. Want a digital pattern? We have those too! Plus tutorials to walk you through how to make each item from start to finish.
If you make this easy project, please tag me. I love seeing your work and color combos.
My patterns can easily be adjusted to the perfect blanket size for you, just add or subtract in multiples of 4. I’m going to wash this and it will be my sofa’s new throw blanket. For more crochet tutorial & patterns, check out The Pattern Index.
Follow me on social media (Pinterest, Instagram, Facebook and Twitter) so you get notifications when I post new patterns and tutorials.
This post contains ads and affiliate links, which means I make a small commission at no extra cost to you. While the ads are annoying, it helps keep this blog going. See my full disclosure here.


I love how simple this looks so it’s not intimidating! I’d love to get back into crocheting soon.
This blanket look so simple and beautiful! I love the colors you chose and the pattern. Your instructions are well explained and easy enough for beginners to understand 🙂
A great pattern! Your tutorials are always so easy to follow.
A great pattern! Your tutorials are easy to follow.