Dixie Baby Blanket – Granny Ripple Crochet Pattern
Today I’m sharing my brand new baby blanket pattern with you, introducing “Dixie”. What can I say, I’m hooked on granny’s! This is a granny ripple crochet pattern and you will love making this one. If you love the look of a classic granny stitch but want something with a little wave to it, the granny ripple is a great stitch to try. It’s one of those patterns that looks fancy but is easy to remember after a few rows. This baby blanket pattern uses the granny ripple stitch to make something soft, sweet, and perfect for gifting.
This pattern is easily adjustable to an adult size blanket or afghan, if you know the stitch count. I’ll provide that info below. I’ve made granny hexagons, rectangles, squares and now the ripple. Such a unique pattern , doesn’t even need a border. Seriously, it doesn’t.
Whether you’re new to ripples or just looking for a simple project to unwind with, this pattern is made for relaxed crochet time. No counting to a hundred or switching colors every row unless you want to.
Color Combinations
You can change the entire look and feel of your blanket by the different colors you pick for your project. This pattern needs at least 2 different colors, here are some ideas.
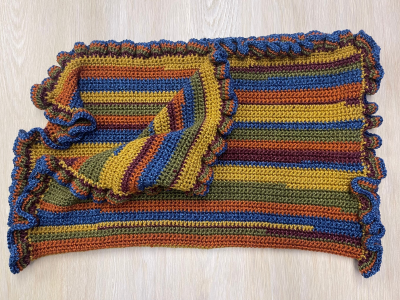
Change colors each round. Use at least 5 different colors to make it pop or change for every row if you are a gluten for punishment (haha). The more colors the better in my humble opinion but match your vibe and aesthetic.
I’m trying to make something that simple, understated and letting the pattern take the attention instead of all the yarn colors. This one is my favorite pattern because it’s so beautiful and unique. I’m going to try making a large afghan to have in my family room.
Ombre would look wonderful too. Try 3 different shades of one color and add a neutral and white to get to 5 colors. Now that would be pretty.
As you can see there are lots of options you can choose from for the color or your blanket. Granny stitch crochet blankets are known for changing colors every row or using a few colors and repeating them. Just remember that the more you change colors, the more yarn tails you will need to weave in and it can be time consuming but give you beautiful results.
I decided to go with wide ripples using just two colors. Boy did I have to restrain myself but the end result is clean, simple and charming. I’m using Caron One Pound Off White (but it looks beige) and Red Heart Super Saver White. You can add a border but I decided not to. The reason is because it’s just beautiful as it is.
What Is the Granny Ripple Stitch
The granny ripple stitch creates an upside down V-shape. Each V-shape has a peak and a valley. You’ll still work in groups of three double crochets, just like in a granny square. The difference is in the shaping. You add extra stitches to make the peaks and skip stitches to make the valleys. That’s what gives it the ripple look. Peaks will always be increase corners, valleys will always be decrease corners. You will be turning your work as you move from peak to valley, this part takes some getting used to. Once you’ve crocheted a couple rows, it’s much easier to work with the yarn.
Everything about this blanket is different from all the other baby blankets I’ve ever made. The sides of the blanket slant when working it up (due to the peaks/valleys), don’t be afraid. Your stitch count isn’t off, you are doing it right. You will see the final results at the end.
This pattern is for a baby blanket but you could easily double or triple the chain count for a full size afghan pattern. I’ll share the stitch count below.
Stitch Count
Knowing the stitch count is knowing the secret sauce. This is the magic number you will need to increase the size of your project or decrease it. It’s the number of stitches needed to make the design work, in this case it’s the ripples. If you don’t like doing maths (figuring out stitch counts and such), you can grab the pattern for $3 in my shop.
You will need to work in multiples of 25 plus 4 for one V-shape. If you want the make the blanket larger or smaller you need to subtract 25. Don’t add the 4 until you have the desired length in increments of 25, 50, 75, 100, etc. Then add 4 for final chains for foundation row if modifying the pattern.


Granny Ripple Baby Blanket Pattern
Original pattern by Sew Nikki for this beautiful granny ripple blanket baby edition. In order to get the finished size, you must use worsted weight yarn 4-ply and a size H (5 mm) crochet hook. It’s made with soft acrylic yarn that’s machine washable, because no one wants to hand wash a baby blanket. Just follow the stitch pattern below. Have fun crocheting granny stitches.
Finished Size Blanket: 32.5 x 43 inches
Skill Level: Easy
Stitch Used: Granny Cluster (3-DC group)
Materials:
- 1 to 1.5 skeins Caron One Pound Off White Yarn
- 2 skeins Red Heart Super Saver White Yarn
- Size H/5 mm hook
- Scissors and yarn needle
Gauge Swatch: Not super important for this pattern if using worsted weight 4-ply yarn. If your ripples look good, you’re good.
Pattern Notes:
- This pattern starts with a foundation chain in a multiple of 25 plus 4
- You can change colors every row or every few rows if you want stripes
Foundation Row (Caron Off White): Single crochet 154 chains (that’s 150 plus 4), turn.
First Row (Caron Off White): Start in the 7th CH from hook, 3 DC same CH, SK 2, 3 DC, SK 2, 3DC, SK2, 3 DC, CH 2, 3 DC next CH, SK 2, 3 DC, SK 2, 3 DEC, SK 2, 3 DC, SK 5, 3 DC, SK 2, 3 DC, SK 2, 3 DC, SK 2, 3 DEC, CH 2, 3 DC next CH, SK 2, 3 DC, SK 2, 3 DC, SK 2, 3 DC, SK2, 1 DC last CH. CH 3, turn.
Second Row (Caron Off White): {INCREASE} 3 DC in 1st CH-2 SP (after the granny stitch), 3 DC CH-2 SP, 3 DC CH-2 SP, 3 DC CH-2 SP, CH 2, 3 DC same turning corner CH-SP, 3 DC CH-2 SP,. {DECREASE} 3 DC CH-2 SP, 3 DC CH-2 SP, 3 DC CH-2 SP, SK corner and place 3 DC in next CH-2 SP, 3 DC CH-2 SP, 3 DC CH-2 SP, (3 DC, CH 2, 3 DC in turning CH-SP). Repeat INCREASE 5 more times. Repeat DECREASE 5 times. Place 1 DC in top ST of turning CH. CH 3, turn.
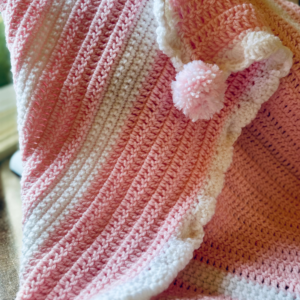
Border (Optional)
This is the first blanket that doesn’t have a crochet border on it. It doesn’t need one, but feel free to add one of these free and easy border patterns.
Want the full pattern? Click the button below for the digital pattern.
dixie baby blanket by
Sew Nikki
Get the full pattern here. Digital download sent directly to your inbox. Get your pattern and start stitching today.
Dixie Baby Blanket by Sew Nikki
Buy My Sample
Rather buy this blanket instead of making it? This sample blanket is for sale in my shop, there’s only one.
Tips for Granny Ripple Crochet
- Each side of the V-shape contains 4 – 3 DC clusters and then a decrease or increase stitch combos in the corner sps.
- Each row after the second row will be done exactly the same. Just change colors on the last stitch of the row before you chain 3 and turn.
- Don’t freak out when the sides of the blanket don’t look “normal”. It will be a slanted angle and that’s just what you want. (This pattern takes some getting used to).
- Keep your tension and stitches the same to keep your blanket even and consistent. If you crochet loose or tight it doesn’t matter, just be consistent.
ABOUT SEW NIKKI
If this is your first time stopping by, welcome! I’m Nikki, a maker obsessed with quilting, crochet, and all things fabric. Here, you’ll find easy-to-follow patterns, helpful tutorials, and plenty of inspiration for your next handmade project. Grab your fabric (or yarn), and let’s create something beautiful together!
Feel free to share your finished projects in the comments below or tag me on social media! I can’t wait to see your work!
Follow me on social media (Pinterest, Instagram, Facebook and Twitter) so you get notifications when I post new patterns and tutorials.
Want to learn how to quilt? Then check out this post, Learn How to Quilt for Absolute Beginner’s.
This post contains ads and affiliate links, which means I make a small commission at no extra cost to you. While the ads are annoying, it helps keep this blog going. See my full disclosure here.