How to Sandwich A Quilt Step-by-Step Tutorial
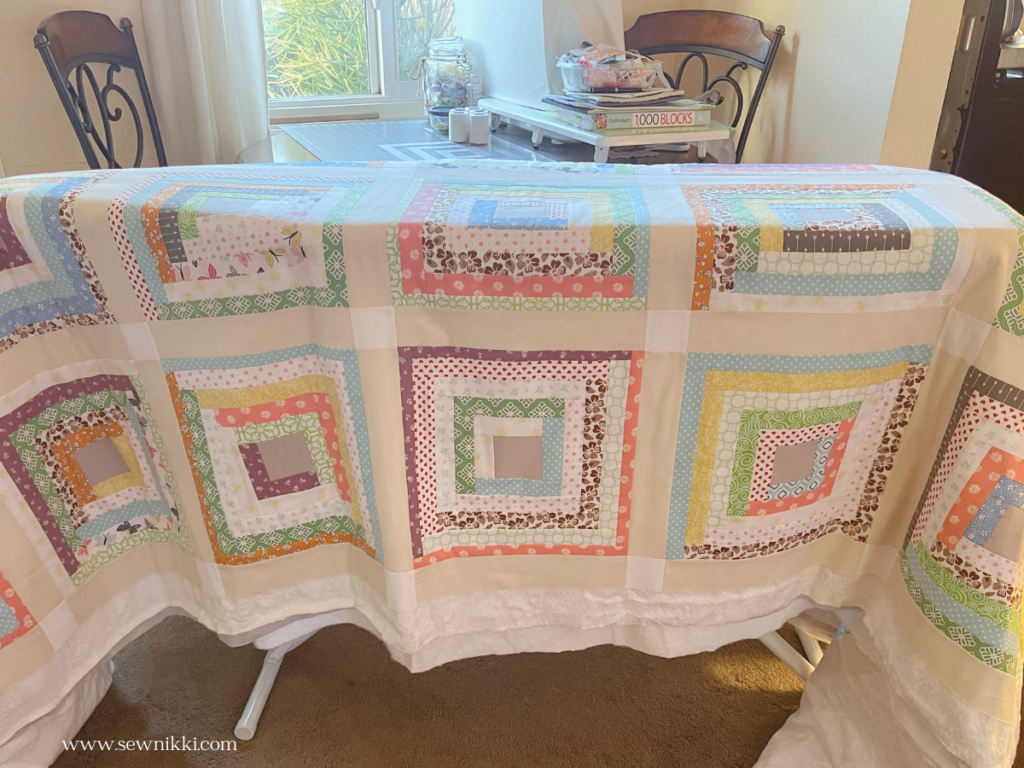
How to sandwich a quilt step-by-step tutorial. Today I’m getting my king size log cabin quilt ready for machine quilting on my Juki sewing machine. So if you’ve been following along with me, we made the log cabin quilt blocks, we added sashing and cornerstones and completed our quilt top.
Next step in our quilting process is quilt basting or to make a quilt sandwich. A quilt sandwich has three quilt layers: quilt top, quilt batting and backing fabric. I quilt all of my own quilts and have to follow this sandwich process for any size project: small quilts, baby quilts, twin-sized quilt and larger quilts. The size of your quilt determines how quickly you can complete your quilt sandwich.
Now let’s go over the types of basting methods and which are most common or preferred method.
MAKE SURE YOU CHECK THESE OUT!
After you read this post, make sure you also check out Learn How to Quilt for Absolute Beginners. It’s jam packed with information to make your first quilt. It also has links and resources that are so helpful when you’re first learning. There’s lots of free quilt patterns that are great for beginners and all skill levels too. So make sure you check this out, seriously don’t forget!
Make sure you grab a copy of my free Quilt Planning Journal. It’s filled with graph paper and note pages to help you design at least 4 quilt or sewing projects! Use it to jot down ideas, fabrics, patterns and inspiration all in one place. Or create your own patterns and share with others. Pin in fabric swatches, photos of your finished quilts and enjoy your creative process!
How To Sandwich A Quilt – Basting Methods
There are several types of quilt basting methods: pin basting, basting spray, iron basting, hand basting and thread basting. Let’s cover the most common basting methods first: pin basting and basting spray.
Pin Basting
As a beginner, I followed the pin basting method with regular safety pins at first and then found the curved quilting pins which were easier to pin because of that curve. I was making throw quilts which were quilts made with 2 charm packs and not very large. Basting pins look like safety pins but are curved. If you use the pin basting method you start in the center of the quilt top and place a pin in the center of each charm square working your way to the outside. Pressing the quilt top as you move outwards.
However, even with a throw size quilt, the pins made the quilt very heavy and it was sometimes hard to sew because the pins would get hung up on my extension table. I was always fighting with my pins. Pins can be taken out once you quilt the entire quilt in one direction (horizontally or vertically, your choice).
Basting Spray
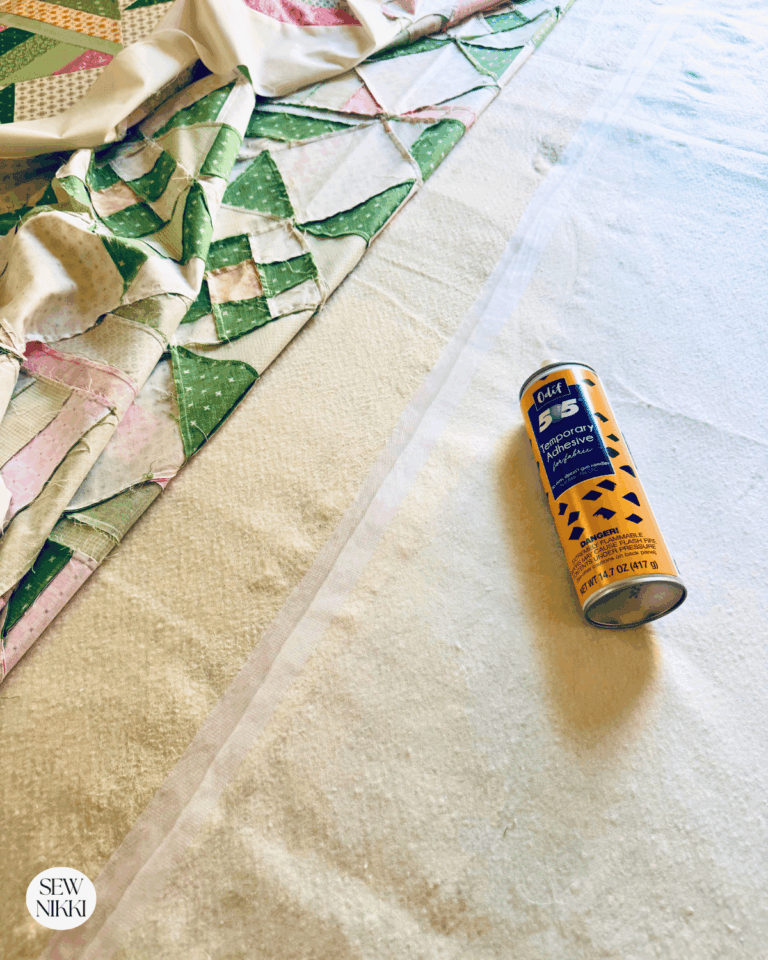
Spray basting is by far the most common method. There are lots of basting sprays on the market, I like 505 Basting Spray and it’s really good. You spray it in sections onto the batting and then press the fabric down to adhere to it. You spray the front and back of the quilt following the same process. Starting in the middle of the quilt top and working your way out to the side, then flipping to do the back of your quilt until you’ve done the whole quilt.
I let my spray basted quilt hang over an ironing board for at least a day to let the spray dry. When I take my quilt to my sewing machine to quilt it, the basting spray isn’t sticky and won’t leave residue on the needle when dried.
Here are the other basting methods you could use: hand basting, thread basting and iron basting.
Hand Basting
Hand basting a large quilt is done when you are hand quilting the entire quilt. The hand basting method is when you take a hand sewing needle and thread and make large stitches to secure the quilt top, batting and backing fabric. After you finish quilting your quilt, you then remove the hand basting stitches from your quilt. This process is not for machine quilting, you would use basting spray or basting pins to secure quilt sandwich instead.
Thread Basting
Thread basting is the same as hand basting but you use your sewing machine to baste instead of hand basting. Set your stitch length to a higher setting to make big stitch lengths. Rip out after quilting to remove basting thread. Thread basting is used a lot for sewing garments.
Iron Basting
Iron basting uses a fusible batting, like Hobbs Fusible Cotton Blend, or Pellon Fusible Cotton Blend that has adhesive on it so you don’t need to spray it on. You iron the fabric to the batting, pressing the iron on the fabric and not the batting. You will iron the quilt top to the fusible batting and then repeat the process with the backing fabric.
Sewing Machine vs Long Arm Quilting Machine
Sewing Machine
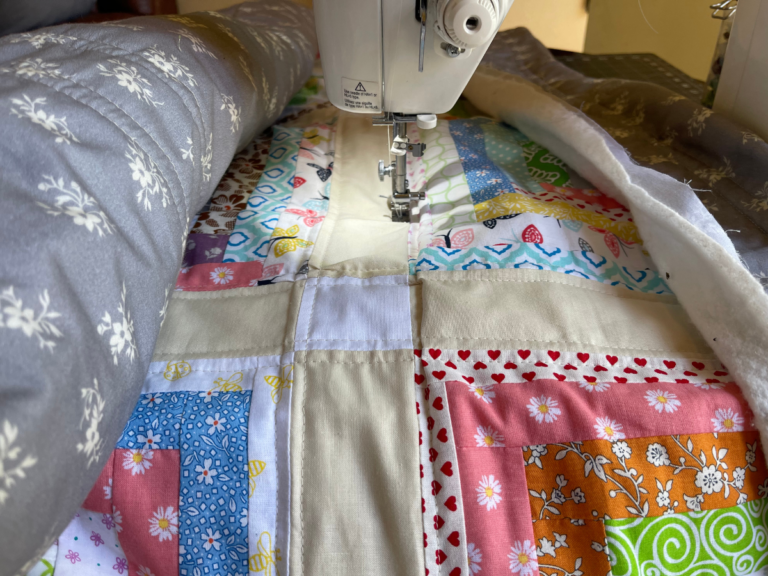
I sew my own quilts from beginning to end on a domestic sewing machine but professional grade. Any time a quilt will be sewn on a domestic sewing machine, a quilt sandwich needs to be done before quilting. I quilt in straight lines on the entire quilt. I still haven’t mastered the art of free motion quilting. My goal is to own a long are quilting machine and proudly hold the title of longarm quilter, a girl can dream!
When I first started out I really went for it and tried to quilt a king size quilt on a Singer Start sewing machine. I do not recommend that. It basically broke my machine. The stitches all had to be ripped out because the tension was all wrong from the heavy weight of the quilt sandwich! I spent three weekends ripping out all of my quilting so I could redo it on a Singer HD machine. I was so happy when I was able to upgrade to my profession grade Juki TL-2000Qi Sewing and Quilting Machine.
Walking Foot Quilting Tips
The walking foot attachment helps your quilt move more easily in your sewing machine. It has teeth to grab onto the fabric on the top of your quilt while the feed dogs grab the fabric on the backing fabric. The walking foot is easy to add or take off. Follow the instructions for your brand of sewing machine. My Juki TL-2000Qi Machine is strong enough to quilt without a walking foot. I just use my 1/4″ presser foot and it does a beautiful job but not recommended for Singer’s or other domestic brand sewing machines. The motor isn’t as big and it puts a strain on the machine.
Long Arm Quilting Machine
Long arm quilting machines are very expensive and since I’m still new to quilting this is not an investment I see in the near future for me. The process is different for long arm quilting machines. They have rollers and feed the quilt top, batting and backing onto their loom in quilt layers.
I have looked into Missouri Star Quilt Company and their quilting services. You send in your quilt top and backing fabric, they provide the batting and long arm quilting service. You can add your quilt size info on their website to get a price quote. They baste the quilt for you on their long arm quilting machines.
You can also google long arm quilters in your area or try your local quilt guild for long arm quilters or references. Again, if you want to spend money to have beautiful patterns quilted on your quilt then this is a nice option. But anyone at any level can machine quilt on their domestic sewing machine and free motion quilt or straight line quilt and it will still look gorgeous!
Now let’s go over the different types of batting you can use to insulate your fabric to become a quilt.
Different Types of Batting
The three most common battings for quilts are Polyester, 100% Cotton and Cotton Blend which is a blend of Cotton/Polyester. There is also Fusible Batting available for all three of these common battings but it’s more expensive if you go that route.
My go to quilt batting is Warm and Natural Cotton Batting, Warm and White Cotton Batting (use this when you have a lot of white fabric in your quilt), or Pellon Cotton Batting. Cotton batting can be hand or machine washed and put in a dryer on med or low setting without shrinking. I make quilts that are made to be used and loved, cotton is my preferred method. I usually buy a package in the size quilt I’m making at Joanne’s when it’s regular priced and I use their stores coupons that they have every few months for 40, 50 and sometimes 60 percent off the regular priced item. You can’t beat that!
Let’s move on to the step-by-step tutorial for a king size quilt, spray basted on a bed.
How to Sandwich a Quilt Step-By-Step Tutorial
Materials Needed
1 quilt top (baby quilt, small quilts, twin-sized quilt or larger quilts)
quilt batting
quilt backing/backing fabric
Basting spray
Iron Fabric
Iron your quilt top and backing fabric. Press these really good before you lay these out to make your quilt sandwich.
Get Wrinkles Out of Your Cotton Batting
Take your cotton batting out of the packaging and place in your dryer with a damp washcloth for 5 minutes on high to remove wrinkles in the batting. Cotton batting that comes in a wrapped plastic package gets stubborn wrinkles and those wrinkles will show up in your final quilt if you don’t treat them first.
Trim Backing Fabric
Cotton batting and fabric backing should be 3″ wider than your quilt top. Everyone else says 4″ wider but it’s just wasting fabric and batting in my opinion.
Take your quilt top and lay it over the bed right side down. Now take your backing fabric and lay it over the quilt top. Grab your scissors and trim the backing fabric while still laying over the quilt top and make sure you add your 3″ on all sides before you start cutting. You want your backing fabric to be larger than your quilt top. Use your trimmed excess fabric for a scrappy project.

Trim Cotton Batting
Take everything off the bed. Now lay the trimmed backing fabric right side down over the bed again. The wrong side of fabric should be facing up. Now lay the cotton batting over the backing fabric. Trim the cotton batting the same size as the backing fabric. Save the extra batting for another project.

Basting quilt top to cotton batting
Take the quilt top and place wrong side onto the cotton batting to form a quilt sandwich. Make sure that your quilt top is covering the backing fabric, you should have 3″ of backing fabric and cotton batting that is not covered by the quilt top. Make adjustments to the quilt top placement as needed. This is your quilt sandwich. Now let’s baste the sandwich.

I’m using the spray basting method. Go back to the bed with the quilt top laying wrong side down on cotton batting, laying on the wrong side of backing fabric. Work the basting with half of the quilt top at a time. We are going to spray the quilt top to the cotton batting first.
Standing on the side of the bed, roll the quilt top to the center of the bed. Spray in 3′ sections going from center of bed towards you. Spray, then roll out to the edge of the sprayed area and then press, then repeat until you are done with that side. Go to the other side of the bed and repeat the process.

Basting backing fabric to cotton batting
Flip the quilt so quilt top is facing downwards and fabric backing is facing upwards. Quilting tip: Before you flip the quilt, place some sewing pins along the edges that are hanging over both sides of bed to secure backing fabric to the basted quilt top. Using the pins helped to keep the backing in place.

Repeat the steps above until done.

How to Sandwich a Quilt – Quilting Tips
When to use painters tape or masking tape
Quilting tip if you are using your floor to lay out the quilt. Sweep or vacuum floor first to remove an dirt. The floor is a nice flat surface, great if you have the space. It’s a good idea to use masking tape or painters tape to hold down the edges of the quilt top. Lay down the backing fabric first, then tape down the outside edge on all four corners. The tape will keep your quilt in place as you start layering your quilt sandwich. Larger quilts move around more than smaller quilts but you can never go wrong by taping the quilt down at the four corners of the outside edge of your quilt.
Tips for using basting pins or regular safety pins
If you are using basting pins, regular safety pins or curved quilting pins, it’s a good idea to think about how you are going to quilt it once you are done basting. You cannot sew over these safety pins and it’s too much work to keep removing them so you can continue quilting. So place them where you know you will have room to sew. Make sure your walking foot will have 1/4″ between the basting pins and where you want to quilt. Straight pins are not recommended because they will break when you try to bend them through the entire quilt. Keep your straight pins handy for attaching binding if needed.
Flatten it out as much as possible
You want your finished quilt sandwich fabric to be secure and as wrinkle free and flat as possible. It’s so important to always start in the center of the quilt and work your way to the outsides, smoothing out the wrinkles without distorting the shape of the quilt as much as possible. Basting spray is forgiving, if you need to pull up a section of your quilt and baste it again to get it smooth that’s ok. You can pull the fabric away from the batting, reposition it, make your adjustments, spray a tiny bit more of the batting spray if needed and finish basting.
Beginner Quilting Supplies
Here are some quilting tools and supplies I recommend. I make a small commission if you purchase through the links, this helps to support this free content. For more info, check out Supplies for Beginners (Best Tools To Start).
Rotary Mat Cutting Mat (Self-Healing Mat)
28 mm Rotary Cutter Replacement Blades
45 mm Rotary Cutter with Sharp Blade (start with this one)
45 mm Rotary Cutter Replacement Blades (start with this one)
60 mm Rotary Cutter Replacement Blades
4.5″ Square Ruler for half square triangles
12.5″ Square Ruler for blocks
SAVE THIS PIN FOR LATER!

This post contains ads and affiliate links, which means I make a small commission at no extra cost to you. While the ads are annoying, it helps keep this blog going. See my full disclosure here.
About Sew Nikki
If this is your first time stopping by, welcome! I’m Nikki, a maker obsessed with quilting, crochet, and all things fabric. Here, you’ll find easy-to-follow patterns, helpful tutorials, and plenty of inspiration for your next handmade project. Grab your fabric (or yarn), and let’s create something beautiful together!
Follow me on social media (Pinterest, Instagram, Facebook and Twitter) so you get notifications when I post new patterns and tutorials.
Want to learn how to crochet? Then check out this post, How to Learn How to Crochet – Guide for Beginners.


I never knew about a quilt sandwich or the different basting methods. You really break it all down for easy understanding. Love your step by step process!
Thanks Charlene, it kind of is a funny term when you think about it!
So you can use a king-size bed as the flat surface? That goes for smaller projects, too, not just a king-sized quilt, right? I guess I can just use painters tape on the bed? This would be easier for me than the floor, with the back issues, etc.
Let me know if I’m on the right track. I appreciate this tutorial. I’ve even researched this because I’m a nervous beginner and have had a little project in the works for years. LOL!
Also, does the fabric have to be the same material when you make a quilt? That is, all cotton? Or can you mix it up. That would be for the next project.
Hi Christine! Yes you can. I use my king size bed as my surface for all of my quilt projects. I don’t use painters tape at all. Use your hands to smooth everything down and get the wrinkles out of the batting. You can slide a large cutting matt in between the bed and bottom of quilt for a really flat surface. Helpful if you pin baste but not necessary for spray basting. Check out my spray basting tutorial. Once you have one side basted, flip it over and spray baste the other side. Smooth out the layers after flipping and repeat steps from first side. Fabric, I only use quilting cotton because it’s sturdy for piecing quilts and sews up nicely. I’m not an expert on different fabrics yet but some have play to it and they aren’t fun to sew. Also, cotton lasts and is durable for every day use. Let me know if you have any other questions. You got this, I’m cheering you on!