How to Sew Quilt Squares Together | Quilting Tutorial
In today’s beginner quilting tutorial, I’ll show you how to get started on your quilt top and teach you how to sew quilt squares together. Not just simple squares but quilt blocks, borders, sashing and rows. Giving you all the info you need to be successful and finally get sewing.
Quilt tops are made by sewing quilt blocks or square together to make rows. Then the rows are sewn together on your sewing machine to complete the quilt pattern. You can add borders, sashing and cornerstones too. We will cover everything you need to know in today’s tutorial. With a little practice, you will be making a beautiful quilt in no time!
If you are an absolute beginner, the best quilt to start with is a simple squares quilt. It consists of rows of squares in cotton fabric. 5″ fabric squares are the most popular size square and come in pre-cut charm packs. It’s a great way to get you sewing right away because you don’t need to cut any fabric. If you haven’t used a rotary cutter before, they take some getting used to. Before we move onto the tutorial, let’s talk about some things you need to know before you start sewing the square together and some helpful tips.
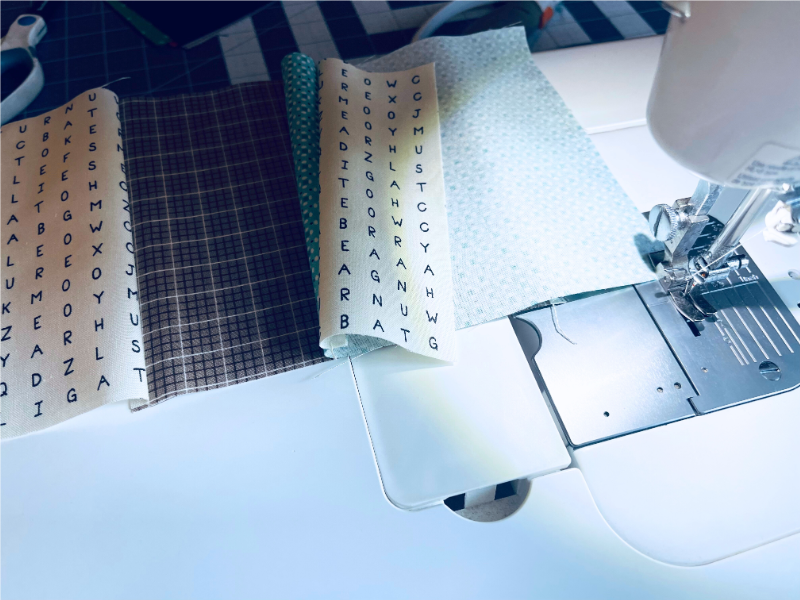
Fabric
Fabric usually has a right side and wrong side, here’s how you can tell the difference. The wrong side in quilting is the back of the fabric. The back of fabric is typically duller in color because the print or design is on the opposite side or the right side of the fabric. You always want the right side of your fabric on your quilt top. If you don’t want to worry about right sides, buy solid color fabric with no print or design. The fabric color will be the same on both sides because it’s a solid color.
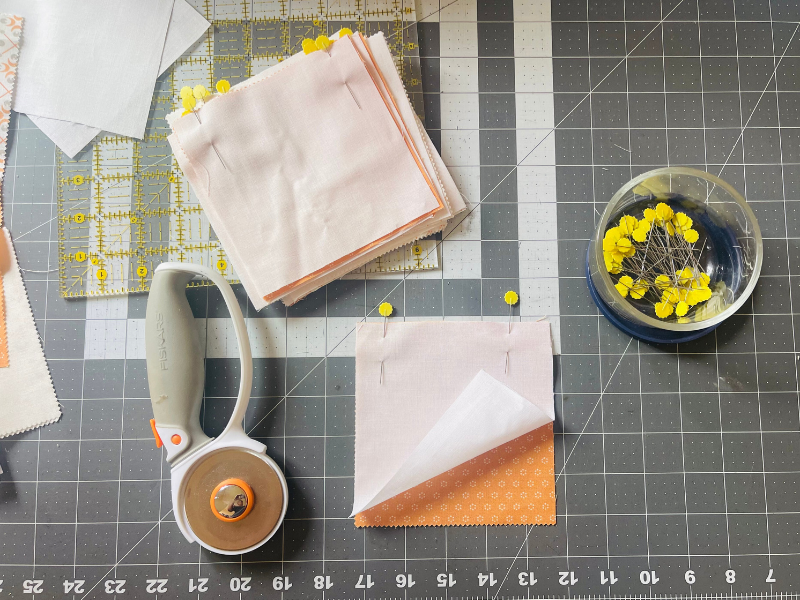
Both pieces of fabric need to be the same size in order to sew together. If you are sewing squares, they need to be the same size. Precuts come in 3 square sizes: Mini Charm Pack (2.5″ squares), Charm Pack (5″ squares) and Layer Cake (10″ squares).
For more info on how to shop for fabric and where, check this out. You can’t find pre cuts in local craft stores, this post tell you where to shop to get the best deals.
Seam Allowance
As a quilter, your seam allowance is always going to be 1/4″ unless noted otherwise. This means that your stitching line will be 1/4″ from the edge of the fabric you are sewing. You can use a quilting presser foot that is 1/4″ which is my favorite method. Or you can use the sewing plate measurements and follow the line for 1/4″.
Pro tip: The sewing plate is not always accurate, here’s how to confirm your sewing machine gauge is accurate and why being accurate is important. grab a ruler and measure from the sewing needle to the marked lines on the sewing plate. Does the 1/4″ sewing line really add up? If it doesn’t, you will need the 1/4″ quilting foot or use painters tape top mark where your true measurement needs to be. Use the 1/4″ quilting foot for best results, just keep the right foot always lines up to the edge of the fabric and you are good to go.
Straight Lines
It’s important to sew straight lines to keep your squares consistent. You want to sew the same way for each square. Having your chair at the right height and distance from your machine is the key. My sewing table is not meant for sewing, it’s a small round table with a regular table chair. My chair isn’t the right height and I’m always looking up, it should be the other way around. You should be looking down onto your sewing machine. If you are having trouble keeping your lines straight, check this out and fix.
Chain Piecing
You don’t need to chain piece but it is more efficient, will save you time and will save your thread. This is especially true if your sewing machine doesn’t have a fancy “cut thread” button. If your machine doesn’t have this, you need to use a leader or ender OR leave a thread tail when you clip it while piecing your quilt top.

Make sure you check this out!
After you read this post, make sure you also check out How To Learn How To Quilt: Beginner Quilting Guide. It’s jam packed with even more information, links and resources that are so helpful when you’re first learning. It also has a section with free quilt patterns that are great for beginners. So make sure you check this out, seriously don’t forget!
Grab a copy of my Quilt Planning Journal, filled with graph paper and some note pages to help you design at least 4 quilts or sewing projects! I have been using mine for a little while and already I am jotting down ideas as I see them and reminders about websites where I have seen some ‘must have’ fabric, so I think this can be so much more than just a design book. Pin in fabric swatches, photos of your finished quilts and enjoy your creative process!
How to Sew Quilt Squares Together
Sewing Simple Squares
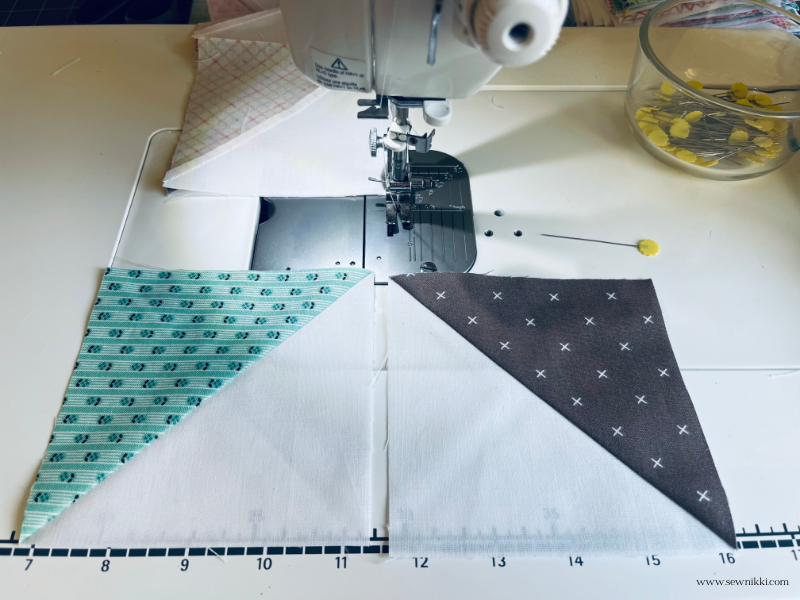
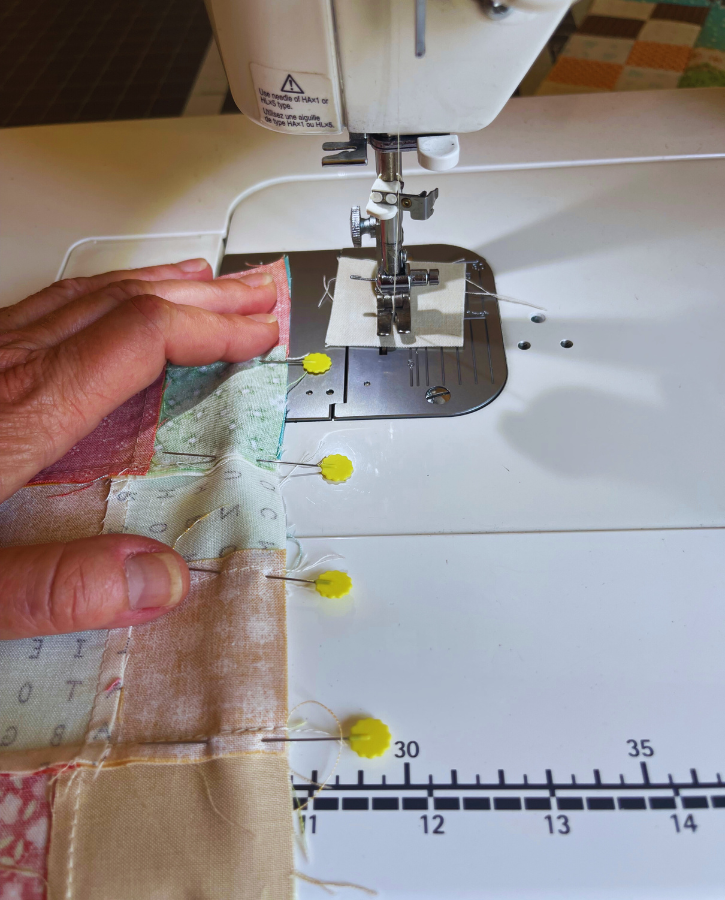
Take a pair of squares that are the same size and place right sides together so they completely cover each other. It’s a good idea for beginners to use solid colored fabrics, no need to worry about a right or wrong side of fabric. Next step is to pin the blocks in place on one side. Insert your sewing pin straight into the side at the top and bottom of square. You can omit using sewing pins for connecting quilt squares once you get comfortable with you skills and keeping everything aligned properly while sewing.
Line up the edge of the presser foot (1/4″ foot) to the raw edges of the pair of squares. The right edge of the presser foot should line up to the raw edges.

All sewing machines vary but stitch lengths will vary between 2.5 to 3.2. Place sewing needle in down position just before the pair of squares begin. Slowing press your foot on your sewing machine foot pedal and stitch a straight line from the top of the squares all the way to the bottom.
Leaders and Enders
If you have more square to sew together, try chain piecing. If you only need to sew one pair of squares, cut thread when done or use a ender. Cut the square where the ender starts. Unfamiliar with leaders or enders?
For those using sewing machines that do not have an automatic thread cutting button, you need to leave thread tails or use a small scrap of fabric to sew onto, then trip your square or block with small scissors. If you don’t leave long tails, most beginner machines will eat up your thread and get stuck under your sewing plate and cause a mess. You can reuse this small scrap of fabric for along time, just use it between sewing. Saves thread and also makes it easier to sew squares and blocks because you can chain piece with your first square.
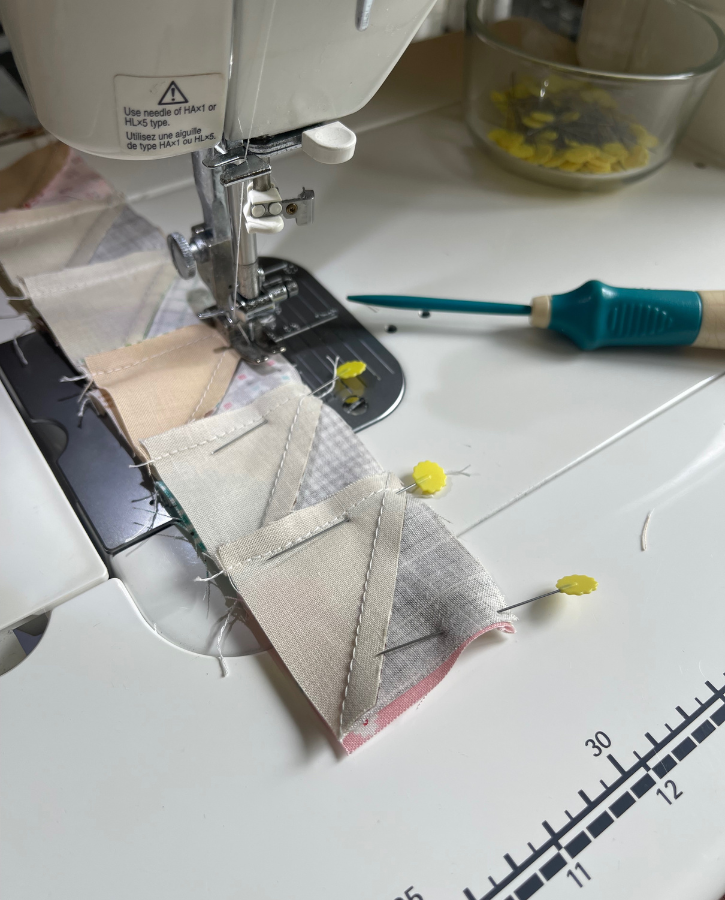
How to Chain Piece
Chain piecing is done by not cutting the thread but sewing another quilt square or block one after another forming a long quilting piece. When you are done chain piecing, you would use an ender, trim with small scissors in between each square you sewed to separate them. You can slip your pair of squares under the presser foot without having to lift the presser foot up in most cases. It depends on the thickness of what your sewing.

Sewing pairs of squares is really easy to chain piece. Sewing your first row of squares to the second row and repeating for the remaining rows may require you to lift your foot up from your sewing pedal, have your next row section pinned and ready, lift your presser foot, place your rows under it, lower presser foot, place sewing needle in down position, begin sewing.
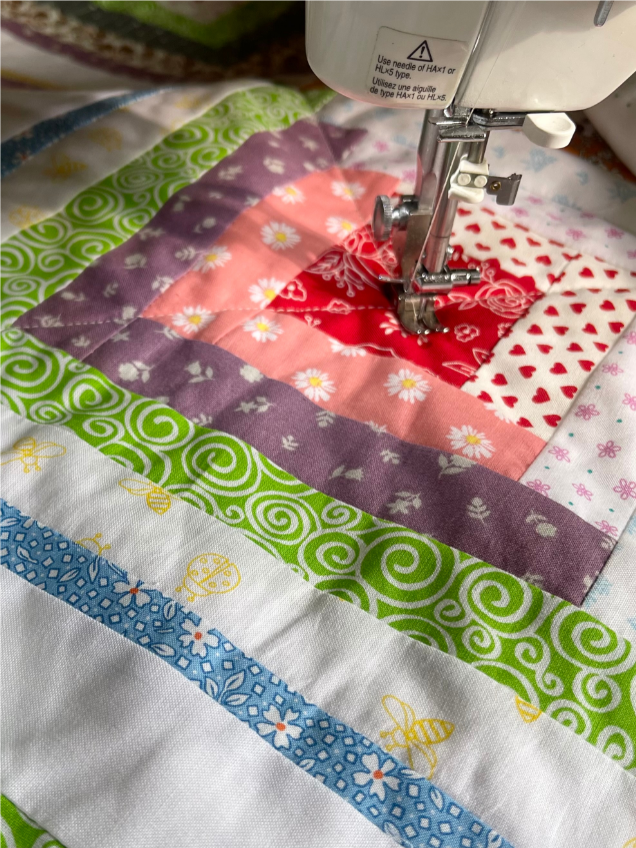
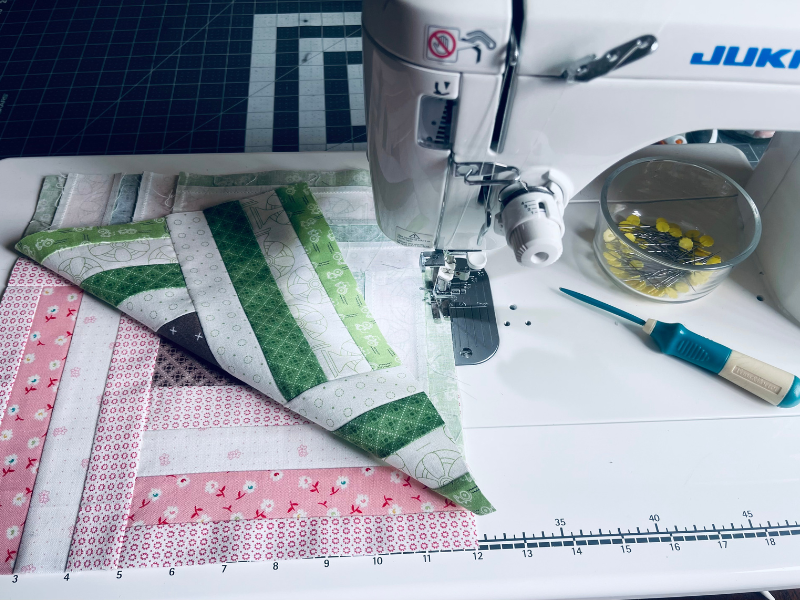
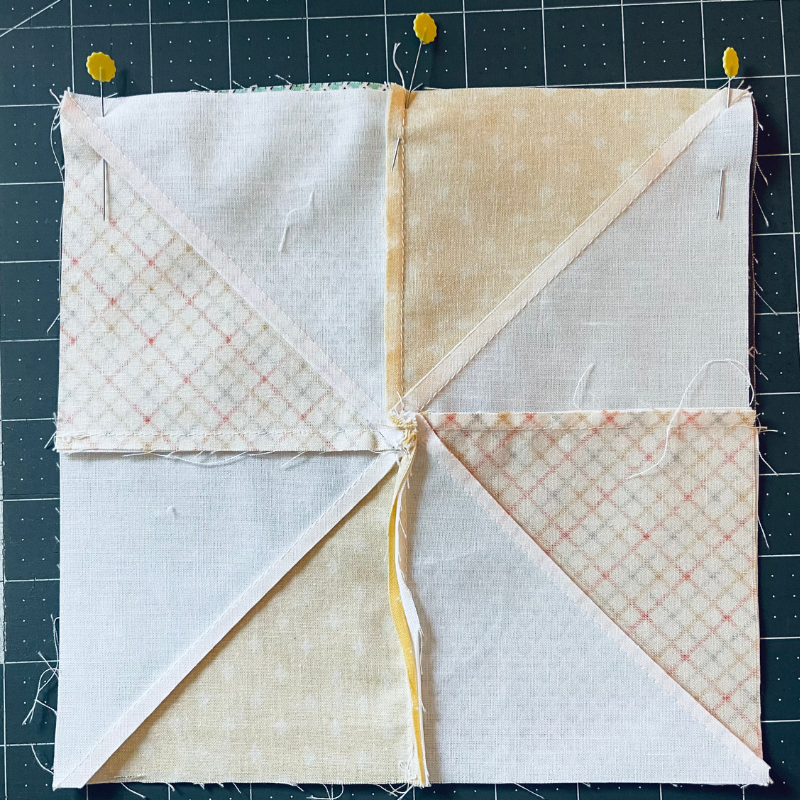
Nesting Seams
Quilt top are usually made by sewing fabric squares or quilt blocks together to make rows. Then sewing rows together. In order for everything to line up correctly, you want to pay special attention to your row seams. Nesting is a term used when for making your seams lay flat, the seams from the two blocks or rows will go in the opposite direction.
If you use your fingers and pinch the seams, they will fall into the center of the seams and lay flat or “nest”. Use your quilting stiletto to help you keep the seams laying in the opposite directions while you are sewing. Use the tool the move the bottom seam that’s touching the sewing plate in the direction you want it to go.
You should also use sewing pins and place a pin everywhere seams connect. I prefer not to iron before attaching but you can if you like. If you don’t press, I find the fabric is more pliable than fabric that is already pressed with an iron. Repeat this process or the remaining squares or remaining rows.
Quilt Blocks
If you want to know how to sew quilt block together, the process is basically the same as sewing squares but you need to nest seams when they meet.
It’s important to nest seams whenever they line up from block to block. If you don’t nest the seams, you run the risk of losing the points and block design you are trying to create. Some find nesting seams easier when they press blocks on the ironing board, others like me find it easier to nest when they are not ironed first.
Different Designs
Quilt designs often use sashing or borders in between blocks. If you are making a quilt with sashing or sashing and cornerstones, you will need to add the sashing the the blocks before you sew the blocks to one another.

Follow your quilt pattern for directions or find a free quilt pattern or sashing tutorial like this one to walk you through the steps.
How To Sew Quilt Squares Together – BEGINNER SUPPLIES
Here are some quilting tools and supplies I recommend. I make a small commission if you purchase through the links, this helps to support this free content. For more info, check out Supplies for Beginners (Best Tools To Start).
Rotary Mat Cutting Mat (Self-Healing Mat)
28 mm Rotary Cutter Replacement Blades
45 mm Rotary Cutter with Sharp Blade (start with this one)
45 mm Rotary Cutter Replacement Blades (start with this one)
60 mm Rotary Cutter Replacement Blades
4.5″ Square Ruler for half square triangles
12.5″ Square Ruler for blocks

This post contains ads and affiliate links, which means I make a small commission at no extra cost to you. While the ads are annoying, it helps keep this blog going. See my full disclosure here.
ABOUT SEW NIKKI
If this is your first time stopping by, welcome! I’m Nikki, a maker obsessed with quilting, crochet, and all things fabric. Here, you’ll find easy-to-follow patterns, helpful tutorials, and plenty of inspiration for your next handmade project. Whether you’re stitching up a cozy quilt, crocheting a vintage-inspired blanket, or diving into upcycled sewing, I’m here to make the process fun and stress-free. Grab your fabric (or yarn), and let’s create something beautiful together!
Weather you are following a quilt pattern or making your own, most patchwork quilts are made with squares or blocks that need to be sewn together to create a quilt top. I hope you learned all the ways how to sew quilt squares together in today’s tutorial. The most important thing is to keep consistent with your seam allowance and enjoy what you are sewing.
Follow me on social media (Pinterest, Instagram, Facebook and Twitter) so you get notifications when I post new patterns and tutorials.
Want to learn how to crochet? Then check out this post, How to Learn How to Crochet – Guide for Beginners.