Free Crochet Rectangle Rug Pattern – Vintage Vibes
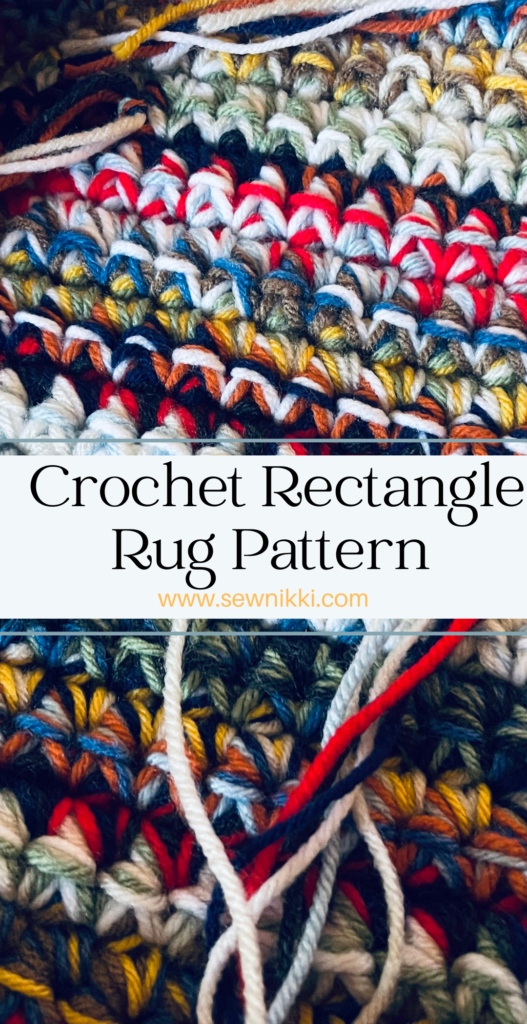
Crochet rectangle rug pattern, bulky yarn pattern. Free crochet pattern for a rectangular rug. Fun project for beginners and any skill level. This rug gives vintage vibes, my favorite. Finished rug measures 25″ x 36″ and looks fantastic anywhere.

Why Vintage Vibes?
When I was growing up in the 70’s, crochet rugs were really popular and most of them where an oval shape available in different sizes depending on what room they would be used in. Large area rug for a bedroom or family room. Smaller sizes for kitchen or bathrooms. The rug colors were either different shades of one color or lots of different colors all mixed together.
This later rug was the most popular and it’s what I refer to as the vintage vibe rug. It was so pretty and it’s a fond childhood memory. So here is my version of that vintage rug but in a rectangular shape. These rugs were mostly used in kitchen’s, bathrooms or as hallway runners.
Vintage Oval Rugs
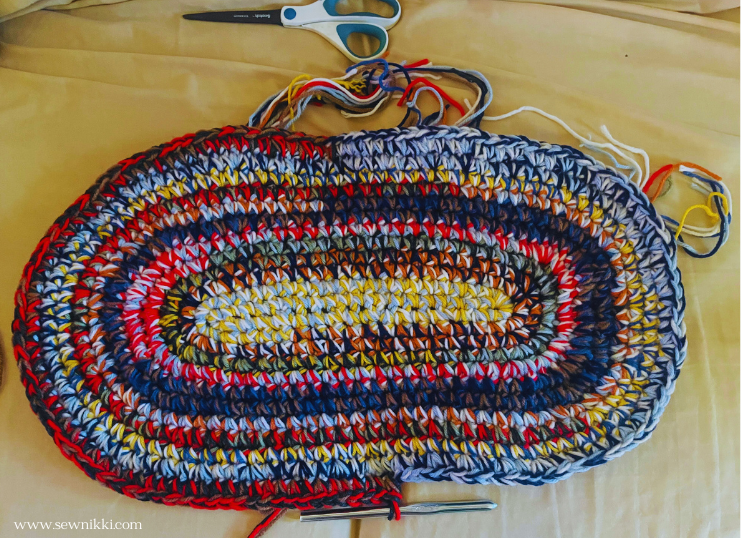
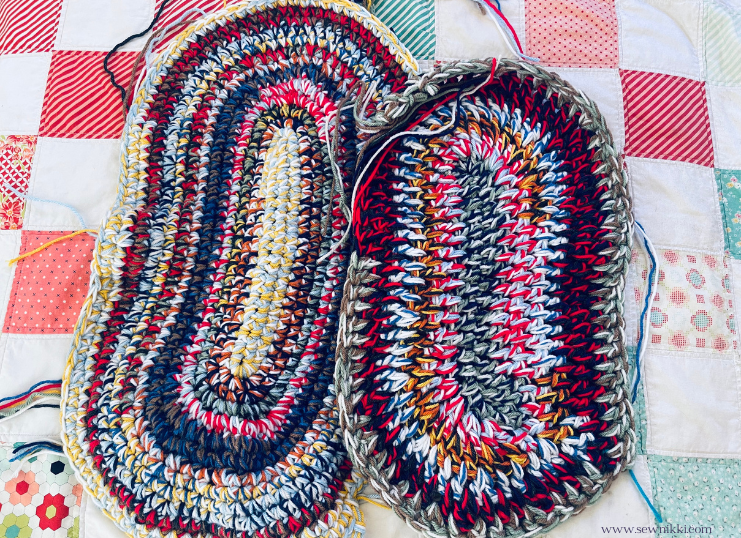
The most popular vintage crochet rug was definitely oval shaped. I have been working on creating an oval crochet rug pattern for the last few weeks. Unfortunately, the rug is curling and NOT laying flat all the way around. I’ve tried two different patterns and neither one lays flat either so I am frogging this project until I can get it right.
Oval crochet rugs need to increase on the ends to round them out and still lay flat but the trick seems to be when you start increasing the ends. I am going to rip out both of the oval rugs I started and reuse all that yarn but not until I’m ready. I’m still mad at that project, I need time to regroup and try tackling it again.
It’s all about getting the stitch increases correct and where to place the increases. I’m beyond frustrated but eventually I will figure it out and post a tutorial on this blog. In the meantime, here is a vintage inspired rectangle rug pattern using simple stitches using three strands of yarn to make it nice and thick like a rug should be.
Here’s a photo of one of those oval rugs I made and how it keeps curling. This oval pattern used double crochet stitches and three strands of acrylic yarn.
Different Sizes
There are so many different size rugs you can make. You can make large, medium or small rugs all rectangular. Adding a handmade rug that you crocheted is a great way to add your own unique style to a small space. Or large space, depending on the size of the area and how much time you want to put into this project. If you want to make a rectangle rug customized for a certain space in your home, here’s how you would do it.
How To Customize Pattern For Your Space
Select the space in your home where you want to add this beautiful rug. Then measure the space so you can make a rectangle rug. Here’s an easy way to figure out rug dimensions to make your own rug that’s customized to your own space.
Take a tape measure, the soft ones that you use to make clothing. Now go to the room where you are thinking of placing a rug. Take measurements until it’s a rectangular shape. Then grab your three strands and crochet hook and build a foundation chain until it measures the smallest measurement you took. This is the width, the smallest measurement. Turn and repeat the stitch until you have enough rows that get to your length measurement. It’s really that easy because you are working with straight lines, no curves or rounded ends.
How To Search For Free Patterns
Try googling these key words in your free crochet rug pattern search: circular rug, oval rug, rectangle rug, rag rug, Tunisian rug, and t-shirt rug.
If you enjoyed making this rectangle rug, then I recommend you try to crochet another rug in a different shape or material. Just remember that the best crochet rug patterns are the ones you can actually finish!
When trying to make the oval shaped rug I quickly found that not all free patterns actually work out. Anyone can post a pattern but unless it’s been properly tested it doesn’t always turn out. When a project doesn’t turn out, not only did you waste your time but you wasted money on the cost of your yarn. On the bright side, you probably learned some lessons along the way and you can reuse the yarn by ripping it out. Fun, not really. Resourceful, definitely!
Types of Textiles and Stitches
You can make a crochet rug with T-Shirt Yarn, old T-Shirts, old sheets, Cotton Yarn, rug yarn, thick blanket yarn or acrylic yarn. I found that the easiest and fairly inexpensive textile is using acrylic yarn. It’s durable and should last a long time, and makes for the perfect accent piece in any room I put it in. Adds a pop of color to a plain area of the house.
I used double crochet stitches for the oval rug samplers but decided on single crochet stitches for the rectangle rug. The clean lines in this crochet rectangle rug pattern was the perfect way to show off the amazing color combination in this rug.
This pattern uses the single crochet stitch and here’s why. It’s easier to crochet when you are using several strands of yarn and it’s a clean look when finished. Basic stitches are sometimes boring but you will like the finished results just using basic crochet techniques. Basic crochet stitches in this rug help to form very solid lines in the rug and I think it’s a beautiful thing.

Yarn Used for Vintage Vibe
The best yarn to use for this project is yarn you already have in your stash. Every time I begin a new project, the first place I go for the materials is my stash. Try to use what you have and then figure out what you need. Then see where the sales are if you need more yarn and try to buy on sale.
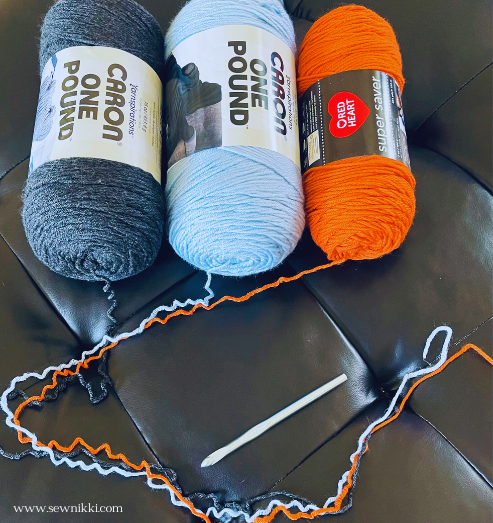
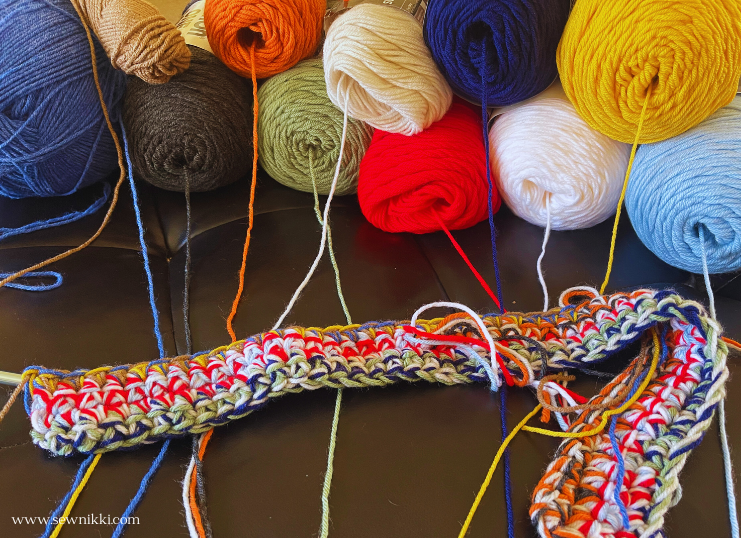
This vintage rug used a wide variety of Yarnspirations yarns. For this project you don’t need to use fancy yarns. Use Red Heart or Caron yarn for this crochet project. These yarn brands will give you the heavy weight you need for a rug when you use three strands of yarn at a time.
It’s the perfect project for using your yarn stash and really grabbing as many vibrant colors as you can. Audition the yarn colors and weed out any that are just not working with the other colors. I only looked at solid colors of yarn, but looking back you could use any type of yarn colors and it would not matter. For example, I really wanted to use a bright orange or dark green but ended up using a sage and burnt pumpkin.
Handmade Items Can Get Expensive To Make
All crafters already know this but if you are just starting to crochet, please know that not all projects are created equal. I have walked away from trying certain projects based on how much the yarn would cost and how many skeins I would need.
That’s why handmade is not always the least expensive, it usually costs more at first. When you are first starting out you don’t have stash yarn to pull from. It takes a while to build up your stash. If that’s the case, shop for yarn only when it’s on sale and try to stay away from the premium yarns.
For this project, I had to buy 8 skeins of yarn for this project and even with some on sale the cost was just under $60.00 US. Now that can seem like a lot for a crochet rug but here’s the thing. Out of all that yarn, I can probably make 4 or 5 different size rugs making it pretty economical in the end.
Make sure you check this out!
Are you an absolute beginner and you want to learn crochet? After you read this post, make sure you check out Learn To Crochet for Absolute Beginner’s. It’s jam packed with even more information, links and resources that are so helpful when you’re first learning. It also has a section with free patterns that are great for beginners. So make sure you check this out, seriously don’t forget!
Grab the Shell Stitch Afghan crochet pattern, I’ll send the printable version directly to your email.
Materials Needed
This pattern used a variety of I used acrylic yarn that was purchased on sale at Joann Craft Stores and also yarn from my stash. You can use any kind of yarn but make sure it’s 4 ply worsted weight yarn. The materials are very common and you should be able to go to your local craft store or shop online to purchase. This project is for any skill level. Finished rug measures 25 inches by 36 inches. Here is a list of all the yarn used for my version pictures in this post.
- Red Heart Super Saver Yarn – Pumpkin, Aran, White, Frosty Green, Cafe Latte, Soft Navy (1 skein each)
- Caron One Pound Yarn – Scarlet, Canal, Sky Blue, Dark Gray Mix, Sunflower, Succulent (1 skein each)
- Lion Brand Pound of Love Yarn – Denim (1 skein)
- Hook Size M (9.00 mm)
- Yarn needle
Vintage Vibes Crochet Rectangle Rug Pattern (FREE)
Crochet Hook Size = M 9.00 mm
Assortment of acrylic 4 ply yarn in your favorite colors.
Sc = single crochet
Sl st = slip stitch
Please note: This rug is made using lots of different colors. To get the thickness, you need to use 3 strands of yarn in different colors.
Make a starting chain of 48 single crochet stitches using 3 strands of yarn, then turn.
Start in the second chain from hook and single crochet in all stitches for a total of 47. Chain 1 and turn.
Repeat this simple pattern until you have a total of 73 rows. Change yarn when you want to start a new pop of color. It’s that simple!
It does not matter what side of the project you change the yarn on. You will be weaving tails when done from both sides of the finished project.
Finish with a slip stitch and tie off.
Weave Tails
This rug is so colorful and I’m really pleased with the way it looks. Now, the only down side to using lots of colors is that there are LOTS of tails to weave in. There are 6 strands of yarn for each color change and I recommend weaving each strand separately. Put something good of the television and weave your tails while you watch your program. You could also zone out to an audiobook too.
Make sure all tails are knotted once before you weave. Take yarn needle and weave tails into blanket. When you weave yarn into any project, try to run the yarn needle up a row and hide it in your work. Weave each tail separately. Make sure it looks like on the reverse side before cutting excess tail. Because we used 3 strands of yarn in different colors, the tails should not show after you weave. The tails will get lost in the rug which is a good thing.

Washing Instructions
Place in the washing machine, use cold water on the gentle cycle by itself with a little laundry detergent. Tumble dry on low cycle for about 30 minutes. Do not add bleach and do not iron.
Make Your Rug Non-Slip
If you are laying your crochet rug on tile, hardwood or even linoleum surfaces then try using a grip rug pad. You can find some on Amazon or at Home Depot. Do not use rug grip tape, you don’t want to ruin your crochet rug and you can’t wash the tape without leaving sticky residue in your rug. Use the rubber grip pad’s instead. You can trim the pad down if they don’t have it in your rug size. Just use regular scissors to cut a little smaller than your rug so it won’t show.
More Patterns You May Like
SAVE THIS PIN FOR LATER!
ABOUT SEW NIKKI
Welcome to Sew Nikki. Your place for free crochet, sewing and quilt patterns for beginner to intermediate skill levels. Want a digital pattern? We have those too! Plus tutorials to walk you through how to make each item from start to finish.
For more crochet tutorial & patterns, check out The Pattern Index.
Follow me on social media (Pinterest, Instagram, Facebook and Twitter) so you get notifications when I post new patterns and tutorials.
This post contains ads and affiliate links, which means I make a small commission at no extra cost to you. While the ads are annoying, it helps keep this blog going. See my full disclosure here.


This looks absolutely adorable! And the perfect project for the rainy days ahead. Thank you for sharing!
Thank you!
I’ve got a ton of yarn laying around and need a new rug at our back door….I may need to try this!
Such a fun and colorful throw to make and use around your home. Thanks Meghan