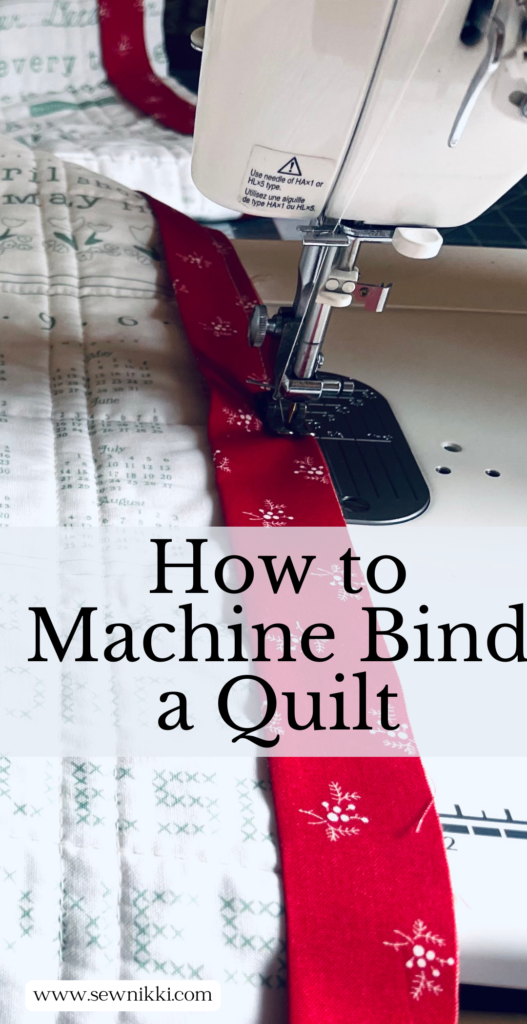
How To Sew Binding on a Quilt
How to sew binding on a quilt, machine binding tutorial. Sharing my tried and true quilt binding process on a sewing machine with you, demonstrating on my Log Cabin On-Point Quilt Pattern. If you are slightly afraid of machine binding, don’t be! With a few tips and your home sewing machine, you’ll be on your way to achieving beautifully bound quilts in no time. Standard quilt binding is 2.5″ wide by width of the fabric and double folded attached to back of your quilt first and then to front side using a sewing machine. This tutorial will cover this binding style and method.
There are lots of different methods to sew binding on a quilt. For my first quilt, I attached binding to the front of the quilt using the sewing machine and then finished attaching to the back of the quilt by hand quilting. I’ll never do that again, it takes forever to hand stitch binding especially if you are working on a queen or king size quilt. There is a stitch line that will appear on the side of the quilt you began binding on. For me, I have no problem with that line, but prefer to have it show on the back of the quilt. That’s why I start binding on the back of the quilt first.
Binding and Backing (Fabric Chart)
Quilt sizes can vary, but here are some general dimensions for common quilt sizes along with estimates for binding fabric and backing yardage. Keep in mind that these are approximate values, and it’s always a good idea to measure and calculate based on your specific quilt to make sure your binding fits all the way around the quilt with 20″ extra for joining ends.
- Baby Quilt (30″ x 40″)
- Binding: Approximately 1/2 yard
- Backing: Approximately 1 to 1.5 yards
- Crib Quilt (36″ x 52″)
- Binding: Approximately 5/8 yard
- Backing: Approximately 1.5 to 2 yards
- Lap Quilt (50″ x 65″)
- Binding: Approximately 3/4 to 7/8 yard
- Backing: Approximately 2.5 to 3 yards
- Twin Quilt (68″ x 88″)
- Binding: Approximately 1 to 1.25 yards
- Backing: Approximately 5 to 6 yards
- Full/Double Quilt (80″ x 90″)
- Binding: Approximately 1.25 to 1.5 yards
- Backing: Approximately 6 to 7 yards
- Queen Quilt (90″ x 90″ to 100″)
- Binding: Approximately 1.5 to 1.75 yards
- Backing: Approximately 7 to 8 yards
- King Quilt (100″ x 100″ and above)
- Binding: Approximately 1.75 to 2 yards or more
- Backing: Approximately 8 to 9 yards or more
These estimates are based on the assumption of using fabric that is 42-44 inches wide. If you choose wider fabric, you may need less yardage. Additionally, if you plan to piece your backing or use a directional fabric, you might need to adjust the yardage accordingly. Always remember to add a little extra to account for any cutting errors or shrinkage during the quilting process. It’s better to have a bit more fabric than not enough! For more info, check out Best Fabric for Quilting – How to Shop Like a Pro! and Pieced Quilt Backing Ideas – Super Simple Backs.

Make sure you check this out!
After you read this post, make sure you also check out How To Learn How To Quilt: Beginner Quilting Guide. It’s jam packed with even more information, links and resources that are so helpful when you’re first learning. It also has a section with free quilt patterns that are great for beginners. So make sure you check this out, seriously don’t forget!
Make sure you grab a copy of my free Quilt Planning Journal. It’s filled with graph paper and note pages to help you design at least 4 quilt or sewing projects! Use it to jot down ideas, fabrics, patterns and inspiration all in one place. Or create your own patterns and share with others. Pin in fabric swatches, photos of your finished quilts and enjoy your creative process!
How To Sew Binding on a Quilt TUTORIAL
Materials You’ll Need
- Quilt with completed quilt top and batting
- Fabric for binding (preferably pre-cut strips)
- Rotary cutter and cutting mat
- Quilting ruler
- Sewing machine with a walking foot
- Matching thread
- Iron and ironing board
- Pins or binding clips
Cutting Instructions
Iron your fabric before cutting, then get out your cutting mat and rotary cutter with a fresh blade for easy cutting. Your fabric already comes folded in half (single fold), selvage edges should be facing in downward direction on your mat with raw edges facing to the left and right. If you only have one layer of fabric, you are doing something wrong.
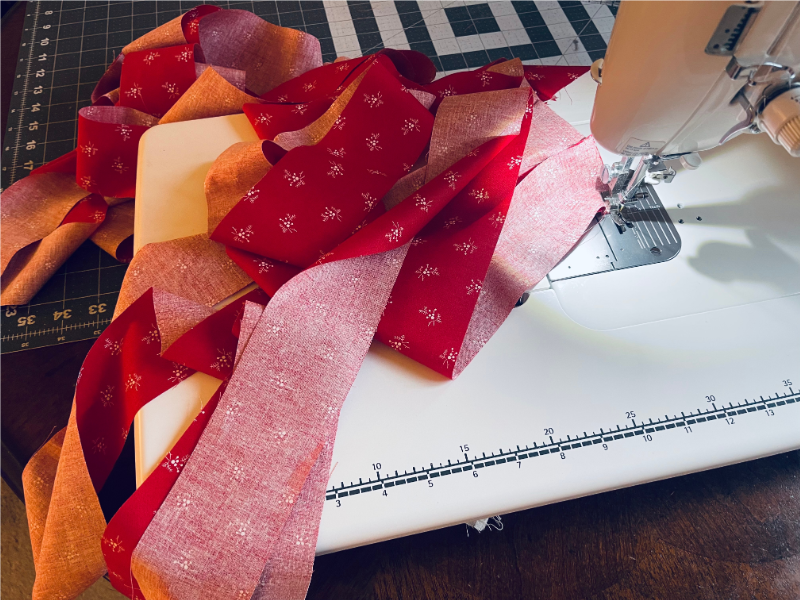
Now cut a strip that is 2.5″ by width of fabric. Take that strip of fabric over to your quilt top.
Use this one strip to measure around the outside of your quilt top and this is how many strips you need to connect for the continuous binding strip length. Or you can cut a few strips until you have enough strips going around your quilt top. Sew these strips together using 1/4″ seam allowance.
Don’t let your quilt drag
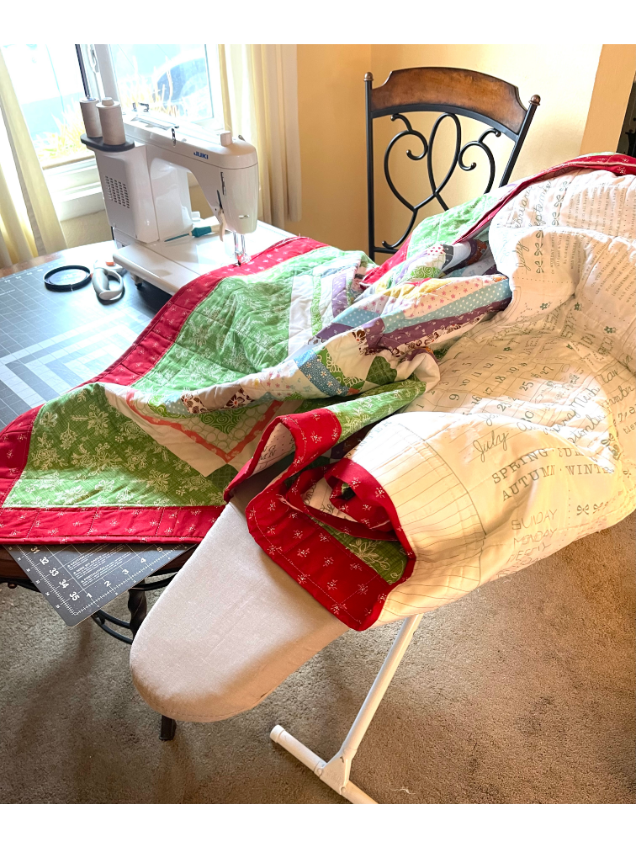
Make sure you don’t have drag when quilting. You want the quilt lifted up and not dragging down to the floor. When it’s dragging, it makes it almost impossible to quilt.
I have a small sewing table and use this trick to lift the quilt off the ground. Use an ironing board. Place the quilt that usually hangs off the machine and put it on an ironing board. Push the board forward or backwards to get the quilt sandwich to lay flat under machine. I use this method when attaching the binding.
Join Binding Strips
Place straight edges of two ends of the strips with right sides facing each other and sew together with quarter inch (1/4″) seam line. Continue adding the smaller strips until you have all fabric strips in one continuous binding strip that is enough to go around your quilt top with extra for the corners and finishing off when quilting.
Length of Binding: The total length of your quilt binding will depend on how many 2.5″ by width of the fabric strips you need for your project plus a little extra for good measure. Note: When you are adding binding at sewing machine to finish your quilt, you want extra binding for the last step of quilting. This last step is when you trim off the excess binding and do the final join on the quilt. You want extra binding in order to be able to sew it while it’s partially quilted.
Double Fold Binding
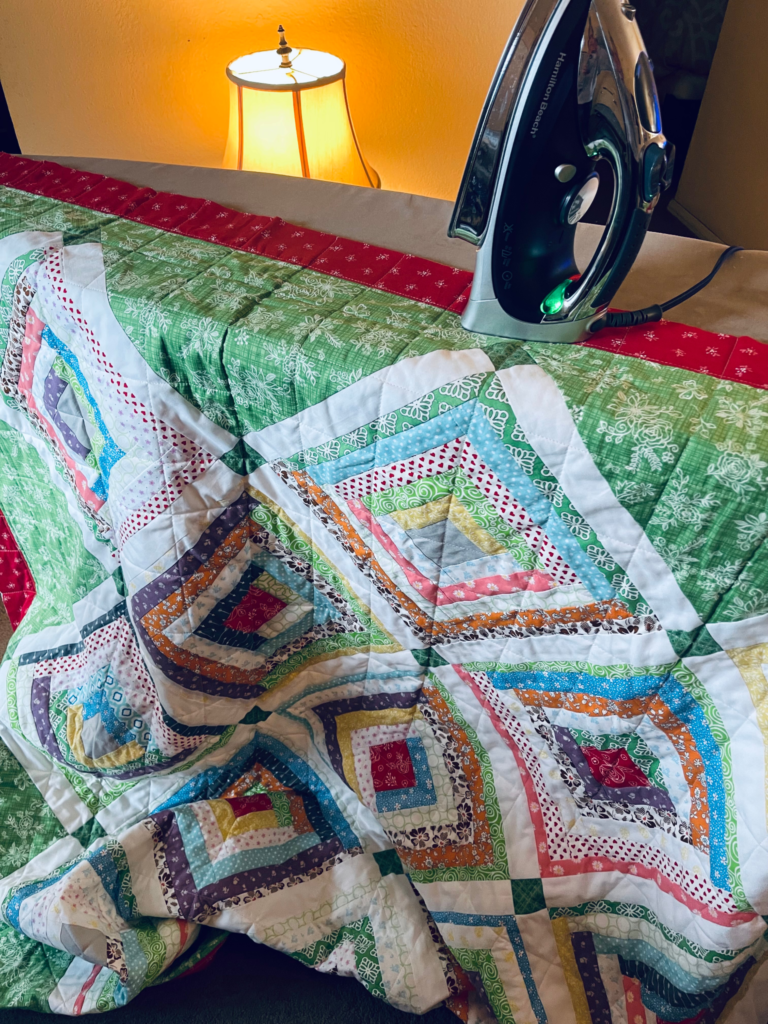
Final step is to make a double-fold binding. Take your long quilt binding strip to the ironing board and give it a good press with iron. Really press the seams and get as flat as possible. One way to do this is to press the seam down the middle and open it. Pressing seam to left or right will make a bump and it’s harder to sew onto quilt.
Next, fold your binding in half, wrong sides facing down and press the entire strip. This gives you a double fold and crisp look for your finished binding.
Press First
Press your quilt really good around the edges so it’s nice a flat. You don’t need to iron the entire quilt, just iron along edges on all four sides.
Machine Binding
No matter the size of your quilt, the process will always be the same when sewing on binding. First step, change your 1/4″ presser foot for your walking foot.
Next, take your quilt sandwich (three layers of fabric including quilt top, batting and backing fabric) to machine and lay under the machine throat and walking foot.

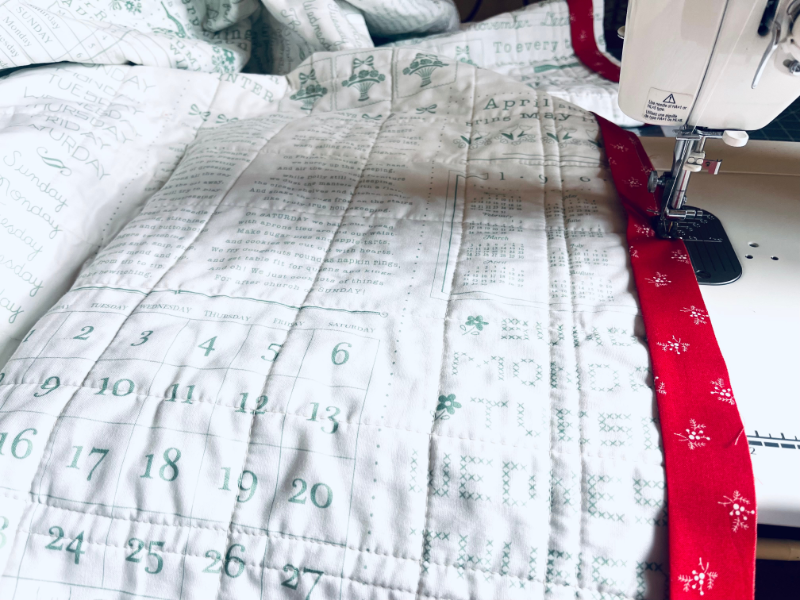
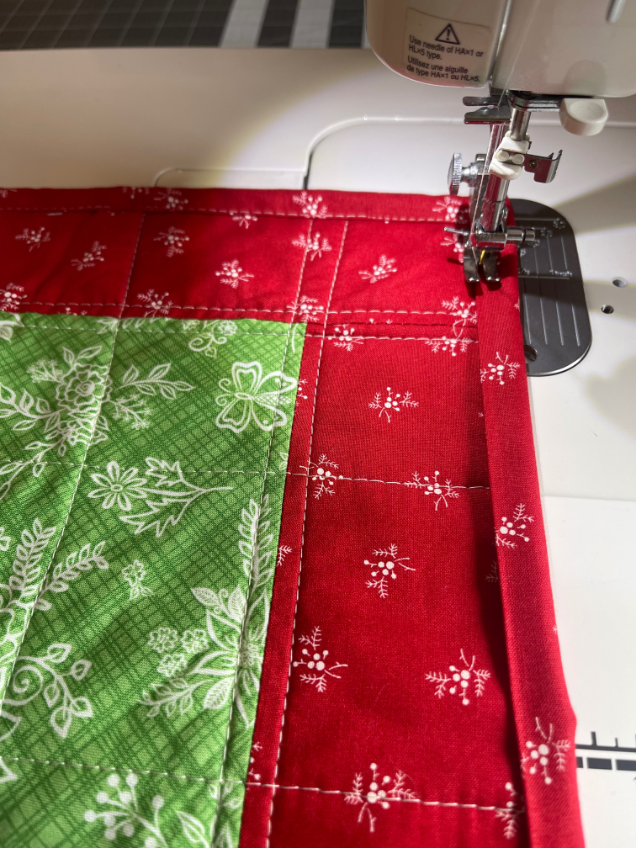
Starting on one side of your quilt, place your binding on the quilt, up against the quilt’s edge. The folded edge of the binding should be facing away from edge of quilt. The raw edge of the binding should be against edge of quilt top.
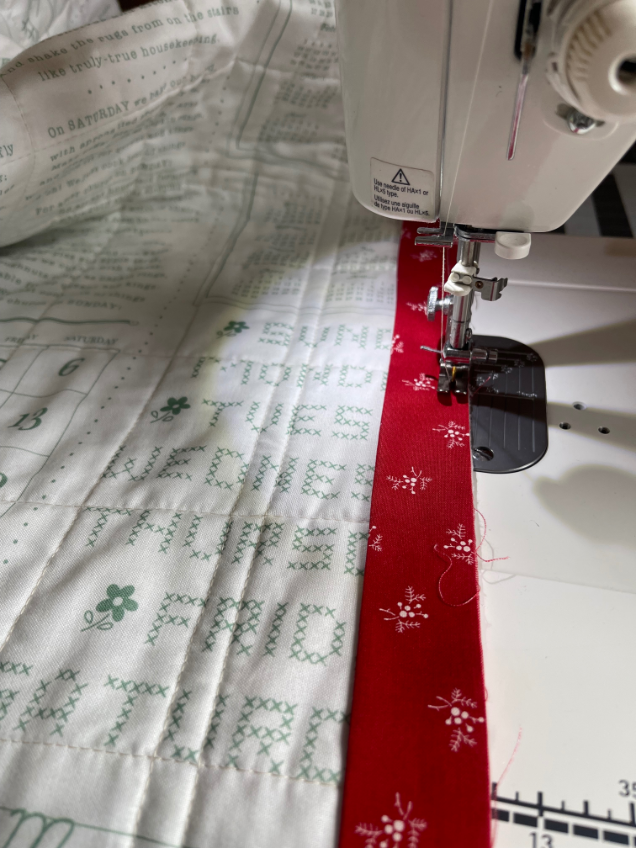
Place your quilt with backside facing upwards and find the middle of that quilt side.
Pro Tip: Do not start binding on the front side of the quilt, start on the back side first. You want to finish binding on the front of your quilt so that the stitches from binding the first side appear on the back of the finished quilt. The binding will be smaller on the side you start on, and the binding will be larger on the last side you bind. It’s your quilt, start on whatever side you prefer.
Attaching Binding
Lay your binding strip in the middle section with folded raw edges facing toward raw edges of the quilt. Leave 10 extra inches of binding and then beginning sewing. Needle position should be down, place presser foot to the edge of the quilt top with binding lined up underneath. The folded edge of your binding strip should be lined up to the edge of your quilt.
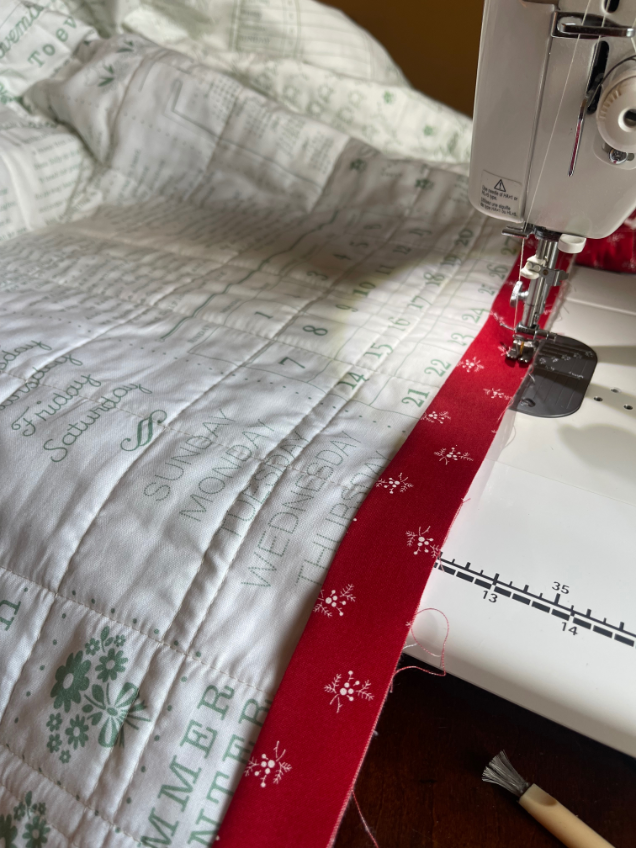
Set your stitch length to 3.5, adjust the know for your pressure foot and lift your foot all the way up to avoid puckering. Begin attaching binding with straight stitching line down the quilt length. Always use a quarter inch seam. Stop sewing when you are 1/4″ before the end of the quilt. Sew off the quilt with a right angle and cut thread as pictured below.
Binding Quilt Corners
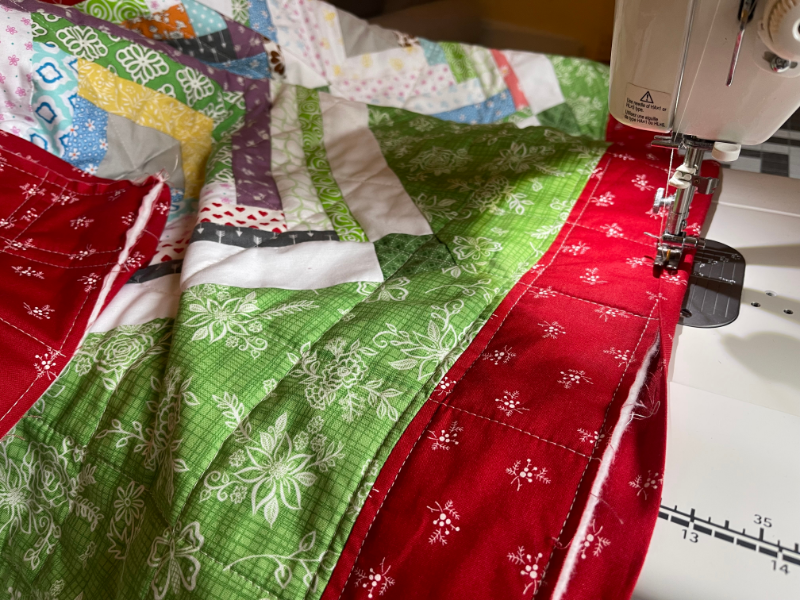
Miter the corner by pulling binding up and to the right (it will be a right angle). Use a right angle to miter the corner. Place binding on quilt top to repeat the process until get to the side you started on.
Stop attaching the binding when you are 15 inches from the beginning of the binding strip and cut thread. Make sure you leave enough room for you to attach the binding ends on your sewing machine. Remove quilt from machine and lay on a flat surface, preferably your cutting mat.
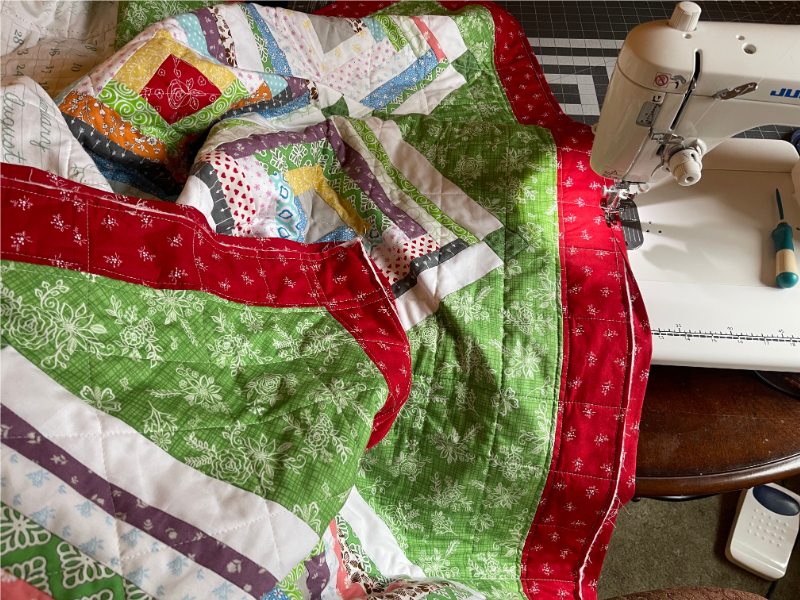
How to Join Binding Ends
This is the easiest way to join binding ends. Fold both binding pieces in half and leaving 1/4″ between both sides of binding.
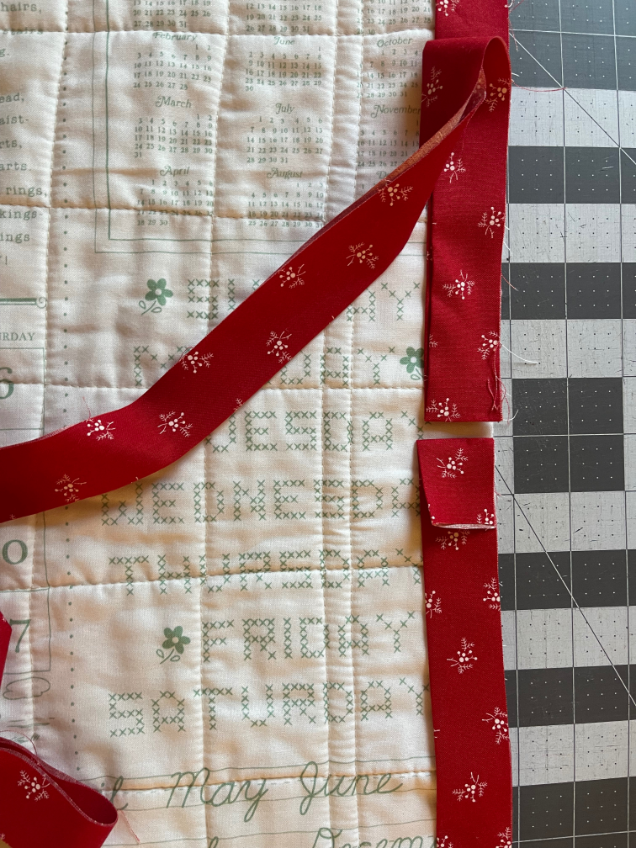
Press a crease in the fabric to mark 1/4″ . Cut extra binding and remove. Take both end of binding, right sides facing each other and use sewing pins to pin together. Take to sewing machine and join with quarter inch seam.
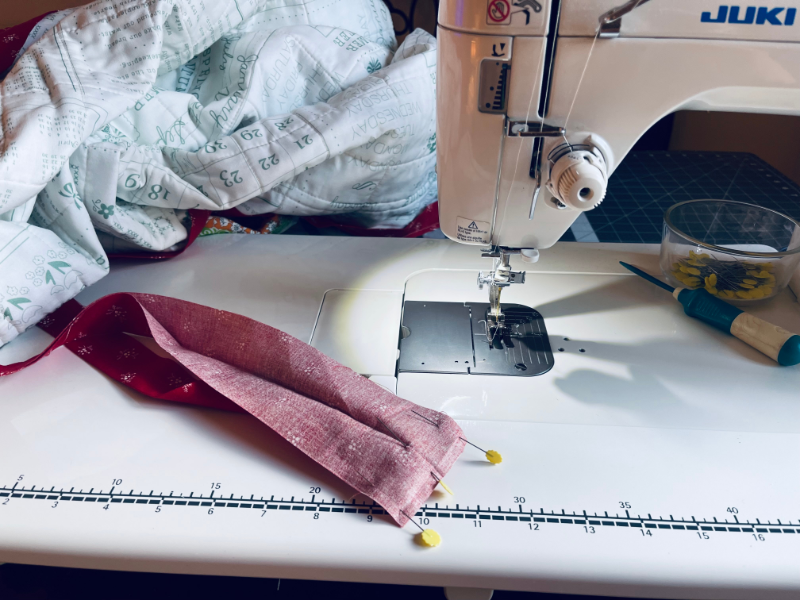
Fold your quilt in half or over itself so that you can squeeze the binding under the needles and join the strips of binding together. Finger press the seam in middle and gently fold the finding back into a double-fold binding and do a fit check. Binding should lay perfectly on quilt. Use sewing pins if needed to pin binding in place the sew in place. Place your needle down, sew forward, then backstitch and continue forward sewing. Sew over the starting stitches, back stitch as your last stitch then cut thread.
Take quilt back to sewing machine and attach to the next side of the quilt. Quilt top facing upwards and find the middle of the quilt side. Fold the binding into place, pulling it to the left but not stretching it out of shape.
Don’t start on any binding joins. Place you needle down and sew with straight stitching or a decorative stich to secure binding to front of quilt. This time line your pressure foot to the left side of the binding strip to attach. Keep your needle as far to the left as possible without going off the left edge. Double stitch when you get to your starting place and cut your threads.
You just completed your quilt, way to go! Enjoy your accomplishment, well done.
BEGINNER QUILTING SUPPLIES
Here are some quilting tools and supplies I recommend. I make a small commission if you purchase through the links, this helps to support this free content. For more info, check out Supplies for Beginners (Best Tools To Start).
Rotary Mat Cutting Mat (Self-Healing Mat)
28 mm Rotary Cutter Replacement Blades
45 mm Rotary Cutter with Sharp Blade (start with this one)
45 mm Rotary Cutter Replacement Blades (start with this one)
60 mm Rotary Cutter Replacement Blades
4.5″ Square Ruler for half square triangles
12.5″ Square Ruler for blocks
SAVE THIS PIN FOR LATER!
This post contains ads and affiliate links, which means I make a small commission at no extra cost to you. While the ads are annoying, it helps keep this blog going. See my full disclosure here.
ABOUT SEW NIKKI
If this is your first time stopping by, welcome! I’m Nikki, a maker obsessed with quilting, crochet, and all things fabric. Here, you’ll find easy-to-follow patterns, helpful tutorials, and plenty of inspiration for your next handmade project. Grab your fabric (or yarn), and let’s create something beautiful together!
I hope this tutorial on how to sew binding on a quilt was helpful to you. With practice, this technique will become second nature, allowing you to enhance the beauty and longevity of your quilting projects.
Follow me on social media (Pinterest, Instagram, Facebook and Twitter) so you get notifications when I post new patterns and tutorials.
Want to learn how to crochet? Then check out this post, How to Learn How to Crochet – Guide for Beginners.


You are sooo talented & eloquent at explaining “how to do each step” so that others can read & understand easily!!
Keep up the good work, Nikki!
We have the same Juki! I just got mine in August, and I love it so much! Thank you for another great sewing post. I look forward to your next one!