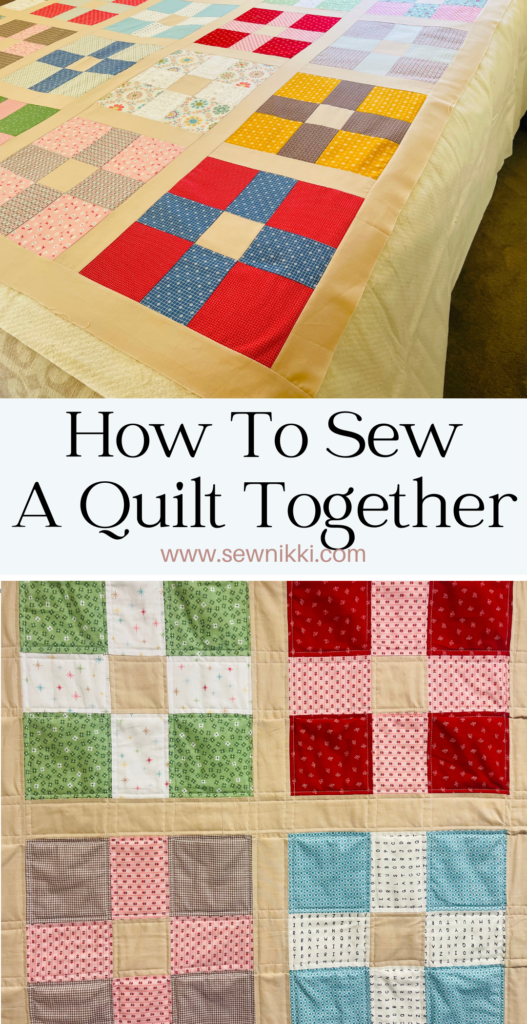
How To Sew A Quilt Together – Quilting For Beginners
How to sew a quilt together. Beginner friendly tutorial to turn your quilt top into a finished quilt. Tutorial covers quilt top, quilt sandwich, backing fabric, machine quilting and attaching binding. Let’s get started.
If this is your very first quilt, then I suggest making a charm square quilt with one or two 5″ precut charm packs and safety pins to make your quilt sandwich. Once you get the hang of that, follow the spray basting method. The quilting process will be the same no matter the size of your quilt.
MAKE SURE YOU CHECK THESE OUT!
After you read this post, make sure you also check out Learn How to Quilt for Absolute Beginners. It’s jam packed with information to make your first quilt. It also has links and resources that are so helpful when you’re first learning. There’s lots of free quilt patterns that are great for beginners and all skill levels too. So make sure you check this out, seriously don’t forget!
Make sure you grab a copy of my free Quilt Planning Journal. It’s filled with graph paper and note pages to help you design at least 4 quilt or sewing projects! Use it to jot down ideas, fabrics, patterns and inspiration all in one place. Or create your own patterns and share with others. Pin in fabric swatches, photos of your finished quilts and enjoy your creative process!
How to Sew a Quilt Top – The Basics
Quilt Top
A quilt top is the front of your quilt. Most quilt tops are made by following a quilting pattern or by selecting a quilt block and making enough blocks to get to your desired size. When you’ve made enough quilt blocks you can add sashing or simple border to complete your quilt top.
All About Backing Fabric
Backing fabric is for the back of your quilt. Backing fabric will need to be sewn together to make it big enough to cover the quilt top. Take you one large piece of backing fabric, cut in half with rotary cutter, sew both halves together using quarter inch seam allowance.
Backing fabric does come in wider sizes, 108″ and 120″. 108″ wide fabric will have no problem covering a queen size quilt top but may not be wide enough for a king size quilt. Make sure you check the bolt that the fabric is on to see what width it is. 120″ width will cover king size quilts up to 115″ with a little extra. If you use a wider backing, you only need half the amount.
Best Backing Fabric for Beginners
There are lots of options for backing fabric. However, a lot of people say the best fabric for beginners is a print fabric. Why? Because a print fabric will hide your beginner straight line quilting stitches until you get better with practice. If you use a solid fabric then your quilting stitches will not have anywhere to hide. If you use standard fabric, you will need to sew your backing piece to make it big enough to cover your quilt top. Just use scissors to cut away excess fabric. Go to your local quilt shop to see their selection of 108″ and 120″ width fabrics. For more info, check out Best Fabric for Quilting – How to Shop Like a Pro! and Pieced Quilt Backing Ideas – Super Simple Backs.
Quilt Sandwich
A quilt sandwich is two layers of fabric with quilt batting in the middle for a total of three quilt layers. To make a quilt sandwich you will need to baste it on a flat surface. I have a small sewing space so my personal preference is to baste on my king size bed. There are different ways to baste a quilt: basting spray or safety pins.
The favorite method is spray basting, that’s what I use for my own quilts but try both and see which one you like better. After you spray the quilt top to the quilt batting, flip and spray the quilt backing fabric to the quilt batting. You now have a quilt sandwich. Next step is to take to your ironing board or large table and smooth out any creases then let it dry until the next day for best results. For more info, check out How to Sandwich a Quilt Step-By-Step Tutorial.
Right Sides vs. Wrong Sides
Unless otherwise stated, I am referring to right sides in this tutorial. Once you are working with a quilt top, backing fabric and batting then you are only working on the finished quilt. Right sides will always be facing outwards. Wrong side of the fabric is used when making the quilt top and piecing it together.
Machine Quilting on Domestic Sewing Machine
There are two ways you can quilt on most domestic sewing machines. Machine quilting with straight lines or free-motion quilting. Please note that you can only free-motion quilt if your machine lets you lower the feed dogs. If it doesn’t let you do that, then your machine cannot free motion. Straight line quilting is perfect for beginners, you just need to follow seam lines in your quilt top. Let me show you how to machine quilt with straight lines below.
You can opt for straight line quilting, free motion quilting, or any other quilting design that inspires you. For more info, check out How to Machine Quilt With Walking Foot for Beginners.
How To Sew A Quilt Together – Instructions
To begin, you need to find the middle of your quilt sandwich and roll both sides towards the middle until the right roll will fit in your sewing machine throat. This is the section on your sewing machine between the section where the hand turn dial is and where you sew (where the needle is).
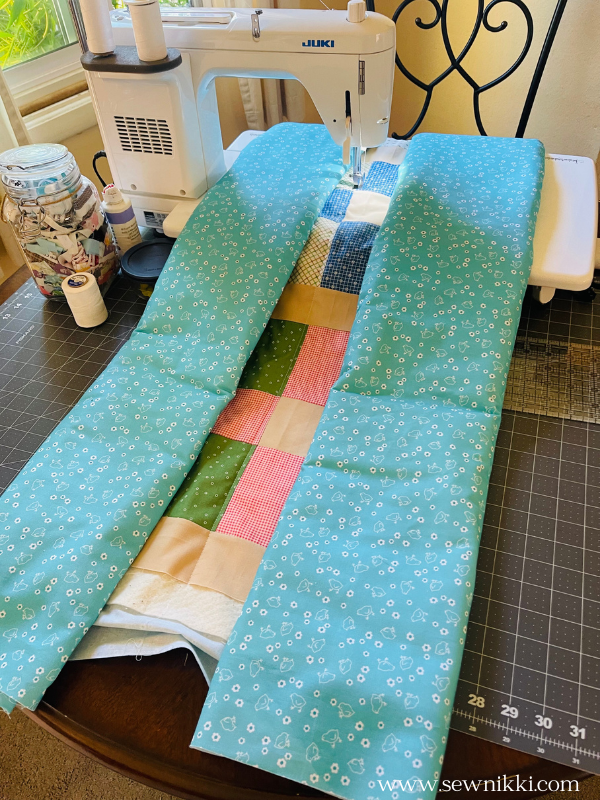
You will begin quilting in the middle section of the quilt and working your way to the right until done, rolling up on the left side and unrolling the right side as needed. Start at the top of the quilt just before the quilt top begins (your walking foot should be sitting on top of the batting).
First line that you quilt will be in the middle section of the quilt. Start in the middle of the quilt, right side facing up, and with stitch length set to 3 , sewing machine’s feed dogs are up in the standard position (and not lowered for free motion quilting).
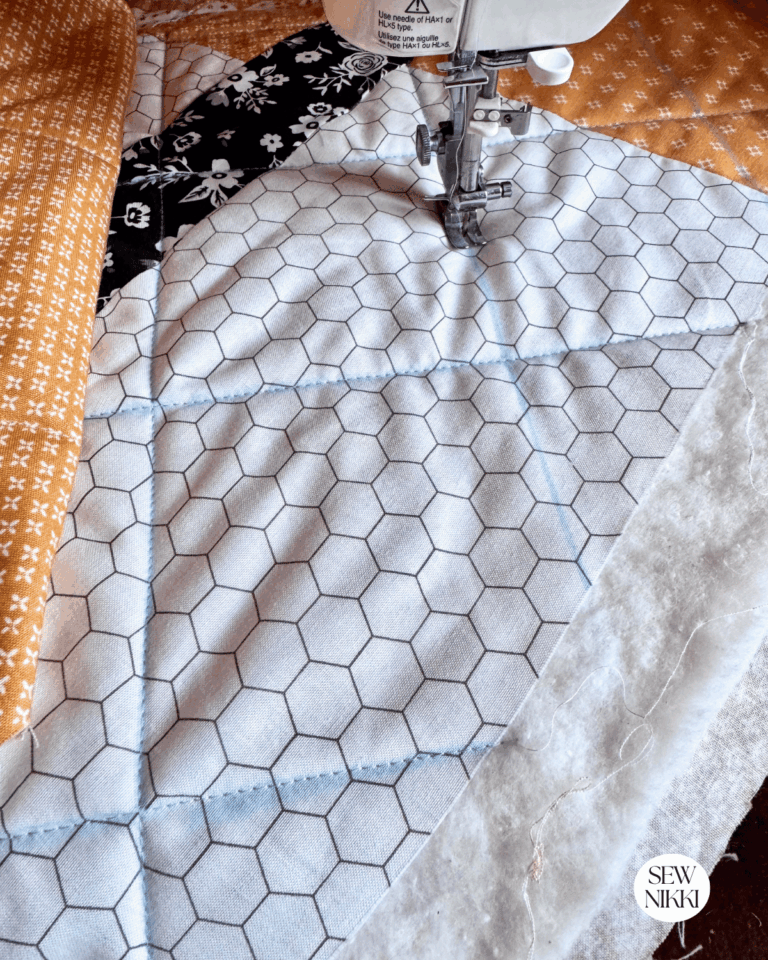
Straight Line Stitch
Line up your presser foot or walking foot so that it touches the seam line on your quilt top and you sew a straight stich from the top of the quilt all the way off the bottom of the quilt. Then flip the quilt and do the other section starting in the middle and working your way to the right. Now you will have one half of the quilt complete. Now it’s time to turn it and the other direction and repeat the steps above. Once you have quilted each side in opposite directions, you are done. If you make any mistakes, use a seam ripper and redo.

Now Quilt In Opposite Direction
Next, you will take your quilt sandwich and unroll it. Now we are going to quilt in the other direction. Again, find the middle of the quilt and roll up both sides so that it will fit in your sewing machine throat. Follow the steps above, starting on the batting before your quilt top begins.
Follow the seam line with your foot up against the seam and sewing a straight stitch all the way to the bottom of the quilt top. Make sure you start and stop sewing a little before the quilt top and a little after the quilt top ends. You want to quilt on the entire quilt top so you don’t mess any portion of it.
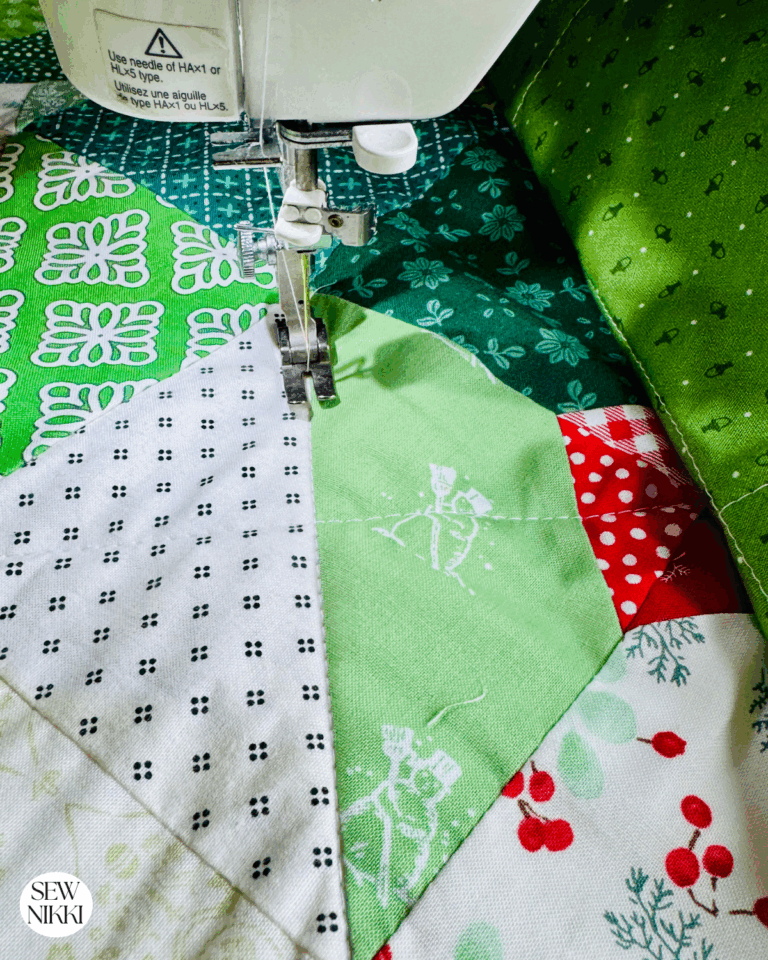
Machine Quilting With Straight Lines
Following the seam lines in your quilt top with straight line stitches when quilting is the best method for a beginner. I use this easy way to set the quilting line or stitching lines when machine quilting with a walking foot.
Sewing next to the seam lines with straight lines is my go to stitch for beautiful quilts every time. I highly recommend this stitch design when you are new to quilting or trying to quilt for the first time. Find your grove and finish that quilt!
Trim Quilt
Iron your quilt and then trim up the sides using rotary cutter, cutting mat and quilting ruler. Square up the corners with a square quilting ruler.
Binding
Make your continuous binding strip to fit around the entire quilt with 15″ extra to machine attach. The most common binding width is 2.5″ by width of fabric. Take your binding fabric and cut strips that when connected will go around entire quilt. Join strips with straight seam or diagonal seam. For more info, check out How Wide to Cut Quilt Binding and Make Easy Strips, How to Join Quilt Binding Ends, Beginner Series and How to Bind a Quilt – Easy Single Fold Binding.
Beginner Quilting Tips
Machine Quilting Simple Patchwork Quilt
Machine quilting is not easy to do. It’s supposed to be the easiest method but it’s a lot of work. Make sure you don’t have drag when quilting. You want the quilt lifted up and not dragging down to the floor. When it’s dragging, it makes it almost impossible to quilt.
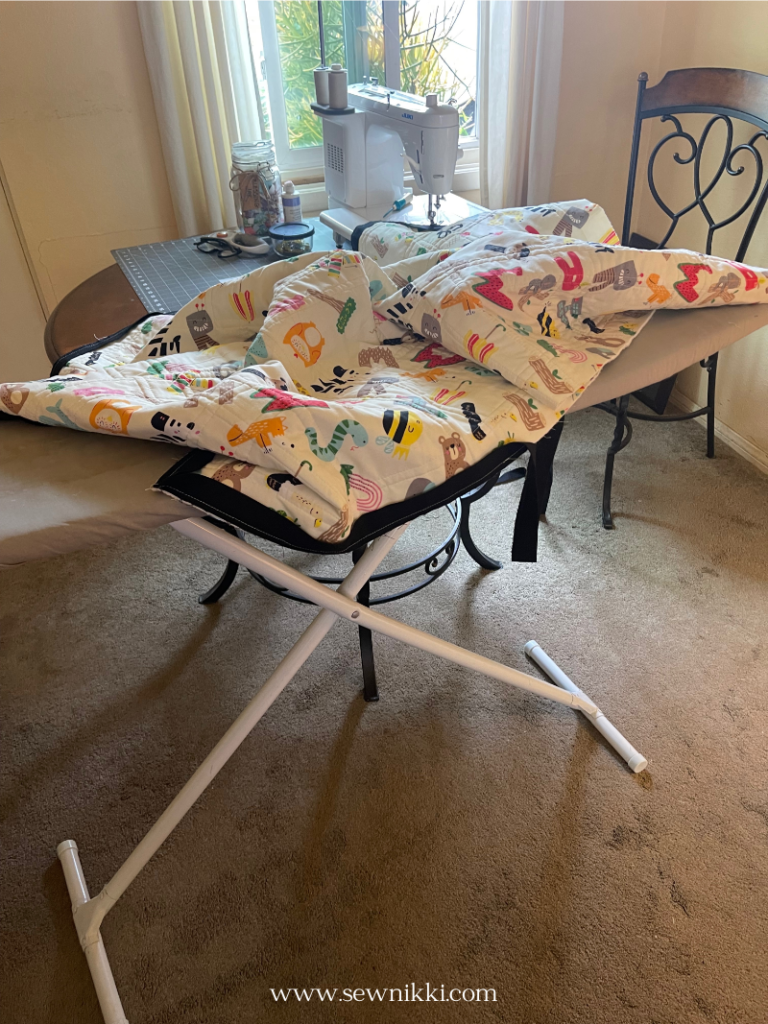
I have a small sewing table and use this trick to lift the quilt off the ground. Use an ironing board. Place the quilt that usually hangs off the machine and put it on an ironing board. Push the board forward or backwards to get the quilt sandwich to lay flat under machine. I use this method when attaching the binding. Check out my tutorial on how to cut and attach quilt binding here.
When you machine quilt there are lots of times it may not always look pretty. Keep quilting. You need to finish the entire quilt sometimes until you are done and have it washed for the first time. Machine quilting on a home sewing machine is a lot of work especially if the throat on your machine is small. I can’t tell you how many times I thought my quilt was ruined due to my quilting only to be happy when it looked alright when done. It looks even better once you wash it and the stitches and fabric melt together.

Longarm Quilter and Quilting Services
If you are lucky enough to have a longarm quilter available and know how to use it, then by all means use that. For the rest of us, we just have to make it work on our home sewing machines. You can also make the quilt top and pay someone to quilt it. Check out your local quilting services by googling it. You can also send it to Missouri Star Quilt Company, click here.
Go Slow When Quilting
Our first impulse is to sew fast. I get it but try to avoid sewing fast when you are actually quilting. Every one wants to move fast these days but your stitches will be uniform and look the same size when you go slower. If you don’t believe me, try going slow and then fast. Look at your stitches. When you go super fast, the stitches are tighter and you don’t want that. Quilts with even stitches, set to 3 or 3.5 on machine dial, will look much better when washed.
Remember, the machine needs to press through the whole quilt, two layers of fabric plus a layer of batting. Also, make sure you start on the batting, just before the quilt top begins and quilt all the way to the edge of the quilt at the bottom before stopping. Sew off the quilt top when down at the bottom and just a little on the extra batting.
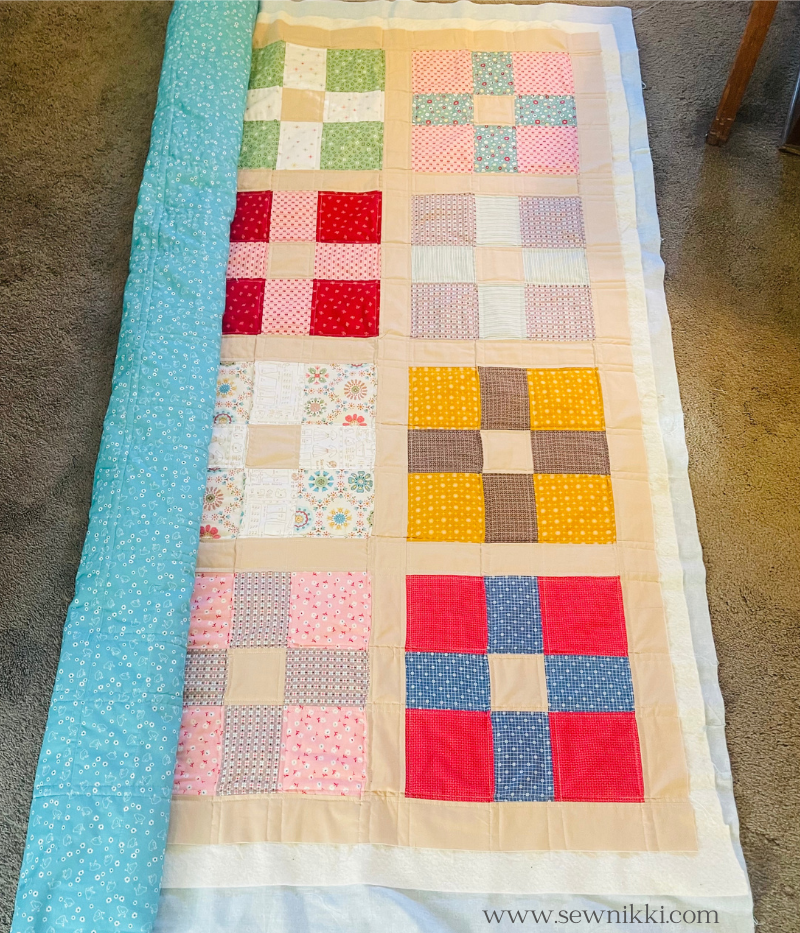
Positive Effect Free Charity Quilt Pattern
I recently made the quilt above and gave a review on it. It’s a great quilt pattern for beginners but here are tips for quilting it. Free quilt pattern listed below.
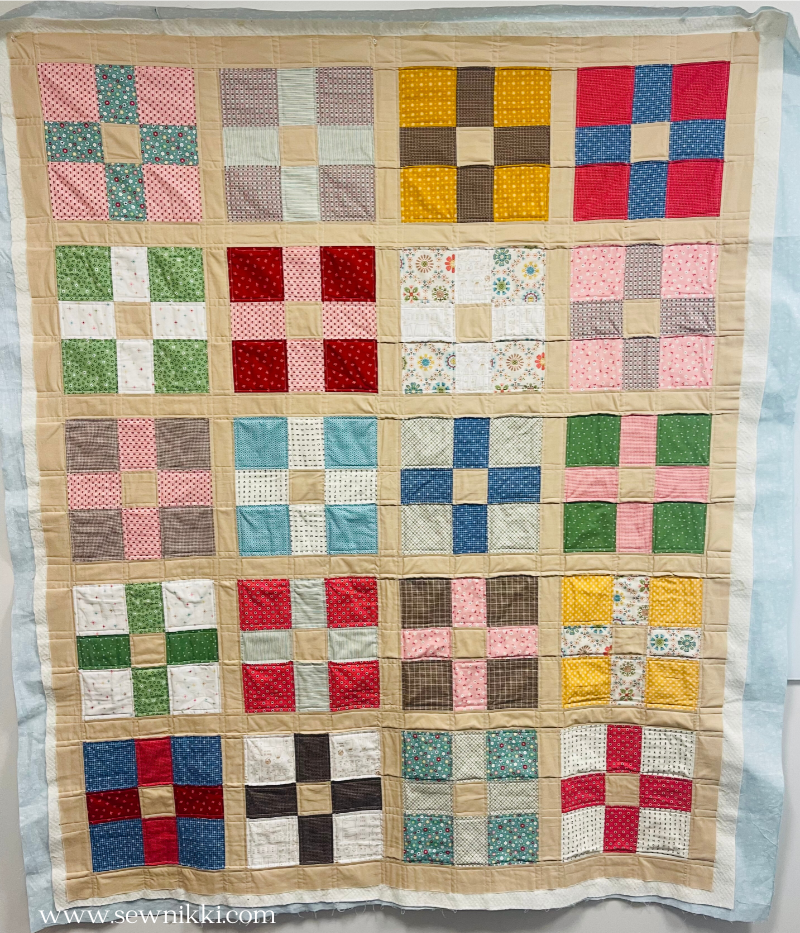
For some reason I was struggling on this Positive Effect quilt top. I was getting a lot of puckering when I tried to sew next to the seam with straight lines and you don’t want that. I had to keep going and in the end it should be fine once I bind it and wash it. My advice is to sew along with seam line on the sashing first, then straight line quilt down the other side of the seam on the block side. Hopefully this will reduce the puckering.
Beginner Quilting Supplies
Here are some quilting tools and supplies I recommend. I make a small commission if you purchase through the links, this helps to support this free content. For more info, check out Supplies for Beginners (Best Tools To Start).
Rotary Mat Cutting Mat (Self-Healing Mat)
28 mm Rotary Cutter Replacement Blades
45 mm Rotary Cutter with Sharp Blade (start with this one)
45 mm Rotary Cutter Replacement Blades (start with this one)
60 mm Rotary Cutter Replacement Blades
4.5″ Square Ruler for half square triangles
12.5″ Square Ruler for blocks
This post contains ads and affiliate links, which means I make a small commission at no extra cost to you. While the ads are annoying, it helps keep this blog going. See my full disclosure here.
About Sew Nikki
If this is your first time stopping by, welcome! I’m Nikki, a maker obsessed with quilting, crochet, and all things fabric. Here, you’ll find easy-to-follow patterns, helpful tutorials, and plenty of inspiration for your next handmade project. Grab your fabric (or yarn), and let’s create something beautiful together!
Follow me on social media (Pinterest, Instagram, Facebook and Twitter) so you get notifications when I post new patterns and tutorials.
Want to learn how to crochet? Then check out this post, How to Learn How to Crochet – Guide for Beginners.


I love how you break everything down and explain things! I love sewing quilts when I have a little extra time, and have fond memories doing it with my Grandma.
Hello fellow quilter, thanks for stopping by. God bless grandma’s who taught US how to sew or crochet. I miss mine too but cherish the memories.
This is such a helpful tutorial! I feel prepared to start making a quilt now!!
Great post! It’s on my bucket list to sew a quilt, maybe one day! Thank you for sharing 🙂