Table Runner DIY – Simple Quilted Fabric Table Runner
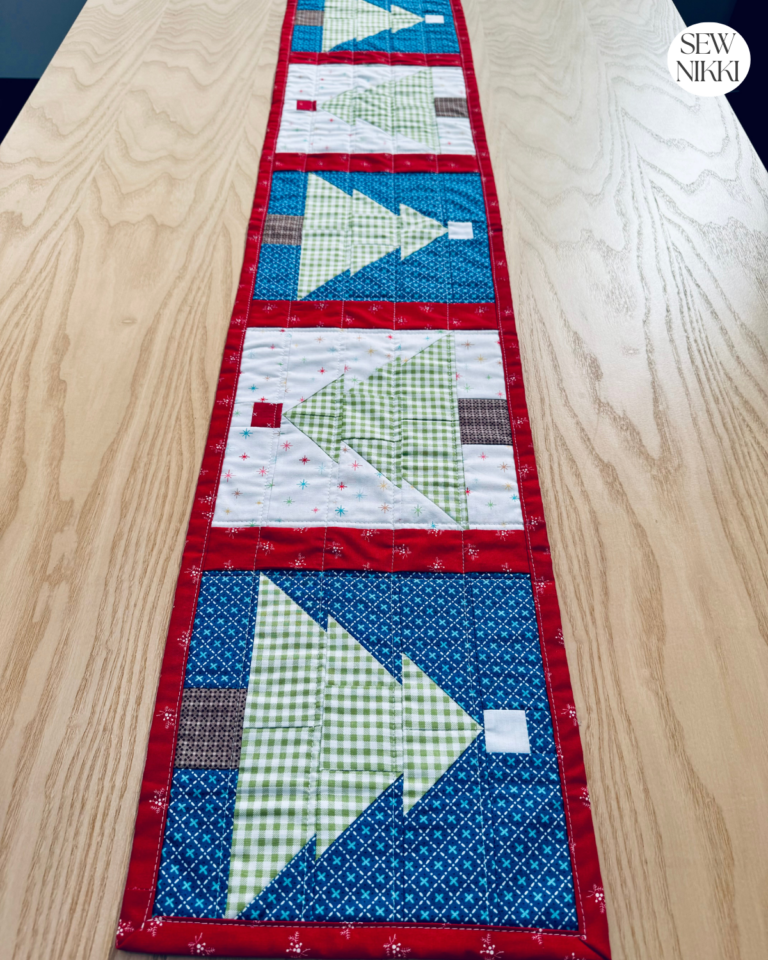
When it comes to adding a touch of charm to your home, few things beat a handmade DIY fabric table runner. It’s also a fun way to decorate your house and use up your fabric scraps. If you’re new to quilting or simply looking for a quick and easy project, you’re in the right place! In this easy DIY tutorial, I’ll show you how to make a simple quilted fabric table runner with four patch blocks. It’s simple and easy for all skill levels, a great free pattern for beginners.

Table Runner DIY – Patchwork Info
This patchwork quilted DIY table runner is made with 4″ squares and 2 ” strips, all fabric used is 100% cotton. Finished table runner measures 14 3/4″ x 75 1/2″. The fabric pictured in this table runner was left over layer cake scraps by Joanna Figueroa of Fig Tree Quilts Pumpkins & Blossoms and Strawberries & Rhubarb. Kona Black 100% cotton for borders and sashing, Muslin Natural for backing fabric.
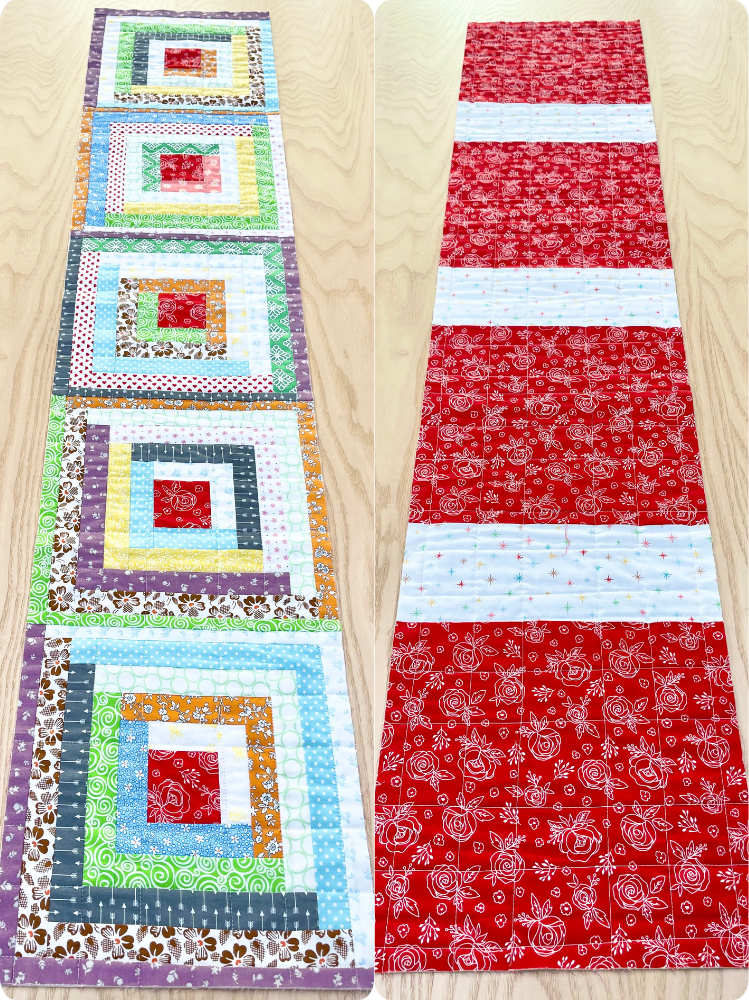
Whenever I’m doing a table topper or table runner, I try to use neutral colors on the back and prints on the top. Because it’s 100% cotton, it is also machine washable. Why not make your own table runner with this easy DIY tutorial and free quilted table runner pattern today. I’ve included a step by step tutorial that is easy to follow.

This project is perfect for beginners who want to make handmade gifts this holiday season but aren’t sure what to make. Table runners are a nice way to show off your skills and give a one of a kind gift to your friend or family member. You will impress them with this little beauty. Change up the fabric to match the colors of the holiday.

Did I mention this is a reversible table runner? For best results, please read the entire post before you begin this project. Also, this pattern can be modified to fit any table length by adding or removing a four patch block. Brighten up your dining room or kitchen table by making this cute table runner. Dust off your sewing machine, pick out your favorite fabrics, follow these steps, and enjoy your newly crafted table runner that’s both beautiful and functional.
MAKE SURE YOU CHECK THIS OUT!
After you read this post, make sure you also check out Learn How to Quilt for Absolute Beginners. It’s jam packed with information to make your first quilt. It also has links and resources that are so helpful when you’re first learning. There’s lots of free quilt patterns that are great for beginners and all skill levels too. So make sure you check this out, seriously don’t forget!
Make sure you grab a copy of my free Quilt Planning Journal. It’s filled with graph paper and note pages to help you design at least 4 quilt or sewing projects! Use it to jot down ideas, fabrics, patterns and inspiration all in one place. Or create your own patterns and share with others. Pin in fabric swatches, photos of your finished quilts and enjoy your creative process!
Patchwork Table Runner DIY
Before you start this project, I recommend you measure the length of your table first. You can adjust the size of this entire table runner by adding or subtracting blocks. If you are gifting the table runner, please know that this size is considered a full length dining room table runner.

Cutting Instructions:
4″ x 4″ print squares (24 total)
2″ x 4″ print strips (24)
5 1/2″ x 2″ print strips (24)
2 1/2″ x 15 3/4″ solid black strips for borders (19)
2 1/2″ x 2 1/2″ low volume fabric squares for border cornerstones (14)
17 1/2″ x 78 1/2″ Muslin backing fabric or a solid backing fabric that goes with quilt top fabric
2″ x WOF black strips for binding (3 or 4)
Pattern Notes:
Each four patch block will have 4 – 4″ x 4″ squares, 4 – 2″ x 4″ strip and 4 – 2″ x 5 1/2″ strip. If you are new to quilting and want to know how to cut fabric for quilting then check out How to Cut Fabric For Quilting Easy and Accurate.
Finished table runner measures 14 3/4″ x 75 1/2″.
Patchwork Table Runner DIY – Free Pattern
Make Four Patch Block Quarters
It takes four 4″ squares, four 2″ x 4″ strips and four 2″ x 5 1/2″ strips to form a four patch block. The four patch block has four sections. Build each four patch section to begin.

Grab one square and one set of matching fabric strips out of your cut fabric (as shown below).

Sew the smaller strip to the right side of the 4″ square with a 1/4″ seam allowance, right sides of the fabrics facing each other (as shown below). Press open with iron.

Sew the 2′ x 5 1/2″ piece of fabric to the piece you just completed. Right sides of fabrics facing each other with a 1/4″ seam allowance (as shown below).

Press open with iron. Repeat this process until every fabric piece in the photo below is gone. These units represent one quarter of the four patch block.
Make Four Patch Block Halves
Third step is to sew two quarter units together to form block halves. Use straight pins to hold the nested seams in place. Right sides of fabrics facing each other with a 1/4″ seam allowance (as shown below).

Chain piece two quarter units together until all are done (as shown below). Press with iron.

Sew Halves Together
Last step is to sew two half units together to finish the blocks. Make sure right sides of the fabrics are facing each other, use 1/4″ seam allowance until all are done. Open the squares up, press with iron, and you’ve got your first block. Repeat until all blocks are done, 6 total.

Add Borders
Now it’s time to add the 2 1/2″ accent fabric strips to the sides of the blocks. Place a border strip in between each block and at both ends.

The table runner should start with a border strip and end with a border strip. Sew these strips to the runner, pressing the seams as you go.
Make Sashing Strips with Cornerstones
Last step is to make and attach the 2 1/2″ accent fabric strips with cornerstones in between each strip (as shown below). Want more information on sashing, check out How to Make Quilt With Sashing and Cornerstones.

Final Assembly
Attach the sashing strips by sewing to the top and bottom of your table runner. The table runner should start and end with a cornerstone. Make sure to match up the seams for a clean finish. Press with iron.

Basting and Backing
Make a quilt sandwich with your table runner top, batting and backing fabric.

Grab the muslin fabric for the backing fabric. Lay your batting between the table runner top and the backing fabric, wrong sides down. Use spray basting, straight pins or clips to hold in place.

Want more info on basting, check out How To Sandwich a Quilt Step-By-Step Tutorial.

Machine Quilting Designs
Beginner friendly design is to follow the seam lines in the blocks, borders and sashing. You could also stitch in the ditch, stitch diagonally or free motion quilt. Get creative with your quilting pattern and have fun. For more information on machine quilting designs, check out How To Machine Quilt with Walking Foot For Beginners.

Trim and Square Up
Once you have quilted the table runner, it’s time to trim off the excess batting and square it up. Use your straight quilt ruler, rotary cutter and cutting mat to trim. Find a line on your ruler that you can line up to the sashing seam. It most likely won’t be straight but you need a line to follow and that’s how I do it. You want to keep as much of the sashing as possible and keep it straight so once you find a good line us that on all sides.

On this DIY project, I began trimming on the long sides, then the short sides. Doesn’t matter which side you start on but do the top and bottom first, then sides. Or do sides first, then top and bottom.
How to properly trim quilt
When you trim or square up a quilt, you don’t want any fabric that doesn’t have batting under it. Things get distorted when you quilt. You are moving it all around to quilt in both directions and that distorts the fabric. And that’s normal, it’s what happens in real life. When you trim, make sure that there is only fabric under your ruler. You don’t want batting left on your quilt top without fabric over it.

Use the seam line and the quilting ruler lines to trim the same amount off from all sides. My picture has a hand drawn line in red above, it’s supposed to be straight. The border strip was 2 1/2″ but because things get distorted when you quilt it won’t stay that size when squaring up. You want to trim off batting only and keeping the quilt lines straight. Try trimming at 2 1/4″ and see if the ruler is covering fabric. If you still see batting only then try trimming at 2″. Line up the 2″ line to the seam line of the border or sashing strip.
For more info, check out How To Sew a Quilt Together – Quilting For Beginners.
Single Fold Binding
For the binding, cut 3 – 2″ x WOF strips of accent fabric. I used single fold binding but you could use 1 3/4″ up to 2.5″ by WOF, single or double folded binding. Not sure which, check out How Wide to Cut Quilt Binding & Make Easy Strip.
Attach the single fold binding to the edge of the runner (starting on back of quilt) and mitering the corners for a polished look. For more information on how to attaching quilt binding, check out How to Bind a Quilt – Easy Single Fold Binding and How to Join Quilt Binding Ends: Beginner Series. Give your table runner a final press, and you’re done!

Quilting Tips – Simple Quilted Table Runner
Layout Quilt Block Units
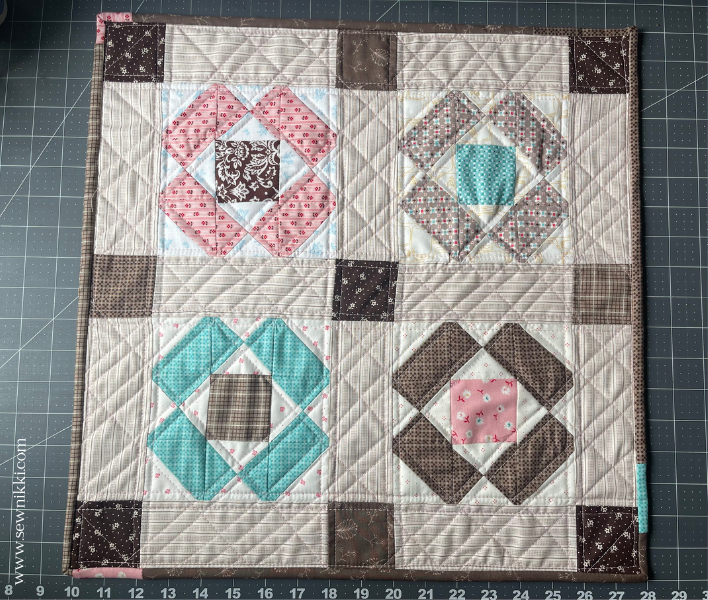
Before you start forming the block, it’s always a good idea to lay out your quilt top and audition the fabrics and how they look next to each other. You should also pay special attention to distributing the colors evenly in your quilt and not have the same fabrics repeated in any of the four sections of the block. Once you are happy with the layout, you can complete the blocks.
Nesting Seams
The most important part of patchwork quilting is lining up the elements in your block. You line up things correctly when you nest your seams. Make sure the seams on the two pieces you are sewing together are facing the opposite direction if you can. Use your thumb and pointer finger to rub the fabric until it slips into one another, this is called nesting.

Scrap Buster
This is a great scrap buster pattern and an inexpensive way to spruce up your home for Fall or the holiday season. Choose coordinating colors or prints to match your home decor. You can change the entire feel of the table runner by selecting a color scheme that goes with a holiday or the season. My motto is to always go to my fabric stash before buying new fabric. Why spend money if you don’t have to, use what you have if possible.
SAVE THIS PIN!

If You’re New Here
I’m really glad you found your way here.
If you’re new to quilting, then welcome. The learning curve is fast, and yes, you will face challenges. But I’ve got you. If I can do it, so can you!
Here’s where to go next:
- Learn to Quilt Page – every step of making and finishing a quilt
- Free Pattern Index – all my free patterns in one place
- Digital, ad-free patterns – clean, printable, and beginner-friendly
My blog is built for the home sewist and quilter who wants to make a quilt from start to finish all by themselves. Take a full tour of this blog so you know your way around. Subscribe to the newsletter so you don’t miss out on new patterns or tutorials. And follow me on Pinterest, Instagram and Facebook.
ABOUT SEW NIKKI
If this is your first time stopping by, welcome! Your place for free crochet, sewing and quilt patterns for beginner to intermediate skill levels. Want a digital pattern? We have those too! Plus tutorials to walk you through how to make each item from start to finish.
Follow me on social media (Pinterest, Instagram, Facebook and Twitter) so you get notifications when I post new patterns and tutorials.
Looking for your next quilt project? Then head on over to my free “Pattern Index”. It’s a page dedicated to all of my free patterns separated by categories for crochet, sewing and quilting.
If you prefer an ad-free printable version, head over to my shop and browse the Digital Patterns. These are instant digital downloads you print yourself.
This post contains ads and affiliate links, which means I make a small commission at no extra cost to you. See my full disclosure here.


It turned out awesome, Nikki … and just in time for Fall
Thanks Patti
I’m confused regarding the boarder pieces between the big squares. I cut out 19 2.5×15.75 but am I supposed to cut some of those down? This is my very first project and I was following along perfectly but I feel like I missed a step or something.
Hi Sheena – I’m so happy this is your first project. You shouldn’t need to trim but if they are too long, just trim them to block size to make the pattern work. But after you finish this project, I would test your seam allowance because it may be larger than 1/4″ and thus making your blocks smaller. Another tip is not to trim your border pieces until you have finished your blocks, that’s what’s worked best for me. Double check the block size of YOUR finished blocks and then trim to size. Hopefully I answered your question. Please share a pic when done!