How to Sew a Tote Bag With Flat Bottom- Three Ways
Today’s blog post is for all my sewing friends. I’ll show you how to sew a tote bag with flat bottom. That way your simple tote bag with handles that can stand up on it’s own. Now there are three ways to achieve this and I’ll cover each one. Then I’ll share my favorite method that I use on my tote bags.
If you are new to sewing and want to learn how to sew a tote bag with flat bottom, you’ve come to the right place. In today’s easy tote bag tutorial, I’ll show you how to make a simple tote bag. A flat bottom bag is a must for me, you just need to know how. Sewing always offers us more than one way to do things which is fun too. So grab two fun fabrics and let’s get started. Make sure you grab the ad-free pdf download of this tutorial, it’s free when you sign up for my newsletter.
Skill level is confident beginner to intermediate. You should know how to sew in a straight line, be able to use fabric scissors or rotary cutter, and be able to follow simple sewing instructions. This is the perfect beginner sewing project once you have several hours of practice under your belt. Just follow the step-by-step instructions below to make the bottom of your bag flat.
Before we begin, need to share this first
The sample tote bag isn’t finished and doesn’t need to be for this post but I still messed up. I really do know how to sew but forgot to add a wide piece of fabric to the bottom of the bag on both sides to cover the raw edges of my handles and bottom of outside pocket. Please allow me grace and just know that I know there is an error.
Let me just say that I really like making bags. Large tote bags, small tote bags and handbags. With each of these bags, I’ve used one of the 3 methods listed below. Now before we begin, I need to share this first.
This post does not contain a tote bag sewing pattern, but it does have instructions with photos on how to make a flat bottom on any bag. There is a sewing pattern for one method along with a digital download if you want to buy that in my shop. I will include the link under the method.
How to Sew a Tote Bag with Flat Bottom
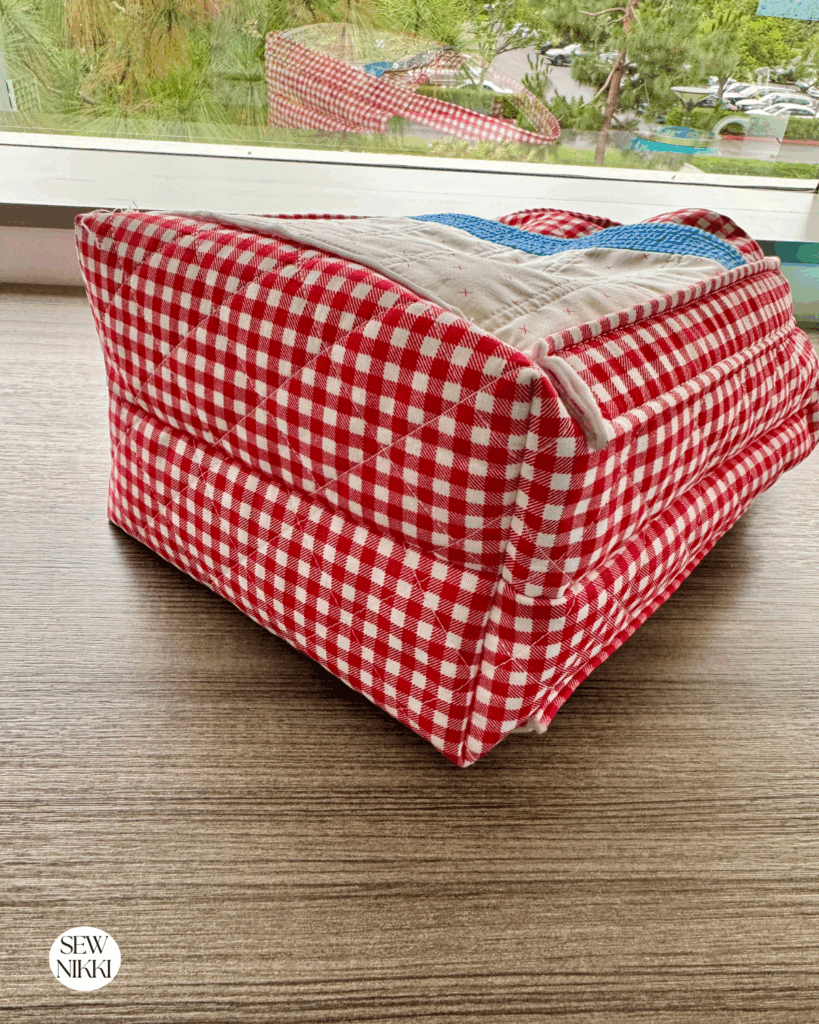
There are three ways that I know of to get a flat bottom on a bag. The three methods include strip, cut-out box corner and fold-and-sew. I have done all three methods and recommend using the box corner method for tote bags.
First Method: Cut-Out Box Corner
Cut rectangles from your main fabric plus lining (like 16″ W x 18″ H).
Cut a square on both corners of the bottom of the bag (usually 2″–3″ square). To cut a square, line up the corner of a square ruler or straight line ruler to the side and bottom of the bag. If you want a 2″ corner, find the 2″ line on your ruler and make sure it’s 2″ from the side and the bottom.
There’s a few ways you can actually trim the fabric to make the cut out. You could take chalk or a pencil or pen and trace around the ruler. Remove the ruler and cut with sewing scissors.
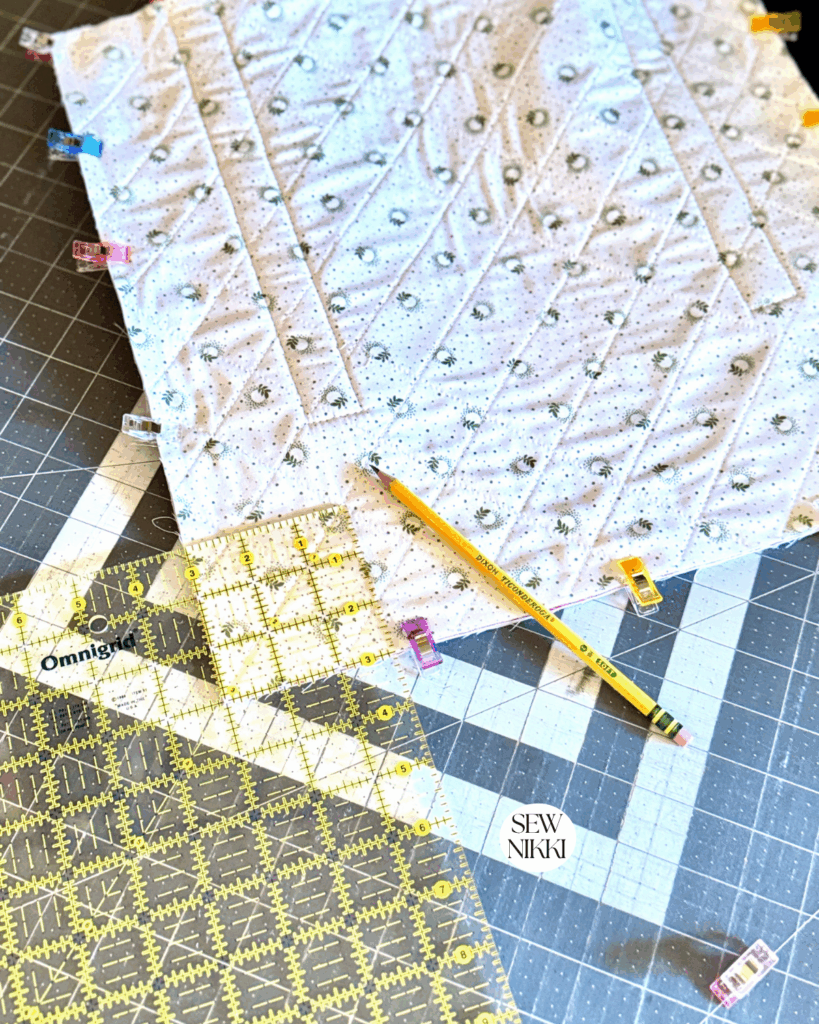
You could also leave the ruler and trim around the ruler on those two sides with a small rotary cutter. I use a pen and then trim with scissors. Do this before sewing.
With right sides facing, stitch the outside cloth’s lower and side edges. Do the same for the lining. Let’s move onto the next step.
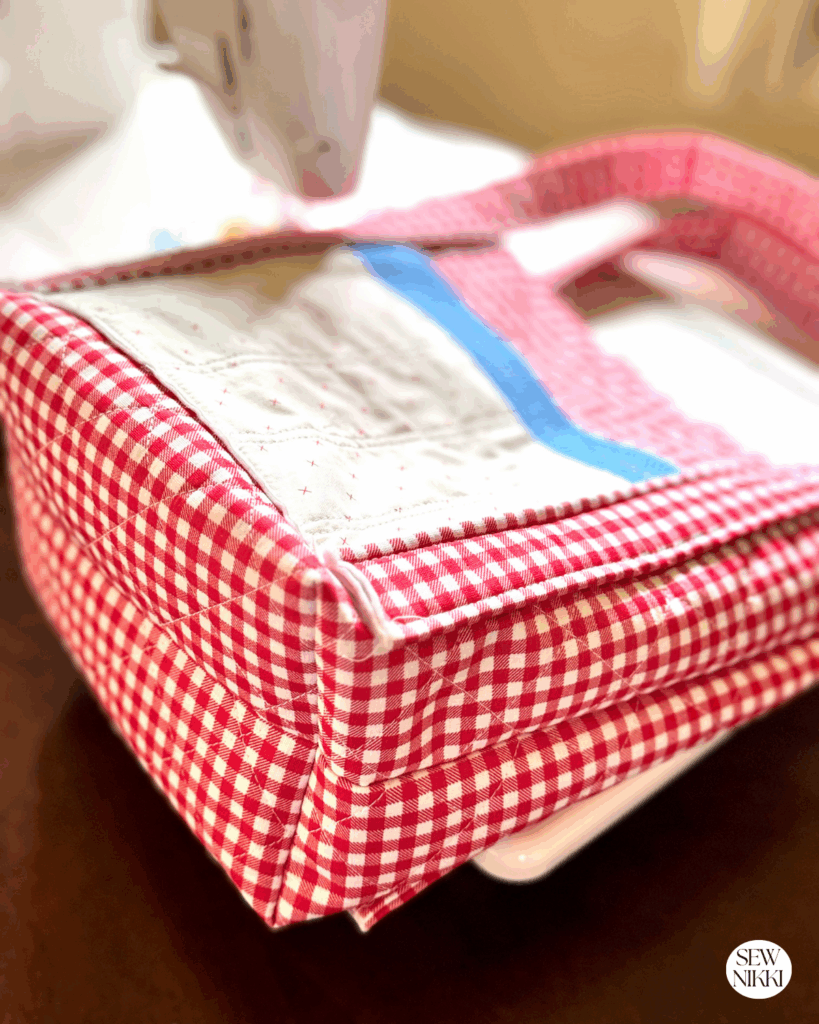
Box the corners:
The side seam goes with the bottom seam in the act of pinching the corner.
Make it into the shape of a flat line and pin in place with sewing clips or pins.
Sew straight on top of the raw edge using a half inch seam allowance.
Keep doing the action for the other corner. Do it also for each of the lining corners.

Pro Tip: Your bag’s depth = the square’s size you will cut. A 3″ square gives to you a bottom that is finished and 6″ wide. Here’s a handy YouTube video by Caroline Moore of picking the right size corner for your project.
Second Method: Fold-and-Sew
If you forget to cut out your corners before you sew your tote, this is the method for you. But it’s also a great method for a large tote bag because the folded fabric isn’t cut after you sew the fold in it. You can leave this as part of the bag for more stability at the bottom of the bag. It’s best to use fabric lining so that you don’t see the folded fabric when done. If you do use more fabric for the inside of the bag, you need to fold the bottom corners of the lining fabric as well. Just repeat the same method for outer fabric and lining fabric.
Take your two outer fabric pieces and turn wrong side facing you. Start on one of the side seams and sew down, then around the bottom, and back up ther other side. You do not need to backstitch when you start and stop for this method.
With the bag still inside out, squeeze at the bottom corners until the side as well as bottom seams come together. This creates a triangle.
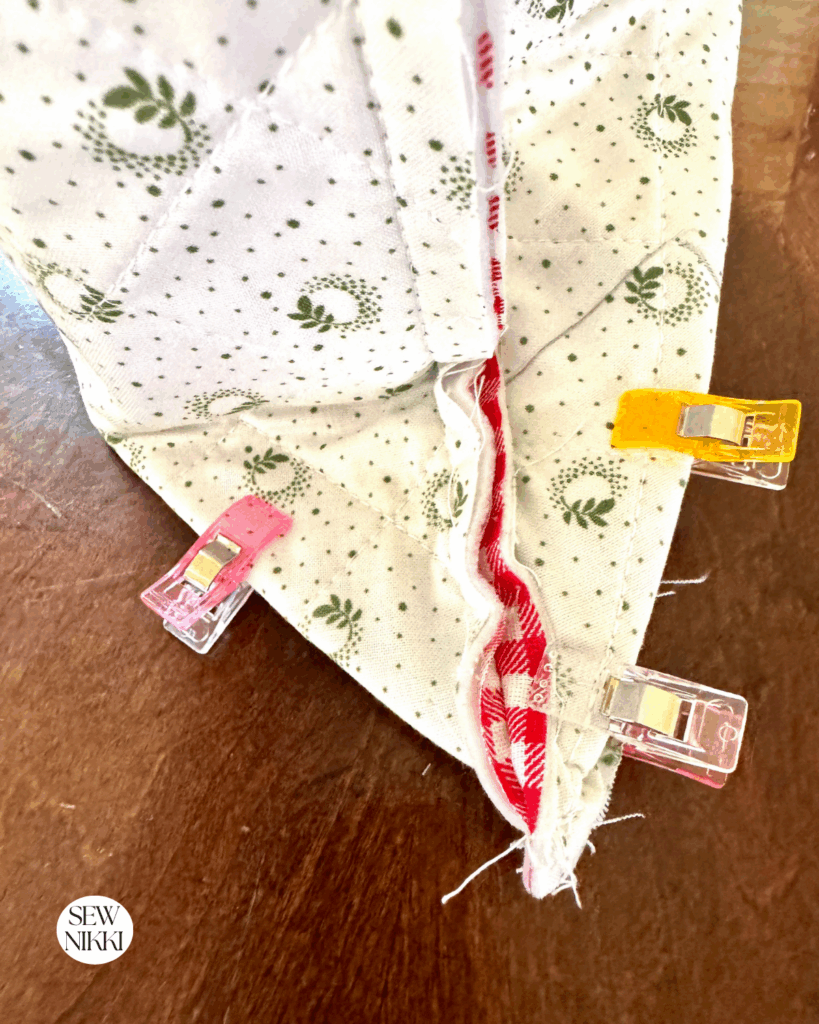
Make a straight line about 2”-3” away from the point.
Sew across that line, directly on the line. You can trim the excess fabric if desired. Place 1/4″ line from your ruler onto the drawn line and trim with rotary cutter or sewing scissors or you can leave it. If you do leave it, tack it down inside of the lining.
This method works well for totes made using one active fabric piece. All three methods give you the same end result because the base is roomy, structured, and allows your tote to stand up by itself.
Grab the Digital Download
You can find free sewing tutorials in The Pattern Index. There you will find patterns and tutorials for sewing, crocheting and quilting.
Want a printable version of this tutorial but without all the ads, just sign up for the free newsletter below.
Third Method: Strip
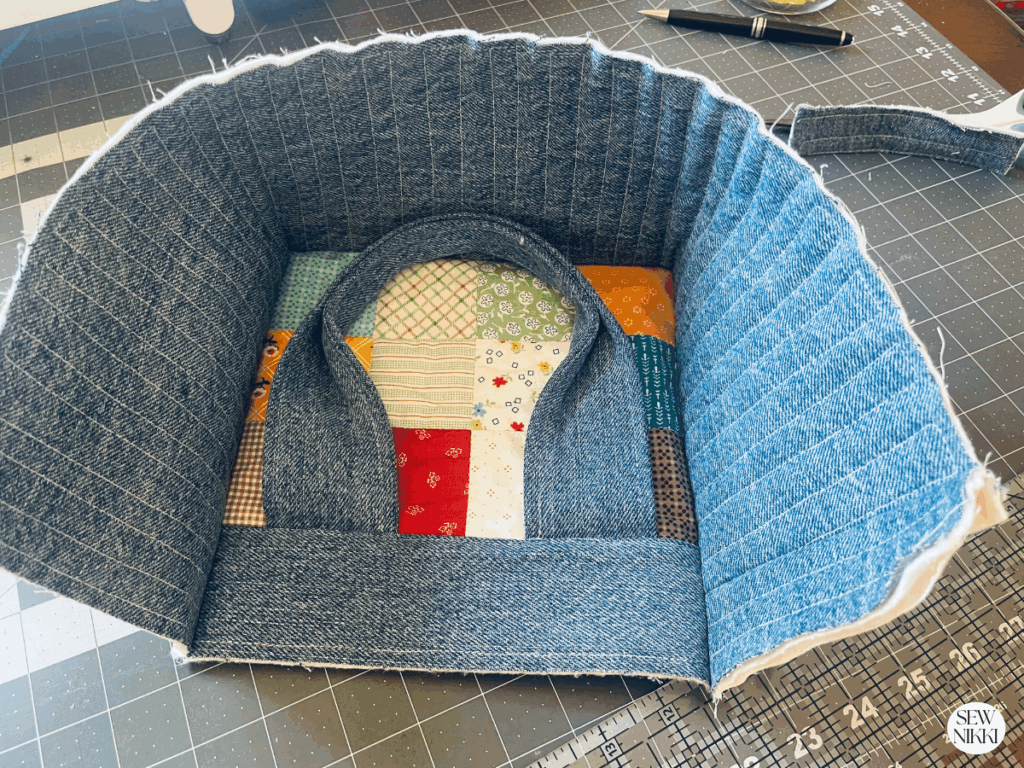
The last method I’ve used is the strip method. To sew a tote bag you will need two side panels and then one long strip that will be the sides of the bag and the bottom of the bag. For a full tutorial, see my denim handbag post.
When you use the strip method, I always make my strip slightly longer than it needs to be and then trim the excess right before I get to the end of the final side.
You pin your side panel to one side of the strip and sew with a half inch seam allowance to attach. You can center the bottom of your side panel to the center of the strip and then pin up each side. Or you can line up the strip to the top of your first side panel and work your way around the bottom and up the other side, trim excess before your final stitch.
Which method is best?
I think I’ve already said this but I’ve used all three methods. It’s nice to know different ways to sew something. It let’s you be free to mix things up if you are getting bored doing the same technique. That’s why sewing is so much fun, it’s your sewing machine and your project. You can decide what you want to do. The more skills you learn, the more confident you are when you look at different things you want to make and you know you can finish it.
The last method can also be used if you wanted to do the boxed cut-out corners but forgot to cut them out. You can just do the fold-and-sew method and you don’t need to use your seam ripper to undo your work. You can also cut-out boxed corners after you’ve sewn all the way around the sides of the bag and bottom.
The only issue you may have is when you bunch up the corners to pin in place before you sew the quarter inch seam, the stitching on your work may come loose. That’s why I back stich when I start and stop sewing the long side of the bag or the bottom of the bag. Just go slow so your sewing machine doesn’t eat up your fabric under the sewing plate.
What stitch length should I use?
For quilted tote bags, I raise my presser foot and make the stitch length longer so it’s easier to sew. Set it to 3.2 – 3.5, but this will vary depending on your sewing machine. For non-quilted tote bags and for tote bags with light interfacing on the quilting cotton, I will use 2.5 for the stitch length. Again, this varies based on your machine.
For batting, I do recommend polyester batting but have used cotton batting too. Polyester batting will give you more structure, cotton batting doesn’t provide much of that. I also don’t iron my project when using batting, it tends to flatten everything out and it won’t get it’s puffiness back when done.
More great sewing resources
WeAllSew, All About Sewing Machine Needles: This useful article will aid you as you troubleshoot any of your sewing needle issues. Great reference for beginner’s and the most experienced sewists. Charts that show the different types of needles and what needles should be used on each type of fabric or sewing application.
Sewaholic Sewtionary: This is a dictionary of sewing questions and terms from A to Z and it’s also a book you can purchase.
Tilly and The Buttons: This is a great website if you want to learn to sew your own clothes. Lots of tutorials, online sewing classes and tons of tips and advice to get your sewing journey up and running.
Not sure which supplies are best for sewing or quilting, no problem. Just head over to my Resource Page to find my favorite tools, sewing notions and quilting supplies including interfacing and batting for quilts and sewing projects.
SAVE THIS PIN FOR LATER

This post contains ads and affiliate links, which means I make a small commission at no extra cost to you. While the ads may seem annoying, it helps keep this blog going. See my full disclosure here.
ABOUT SEW NIKKI
If this is your first time stopping by, welcome! I’m Nikki, a maker obsessed with quilting, crochet, and all things fabric. Here, you’ll find easy to follow patterns, helpful tutorials and plenty of inspiration for your next handmade project. Grab your fabric (or yarn) and let’s create something beautiful together! Read more about me here.
I’ve used my own handbag to recreate denim bags. You just measure the height of the bag, from the bottom straight up to the top of the bag. Then you measure the width, one side to the other. Add your half inch seam allowance to those measurements. Then box the corners. To determine how wide the bottom of the bag is, you double the corner square measurement. If you cut 4 inch box corners, the bottom of your bag will be 8 inches wide.
You can use any of these methods along with a certain type of fabric (canvas, rayon, cotton, linen). Some fabrics may need interfacing to stabilize them, this just means the fabric will stay in place and have more structure. I have a full tutorial on interfacing and which ones you should use if you want more info. Now that you know how to make a flat bottom bag you can make a grocery bag, some book bags for your besties (these make great gifts) or canvas bag for heavy items.
Once you make one for gifts, the farmers market, or your next road trip, you’ll want to make more.
Follow me on social media (Pinterest, Instagram, Facebook and Twitter) so you get notifications when new patterns and tutorials are posted.
Want to learn how to crochet? Check out this post, How to Learn How to Crochet – Guide for Beginners.