How to Sew a Zippered Pillow Cover
This project is simple sewing at it’s finest. Zippers are your friend, don’t be afraid of them. Once you learn zippers, you can make all kinds of useful and unique items for yourself or your home. Today I’m going to show you how to sew a zippered pillow cover. No lining, no quilting, no buttons or hand sewing required. So grab your fabric, pillow insert and a zipper. Let’s get sewing.

Sewing zippers is intimidating if you have never worked with them before. I’ve been using them to make quilted pouches and they are easy to do when you understand the basics. I won’t bore you with that stuff, I’m just going to show you how to do this.
Even if this is your first pillow cover or your first time working with a zipper, you will find this easy to do. You can keep it really simple or make it fancy, you have so many options. You can change the vibe in your living room or bedroom by adding a simple pillow. If it gets dirty, just unzip the pillow cover and throw it into the wash. You can make lots of different sizes, just make sure your pillow cover is the same size as your pillow insert or an inch small. This will make a fuller pillow when the form insert is slightly larger than the cover.
MAKE SURE YOU CHECK THESE OUT!
After you read this post, make sure you also check out Learn How to Quilt for Absolute Beginners. It’s jam packed with information to make your first quilt. It also has links and resources that are so helpful when you’re first learning. There’s lots of free quilt patterns that are great for beginners and all skill levels too. So make sure you check this out, seriously don’t forget!
Make sure you grab a copy of my free Quilt Planning Journal. It’s filled with graph paper and note pages to help you design at least 4 quilt or sewing projects! Use it to jot down ideas, fabrics, patterns and inspiration all in one place. Or create your own patterns and share with others. Pin in fabric swatches, photos of your finished quilts and enjoy your creative process!
How to Sew a Zippered Pillow Cover
Materials Needed
- 2 – 15.5″ x 15.5″ fabric pieces
- 1 – 18″ zipper
- 1 – 16″ pillow insert
- Zipper foot (optional)
- Iron and pressing surface
- Clips or pins, seam ripper, ruler, rotary cutter, or scissors
Instructions – How to Sew a Zippered Pillow Cover
Step 1: Cut and Prep Your Fabric
For this pillow tutorial, I’m using 2 fabric pieces 15.5″ x 15.5″ for each side of the pillow cover. These will be your front and back pillow cover pieces. Press both pieces so they lay flat.
If your fabric has a print with direction, decide which edge will be the bottom. That is where you will sew the zipper.
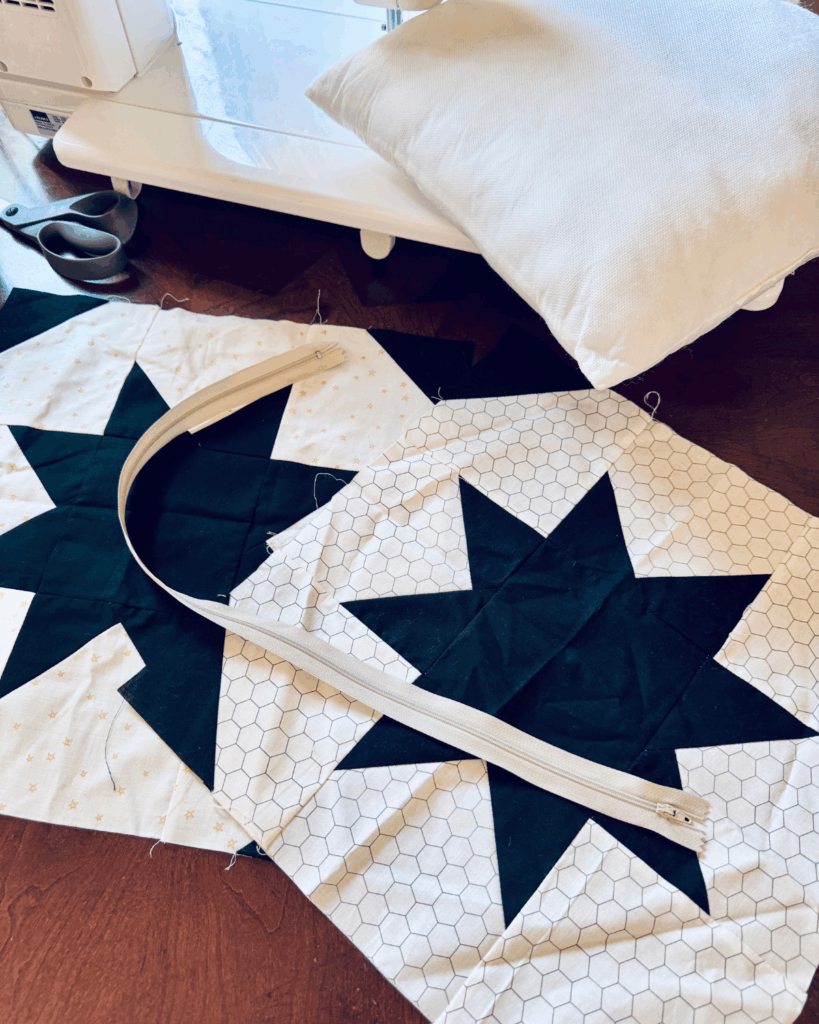
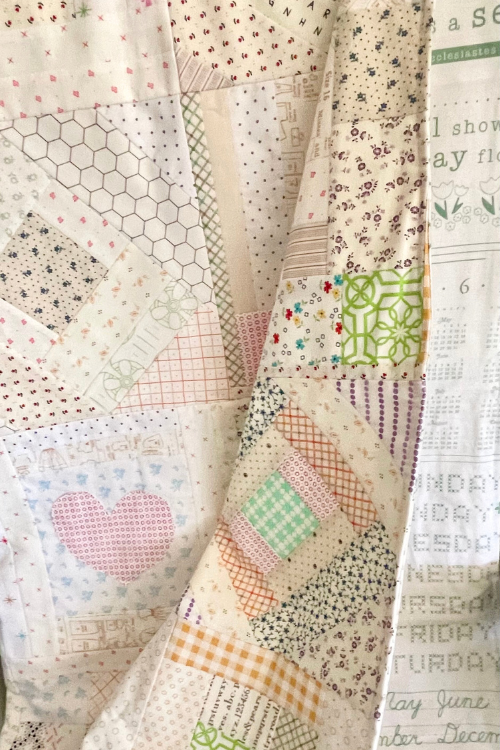
My pillow has 2 star quilt blocks for the front and back. These were leftover from my free Big Stars quilt pattern. I recently found these as I was organizing my fabric stash. The digital pattern is also available for download.
Step 2: Attach the Zipper
Front Pillow Cover
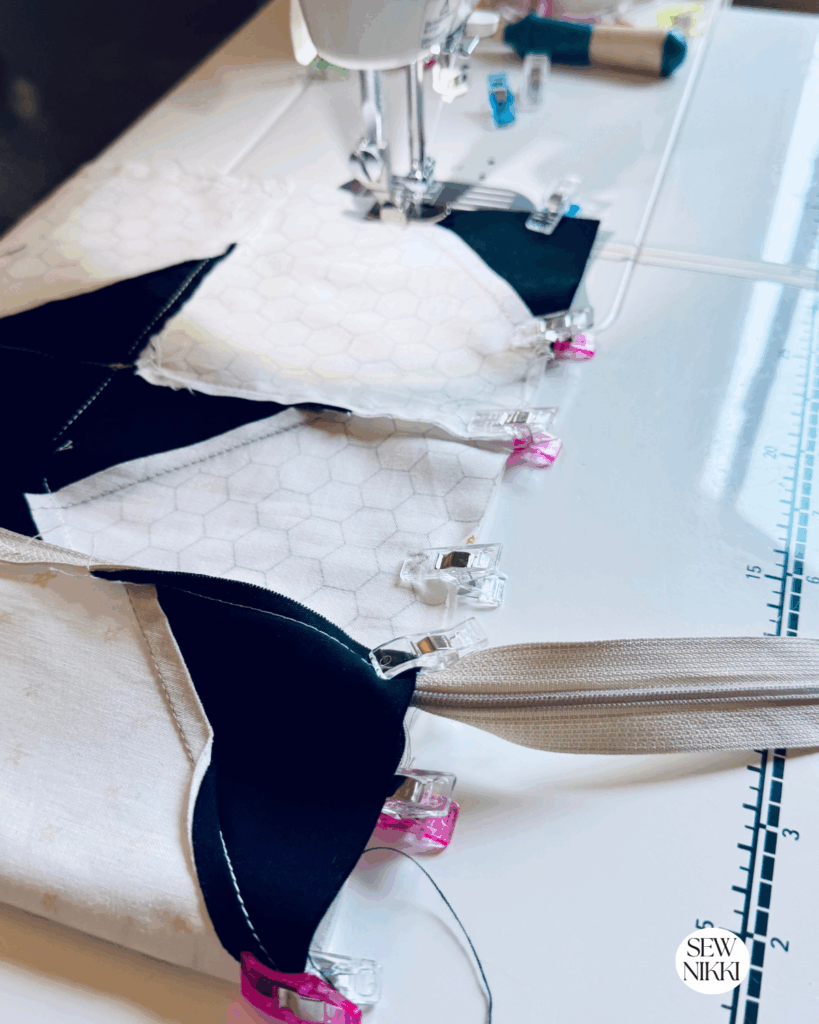
Lay one pillow square right side up with its bottom edge facing you. Place the zipper face down along that edge. The edge for the zipper tape should align with the fabric’s raw edge. Clip or pin the zipper after placing it. Note: The bottom of the zipper will be facing you, the zipper pull will be all the way to the left.

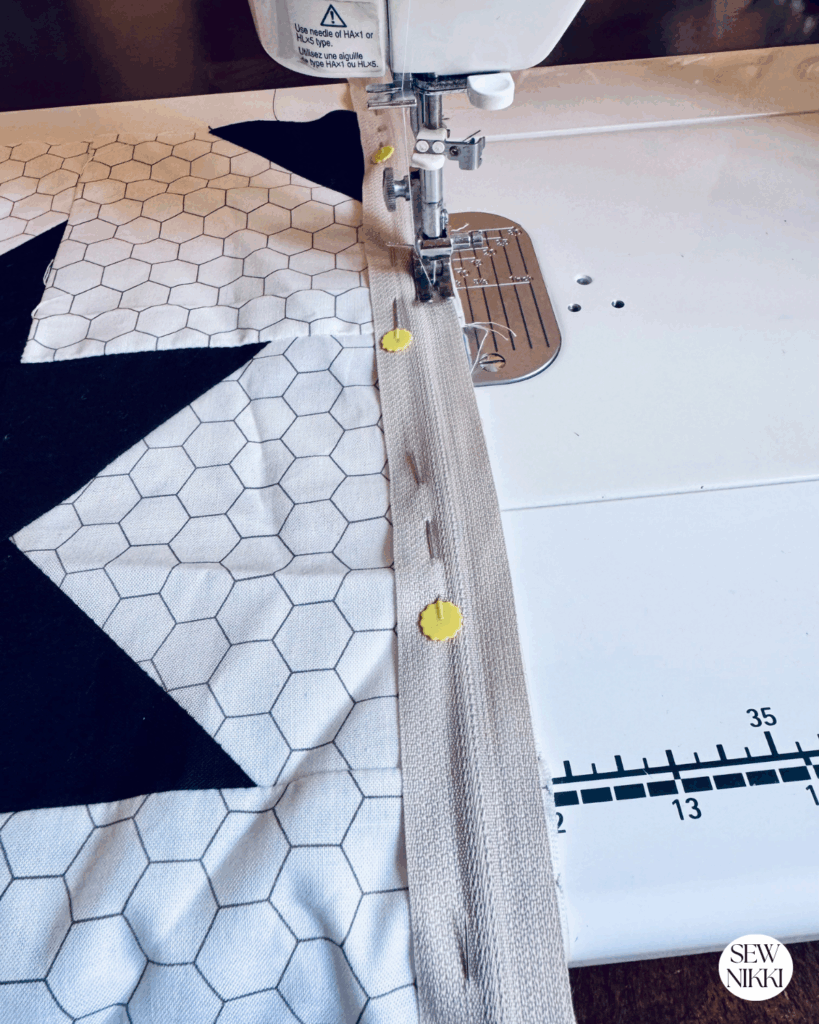
If using a zipper foot, sew the zipper to the fabric, or using a regular foot, sew near the zipper teeth. Backstitch right at the beginning which secures the seam. The end of the seam is also made secure.
I prefer using a longer zipper than my pillow projects. This gives me wiggle room to play with and is the easiest method for beginners. Pin or clip the zipper to the fabric. Sew the zipper to the fabric using a zipper foot if you have one, or a regular foot sewn close to the zipper teeth. Backstitch at the beginning and end.
Back Pillow Cover
Now we need to attach the zipper to the back of the pillow cover. Lay the right side of the back cover onto top of the right side of the front cover and zipper. Align your pillow pieces so they line up directly on top of one another. Pin in place with pins or clips.
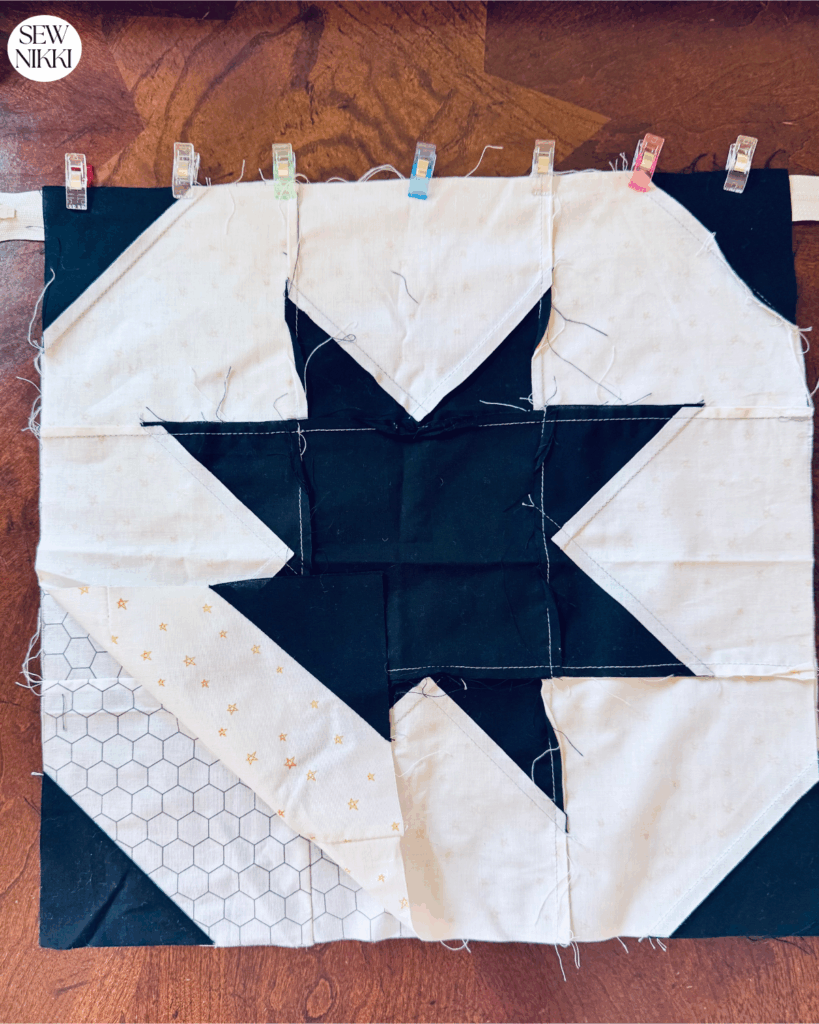
Sew it like the first side; keep your seam as close to the the zipper teeth as possible. Press with iron before joining sides, pressing both fabric pieces away from the zipper.
Step 3: Sew the Pillow Cover
Next step is to sew all the way around the other sides and turning right side out when done. We will be sewing straight lines using a normal stitch length of 2.5 with the presser foot adjustment half way down. I like to sew a 1/2 inch seam allowance or the number 10 on the sewing machine needle plate.
Open zipper to halfway or almost all the way to the right side of the cover before you sew the sides together. If you don’t open the zipper before sewing around the sides, you won’t be able the turn the pillow cover inside out. This is a very important step, don’t forget to open that zipper.
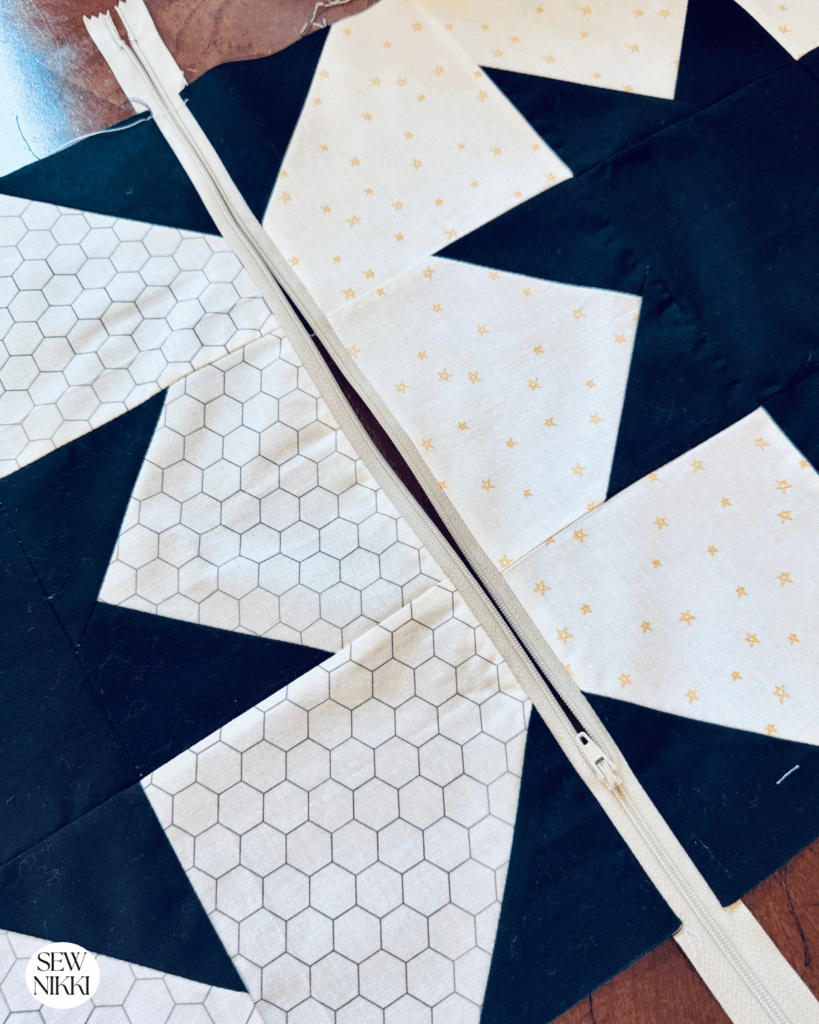
Fold the pillow front and back with right sides that face each other. The wrong side of the fabric should be facing outwards when you take it to the sewing machine. You can snip the excess zipper now or after you have finished sewing around the outer and bottom of the cover. Align all corners and edges together. Securing the three sides with sewing pins or sewing clips.
Pro Tip
Sometimes it gets tricky sewing the zipper if it’s not attached already. I like to sew a quarter inch seam allowance and run it over the zipper to secure. That way it’s really easy to fold in half when sewing around the cover.

Sew around all of the edges using a half seam allowance or follow the 10 line on your sewing machine needle plate. Again, I like to backstitch at the beginning and end but you don’t have to.

Step 4: Turn and Press
Trim the sides of the zipper that are excess. You don’t need them anymore. Turn the pillow cover right side out through the zipper opening. Shape the corners with use of a chopstick or point turner. Press the seams flat. This will give a clean finish to it.
Step 5: Insert the Pillow Form
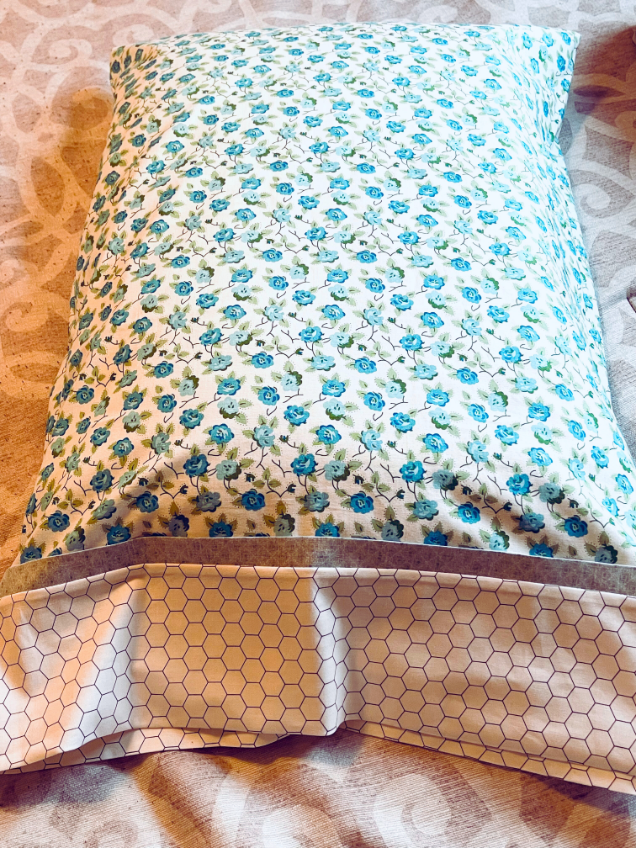
Close it using its zip then put your pillow form in the zip opening. Your 15 inch cover will have a nice full shape with a 16 inch insert.

You may need to pull loose thread from the edge of the pillow cover after turning it right side out. If the thread doesn’t easily pull from the edge of the fabric, just use scissors to cut it without cutting your pillow cover.
You don’t need to worry about raw edges on the inside of your pillow cover. Just wash on gentle cycle cold water in the washing machine with the zipper pulled close. Make sure you use 1 Shout Color Catcher sheet in the first wash to catch any fabric that may bleed. Tumble dry low or air dry to prevent shrinkage.
For Quilters: Use Your Fabric Stash
If you are a quilter, this is a great way to use up leftover blocks or works in progress. Many of us have a drawer full of test blocks, samples, or designs we made once and set aside. A quilted pillow cover is the perfect way to show them off.
That is exactly what I did for my pillow. I used two quilt blocks from my Big Stars Quilt pattern. They were already sized at 16.5 inches and made the perfect front and back. If you want to make the same pillow, you can find the free Big Stars block tutorial on the blog or grab the full digital pattern in my shop.
This is a great way to turn those forgotten blocks into something finished and usable. You can mix and match designs or create a full set of patchwork pillows from your scraps.
Save This Project
Pin this tutorial so you can come back to it later or use it whenever you need a quick gift or a weekend sewing project.

More Easy Sewing Projects
- How to Make a Burrito Pillowcase
- Large Patchwork Tote Bag Tutorial
- Easy Patchwork Square Curtains
- Patchwork Heart Zippered Pillow
- Fabric Storage Basket
Resources
Now there are different types of pillow cases you can sew up. You know how to do a zippered cover. But you can also try envelope pillow cover or a button closure pillow cover.
Still need some help with zippers? Read How to Sew a Zipper with a Quilting Presser Foot.
Cozy DIY Home has a blog on DIY piped pillow covers that look really cute. I saw this other gal who did a tutorial but her method is slightly different than mine. It’s a home decor blog called Hey There, Home. Katia Fabrics has a post on how to sew a cushion cover without a zipper. If either sounds interesting, check them out.
Looking for your next quilt project? Then head on over to my free “Pattern Index”. It’s a page dedicated to all of my free patterns separated by categories for crochet, sewing and quilting.
If you prefer an ad-free printable version, head over to my shop and browse the Digital Patterns. These are instant digital downloads you print yourself.
You May Also Like:
How to Sew Lined Curtain Panels
How to Sew a Double Sided Patchwork Blanket (not a quilt)
The Best Fusible Interfacing for T-Shirt Quilts
Design Your Own Fabric with Spoonflower (even kids artwork)
Making Yardage with Fabric Scraps
How to Enter a Fair Competition
ABOUT SEW NIKKI
Welcome to Sew Nikki! Your place for free crochet, sewing and quilt patterns for beginner to intermediate skill levels. Want a digital pattern? We have those too! Plus tutorials to walk you through how to make each item from start to finish.
I hope you enjoyed making this easy zippered pillow cover. Weather you are using stuff you got at Joann fabric or left over quilt blocks. You can use a basic Singer sewing machine or a really expensive one, it’s just basic sewing stitches and a fun thing to make.
I love my beautiful pillow, I’m going to be making a ton of these. Tag me @sewnikki_ in the event that you make one, so that I can see just how yours turned out. Happy Sewing!
This post contains ads and affiliate links, which means I make a small commission at no extra cost to you. See my full disclosure here.


Exactly what I needed! Easy to follow and simple tutorial.
What a cool idea for using up quilting blocks and scraps. I love having a zipper on pillow cases for easy cleaning. Thanks for this great tutorial!
So stinking cute! I’ve always wanted to learn how to piece quilts. This seams like a great starter project!
What a perfect timing finding your article! I was just thinking I need to make new covers this morning! And I found your perfect article explaining everything!
Pillow covers can be expensive. What a good way to spruce things up without spending as much money. Thanks for explaining step by step!
Thank you so much for mentioning Katia Fabrics and linking to our blog! 😊 Beautiful tutorial and project – congrats! ✨ Greetings from the Katia team