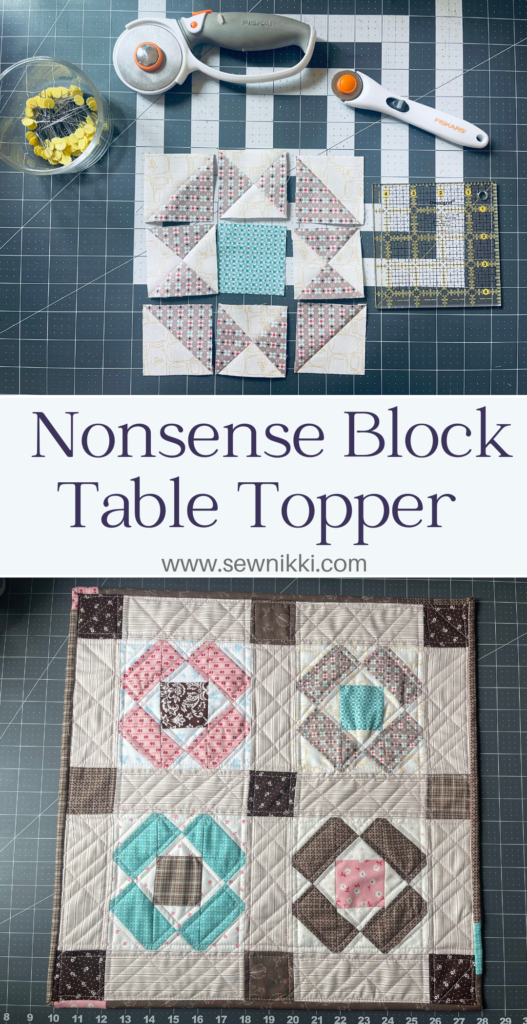
Quilt Blocks, The NONSENSE Table Topper Review
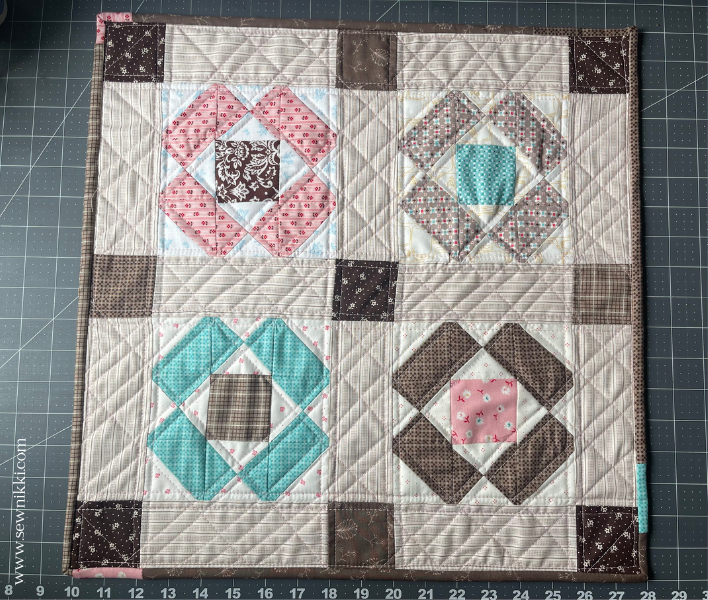
Quilt blocks, the Nonsense block table topper by “my sewing room” YouTube channel pattern review. Table topper made with 4 – 6.25″ Nonsense quilt blocks, some sashing and cornerstones. Tips and tricks for advanced beginners to complete this project successfully.
The very first sewing channel that I watched was Fat Quarter Shop and Missouri Star Quilt Company. I learned a lot watching these channels. But when I found my sewing room, I no longer felt intimidated because she didn’t strive for perfection but to enjoy the joy of quilting.
Beth was so calming and not a perfectionist. She didn’t follow the same “rules” as those other channels and it took the pressure off of me in a weird sort of way.
MAKE SURE YOU CHECK THESE OUT!
After you read this post, make sure you also check out Learn How to Quilt for Absolute Beginners. It’s jam packed with information to make your first quilt. It also has links and resources that are so helpful when you’re first learning. There’s lots of free quilt patterns that are great for beginners and all skill levels too. So make sure you check this out, seriously don’t forget!
Make sure you grab a copy of my free Quilt Planning Journal. It’s filled with graph paper and note pages to help you design at least 4 quilt or sewing projects! Use it to jot down ideas, fabrics, patterns and inspiration all in one place. Or create your own patterns and share with others. Pin in fabric swatches, photos of your finished quilts and enjoy your creative process!
Quilt Blocks – The NONSENSE Table Topper
Quilt Block Fabric Measurements
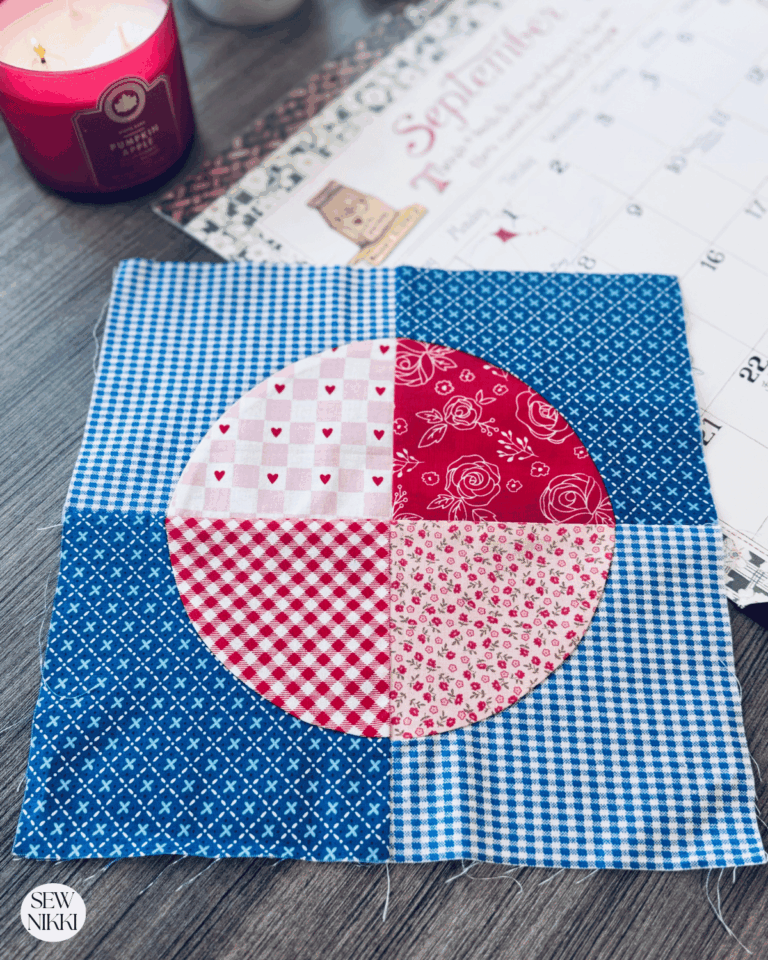
1 center (2.5″ x 2.5″ square)
2 background and 2 main 3″ x 3″ squares
2 background and 2 main 3.5″ x 3.5″ squares
Note: Alternate the main and background fabric to distribute your pink, blue and brown fabrics in the block. Look at my table top for ideas and also in Beth’s video.
Make HST’s
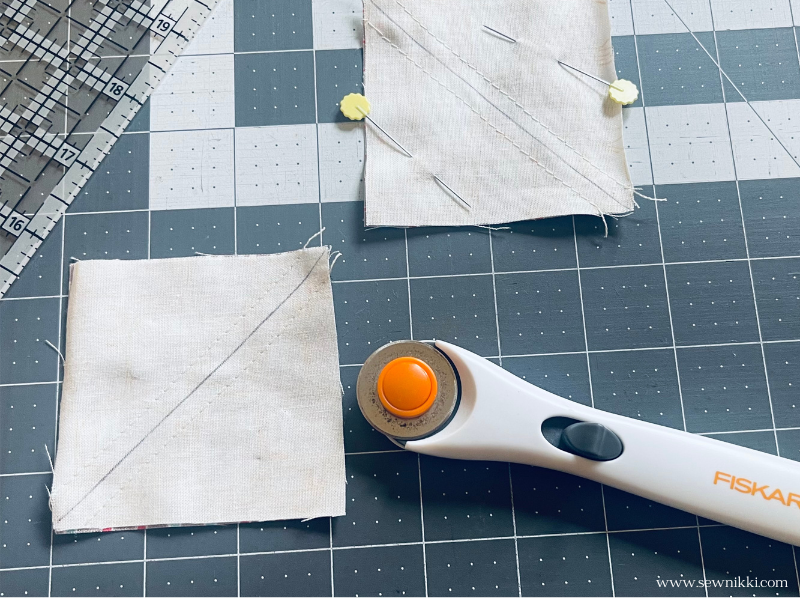
Making half-square triangles per the pattern. Place one main and one background fabric right sides together. Draw line down the center.

Sew 1/4″ seam allowance down both sides of the line. Then cut with rotary cutter on the line to form two units.
Now make the hour glass units with one background and one main of the 3.5″ squares. Follow the same process as above and cutting on the line when done. Make sure the fabric is facing the opposite direction when you make the hour glass units. They are pretty cool and a good skill to learn for bigger quilt blocks.
Lay Out Your Block – Review Placement Is Correct

Lay all your units on your cutting mat to make sure you have them facing the right direction. Pay special attention to the half square triangles to ensure you have the right one placed in each spot. You want the fabric to line up with the hour glass units.
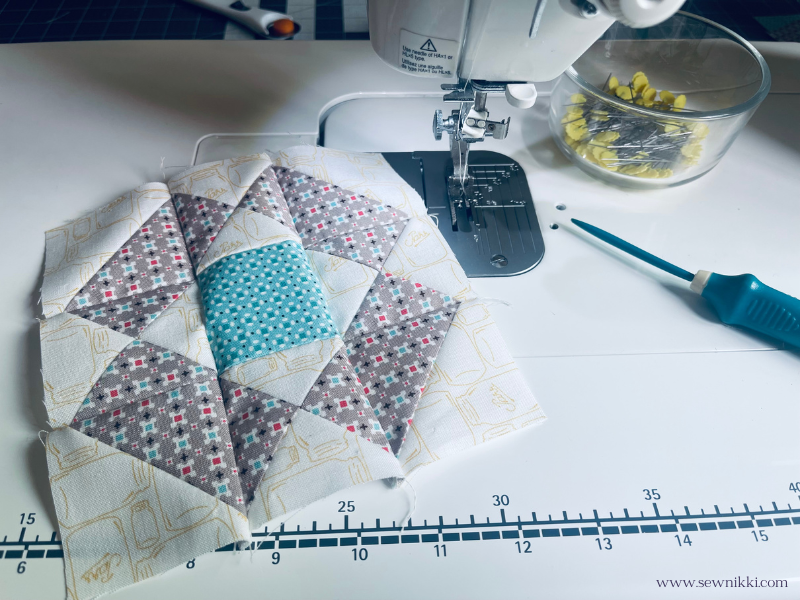
Sew Rows
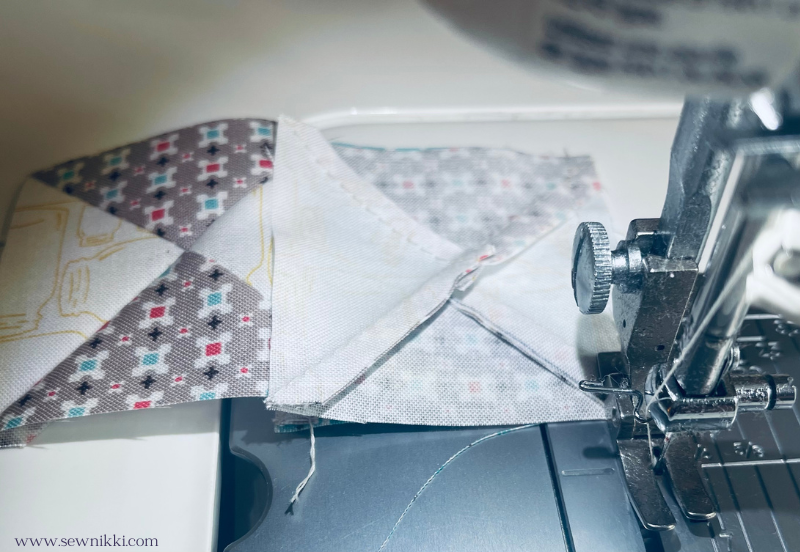
Sewing the rows together, making sure the seams are nested, using a 1/4″ seam allowance. Complete all the rows, there are three rows total for each Nonsense block.
Sew Rows Together

Sew the rows together, again, paying special attention to the seams and nesting. Place sewing pins at each seam to hold the fabric in place. Remove the pin right before you sew that section. Use your stiletto to hold the fabric down at the seam. Stilettos are a must for patchwork piecing. It’s an extension of your hand but won’t get hurt if the needle accidentally hits it. It’s better than the sewing needle hitting your finger, trust me.
Make Blocks Same Size
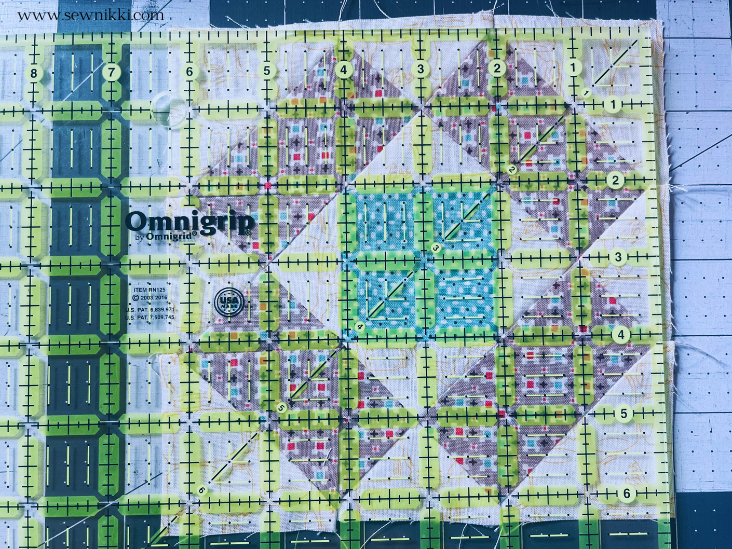
Beth didn’t trim her blocks. I accidentally did. If your blocks are not all 6.5″ squared, then you may have to trim them like I did. If you do need to trim, find the block that is the smallest and measure it. Then make the other blocks the same size. Find the middle of that measurement and line the ruler up to those measurements. Trim all four sides, then done.
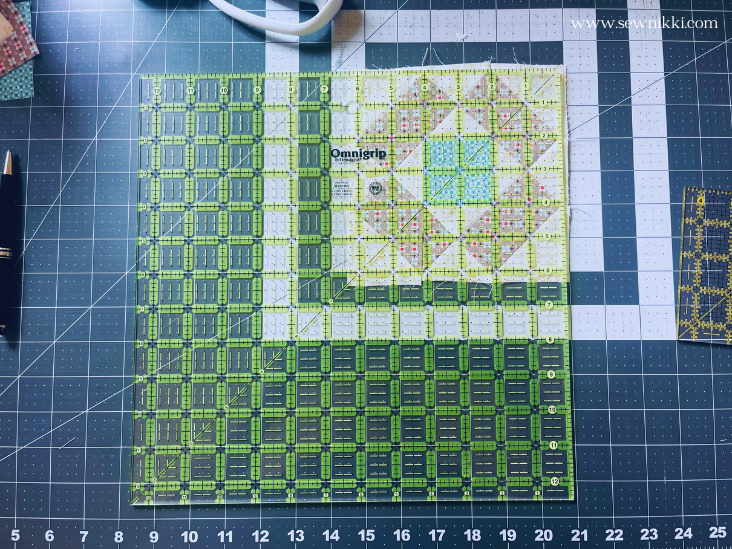
I didn’t think I had a 6.5″ square ruler, I found it after I finished this project. In the photo above, I used my neon Omnigrid 12.5″ square ruler and found the measurements for 6.25″. Then I found the center of that measurement which was just over 3″. I also lined up the ruler over the rectangle points and that helped me out tremendously when trimming.
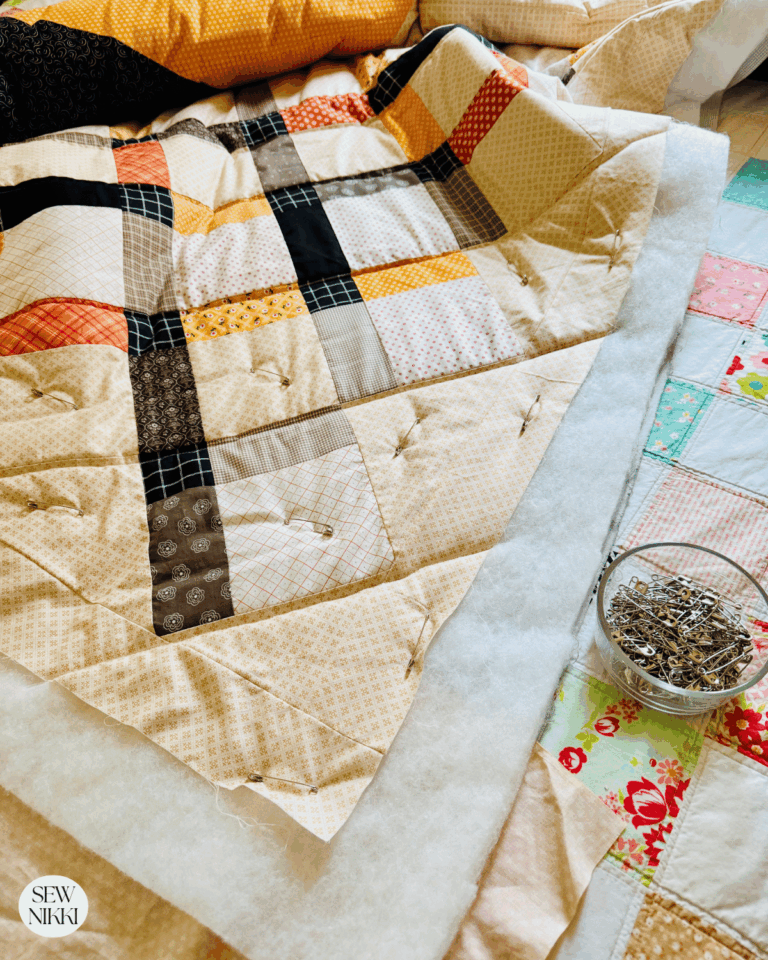
Make All Blocks And Finish With Sashing and Cornerstones
Make a total of 4 quilt blocks. Then connect sashing to blocks. Then connect outside and inside sashing strips with cornerstones. Last step is to connect the three rows to complete the table topper. Here’s the YouTube link for my sewing room’s video tutorial to make this Nonsense block table topper, click here.

Watch The Video For Complete Instructions
Watch Beth’s tutorial to complete the sashing and cornerstones. I had so much fun quilting this up. Did lots of quilting trying to follow seam lines in the blocks. Forgot to attach the binding correctly, was trying to get my colored cornerstones in the sashing placed just right.

Started the binding on the front of the table mat, oops. Adding cornerstones randomly to the quilt binding strips gives it lots of charm too.
I took leftover 2.5″ squares from the quilt blocks and added one of each color (other than brown) to the binding. I like the way that turned out. It would have looked 10 times better if I started the binding on the backside and then finished on the front side. Still looks awesome, I really love the colors she recommended that I could find in my fabric stash.
Beginner Quilting Supplies
Here are some quilting tools and supplies I recommend. I make a small commission if you purchase through the links, this helps to support this free content. For more info, check out Supplies for Beginners (Best Tools To Start).
Rotary Mat Cutting Mat (Self-Healing Mat)
28 mm Rotary Cutter Replacement Blades
45 mm Rotary Cutter with Sharp Blade (start with this one)
45 mm Rotary Cutter Replacement Blades (start with this one)
60 mm Rotary Cutter Replacement Blades
4.5″ Square Ruler for half square triangles
12.5″ Square Ruler for blocks
SAVE THIS PIN FOR LATER!
This post contains ads and affiliate links, which means I make a small commission at no extra cost to you. While the ads are annoying, it helps keep this blog going. See my full disclosure here.
Pattern Review
Loved this pattern once I got the hang of trimming up the half square triangle units with my 4.5″ square block quilt ruler. Beth’s blocks were 6.5″ and I don’t think she trimmed them. I accidentally trimmed mine and they ended up being 6.25″. Because I lost .25″, I was trimming right up against the rectangle but it came out fine in the end.
I don’t think this is a good pattern for a true beginner. You need to have some intermediate skills so I’m rating this a good pattern for advanced beginners. Intermediate skills are nesting seams to maintain proper lines to connect cut fabric units. Also, there are a lot of seams in this table topper and it’s challenging to machine quilt if you are a true beginner. Being able to read your ruler is key. Nesting seam lines also very important to get your rectangles right and on point.
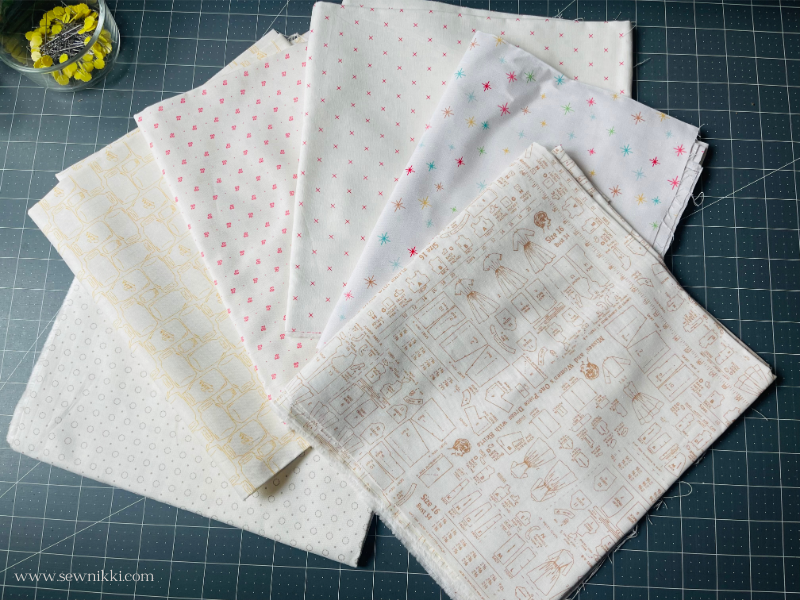
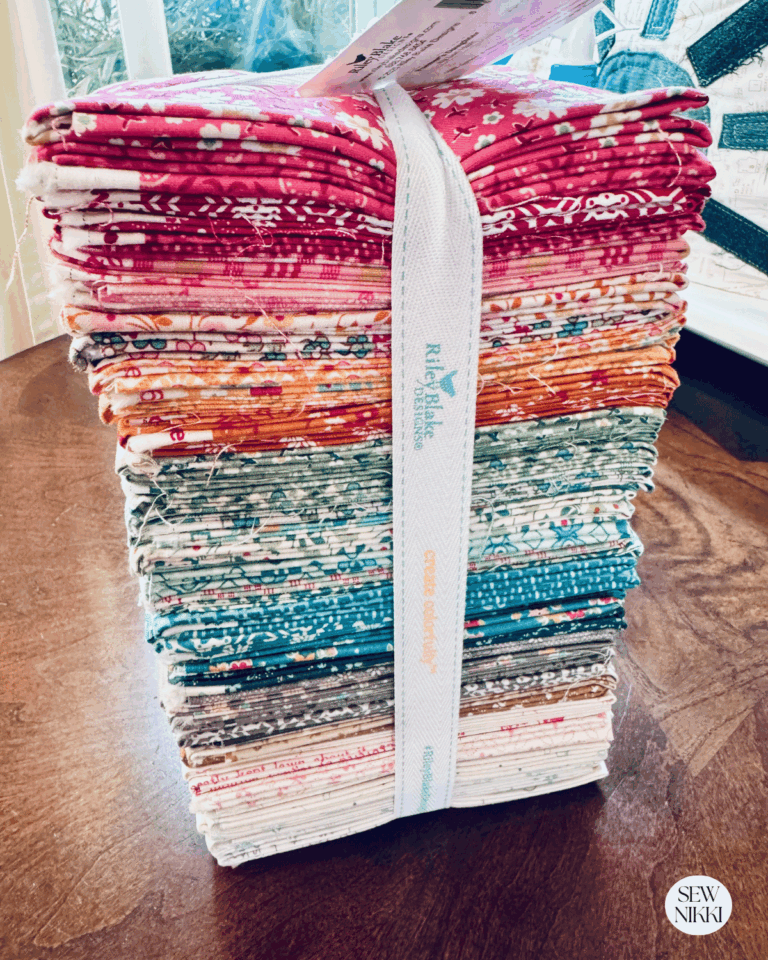
Use fabric that is both low volume and high volume prints. You want contrast in your quilt blocks. If you need to get low volume prints, here are some recent fabric purchases I made to add to my stash. These were in the Riley Blake fabric discount bins at my local fabric store.
Get Rulers That Work For You
There are so many brands of the same quilting rulers. Each brand has a different look or way of marking up the rulers. Every persons brain is different so when you purchase a ruler, make sure you understand how to read it before you buy it. Make sure it has clear markings, that you will be able to read the markings with a quilt block underneath it. I like the neon rulers because the markings are bright and easier to read with fabric underneath them. Also get a ruler that has diagonal lines too because you need that marking with a lot of quilt blocks.
Lay Out Your Block
After you sew the half square triangles and make the four hour glass units (two half square triangles sewn together), lay them out on your cutting mat. Put your center square on the mat first. Then place the hour glass units on all sides of the center square. Next, place your half square triangle units into the block and make sure the fabric is going the right direction. They will all fit like a puzzle pieces, it will make the rectangles perfect if you follow this step.
Quilt Blocks – Lining Up Seams Is Really Important
Lining up your seams, nesting them and pinning them in place before taking to the sewing machine is a must to get good rectangles in this block. Beth is a very experienced sewer and doesn’t always pin but as a beginner, don’t skip this step.
The table topper is the perfect size for any type of table. I fell in love with this quilt block too. Thank you Beth and your wonderful YouTube channel, my sewing room, and all your great projects and tutorials. You helped me build my confidence and taught me to not strive for perfection but try to enjoy the craft.
About Sew Nikki
If this is your first time stopping by, welcome! I’m Nikki, a maker obsessed with quilting, crochet, and all things fabric. Here, you’ll find easy-to-follow patterns, helpful tutorials, and plenty of inspiration for your next handmade project. Grab your fabric (or yarn), and let’s create something beautiful together!
Follow me on social media (Pinterest, Instagram, Facebook and Twitter) so you get notifications when I post new patterns and tutorials.
Want to learn how to crochet? Then check out this post, How to Learn How to Crochet – Guide for Beginners.

Looks like a cute little starter project if you want to get into quilting! I hope to try this out soon for myself!
Thanks Mariah – fun little project, let me know how it turns out.