Circle Baby Quilt (PDF) – Free Modern Quilt Pattern
Today’s free modern quilt pattern is for the Circle Baby Quilt pattern. What makes this a modern design are the circle blocks. Even if you are a traditional quilter, you will enjoy making this modern block. If you don’t want to make a baby quilt, you can always use this as a wall hanging. Mine is hanging in my office and I love it!

My favorite quilts are simple ones with simple piecing, that don’t stress me out and finish pretty fast. This quilt uses an acrylic circles template and once you make a few blocks, you will feel more comfortable sewing on a curve. Take breaks when needed and be creative with the different colors you can combine. I’m using different prints and shades of blue and red, this includes some pink fabric.
This free pattern is easy to adjust into any size quilt. Just adjust your rows with the number of blocks needed to get to your desired length and width. Or follow my pattern and gift this to a baby in your family or group of friends. Let’s get into this easy modern quilt pattern.
Make sure you check this out!
Grab a copy of my Quilt Planning Journal, filled with graph paper and note pages to help you design 4 quilts or sewing projects! You can jot down ideas, sketch, color, add quilt math and fabric swatches. Then pin in a photo of your finished quilts and enjoy your creative process!
Use Acrylic Circle Template
For this quilt pattern, I’ll be using a 6″ quarter circle template, which creates a 12.5″ unfinished quilt block once you join four pieces together. These template are for inset circles. It will be a square block with an inner circle for clarification.
These acrylic templates aren’t full circles but quarter circles. Each quarter circle is sewn into a background square. When four are joined together, they form a complete circle inside a square block. The final circle block will be 12.5″ x 12.5″ untrimmed.
Circle Baby Quilt Pattern
Materials Needed
- Acrylic quarter circle template set (I’m using the 6″)
- Rotary cutter and cutting mat
- Quilting cotton fabric in at least two contrasting colors
- Sewing machine with 1/4″ foot
- Pins or clips
- Iron and pressing mat
Finished quilt size 44″ x 44″ quilted and bound.
Make Circle Quilt Blocks
You will need to make 16 full circle blocks. The instructions below are for one block. Repeat until you have all blocks made. Make 8 – Block A and 8 – Block B blocks.
Cutting Instructions
- Choose two fabrics: one for the circle (inner curve), one for the background.
- Use the 6″ quarter circle acrylic template to cut four curved pieces.
- Cut four matching background units using the template’s outside curve (adjust if desired).
Sewing the Quarter Circle Units
- Lay out your pieces so you can see how the circle will fit into the background.
- Flip the quarter circle on top of the background piece, right sides together.
- Pin the ends first — align the two edges of the curve flush with the background square and pin them in place.
- Slowly pin around the curve — working from the left to the right, ease the fabric until the quarter circle matches the curve of the background. Add pins along the way to keep it secure.
- Sew with a 1/4″ seam allowance — take it to your sewing machine and stitch slowly along the curve, making sure the bottom fabric doesn’t wrinkle up. Remove pins as you go (never sew over them).
Repeat until you have four quarter circle units.
Assemble Full Circle Block
- Lay out your four quarter circle units so the curves form a complete circle.
- Sew the first row — join two quarter circle units together, nesting at the seams. Do the same for the second row.
- Join the rows — sew the two rows together, again nesting the seams for a clean match.
- Pressing tip: I don’t press anything until the entire block is sewn together. Then I give it a final press to keep the circle smooth.
Makes 12.5 x 12.5 inch squares (untrimmed). Just finger press as you are making the unit and press with iron when full circle block is done.
Quilt Layout
This quilt is laid out in a 4 x 4 block grid. Four rows with four circle blocks per row. It also doesn’t have a border to keep it more modern looking but feel free to add a border if you want to make this wall hanging into a baby quilt instead.
This sample quilt has two block types, Block A and Block B, depending on what background fabric. I’ve used four different blue fabrics for the background, paired into two sets of two.
| Row | Block | Block | Block | Block |
|---|---|---|---|---|
| 1 | Block A | Block B | Block A | Block B |
| 2 | Block B | Block A | Block B | Block A |
| 3 | Block A | Block B | Block A | Block B |
| 4 | Block B | Block A | Block B | Block A |
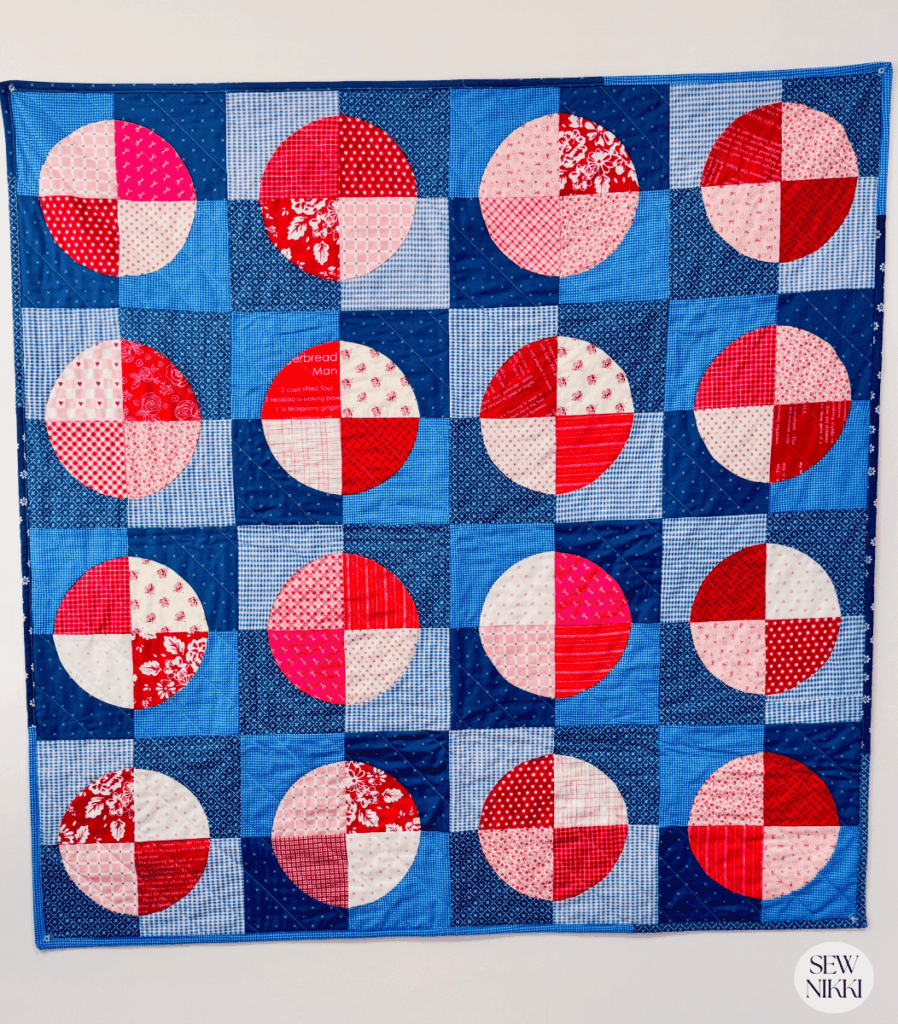
The two blocks rotate in each row and the fabric from the blocks will match at the corners from row to row. This is totally optional but the effect is beautiful when done. The point is that there are two different blocks depending on the background fabric. Let’s call them Block A and Block B.
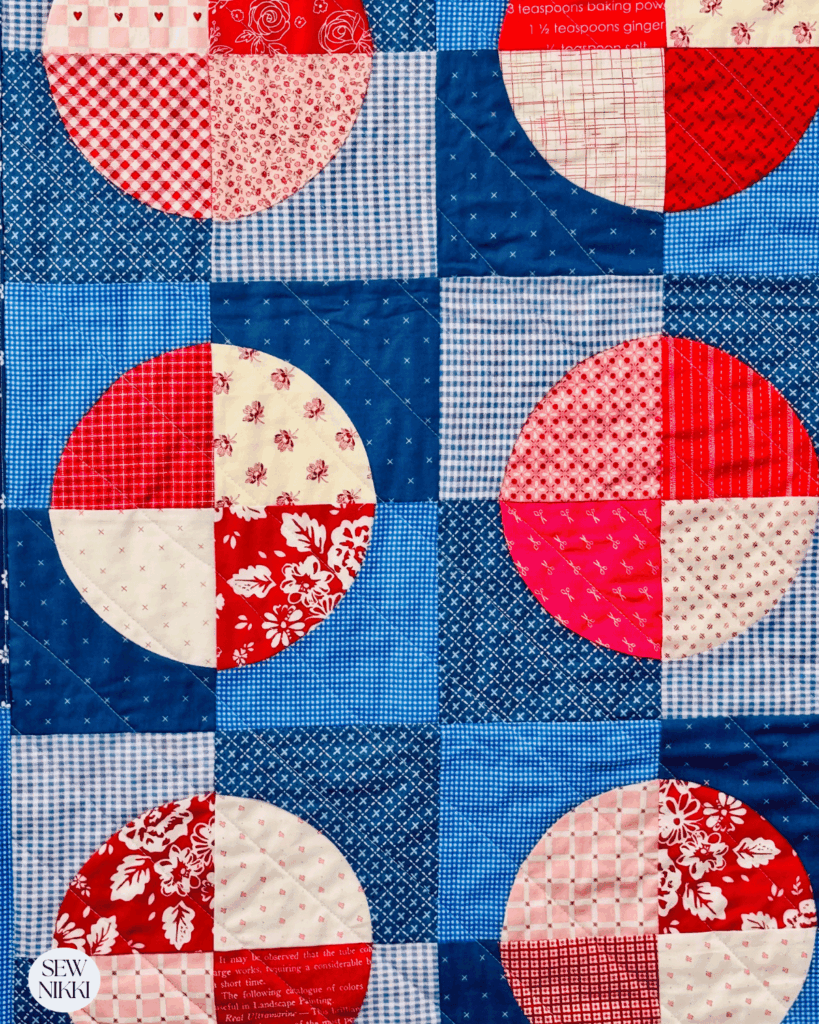
The red and pink fabrics for the quarter circles is really random, I recently used a bunch of red fabrics in the Churn Dash Holiday Quilt so didn’t have a lot left over. So I added pink and some low volume fabrics with red. I’m not in love with the circle fabrics but that’s ok.
Sew Blocks Into Rows
Following the quilt layout chart, arrange your circle blocks into a 4 x 4 grid. Alternate between Block A and Block B and make sure you match the fabric corners from row to row like the photo above. It makes a great secondary pattern.
When sewing, match up the seams and pin in place. Then attach with a 1/4″ seam allowance. The circle seams are the most important, so nest your seams well.
Sew Rows Together
Again, nest your seams by pinning or clipping in place. My Resource page has links to all the quilt products I use including clips and pins.
When all your rows are sewn together, take to your ironing board and press well with an iron.
Keeping it Scrappy
In keeping with the theme of only using fabrics in my stash, I’m using this blue floral print and added one red fabric to the top. Scrappy pieced backings allow you to use what you have to cover your quilt top.

Machine Quilt Designs
I was so tempted to use tailors chalk and a make shift geometric ruler with some string and a pencil to do a circular pattern for the machine quilting design. My brain wanted simple so I ditched that idea but a small quilt is the perfect time to try ideas like this.
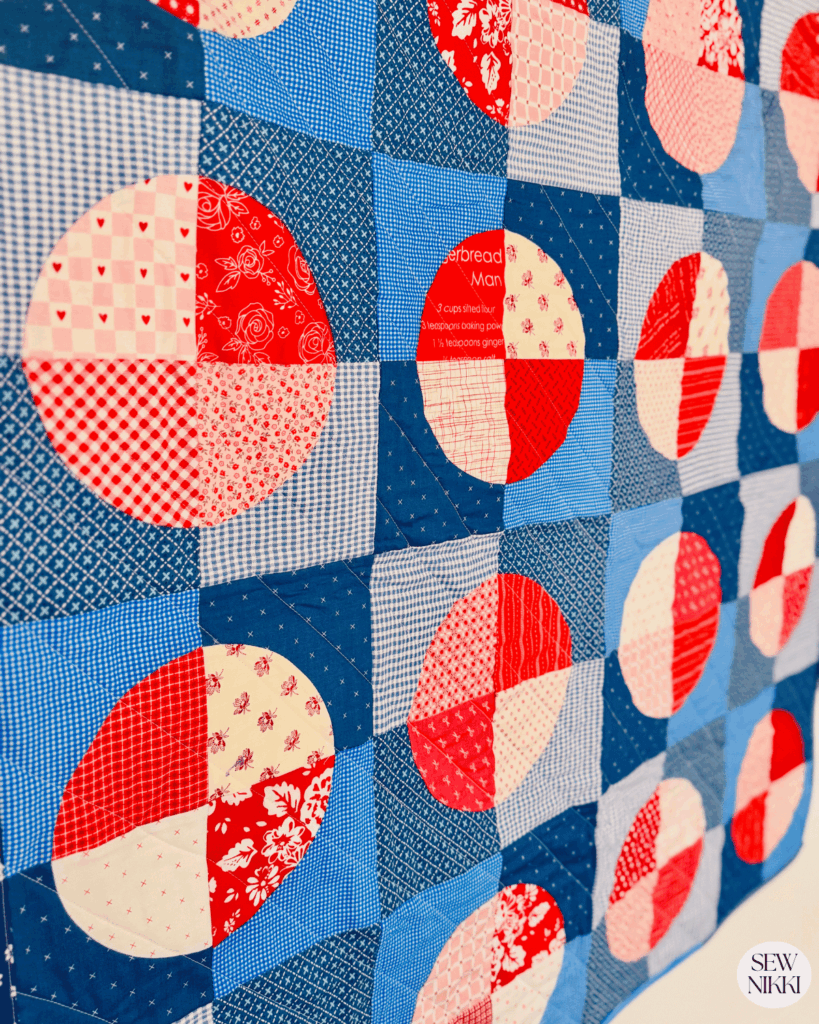
Instead, I decided to not follow seam lines and quilt in one direction only diagonally. Just eye balling my path because this quilt was for me to hang on my wall. My lines were close enough but using a straight ruler and washable tailors chalk works for any size quilt.
Full tutorials on each step in the quilting process is listing in Quilting 101 or in the Quilting Tutorials section of this blog.
Get the digital pattern.
Get the instant download pattern here.
ABOUT SEW NIKKI
Welcome to Sew Nikki. Your place for free crochet, sewing and quilt patterns for beginner to intermediate skill levels. Want a digital pattern? We have those too! Plus tutorials to walk you through how to make each item from start to finish.
Again, I hope you enjoy making this free quilt pattern. I didn’t trim my quilt blocks but some were off and I was careful sewing them. This didn’t effect the final outcome but I don’t recommend this if you are new to quilting. This is a great scrap quilt as you can see all the different fabric used, even 3 different but close background fabrics.
This post contains ads and affiliate links, which means I make a small commission at no extra cost to you. While the ads may seem annoying, it helps keep this blog going. See my full disclosure here.


This is such a beautiful quilt! I love that you break every step down. Thank you for the inspiration!