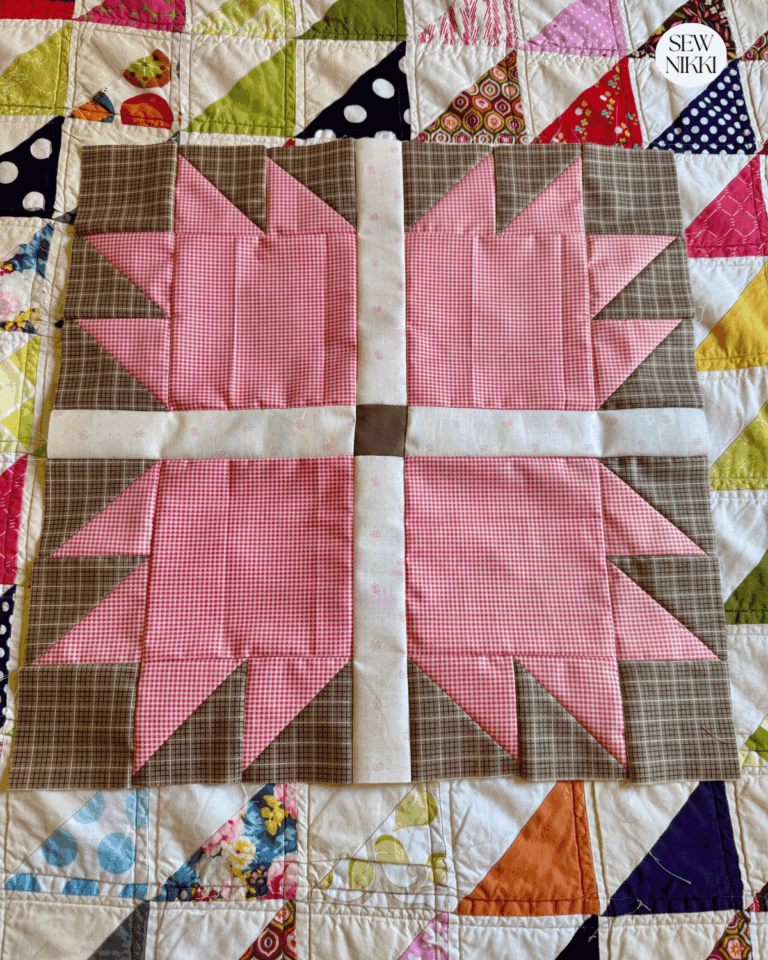
Free 8 Point Star Quilt Block Tutorial & Pattern
This Eight Point Star Quilt Block Tutorial shows you how to make a classic star quilt block using simple squares and triangles. This block looks more complicated than it really is, which makes it a good project for confident beginners who are ready to try something a little more interesting.
Why This 8 Point Star Quilt Block Is Fun to Make
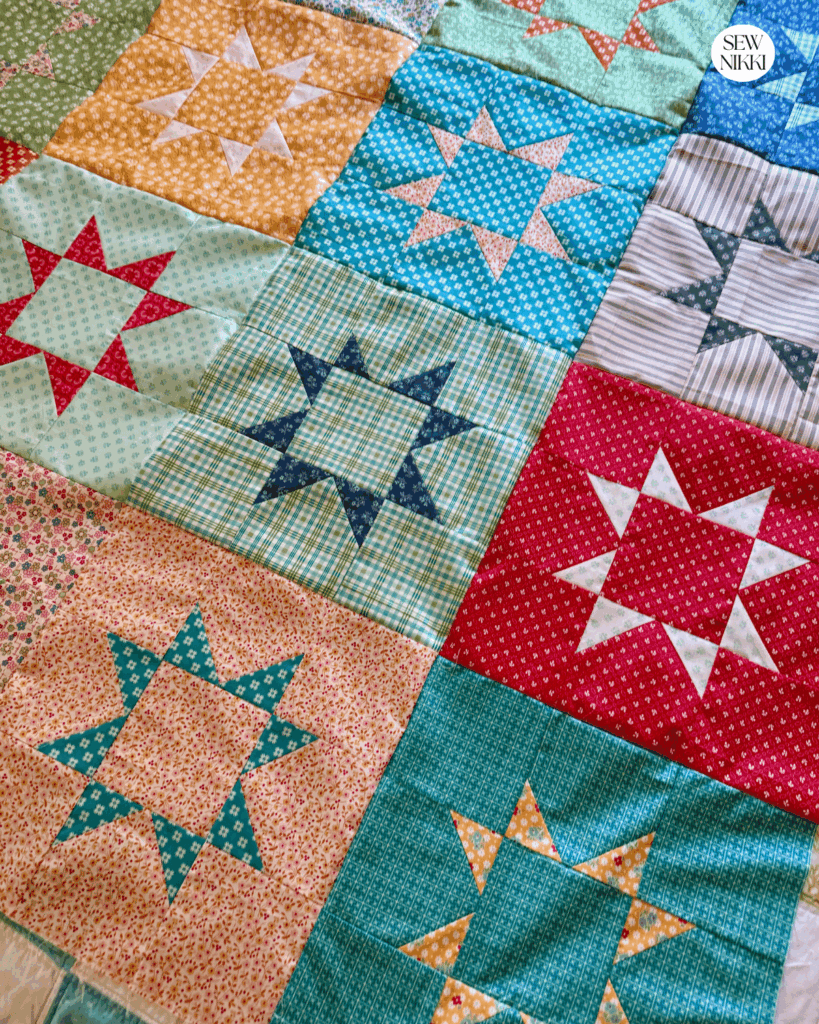
I like quilt blocks that look like you spent all day making them when you really did not. This eight point star quilt block is one of those blocks. The star points give the block plenty of detail, but the construction is simple and does not require half square triangles, y seams, or a pile of specialty rulers.
I made this sample with fat quarters, but you can use yardage if that is what you have. You can also make the star with a dark fabric and a lighter background, use a scrappy mix of fabrics, or keep things simple with two fabrics. The finished block makes a great focal point in a quilt top and works well with other traditional quilt blocks.
MAKE SURE YOU CHECK THIS OUT!
After you read this post, make sure you also check out Learn How to Quilt for Absolute Beginners. It’s jam packed with information to make your first quilt. It also has links and resources that are so helpful when you’re first learning. There’s lots of free quilt patterns that are great for beginners and all skill levels too. So make sure you check this out, seriously don’t forget!
Grab a free Quilt Planning Journal. It’s filled with graph paper and note pages to help you design at least 4 project! Pin in fabric swatches, photos of your finished items and enjoy your creative process!
8 Point Star Quilt Block Pattern
This 8 Point Star Quilt Block Tutorial (Free Pattern) makes one block at a time. The block uses nine 5 inch squares of Fabric A and four 3.5 inch squares of Fabric B. The smaller squares are cut in half diagonally to make the eight triangles needed for the star points.
The block is simple enough to make without complicated piecing, but accurate cutting and consistent seam allowances will make a big difference. Finished block size is 14″.
Sample Fabric
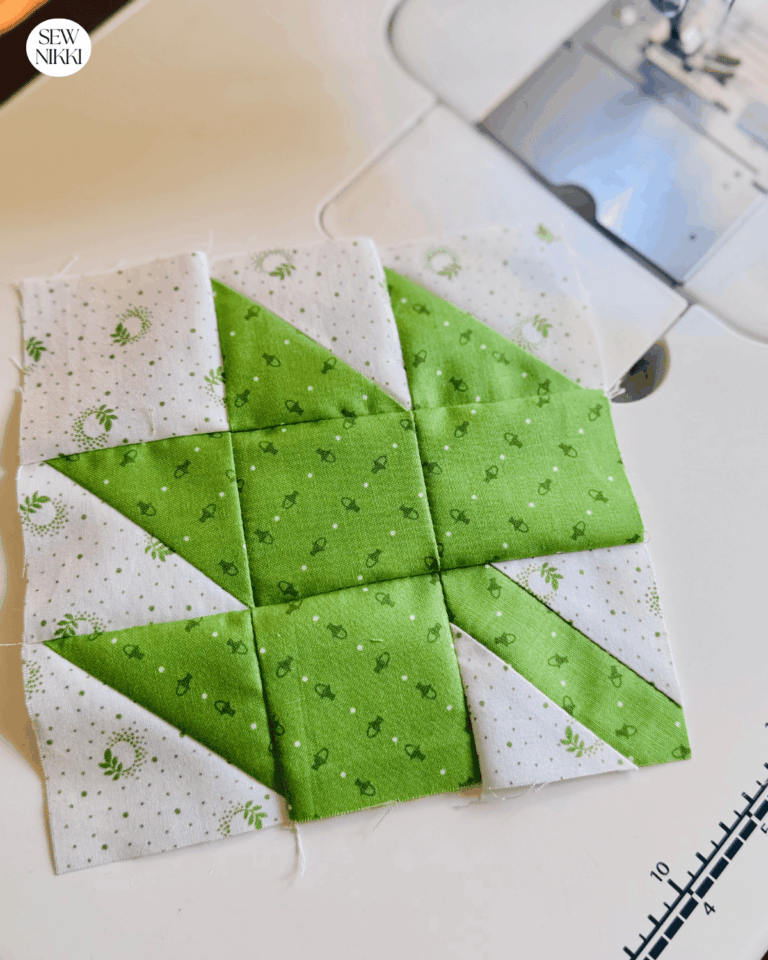
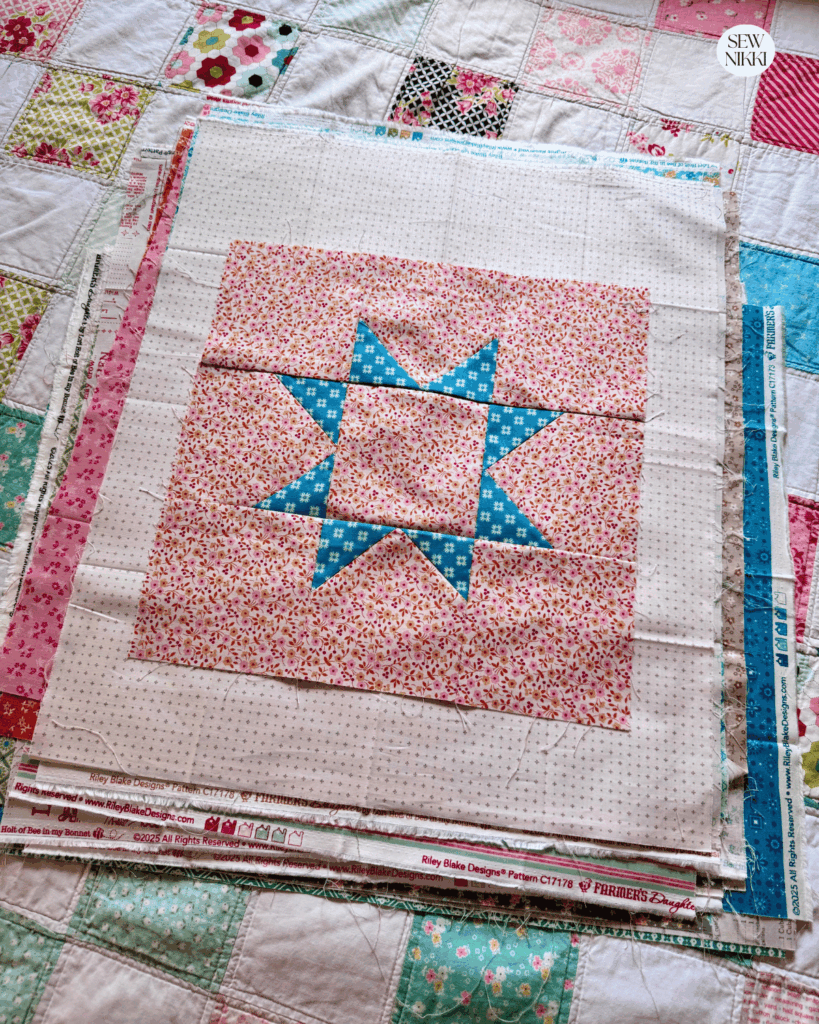
The fabric used in my sample blocks and Scrappy Stars quilt is Lori Holt Farmer’s Daughter Fat Quarter Bundle. Fat quarters in a bundle are great because you know that most of the fabrics will go together which is important for this type of scrappy quilt.
Supplies and Materials
This block requires two different fabrics. You need almost one fat quarter to make a block. But if you pick your two fabrics and cut out all pieces, you can make two opposing blocks.
For one eight point star quilt block, you will need the following:
- One fat quarter of Fabric A
- One fat quarter of Fabric B
- Rotary cutter
- Cutting mat
- Quilting ruler
- Sewing machine
- Thread
- Iron and ironing surface
A regular quilting ruler is all you need for this pattern. There is no need to buy specialty rulers just to make this block.
If you are making several star blocks for an entire quilt, you can cut your pieces from yardage instead of fat quarters. Just make sure you have enough fabric for the number of blocks you plan to make.
Cutting Measurements
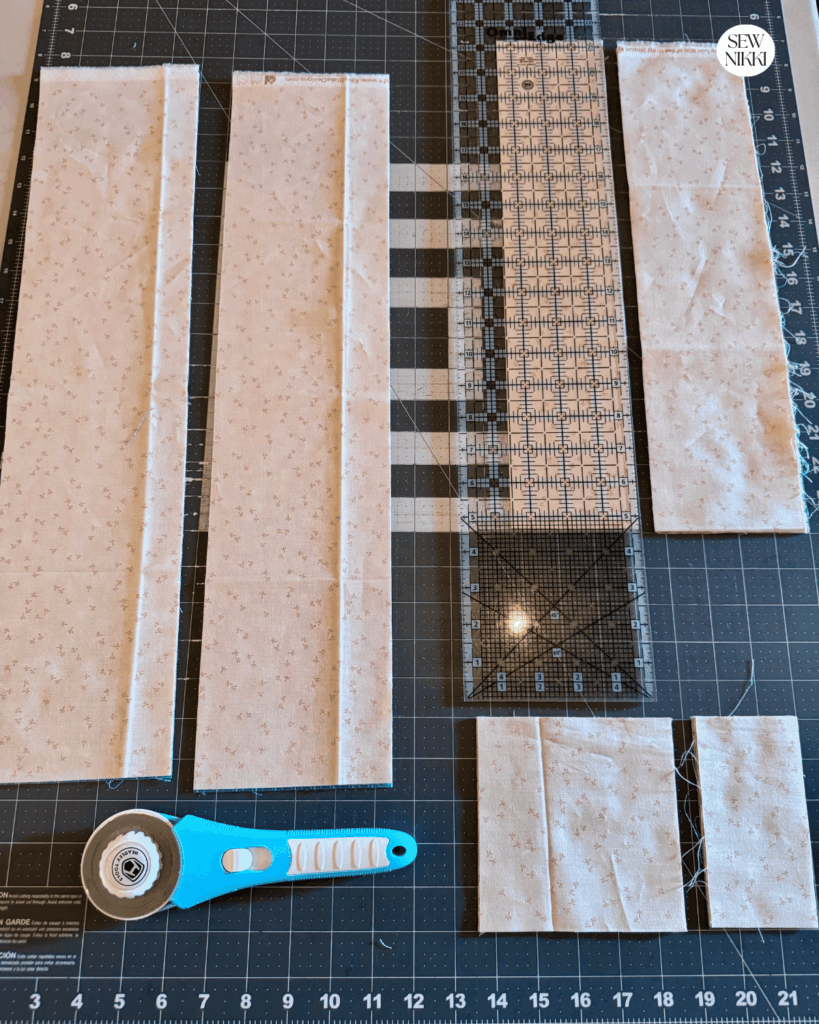
Fabric A
You need 9 – 5″ squares from Fabric A.
Start by cutting two 5″ strips across the full length of the fat quarter. These are your WOF (width of fabric) strips. Sub cut the strips into 5″ squares.
Turn the remaining fat quarter in the opposite direction and cut another 5″ strip. Sub cut this strip into one more 5″ square.
You need a total of:
- 9 Fabric A squares measuring 5″
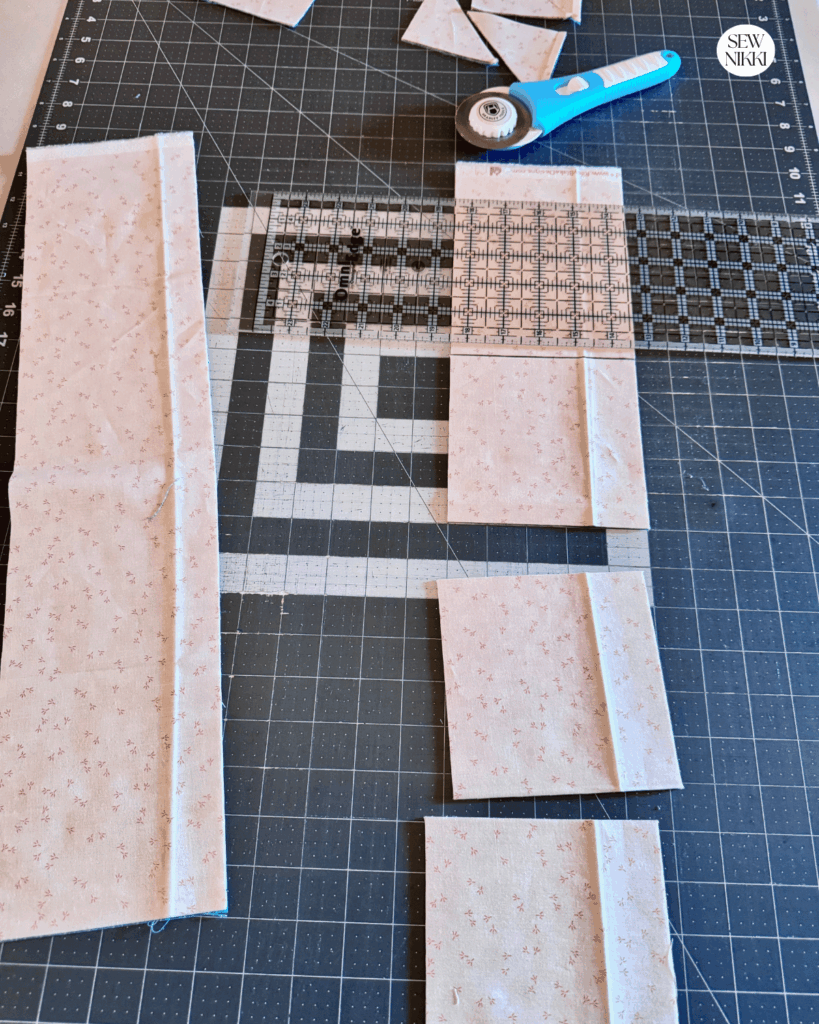
Fabric B
From the remaining fat quarter, cut 1 – 3.5″ strip along the length of the fabric. Sub cut the strip into 4 – 3.5″ squares.
Cut each 3.5″ square once from corner to corner on the diagonal line. This gives you eight triangles.
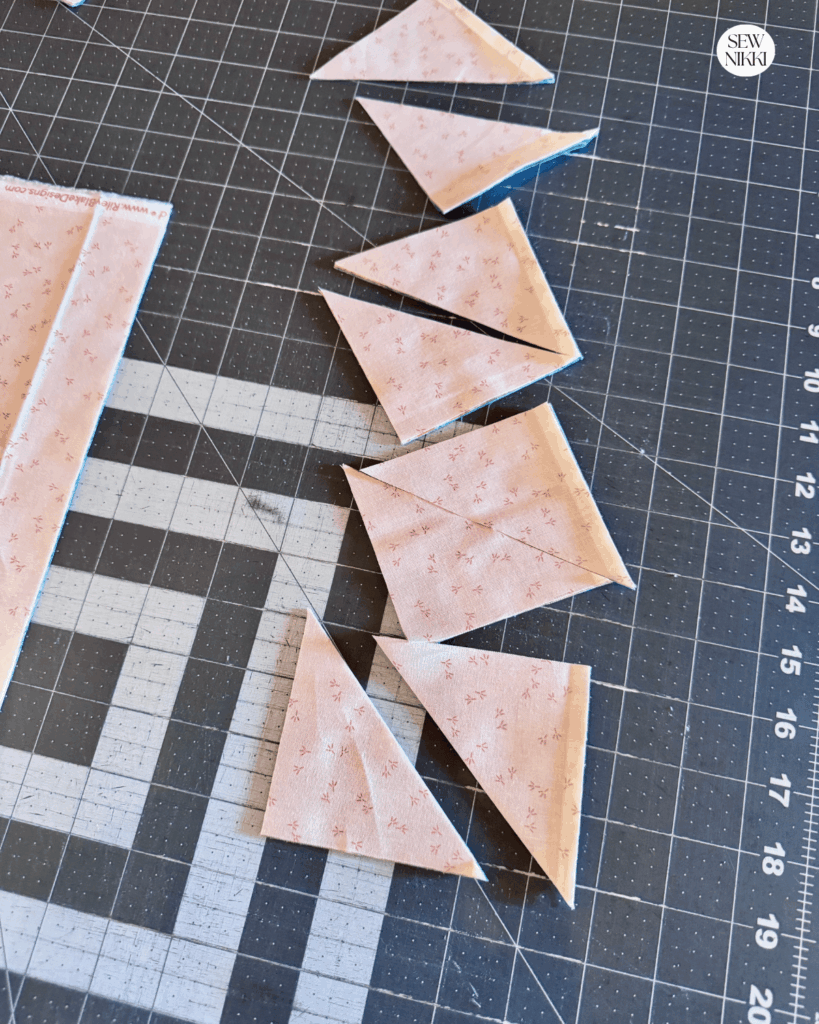
You need a total of:
- 4 Fabric B squares measuring 3.5″
- 8 Fabric B triangles after cutting the squares diagonally
Keep your pieces organized after cutting. It only takes a few minutes to separate the pieces, and it can save you from accidentally sewing a star point in the wrong direction later.
How to Make the Eight Point Star Quilt Block
Step 1: Make the Star Point Units
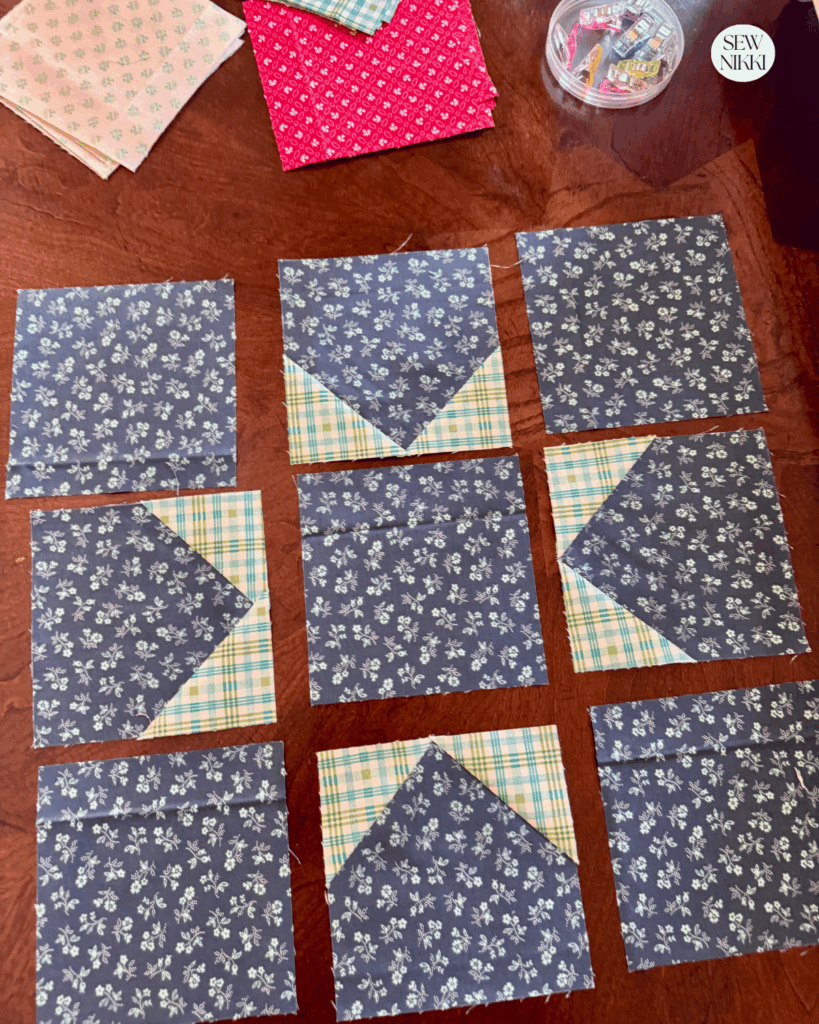
Layout your fabrics to form the block as shown below. Take 4 – 5″ squares and all the triangles to your sewing machine.
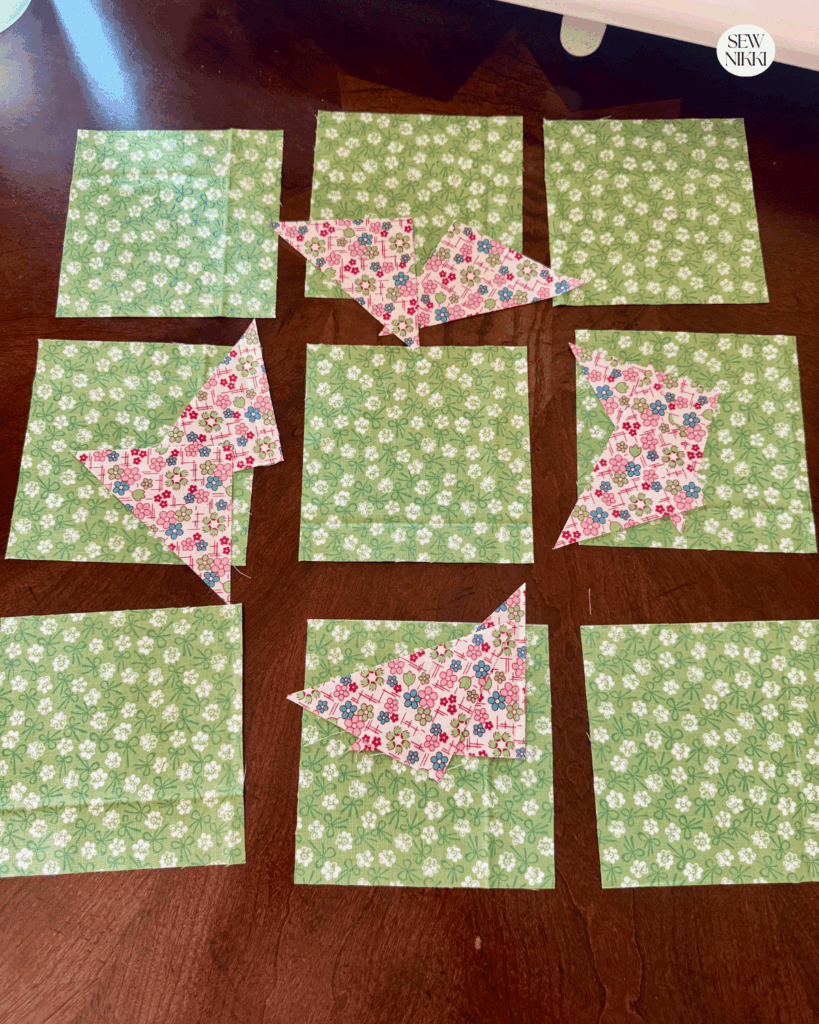
Take one Fabric B triangle and place it on the lower right corner of the square with the right sides together (shown below). The long edge of the triangle should run down the center of the square.
Pro tip: Keep your triangle level so your points face the same direction. Make sure that the tips of the triangle hang over the block slightly.
Sew the triangle to the square using a 1/4″ seam allowance. Sew one triangle to the lower right corner for all four blocks and then press with iron.
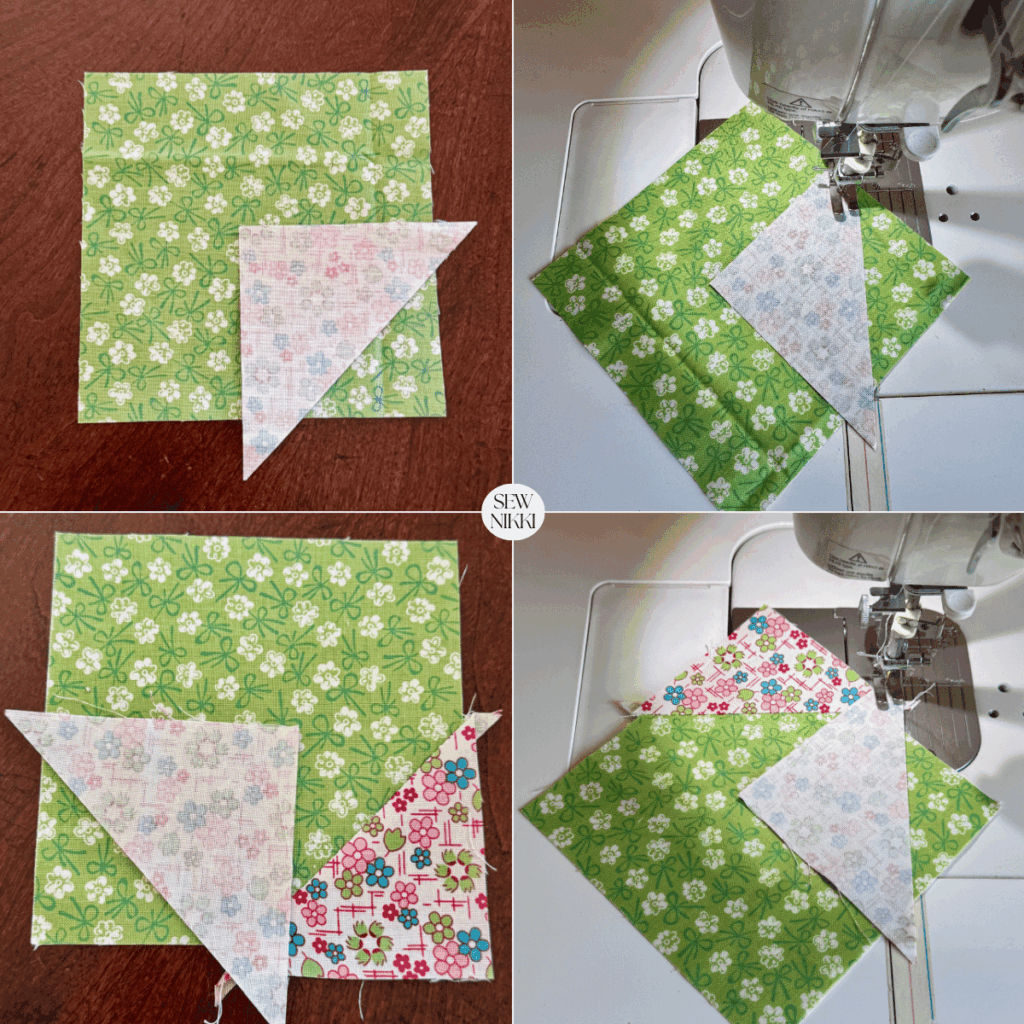
Place a second triangle on the opposite side and slightly overlap the first triangle. Sew it in place using the same 1/4″ seam allowance.
Open the second triangle and press with iron. Repeat for all four star units in the block (there are four).
You now have four units with two star points.
Trim your star units before finishing the block. Working on the backside of the unit, trim the excess fabric using the 5″ square as your guide. Do this for all four units.
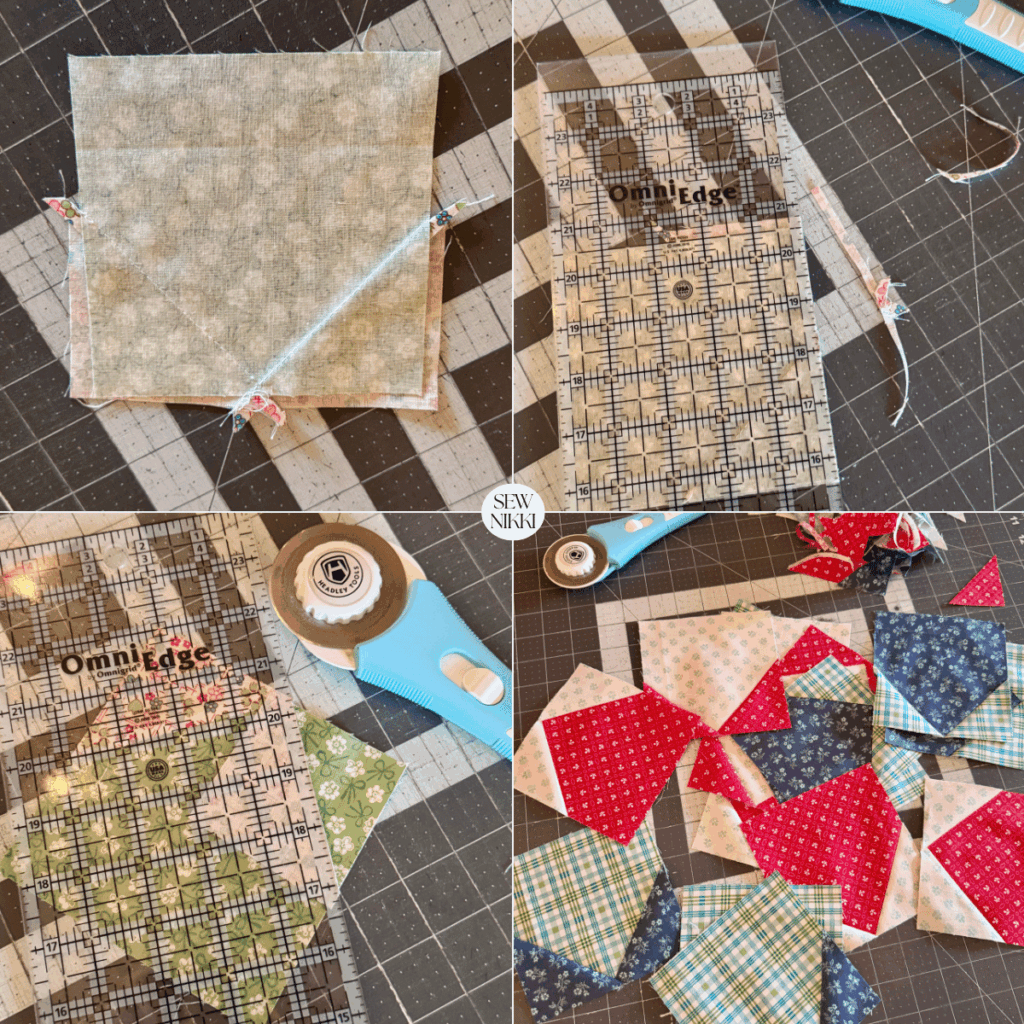
Next, turn the point up and trim the excess fabric from the 5″ block. Repeat for both star points.
Step 2: Lay Out the Block
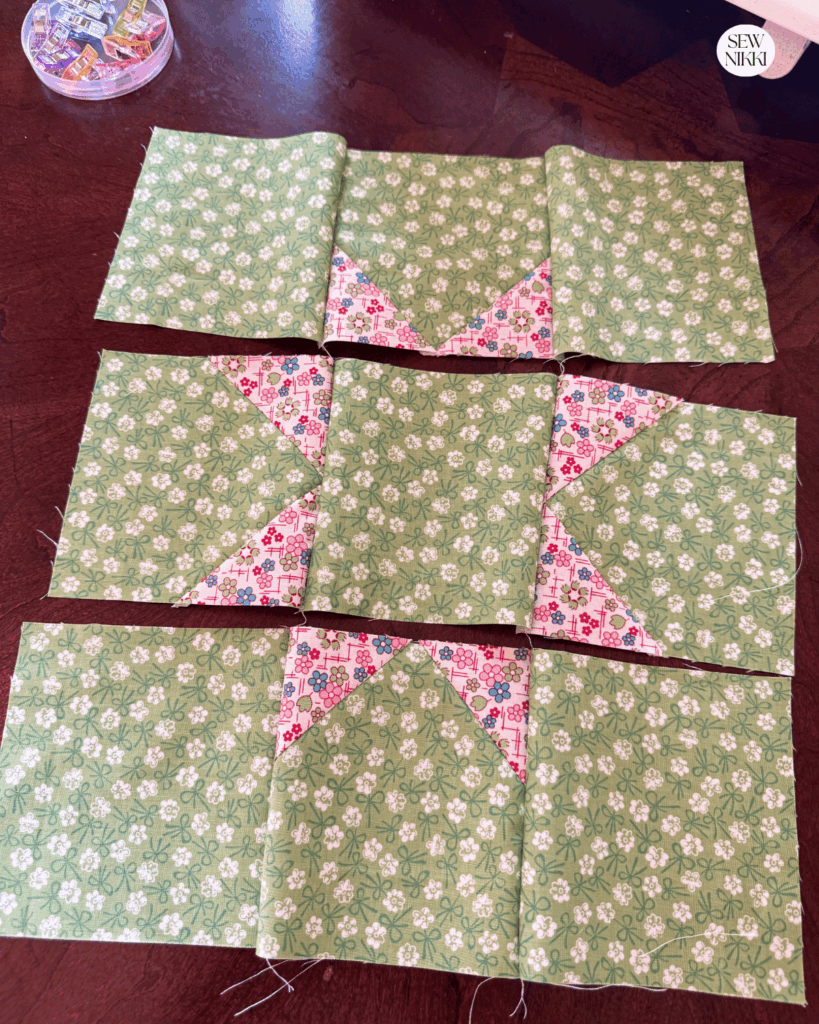
Lay your pieces on your work surface before sewing the block together. This is the easiest way to make sure your star points are going in the right direction.
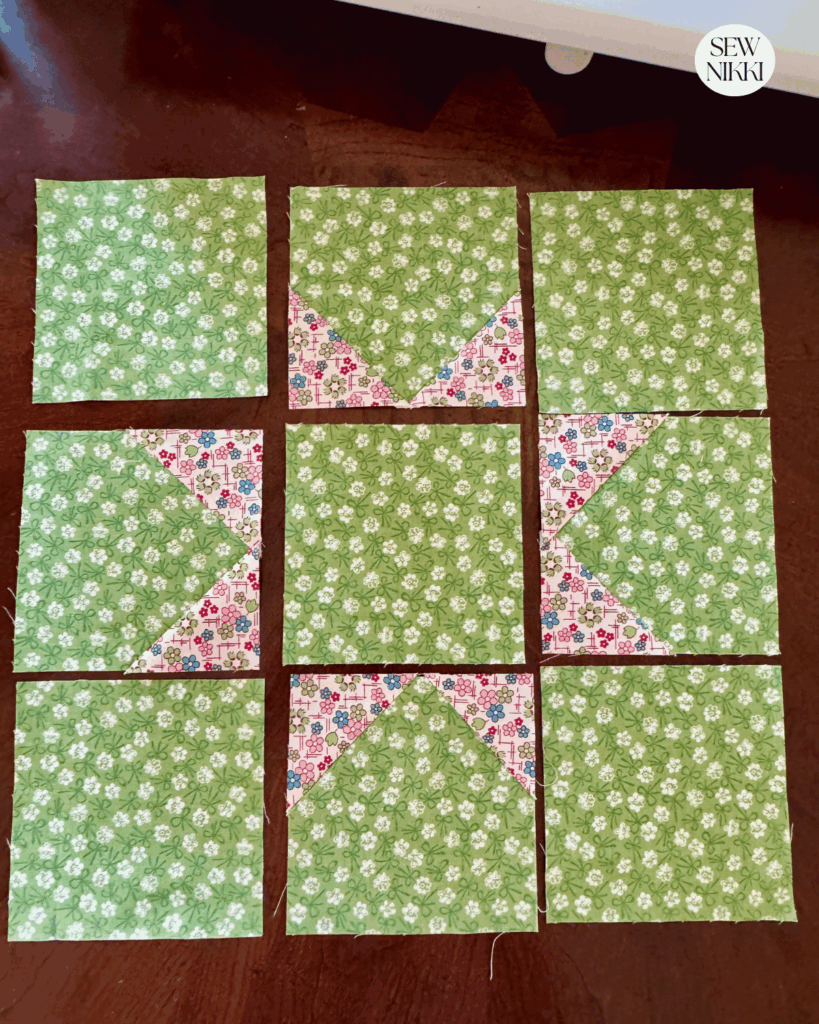
Arrange the pieces into three rows.
The top row has one plain 5″ Fabric A square, a star point unit, and another plain 5″ Fabric A square.
The center row has one star point unit, plain 5″ Fabric A square, and another star point unit.
The bottom row repeats the top row.
Look closely at the star points before you start sewing. The triangles should point away from the center of the block. This is one of those times when stopping to look at the whole block saves you from reaching for the seam ripper later.
Step 3: Sew the Rows
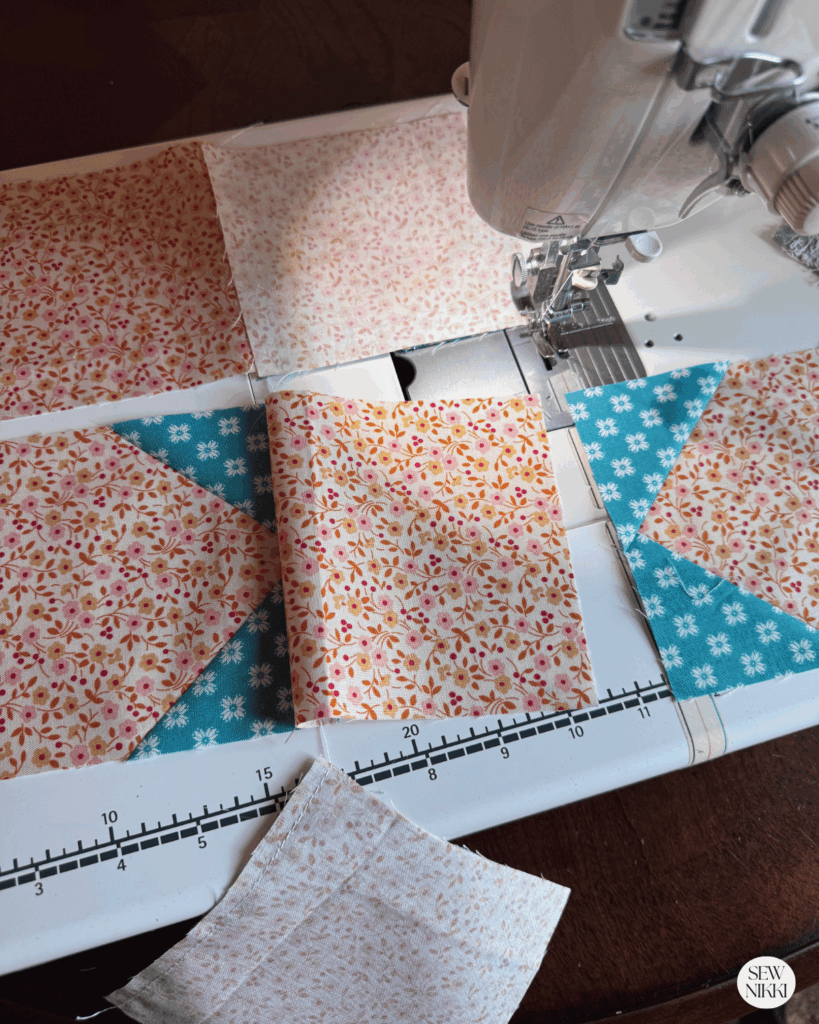
Sew the pieces in each row together using a 1/4″ seam allowance.
Press the seams in opposite directions from one row to the next. This helps the seams fit together when you join the rows.
Take your time matching the seams. You do not need perfect points to make a pretty quilt, but accurate cutting and steady sewing will give you cleaner star points.
Step 4: Join the Rows
Place the first and second rows right sides together. Match the seams, nest them and then sew together using a 1/4″ seam allowance.
Press the seam.
Place the third row right sides together with the second row. Match the seams and sew.
Press the final seam.
Give the finished block a good press and check the size before adding it to your quilt.
Get the digital pattern.
Get the full digital pattern to make the Scrappy Stars quilt here.
Finished quilt measures 55″ x 55″. Digital pattern available in my shop with the full instructions.
More Resources You May Like
For more quilting education, the Quilters Newsletter blog has a large collection of quilting information and inspiration. Suzy Quilts also has helpful quilting tutorials and tips for quilters who want to learn new techniques.
If You’re New Here
Welcome to Sew Nikki. I make quilting and crochet tutorials for real people who want to make things without making the process harder than it needs to be.
Especially like simple quilt blocks, beginner friendly patterns, practical quilting tips, and projects that use fabric you may already have in your stash. And I’m not interested in making you feel like you need every new ruler, tool, or fabric collection before you can make a quilt.
If you are new to quilting, start with my Learn to Quilt page. It walks you through the basic steps and gives you a place to start before jumping into different quilt patterns.
You can also browse my free patterns and tutorials when you are ready for your next project.
Frequently Asked Questions
Is the Eight Point Star Quilt Block good for beginners?
Yes. This is a good block for confident beginners because the construction is straightforward. You will need to be comfortable cutting accurately and sewing a consistent quarter inch seam allowance.
Does this block use half square triangles?
No. The star points are made from triangles cut from 3.5 inch squares. Many star quilt patterns use half square triangles, but this version does not require them.
Can I use yardage instead of fat quarters?
Yes. Fat quarters make the cutting easy for one or a few blocks, but yardage works well when you are making a larger quilt.
Do I need a specialty ruler?
No. A rotary cutter and a regular quilting ruler are enough to cut the pieces for this block.
Can I make this block scrappy?
Absolutely. A scrappy star quilt can be a great way to use smaller pieces of fabric. Keep the background fabric consistent if you want the star points to stand out.
Is this the same as a Lemoyne Star block?
No. A Lemoyne Star block uses a different construction method and commonly involves diamond shapes and y seams. This eight point star quilt block is much simpler to sew.
About Sew Nikki
If this is your first time stopping by, welcome! Your place for free crochet, sewing and quilt patterns for beginner to intermediate skill levels. Want a digital pattern? We have those too! Plus tutorials to walk you through how to make each item from start to finish.
Follow me on social media (Pinterest, Instagram, Facebook and Tik Tok) so you get notifications when I post new patterns and tutorials.
Looking for your next quilt project? Then head on over to my free “Pattern Index”. It’s a page dedicated to all of my free patterns separated by categories for crochet, sewing and quilting.
If you prefer an ad-free printable version, head over to my shop and browse the Digital Patterns. These are instant digital downloads you print yourself.
This post contains ads and affiliate links, which means I make a small commission at no extra cost to you. See my full disclosure here.