How to Make a Bear Paw Quilt Block (Free Pattern)
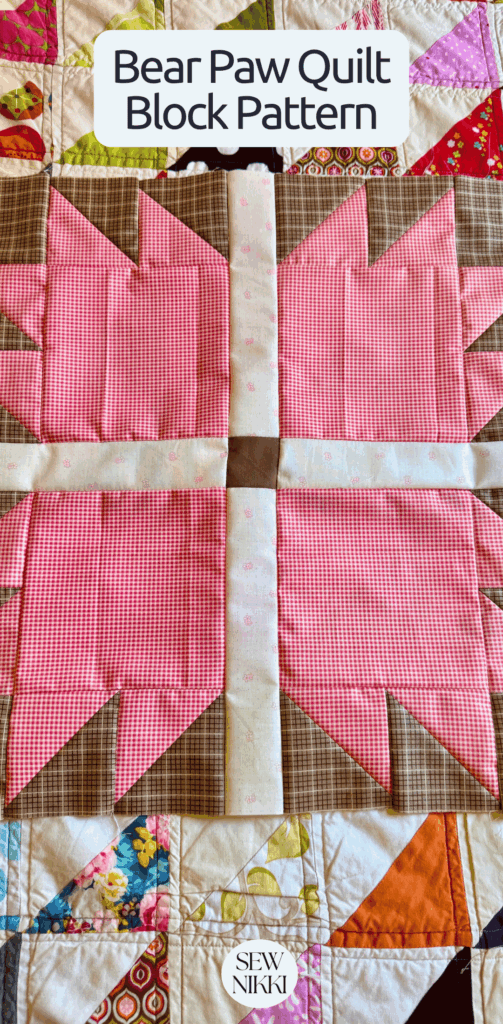
In today’s blog post, I’ll show you How to Make Bear Paw Quilt Block using the 8 at a time half square triangle method. This classic quilt block is easier to make than it looks, and the large size gives you a bold block without a pile of tiny pieces. Finished untrimmed block measures 18.5″.
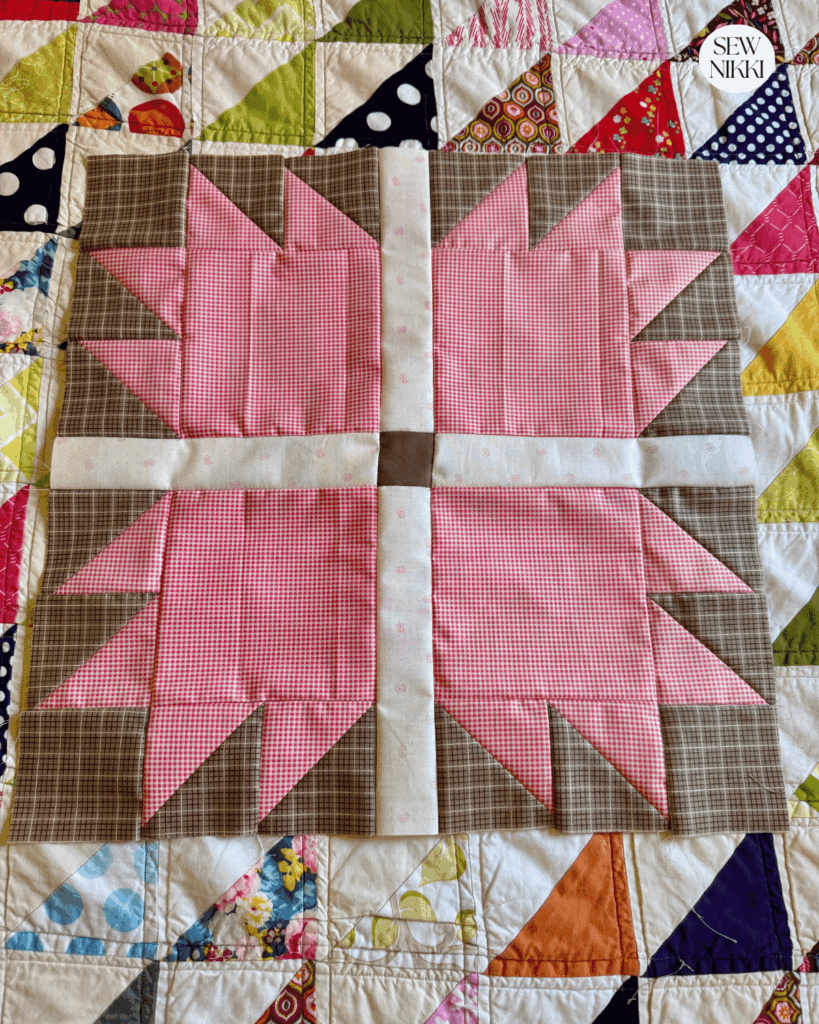
For my sample, I used four fabrics: pink gingham for the paw, brown plaid for the background, low volume pink and white fabric for the stripes, and solid brown for the center. I love how these fabrics give the traditional block a soft, vintage look.
Why This Classic Bear Paw Quilt Block Is Fun to Make
The Bear Paw quilt block is one of those classic blocks that looks complicated when you first see it, but the construction is pretty straightforward. Four paws come together around a center square, with the stripe fabric separating each paw.
The large 18.5″ size is another reason I like this block. You can make a quilt top with fewer blocks, which means less time piecing hundreds of little pieces together. That is always a good thing in my book.
This is also a great way to use fat quarters. Two fat quarters make the main paw and background fabrics for one block, while the stripe and center pieces are small enough to come from your stash.
MAKE SURE YOU CHECK THIS OUT!
After you read this post, make sure you also check out Learn How to Quilt for Absolute Beginners. It’s jam packed with information to make your first quilt. It also has links and resources that are so helpful when you’re first learning. There’s lots of free quilt patterns that are great for beginners and all skill levels too. So make sure you check this out, seriously don’t forget!
I made a free Quilting for the Seasons Calendar to help you plan your quilts around holidays and special occasions. It gives you a simple starting point for deciding when to begin a seasonal quilt so you are not trying to figure it out at the last minute. Print it and keep it in your sewing room, planner or quilt notebook.
How to Make Bear Paw Quilt Block
This Bear Paw quilt block measures 18.5″ finished and untrimmed. The paw sections are made using the 8 at a time HST method.
Supplies and Fabric Requirements
- 2 Fat Quarters or Yardage
- Rotary cutter
- Quilting ruler
- Cutting mat
- Pencil
- Iron and ironing board
- Quarter inch presser foot
For my sample, I used pink gingham for the paw, brown plaid for the background, low volume pink and white for the stripes, and solid brown for the center. Total fabric for one block is two fat quarters, you will have fabric leftover.
Cutting Measurements (One Block)
Paw Fabric
Pink gingham:
- 4 – 6″ x 6″ corner paw squares
- 2 – 7.5″ x 7.5″ half square triangle squares
Background Fabric
Brown plaid:
- 4 – 3.25″ x 3.25″ background corner squares
- 2 – 7.5″ x 7.5″ half square triangle squares
Stripe Fabric
Low volume pink and white:
- 4 – 2″ x 8.75″ sashing and border rectangles
Center Fabric
Solid brown:
- 1 – 2″ x 2″ center sashing square
Step 1: Make the Half-Square Triangles
Pair each 7.5″ paw square with a 7.5″ background square, right sides together.
Draw a diagonal line from corner to corner in both directions to make an X.
Sew a 1/4″ seam allowance on both sides of each diagonal line.
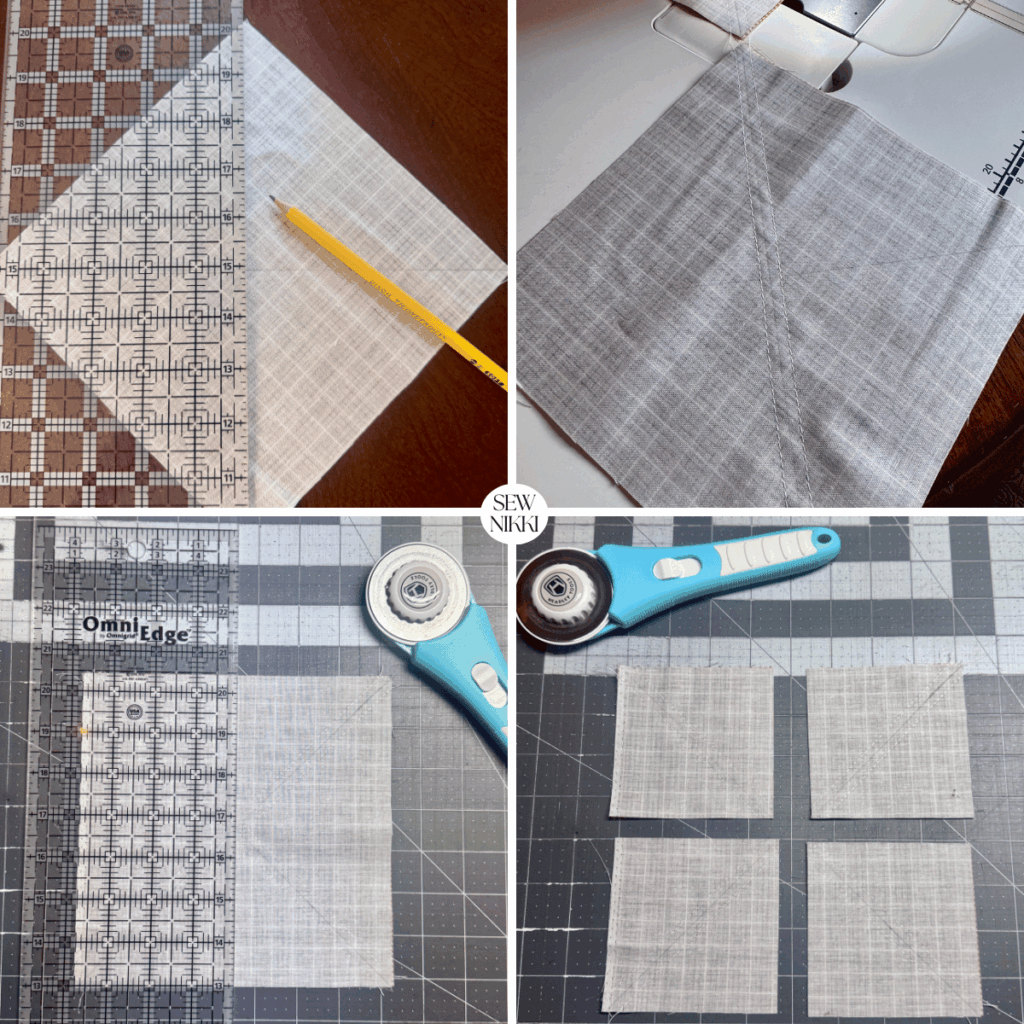
Cut in half through the center of the square. Center should be 3.75″, do not move the cut pieces.
Turn yourself around and cut in half the other direction. Center should be 3.75″. You will have 4 pieces when done.
Cut each of the 4 piece along the diagonal lines to create your HSTs.
Repeat with the second pair of squares.
Trim the HST units to 3.25″, keeping the diagonal seam centered as you trim.
Step 2: Make the Four Paws
Arrange the background square and HST units around one 6″ paw square. The paw fabric should create the main paw while the contrasting fabric forms the claws.
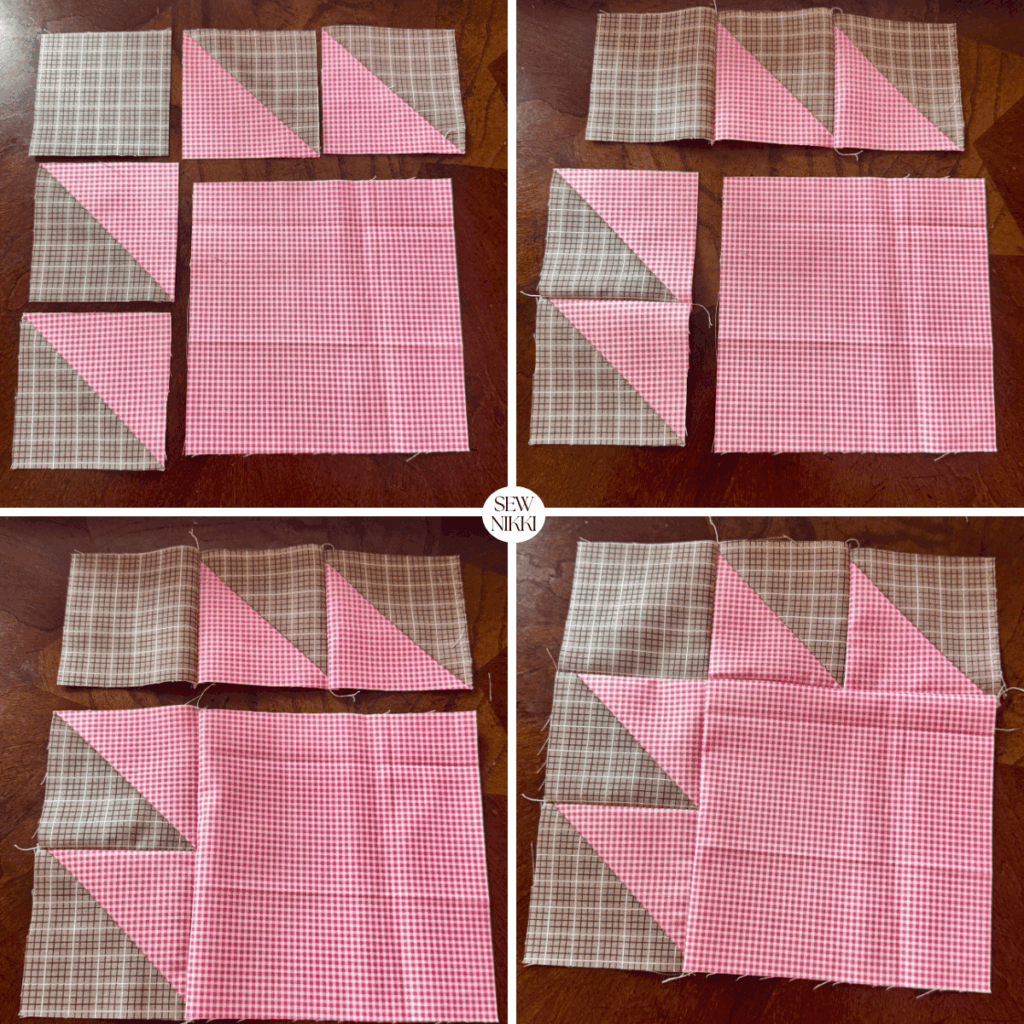
Pay close attention to the direction of the HST units. All four paws need to point toward the center of the finished block.
Just work in rows like you would for any quilt block. But do one paw at a time until you have 4 paws total.
Step 3: Add the Stripes
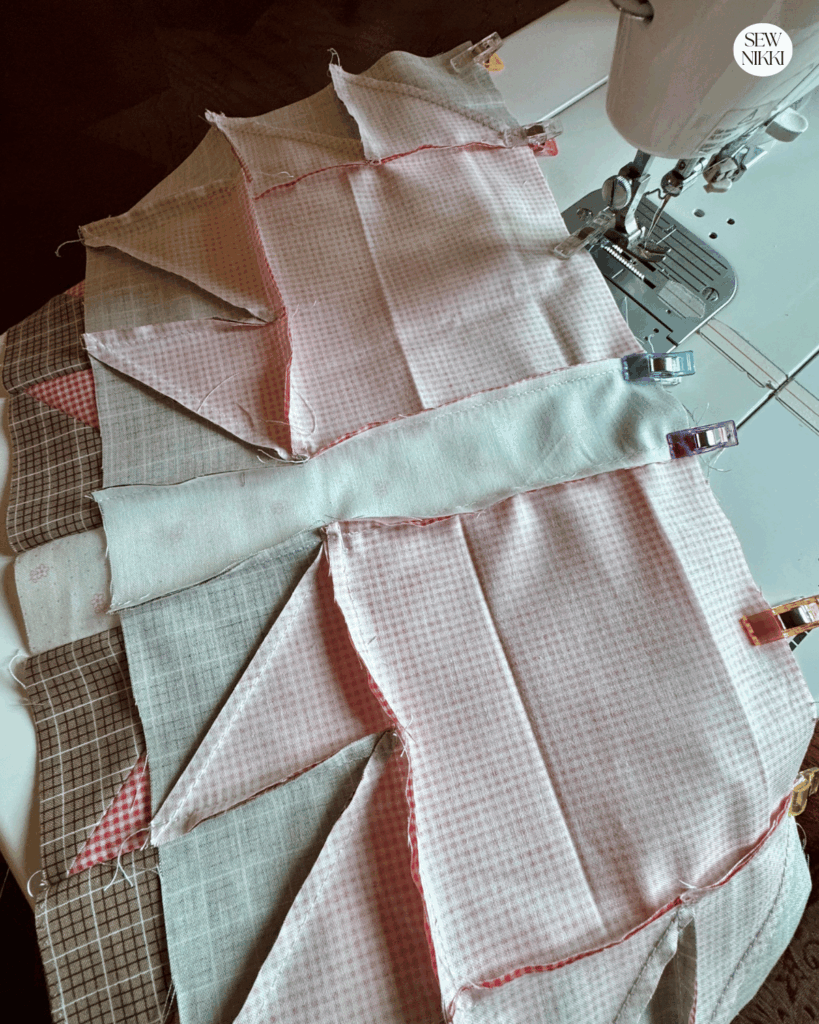
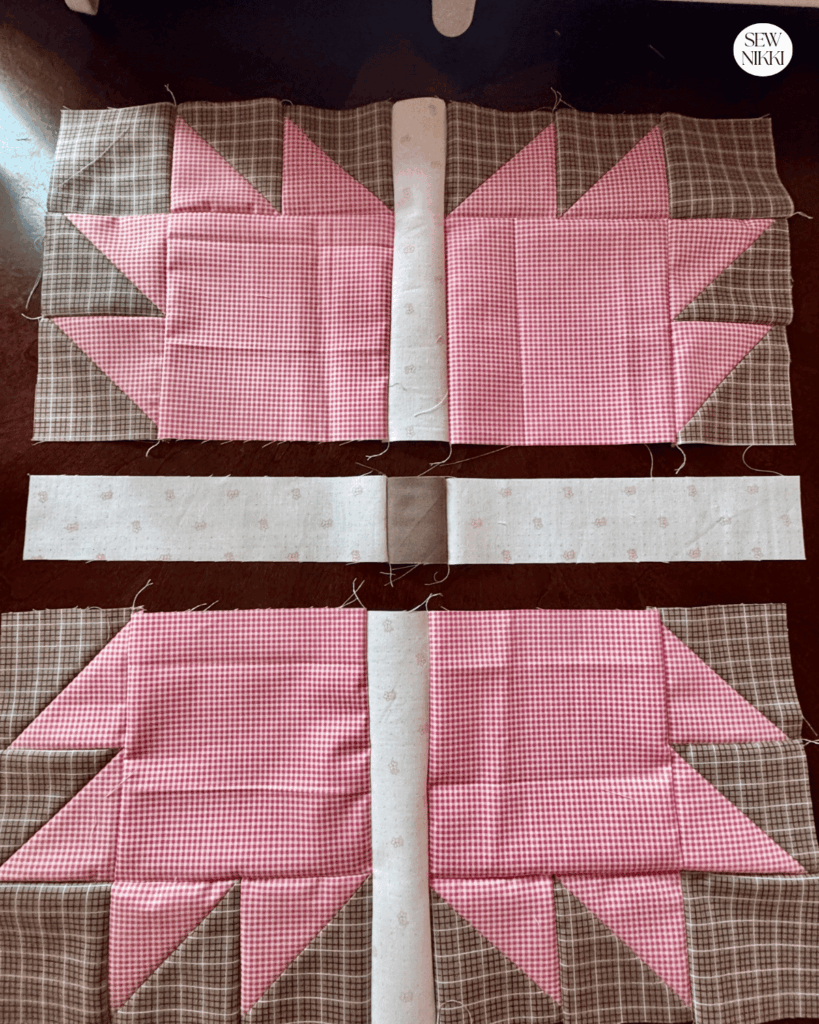
Place one 2″ x 8.75″ stripe rectangle between each pair of Bear Paw sections.
The low volume pink and white fabric creates the stripes between the paws and gives the block a little extra detail without overpowering the gingham.
Sew the strip between the top and bottom paw units only. Leave the strips in the middle alone for now.
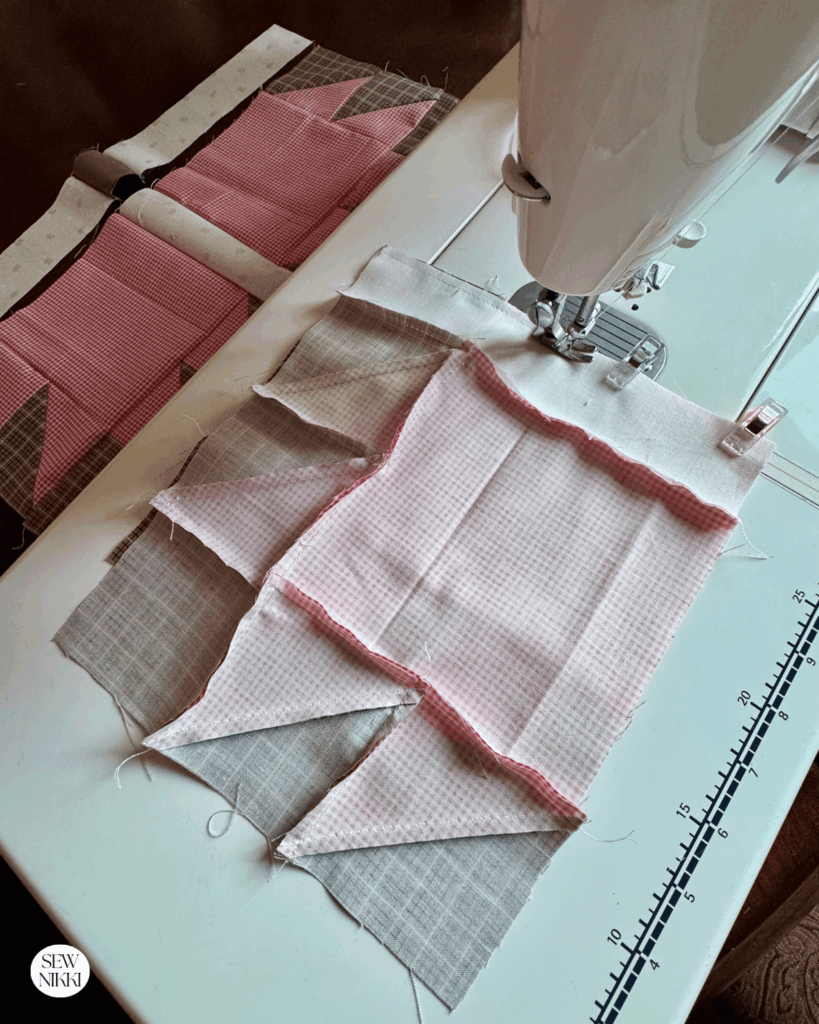
Step 4: Add the Center
Place the 2″ solid brown square in the center of the block.
Sew the middle strips on both sides of the center block.
Step 5: Assemble the Block
Sew the block in rows, you have 3 rows to this bear paw quilt block.
Attach the first row to the second row, then add the third row. Always nest your seams and pin or clip in place.
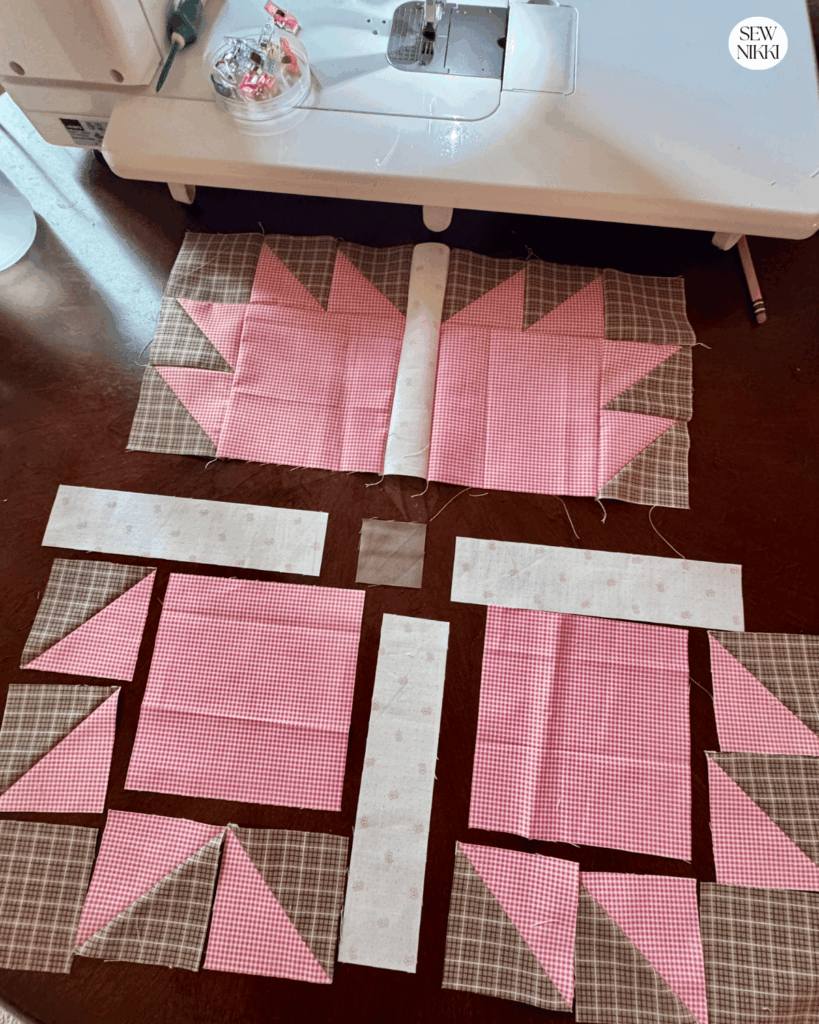
Press the block when done. I like to press on the back side and get all the seams to lay flat, then turn it over and do a final press on the front.
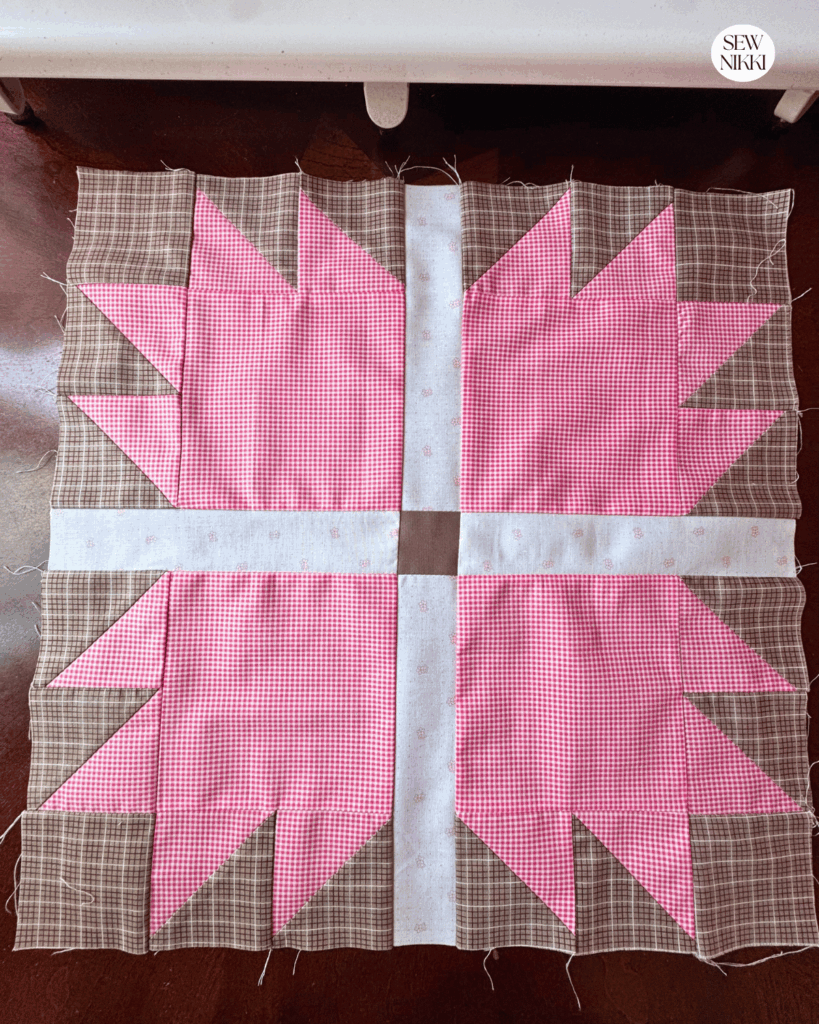
Your finished classic Bear Paw block should measure 18.5″ untrimmed.
Four Fabrics Make This Block Stand Out
I used four fabrics in my sample, and I think they work especially well together.
The pink gingham is the paw fabric, so it becomes the star of the block. The brown plaid creates the background and gives the block a traditional country quilt feel.
The low volume pink and white fabric creates the stripes between the paws. Because it is subtle, it adds interest without competing with the gingham.
The solid brown center ties the whole block together.
You can use the same idea with your own fabrics. Try a floral paw, a small print background, a low volume stripe, and a solid center. You could also make each paw from a different fabric for a scrappy block.
Bear Paw Quilt Block Variations
The bear’s paw quilt block is a traditional design with several names and variations. You may also see it called a Bear Claw quilt block or Bear’s Paw quilt block.
Related traditional designs include names such as Cat’s Paw, Duck’s Foot, Tea Leaf Design, and Illinois Turkey Track. Quilt block names can vary depending on the pattern and time period.
The basic design is easy to change with fabric placement. Try a darker paw with a light background, reverse the colors, or use different fabrics for each paw.
You can also fussy cut the large paw squares to show off a favorite fabric.
More Quilting Resources
Bear Paw Quilt Block video tutorial that shows how the block comes together by Wendy J Haney.
8 at a time half square triangle video tutorial from My Quilting Beehive is a helpful video for visual learners. It shows how to sew, cut, and make eight HST units at once, which is the method used for the paws in this Bear Paw quilt pattern.
If You’re New Here
I’m really glad you found your way here.
If you’re new to quilting, then welcome. The learning curve is fast, and yes, you will face challenges. But I’ve got you. If I can do it, so can you!
Here’s where to go next:
- Learn to Quilt Page – every step of making and finishing a quilt
- Free Pattern Index – all my free patterns in one place
- Digital, ad-free patterns – clean, printable, and beginner-friendly
My blog is built for the home sewist and quilter who wants to make a quilt from start to finish all by themselves. Take a full tour of this blog so you know your way around. Subscribe to the newsletter so you don’t miss out on new patterns or tutorials. And follow me on social media (Pinterest, Instagram, Facebook and Tik Tok)
Resources You May Like
- Churn Dash Big Block
- 8 Point Star Block
- Sisters Choice Quilt Block
- How to Resize a Quilt Block & Make It Bigger
Bear Paw Quilt Block FAQ
What size is this Bear Paw quilt block?
This Bear Paw quilt block measures 18.5″ finished and untrimmed.
How many fat quarters do I need?
Two fat quarters are used for the main paw and background fabrics for one block. The stripe and center pieces are small cuts from additional fabric.
What HST method does this pattern use?
This pattern uses the 8 at a time half square triangle method. Two large squares are sewn together and cut into eight HST units.
Is this Bear Paw block beginner friendly?
Yes. It has several pieces, but the large size makes it easier to handle. If you are comfortable making half square triangles, this is a good traditional block to try.
Can I make this Bear Paw block scrappy?
Yes. Change the paw fabric from block to block while keeping the background consistent. You can also change the stripe and center fabrics.
What fabrics did you use?
I used pink gingham for the paw, brown plaid for the background, low volume pink and white for the stripes, and solid brown for the center.
Can I fussy cut the paw fabric?
Yes. The large paw squares are a good place to feature a favorite fabric design.
About Sew Nikki
If this is your first time stopping by, welcome! Your place for free crochet, sewing and quilt patterns for beginner to intermediate skill levels. Want a digital pattern? We have those too! Plus tutorials to walk you through how to make each item from start to finish.
I am a California quilter who loves making quilts without making quilting feel harder than it needs to be. Here at Sew Nikki, I share free quilt block tutorials, quilting tips, beginner projects, free patterns, and digital quilt patterns.
I believe quilts do not have to be perfect to be worth making. Sometimes a point is a little off or a seam does not line up exactly. That is part of quilting.
This post contains ads and affiliate links, which means I make a small commission at no extra cost to you. See my full disclosure here.