Patchwork Squares Crochet Blanket Pattern (Intermediate)
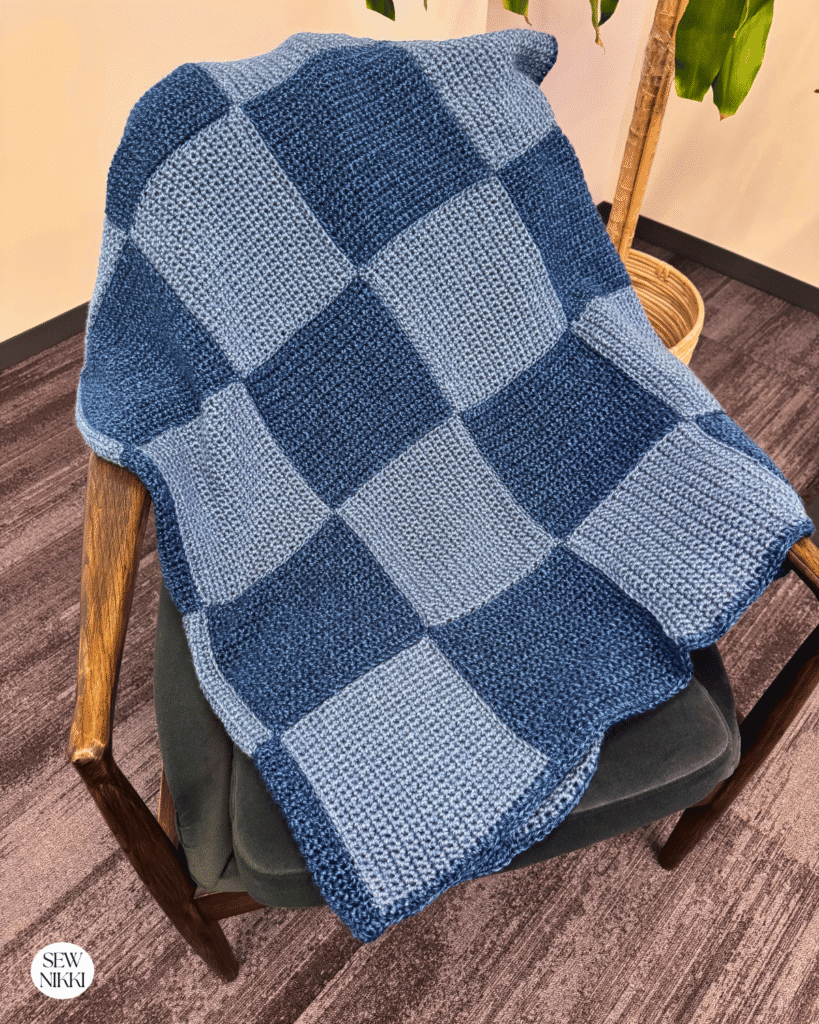
The Patchwork Squares Crochet Blanket Pattern is an intermediate crochet project made with 48 solid crochet squares in two contrasting colors. Each square uses simple single crochet stitches, while an invisible join creates a neat finish without bulky seams. The blanket measures 47.5″ x 64″ with border.
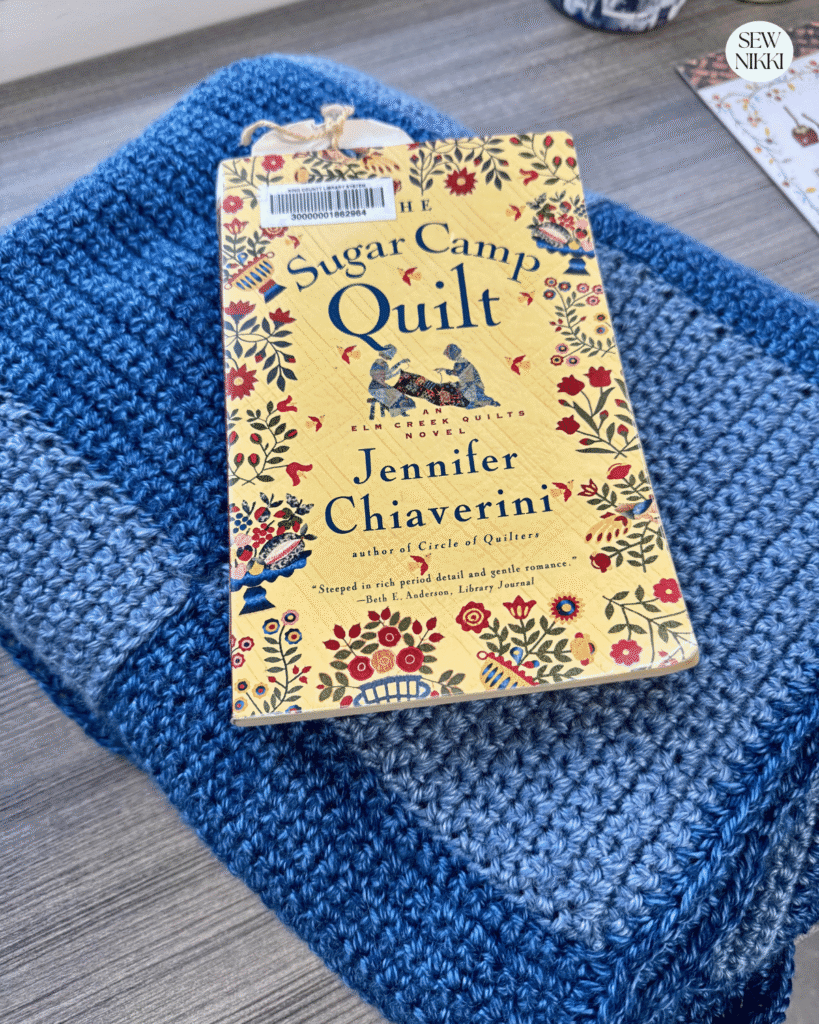
I used Lion Brand Heartland yarn and a J crochet hook to make this blanket. Color combination is just two contrasting yarn colors for my sample but you can use as many colors as you want. What makes the design different is the way the squares are arranged. The colors alternate, and the squares are turned in different directions to create a patchwork effect that pops without complicated stitches.
If you enjoy making square patterns but want something different from a traditional granny square blanket, this pattern is worth trying. This blog post has the free crochet pattern, digital pattern in my shops.
Make sure you check this out!
After you read this post, make sure you also check out Learn To Crochet for Absolute Beginner’s. It’s jam packed with even more information, links and resources that are so helpful when you’re first learning. It also has a section with free patterns that are great for beginners. So make sure you check this out, seriously don’t forget!
Grab the Shell Stitch Afghan crochet pattern, my free gift to you when you subscribe to my newsletter. Click the link below for your copy.
Patchwork Squares Crochet Blanket Pattern
Finished measurements may vary depending on your tension and how firmly you join the squares.
- Skill level: Intermediate
- Finished size: 47.5″ x 64″ with border
- Square size: Approximately 7.5″ x 8″
- Number of squares: 48
- Layout: 8 rows of 6 squares
- Yarn: Lion Brand Heartland
- Hook: J, 6 mm
- Main stitch: Single crochet
- Joining method: Invisible stitch
- Border: Half double crochet
Materials Needed
For this square crochet blanket pattern, you will need:
- 5 skeins of Lion Brand Heartland Olympic yarn
- 6 skeins of Lions Brand Heartland Carlsbad Caverns yarn
- J crochet hook, 6 mm
- Yarn needle or tapestry needle
- Scissors
- Soft measuring tape
- Sewing clips or small binder clips
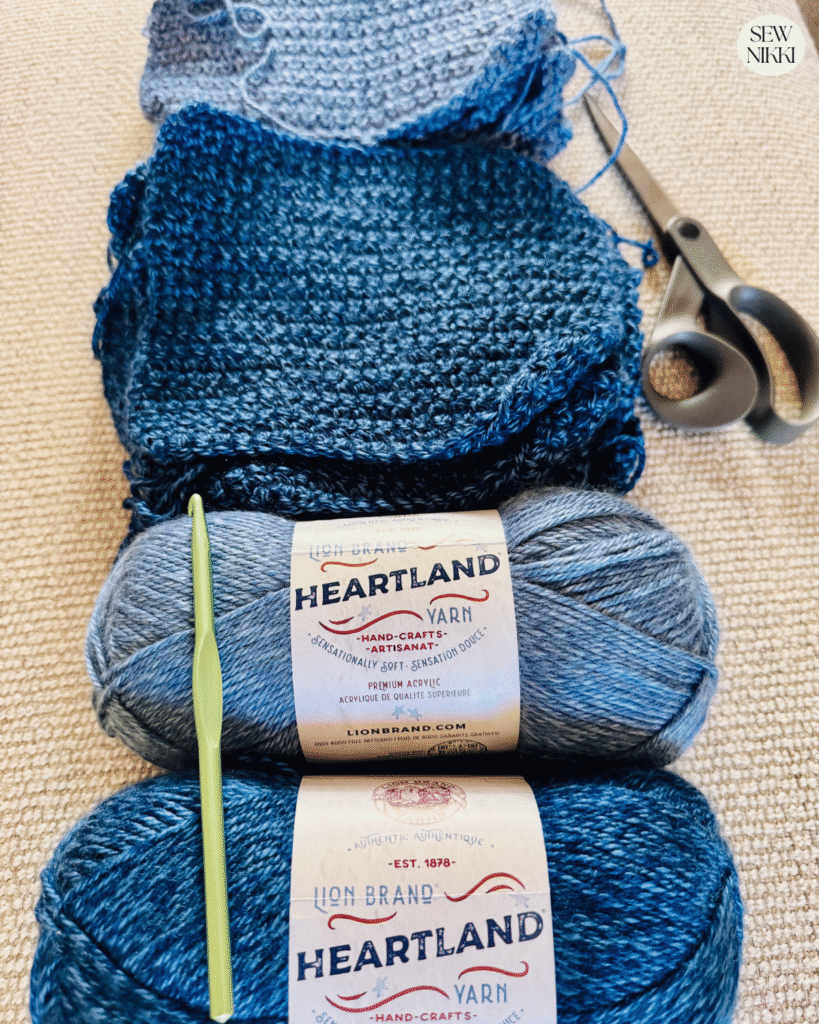
I used Carlsbad Caverns for the border, so keep that in mind when choosing your yarn. Each skein makes approximately five squares, but the amount you use will depend on the yardage in your skeins and your crochet tension.
Choose two contrasting yarn colors so the patchwork design stands out. You can use a light and dark combination, two bright colors, or a neutral color paired with something bolder.
Get the digital pattern.
Get the instant download pattern here.
How to Crochet the Squares
You will make 48 squares in total, with 24 squares in each color. Make all the squares before joining them so you can arrange the colors and directions before assembling the blanket.
Square Instructions
Foundation chain: Chain 26.
Row 1: Single crochet in the first chain from the hook and in each remaining chain across. Chain 1 and turn.
Rows 2 to 27: Single crochet in each stitch across beginning in first chain from hook. Chain 1 and turn at the end of each row.
Fasten off after Row 27 and weave in the loose ends with your yarn needle.
Repeat until you have 24 squares in the first color and 24 squares in the second color.
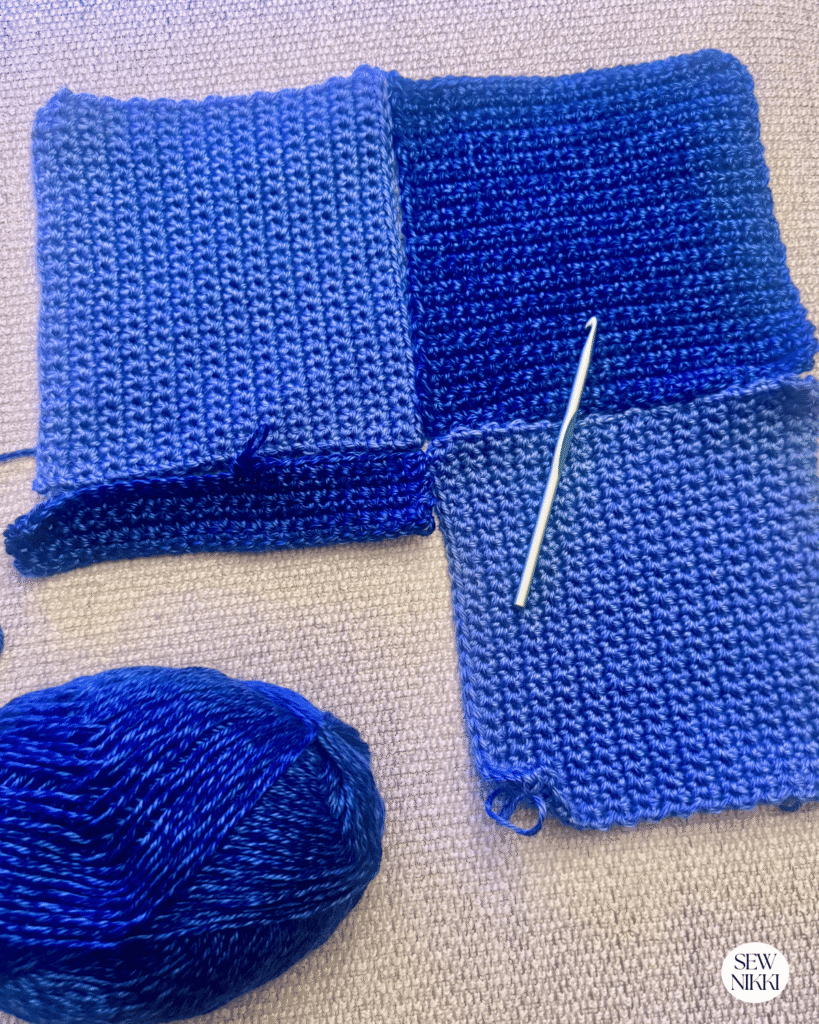
Please note: Once I made one square in each color, I used that square for the measurement instead of counting rows finished while working. Just place your working square on top of the finished square and when they are the same size your done.
Each square should measure approximately 7.5″ x 8″. Check your first square before making the remaining 47. If it is noticeably larger or smaller, adjust your tension or hook size before continuing.
How to Arrange the Patchwork Squares
Once all 48 squares are finished, arrange them on a flat surface before joining them. I always use my bed for this.
You will need eight rows with six squares in each row. Alternate the colors so the same color does not start every row. One row begins with the first color, and the next begins with the second color.
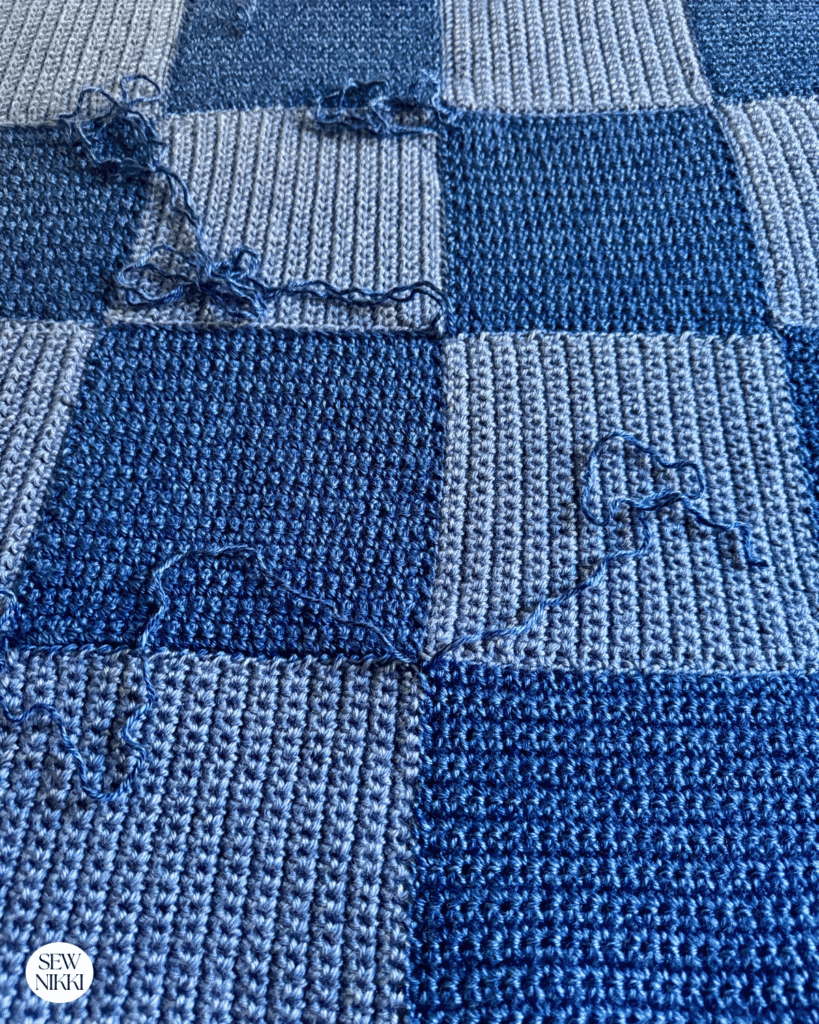
I also rotate the squares so the crochet rows run horizontally in one color and vertically in the other. This gives the blanket its patchwork appearance without using a complicated stitch pattern.
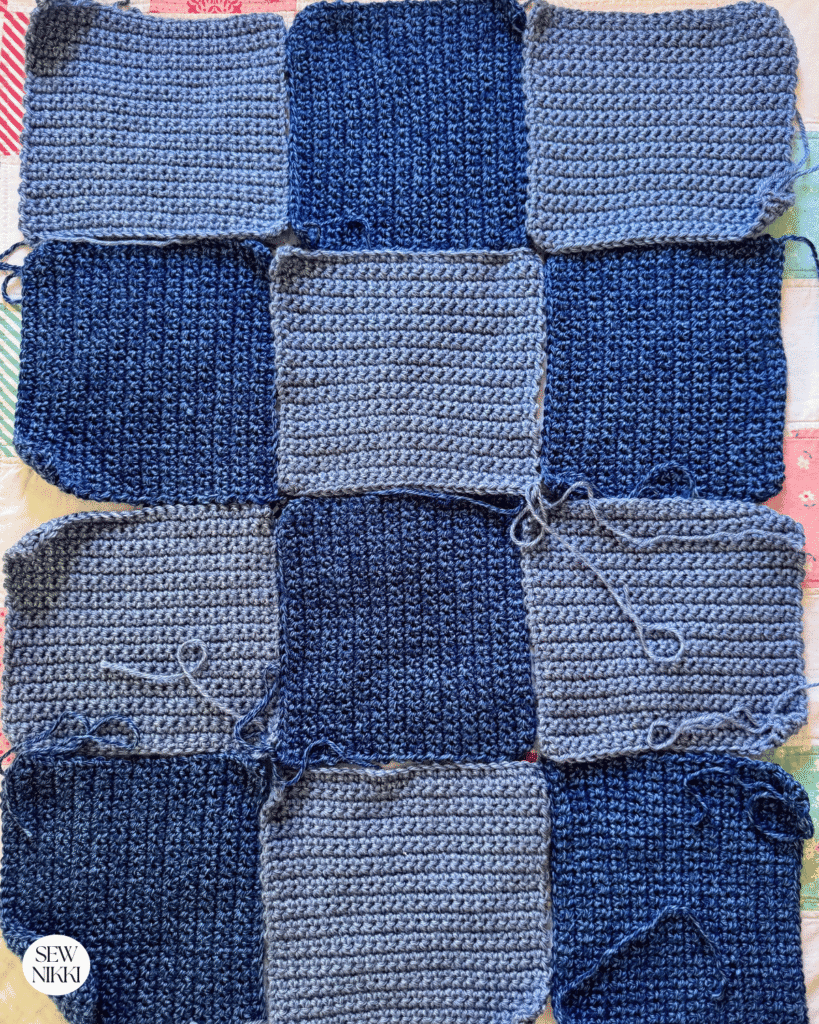
Take a photo of the layout before moving the squares. It will be much easier to keep track of the placement as you begin joining everything together.
How to Join Crochet Squares With an Invisible Stitch
The invisible join is my favorite part of this square blanket pattern because it keeps the seams neat and lets the squares stand out. Instead of adding a thick crochet seam, you use a yarn needle to connect the squares along their edges.
You can use leftover yarn from either color. Since the joining yarn sits inside the seam, it does not need to match the color of the squares.
Step 1: Line Up the Squares
Start with the first two squares in a row. Place them with their right sides facing each other so you are working on the wrong side.
Make sure the squares face the correct directions. One should have the crochet rows running horizontally and the other with rows running vertically.
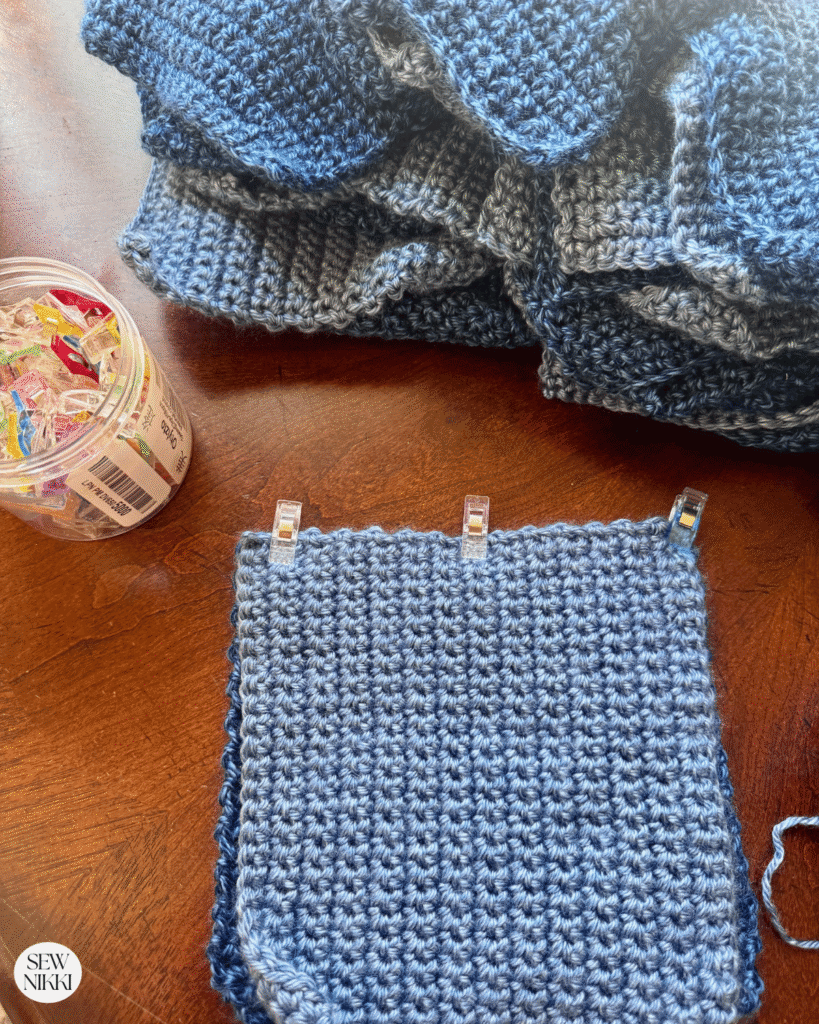
Place two squares with their right sides facing each other and the wrong sides facing out. Match the corners and edges, then use clips to hold them in place.
Clip at the corners first to ensure the squares are the same size, stretch slightly if needed. Then add a clip in the middle to keep the edges from shifting.
Step 2: Sew Squares Into Rows
Thread your yarn needle with a long piece of yarn, about one and half the length of your square.
Thread it through your yarn needle, leaving a generous tail at the beginning.
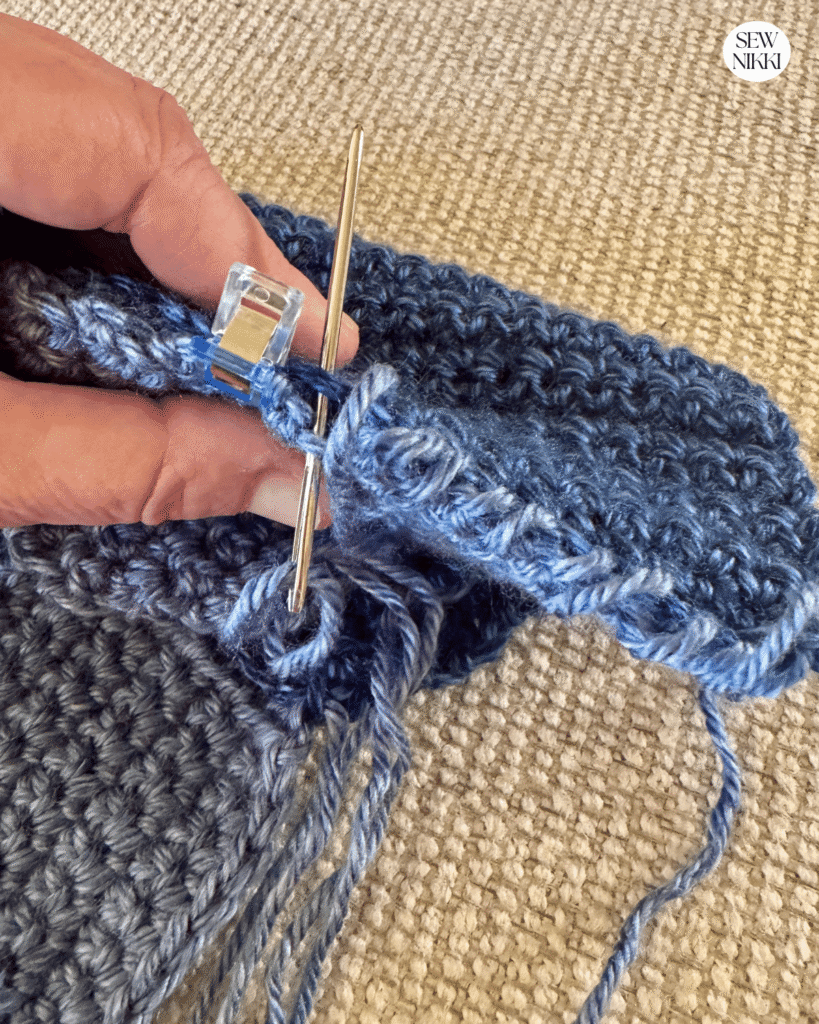
Insert the needle through the corner stitch or chain space of the first square, then through the matching corner of the second square.
Working back and forth between the squares, pick up the corresponding loops along each edge. Continue down the entire side, keeping your stitches even and following the same loop placement for both squares.
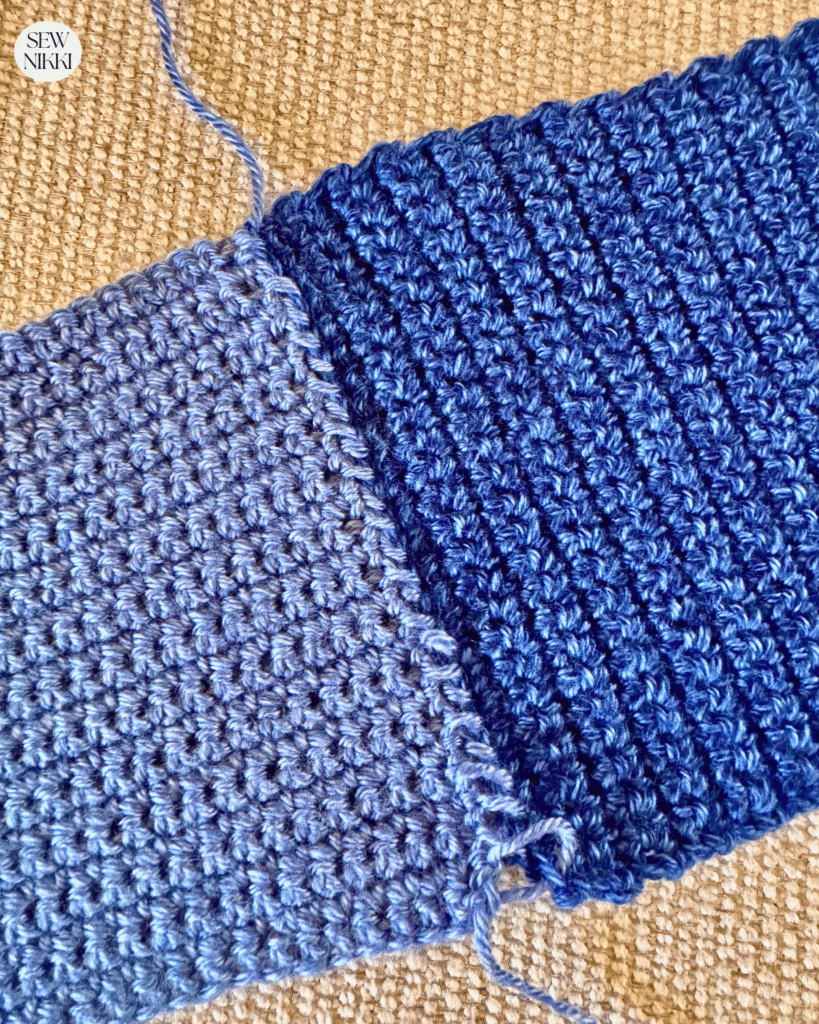
Once you reach the end, secure the last corner stitch again in both squares.
Finally, pull both ends of the yarn hard and fast to tighten the join and make the joining yarn invisible. This part is SO satisfying!!
Leave a long tail at the end as well. Weave both tails into the work before you join the rows.
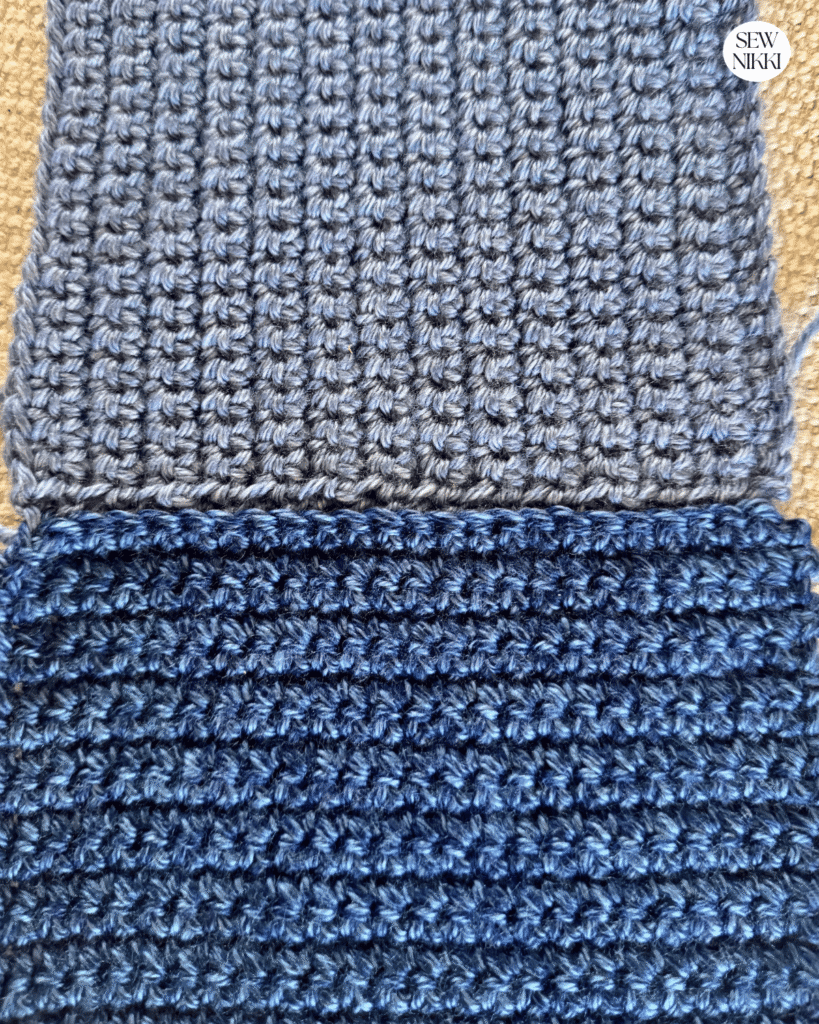
Tips for Joining Squares With Different Edges
When joining, you will have one square will have normal single crochet stitches and the second square will have a side seam ridge. Fear not, just make sure you aren’t skipping any stitches or it will show on the front side.
Insert through the top of the ridge when needed. You can also insert twice into the same back loop of top of ridge on one side when needed. Just keep your joining stitches slightly loose and yank the yarn ends hard and fast to finish the join.
For another explanation of invisible seaming, see this invisible crochet seam tutorial from Life + Yarn.
Step 3: Join All Eight Rows
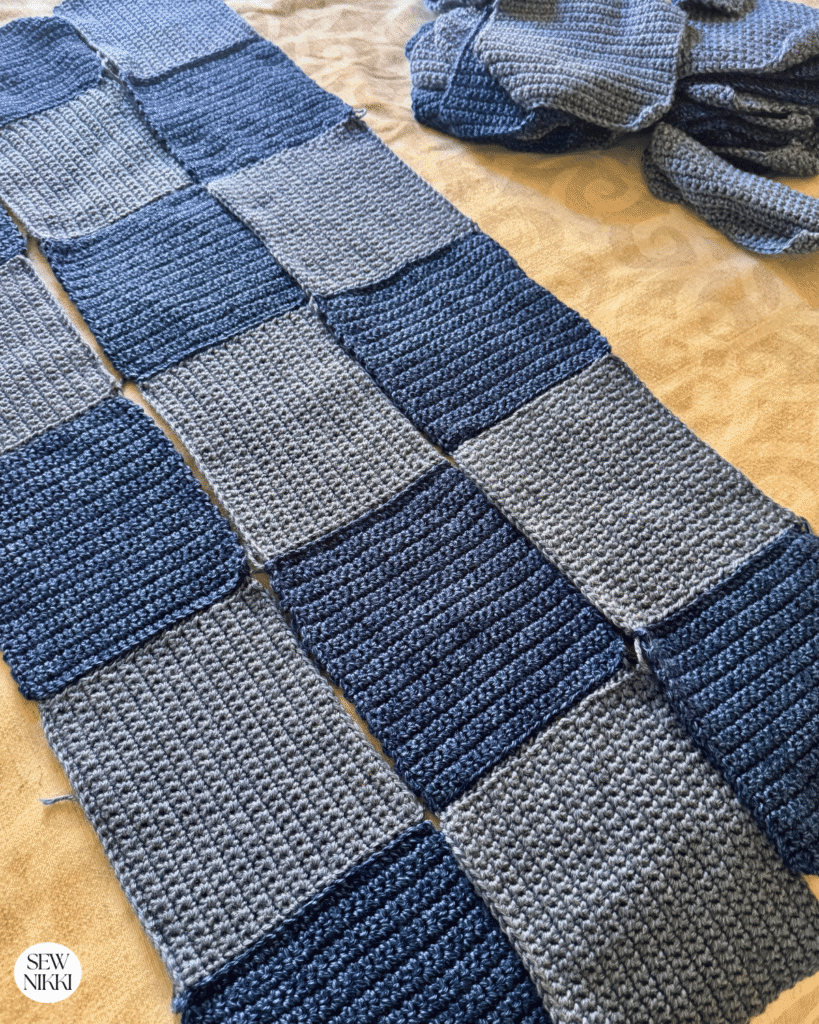
Continue joining the squares until each row contains six squares. Repeat until all eight rows are complete.
Check the alignment as you go. Keeping the edges even now will help the finished blanket lie flat.
Step 4: Join the Rows Together
Place two completed rows together with their right sides facing each other. Line up the corners and clip the edges to hold them in place.
Thread your yarn needle with a piece of yarn long enough to join the row. Work through the corresponding back loops using the same invisible joining method.
Because these seams are longer, take your time and check that the squares stay aligned as you work. If your yarn runs short, secure it neatly and start a new length rather than stretching the remaining yarn too far.
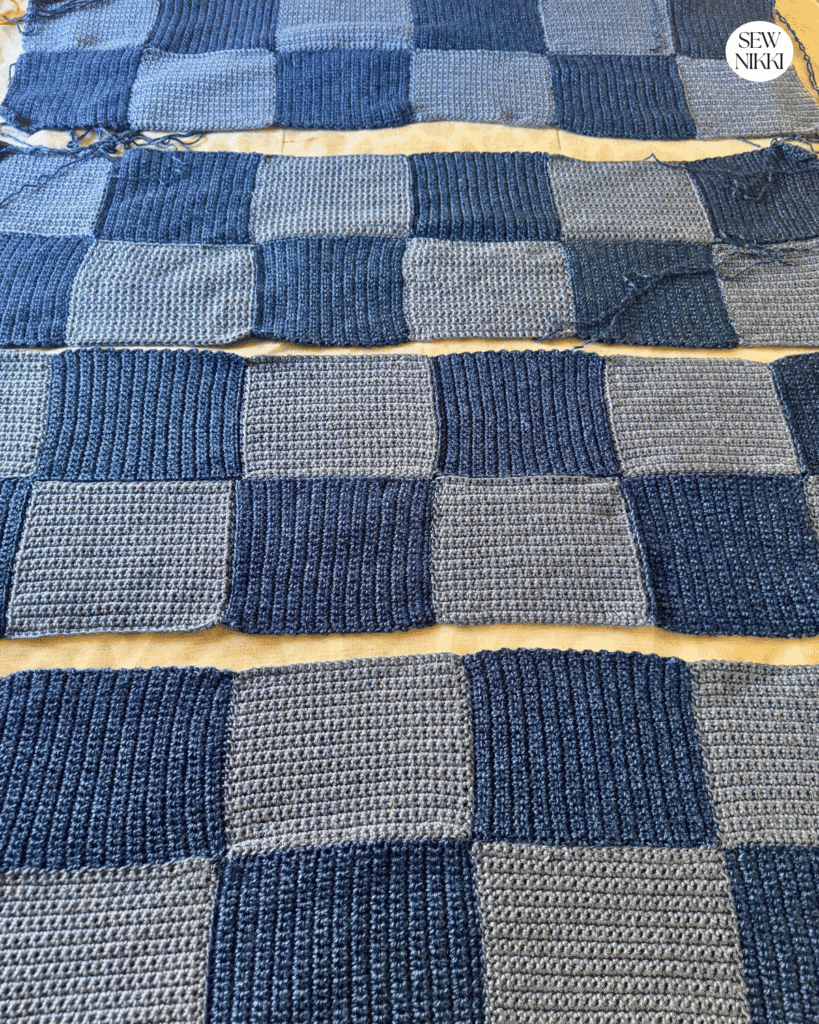
Repeat until all eight rows are joined into one blanket. Weave in the remaining ends and lay the blanket flat to check the seams.
When you weave the rows together you will have two yarn tails to weave in. Use they tails to close up the squares in the center. I just insert into opposite squares as close to the join and pull tight to close space gap. Then weave tail into your work.
When weaving tails on the outside edge of the blanket, insert yarn into the opposite square and then back into the starting square to close the gap between the squares on the edge. Weave tail into work to finish.
Crochet Blanket Border
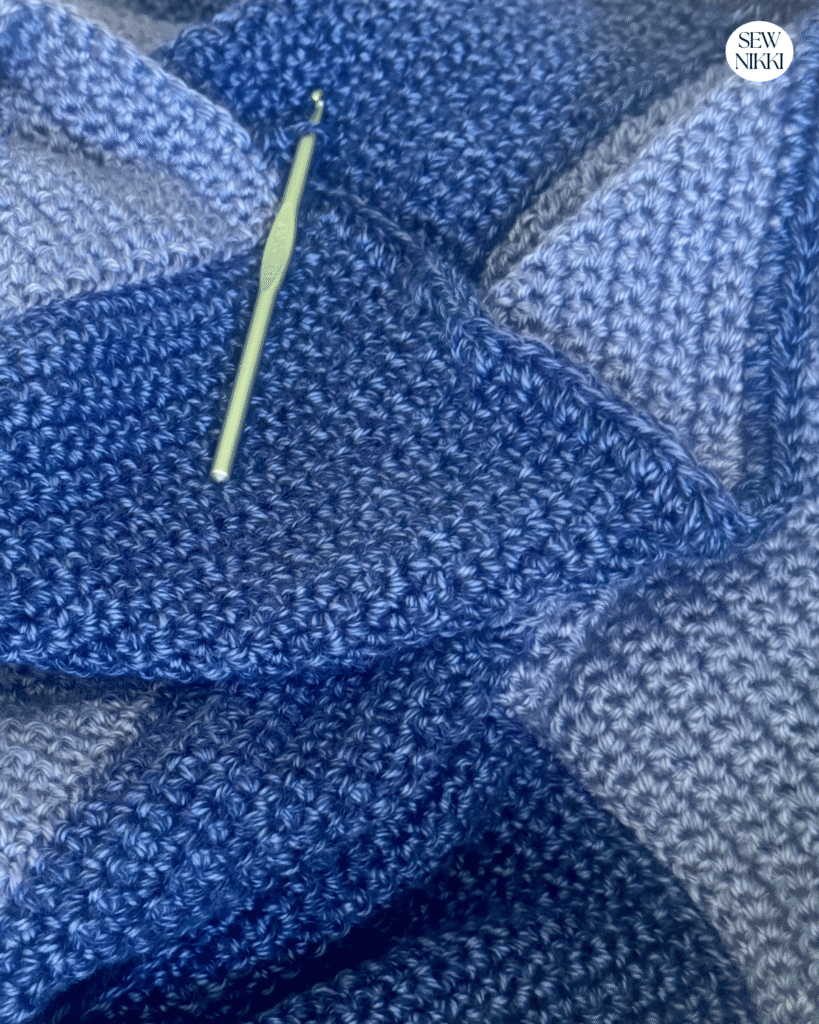
I like adding a border because it gives the blanket a finished edge. For this kind of project, I chose a simple half double crochet border worked once around the blanket in the second color. In each corner space, crochet 3-HDCs so the border curves.
The patchwork squares are the star of the show, so I did not want a fancy border competing with them.
You can also use a simple single crochet border if you prefer a narrower edge. For more edging ideas and detailed instructions, visit my tutorial on easy crochet border patterns.
More Crochet Blanket Patterns
If you enjoy this project, you may also like these crochet patterns from Sew Nikki.


If You’re New Here
I’m really glad you found your way here.
If you’re new to crochet, then welcome. Learning to crochet can feel a little overwhelming at first, but it gets easier with every stitch. You’ll make mistakes, frog a few projects, and learn new techniques along the way. That’s all part of the process. If I can do it, so can you.
Here’s where to go next:
Learn to Crochet – guide for beginners
Free Pattern Index – all my free crochet patterns in one place
Digital, ad-free patterns – clean, printable, and beginner friendly
My blog is built for crocheters who want to learn new skills and make beautiful projects from start to finish. Take a look around so you can find your way through the site, subscribe to the newsletter so you never miss a new pattern or tutorial.
Frequently Asked Questions
Is this crochet blanket pattern suitable for beginners?
The individual squares are beginner friendly because they use chain stitches and single crochet. However, arranging 48 squares and joining them neatly takes patience. A confident beginner can give it a try, but I recommend practicing the invisible join on two squares first.
How many squares do I need?
You need 48 squares total, with 24 in each of two colors. Arrange them in eight rows of six squares each.
Can I use a different yarn?
Yes. A similar medium weight or worsted weight yarn should work. Different yarns and hook sizes can change the finished measurements, so make one square first and check its size.
Do I have to use an invisible join?
No. You can use another square joining method if you prefer a more visible seam. I use the invisible join because it keeps the blanket looking neat and lets the square shape blocks really stand out.
Can I make the blanket larger?
Yes. Add more squares to the width, length, or both. You can change the square layout however you want to adjust, but the amount of yarn may change too.
Does this pattern use granny squares?
No. These are solid crochet squares made with single crochet stitches. They do not use the clusters, corner spaces, or chain spaces found in a classic granny square.
ABOUT SEW NIKKI
Welcome to Sew Nikki. Your place for free crochet, sewing and quilt patterns for beginner to intermediate skill levels. Want a digital pattern? We have those too! Plus tutorials to walk you through how to make each item from start to finish.
This Patchwork Squares Crochet Blanket Pattern is the perfect project for crocheter’s who also quilt. I really want to try making crochet blankets that look like quilt blocks and the charm square is the first quilt I made as a new quilter. The invisible join takes a little practice at first, especially when joining the rows. But once you join a few squares together, it’s very satisfying. Just a lot of hand sewing to connect the blanket.
Make the squares at your own pace, take time to arrange the colors, and practice joining two squares before assembling the full blanket. Once everything is together, add the simple border if you like and enjoy a handmade blanket that is practical enough for everyday use.
Follow me on social media (Pinterest, Instagram, Facebook and Twitter) so you get notifications when I post new patterns and tutorials.
This post contains ads and affiliate links, which means I make a small commission at no extra cost to you. See my full disclosure here.