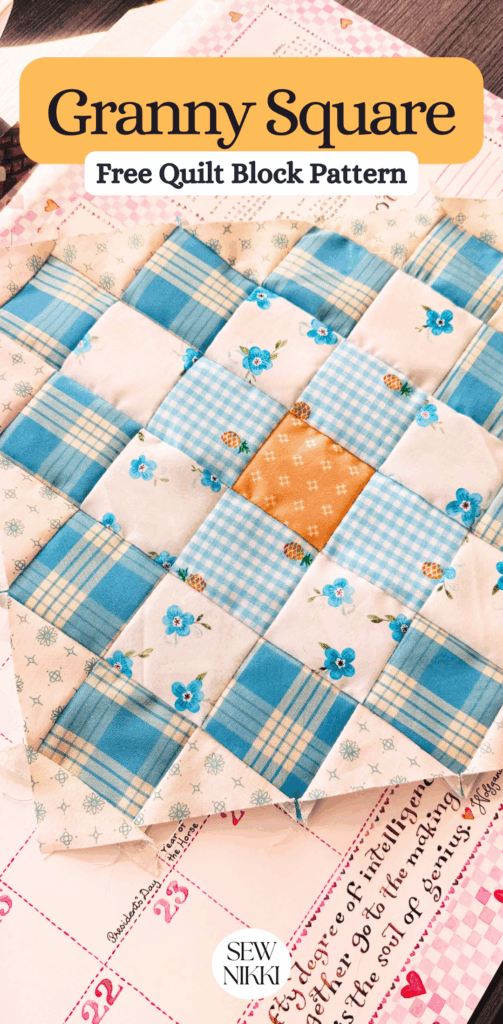
Free Scrappy Granny Square Quilt Block Pattern
This free granny square quilt block pattern is simple, beginner friendly, and made entirely with scrap fabric. If you are building your stash pile, you can use jelly role strips, fat quarters or yardage.
Granny square quilt blocks are perfect for scrappy quilts, modern layouts, and mix and match designs. You can use them to make everything from full size quilts to table runners, tote bags, and even quilted pillows. Once you understand how one block goes together, the design possibilities are endless.
In this tutorial, I’ll walk you through step-by-step instructions to sew one granny square quilt block, share tips for beginners, and show you how to turn free quilt block patterns into custom projects you’ll actually use.
What Is a Granny Square Quilt Block?
A granny square quilt block is inspired by traditional crochet granny squares which are layered, geometric, and often scrappy. Instead of rounds of yarn, we build the block using fabric squares and triangles, creating that iconic framed look with clean quilt lines.
This version keeps things simple by using:
- Using 2.5″ squares for the entire block
- Five different fabric but you can use as little as two if you prefer
- Setting triangles made from 2.5” squares
- Corner triangles made from 2.5” squares
It’s beginner friendly, stash busting, and works beautifully with scraps, fat quarters, jelly rolls or charm packs.
MAKE SURE YOU CHECK THIS OUT!
After you read this post, make sure you also check out Learn How to Quilt for Absolute Beginners. It’s jam packed with information to make your first quilt. It also has links and resources that are so helpful when you’re first learning. There’s lots of free quilt patterns that are great for beginners and all skill levels too. So make sure you check this out, seriously don’t forget!
Grab a copy of my free Quilt Planning Journal. It’s filled with graph paper and note pages to help you design at least 4 quilt or sewing projects! Pin in fabric swatches, photos of your finished quilts and enjoy your creative process!
Supplies Needed
Before we jump in, here’s what you’ll need to make one granny square quilt block:
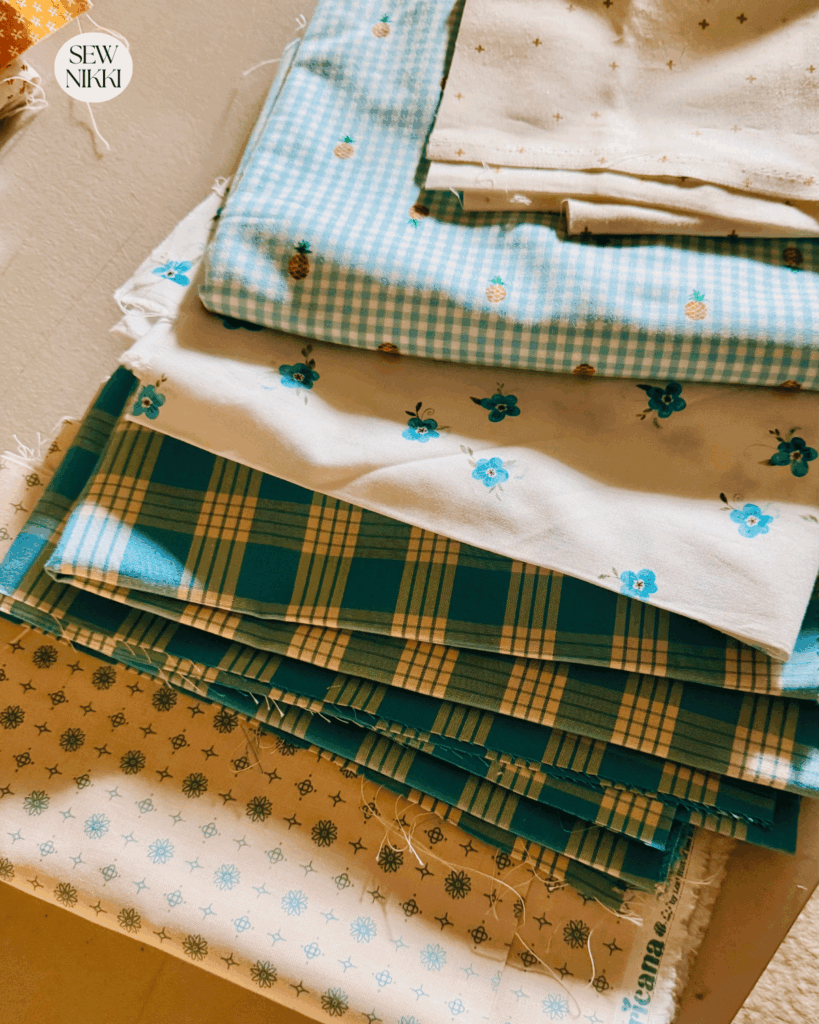
- 5 fabrics total for scrappy sample
- 25 – 2.5” squares (cut as needed for the center and rounds)
- 8 – 2.5” square, cut in half diagonally (setting triangles and corners)
- Sewing machine
- Thread
- Rotary cutter, ruler, and cutting mat
- Iron and ironing board
Use a 1/4” seam allowance throughout the entire block.
See my full list of sewing and quilting favorite tools and supplies with easy links for all, shopping couldn’t be easier.
Granny Square Quilt Block Pattern
Step-by-Step: How to Sew a Granny Square Quilt Block
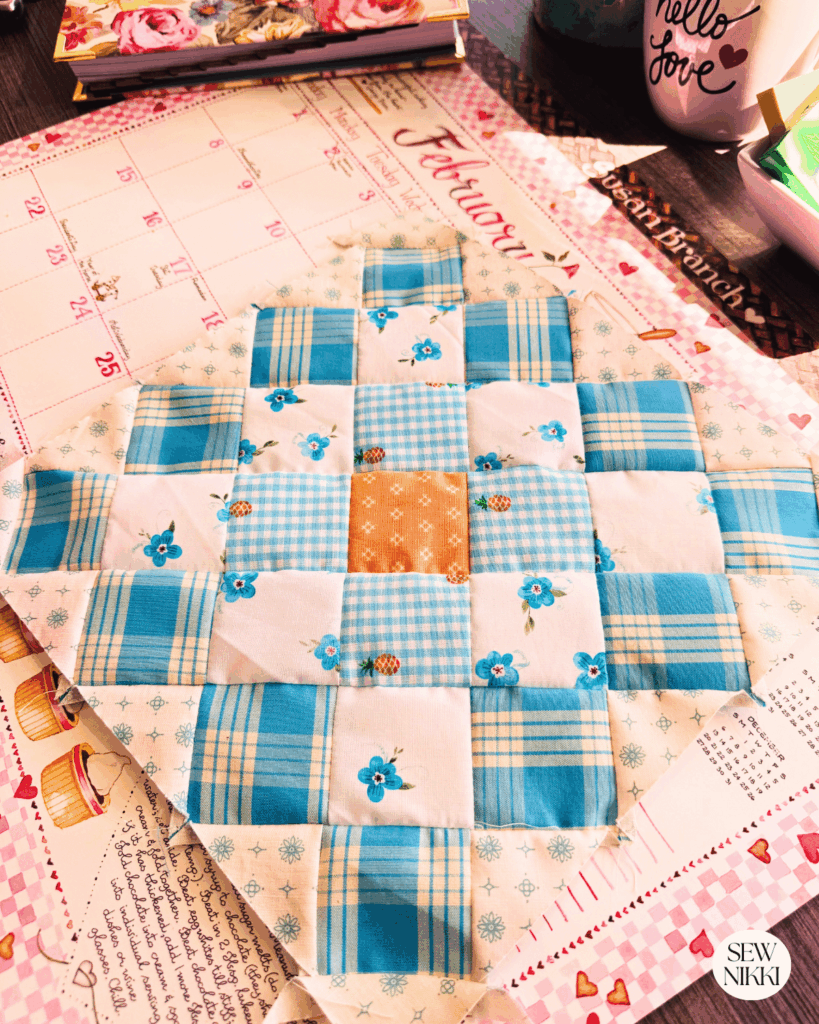
Step 1: Layout Your Block
Start by laying out your block diagonally on a flat surface or design board, using the picture above as a reference. Place your center 2.5” square in the middle and build it out following the picture below. Surround it with additional 2.5” squares to form the first “round” of the granny square.
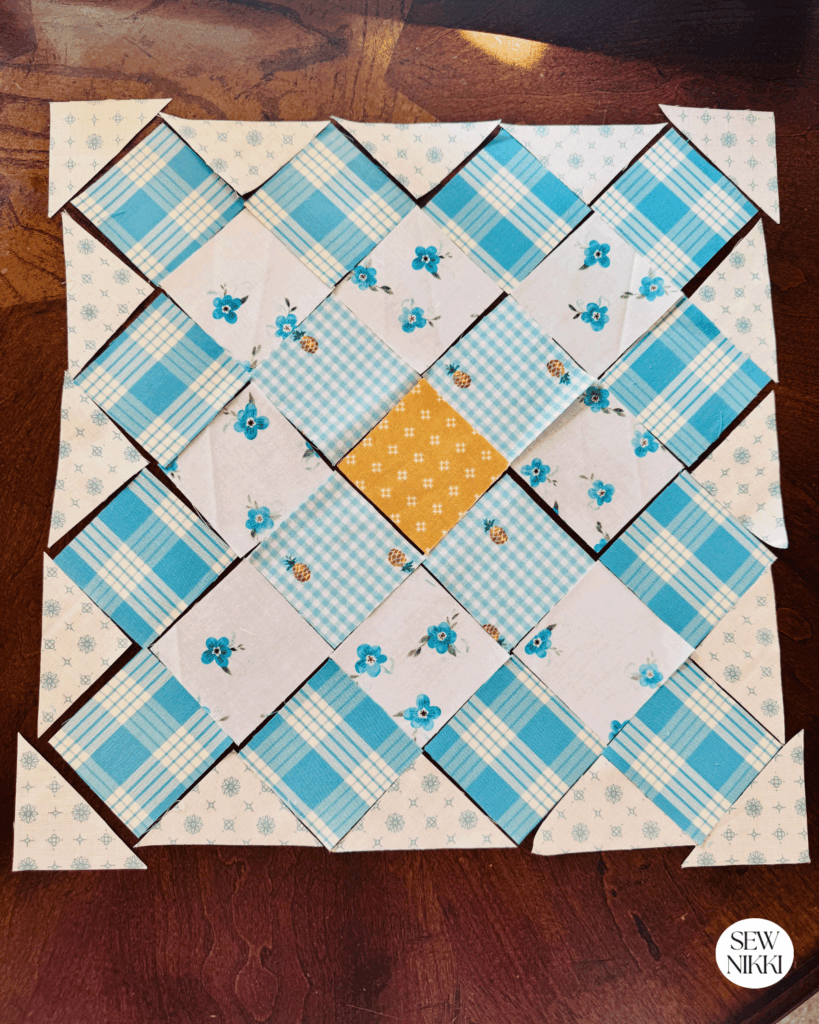
At the corners and along the edges where needed, place the setting triangles (from the 2.5” square cut diagonally).
Taking a minute to visually check your layout will save you from seam ripping later.
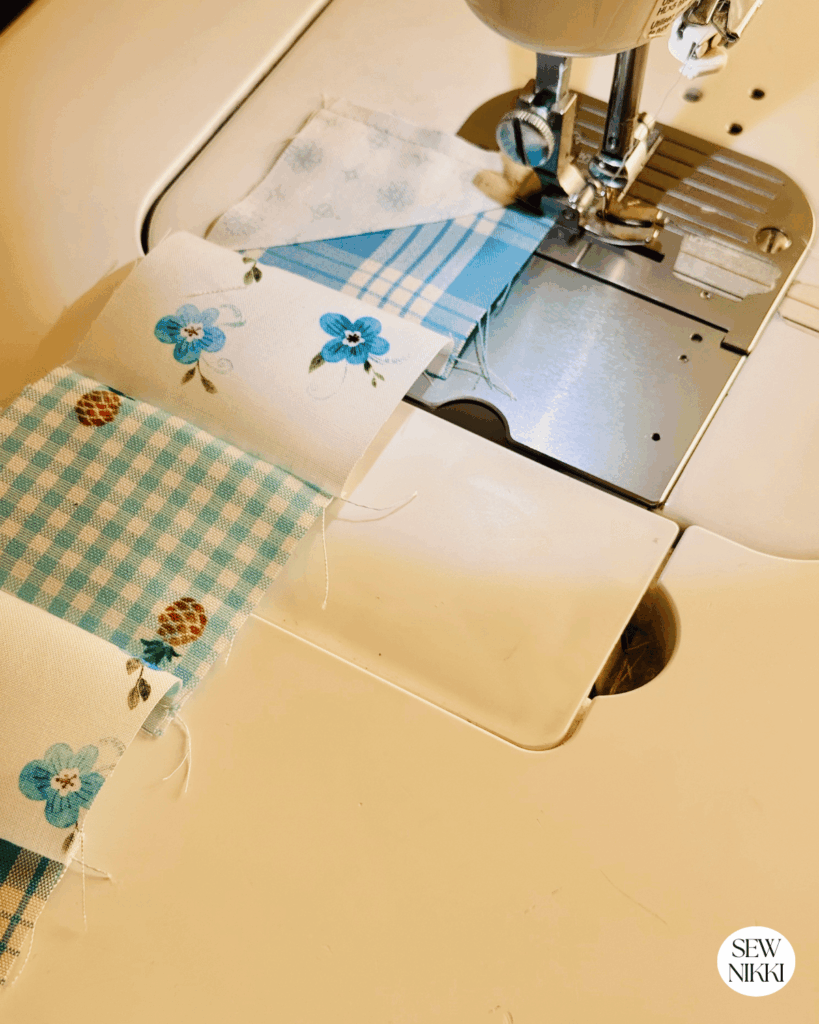
Step 2: Sew Squares Into Rows
Sew the squares together to form rows. You can sew the squares first and add the setting triangles at both ends of each row last or do it all at the same time.
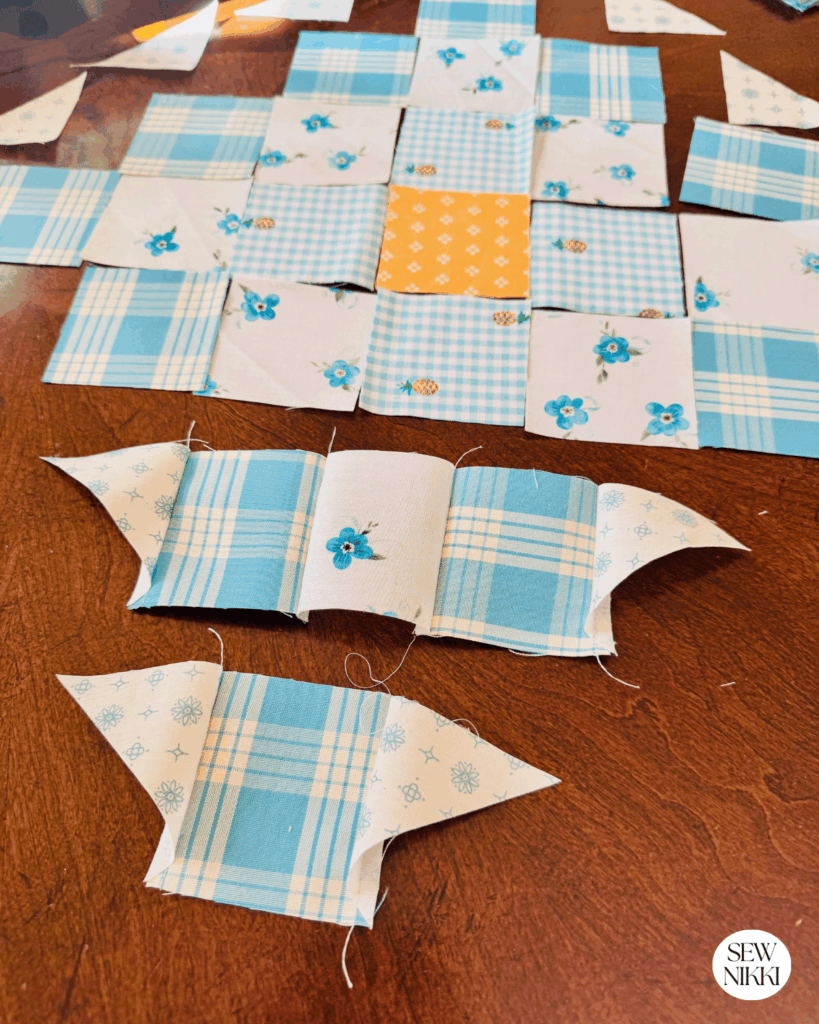
I started from the middle row and then worked my way out diagonally in both directions. Keeping the setting triangles angled the correct direction to keep the block square. Save corner end triangles for now, don’t add at this point.
- Stitch pieces together within each row
- Add setting triangles at the beginning and end of each row
- Save corner triangles for last
- Press seams to the side or open, whatever you prefer
- Double check alignment on setting triangles before moving on (it’s easy to sew triangles in wrong direction)
Setting Triangles
Go slow here, especially on the setting triangles. You are sewing on bias fabric so there’s a lot of stretch to bias pieces.
Setting triangles help square up the block. When sewing triangles to squares:
- Align the long edge of the triangle with the square
- Stitch carefully to avoid stretching the bias
- Press gently, don’t drag the iron
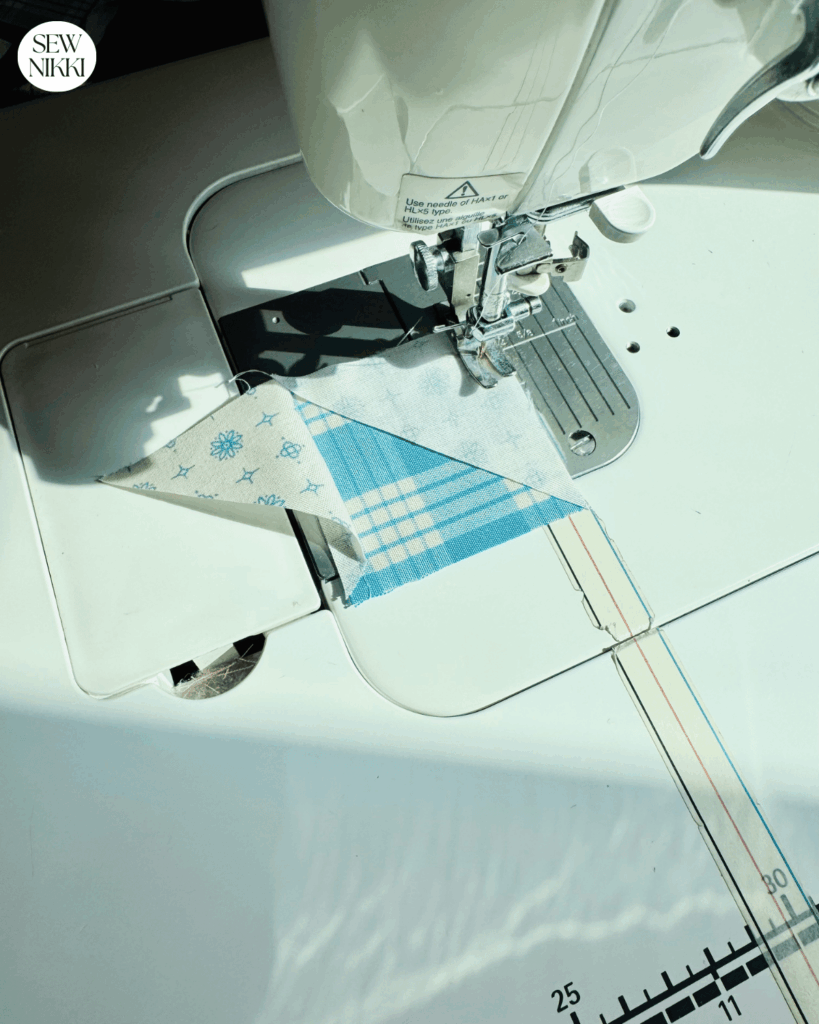
Pro tip: Use a leader or thread bunny scrap and then sew your setting triangles to the squares. This ensures that your sewing plate does not eat up your fabric since one end will be pointy.
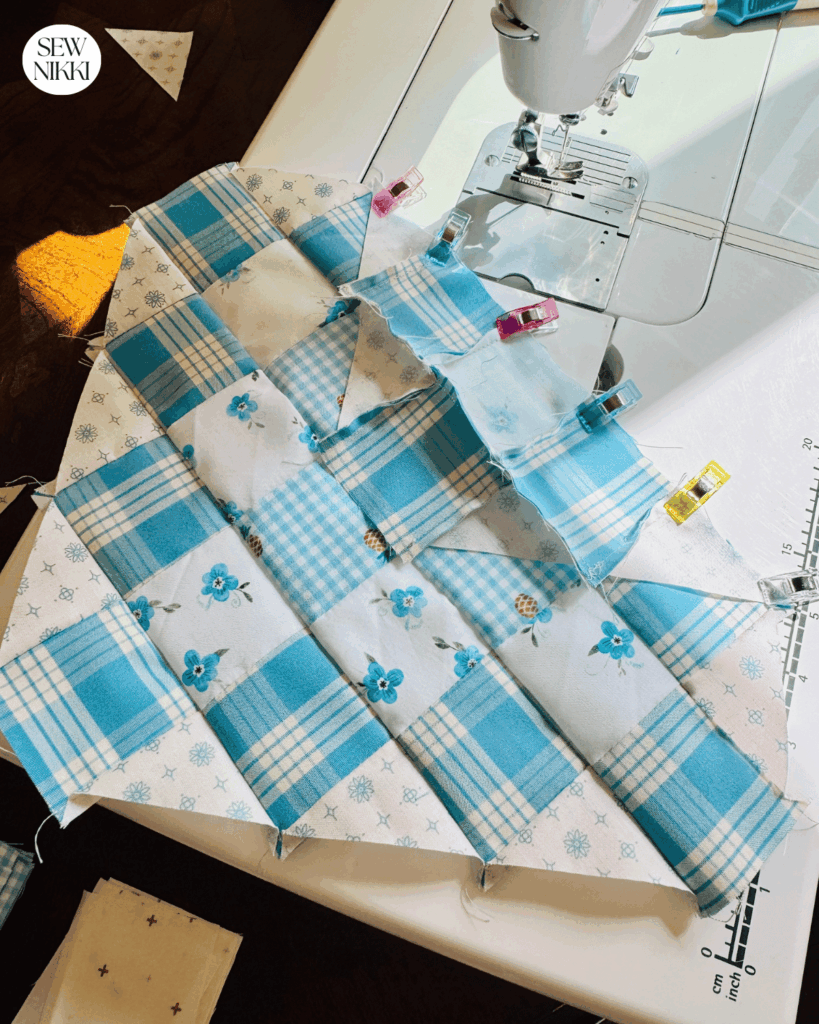
Step 3: Sew Rows Together
Sew the rows together to form the block. Again, I started in the middle and worked my way out but there’s no right or wrong way to do this. It’s personal preference. Press each row as you go, press only and don’t stretch fabric by ironing.
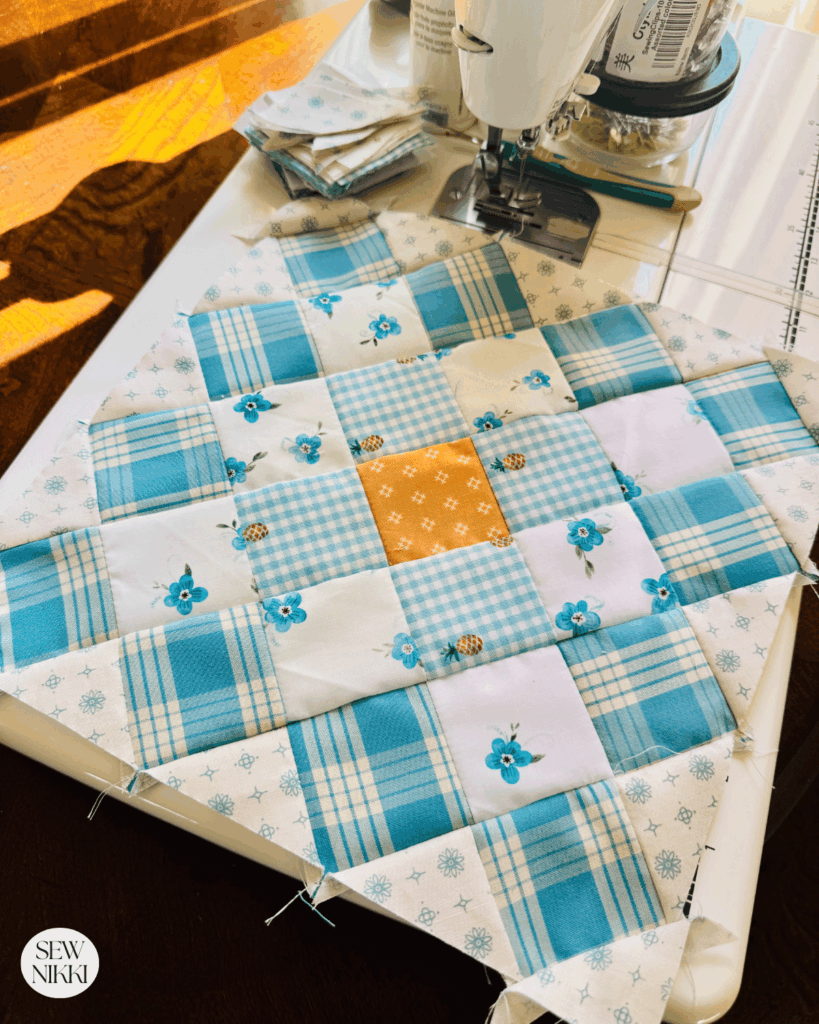
Step 4: Add Corner Triangles
Next, sew the corner triangles but this time use 1/2″ seam allowance to it lines up with the outer setting triangles. Or you can take one 3″ square and cut in half both ways diagonally, use one of the four triangles as the setting corner using 1/4″ seam allowance.

Trim dog ears as needed, but don’t over trim. Your block should now be square and ready to join with others.
Step 5: Final Press
Give the block a final press. At this stage, your granny square quilt block is complete and ready to be used in any project.
Quilt Blocks for Beginners: Why Granny Squares Are Perfect
If you’re new to quilting, granny square quilt blocks are an excellent place to start.
Here’s why:
- Straight seams only
- Small pieces = great practice
- Easy to fix mistakes
- Perfect for scraps
- Good practice for on point quilts
Beginner quilters can build confidence by making several blocks, then mixing and matching them into larger projects without committing to a full quilt right away.
If You’re New Here
I’m really glad you found your way here.
If you’re new to quilting, then welcome. The learning curve is fast, and yes, you will face challenges. But I’ve got you. If I can do it, so can you!
Here’s where to go next:
- Learn to Quilt Page – every step of making and finishing a quilt
- Free Pattern Index – all my free patterns in one place
- Digital, ad-free patterns – clean, printable, and beginner-friendly
My blog is built for the home sewist and quilter who wants to make a quilt from start to finish all by themselves. Take a full tour of this blog so you know your way around. Subscribe to the newsletter so you don’t miss out on new patterns or tutorials. And follow me on Pinterest, Instagram and Facebook.
Create Your Own Projects
Here are a few ideas:
- Full size scrap quilt
- Table runner
- Tote bag or zipper pouch
- Baby quilt
- Quilted pillow cover
You can even alternate granny square blocks with solid blocks or sashing for a more modern look.
There are a lot of quilt blocks that finish at 12 or 12.5 inches and you can mix and match to create a quilt pattern when blocks are the same size. This block trimmed is just shy of 12 inches but a simple border using the setting triangle fabric all the way around would make this larger. If you’re new to sizing layouts, this guide on quilt block layouts from American Patchwork & Quilting is helpful.
More Resources
If you’re a visual learner, here are some videos for this quilt block and are great companions to this tutorial.
Olive & Elle Quilt Co or Ericka Arndt – How to sew a granny square block
SewVeryEasy – No math way to add corners to a quilt block
More Quilt Patterns You May Like
If you enjoyed this granny square quilt block, here are more patterns from my site you might love:
Save This Pin!
Granny Square Quilt Block
This free granny square quilt block pattern is a great reminder that quilting doesn’t have to be complicated to be beautiful. With just a few 2.5” squares and some simple triangles, you can create blocks that feel classic, cozy, and totally customizable.
Whether you’re a beginner learning the basics or an experienced quilter looking to use up scraps, granny square quilt blocks are always a win.
And don’t forget to grab the digital download if you want an easy printable version!
Etsy Shop
You can browse my Etsy shop, SewNikkiCo, for blog samples and handmade items for sale along with digital patterns.
ABOUT SEW NIKKI
If this is your first time stopping by, welcome! Your place for free crochet, sewing and quilt patterns for beginner to intermediate skill levels. Want a digital pattern? We have those too! Plus tutorials to walk you through how to make each item from start to finish.
Follow me on social media (Pinterest, Instagram, Facebook and Twitter) so you get notifications when I post new patterns and tutorials.
Looking for your next quilt project? Then head on over to my free “Pattern Index”. It’s a page dedicated to all of my free patterns separated by categories for crochet, sewing and quilting.
If you prefer an ad-free printable version, head over to my shop and browse the Digital Patterns. These are instant digital downloads you print yourself.
This post contains ads and affiliate links, which means I make a small commission at no extra cost to you. While the ads may seem annoying, it helps keep this blog going. See my full disclosure here.


I love scrap sewing, but really small pieces try my patience! This is a cute block to try!
I love the look of a scrappy quilt and this granny square block is the sweetest! Thanks for the inspiration!
I’m currently trying to go through my fabric scraps, a perfect project for this!
Love this! It reminds me of sewing with my grandmother when I was younger. We made a quilt together out of scrap fabric.
This is so strightforward thank you! I’m going to give this a try and make a zipper pouch!