Free Bow Tie Quilt Pattern – Rose’s Quilt
Free Bow Tie Quilt Pattern and bowtie block tutorial for Rose’s Quilt, she’s my dog. In this quilt tutorial, you will learn how to make a bow tie unit, a bow tie block and a lap size bow tie quilt pattern. This is a fantastic traditional quilt design and perfect for a scrappy quilt. Finished throw size quilt measures 66″ x 74″.

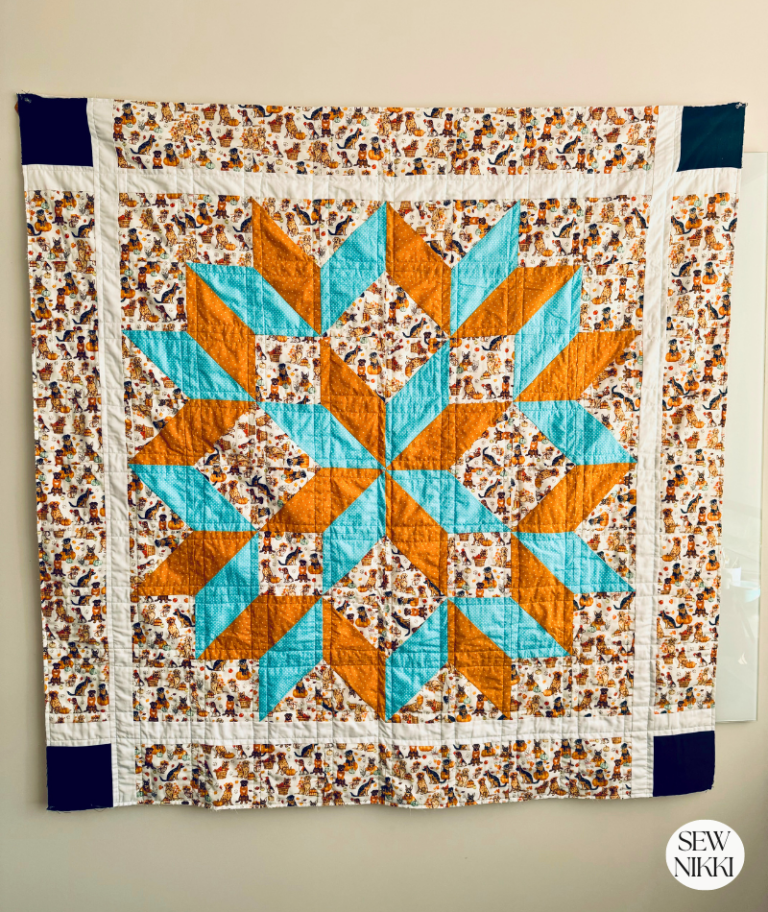
I entered the quilt competition at my local fair after one year of quilting, talk about a newbie. The following year I entered again with this quilt, Rose’s Quilt. Today I will share that quilt with you. This quilt is named after my dog and it’s a car quilt to protect my leather seats. Rose’s Quilt was made with the easy bow tie quilt block. Let me show you how to construct this traditional block and turn it into the cutest lap size quilt.
Bow Tie Traditional Block
You will need four squares that are the same size, one background fabric and one print fabric. Then to make the bow tie, you will also need two squares that are one inch smaller than the four squares. For example, if you are using 2.5″ squares, you will need 1.5″ bow tie squares. If you want bigger bow ties you can use 5″ squares with 4.5″ bow tie squares.
Quilt Design:
This quilt has 168 bowtie units, each are made with 2 – 2.5″ background squares and 2 – 2.5″ & 2 – 1.5″ printed squares. You will need 4 bowtie units to make 1 bowtie block. There are 7 rows in this quilt, each row has 6 bow tie blocks. There are three simple borders to frame and tie everything together. Skill level is beginner.

MAKE SURE YOU CHECK THESE OUT!
After you read this post, make sure you also check out Learn How to Quilt for Absolute Beginners. It’s jam packed with information to make your first quilt. It also has links and resources that are so helpful when you’re first learning. There’s lots of free quilt patterns that are great for beginners and all skill levels too. So make sure you check this out, seriously don’t forget!
Make sure you grab a copy of my free Quilt Planning Journal. It’s filled with graph paper and note pages to help you design at least 4 quilt or sewing projects! Use it to jot down ideas, fabrics, patterns and inspiration all in one place. Or create your own patterns and share with others. Pin in fabric swatches, photos of your finished quilts and enjoy your creative process!
Bow Tie Quilt Pattern Free – Rose’s Quilt
Materials Needed
- Fabric for bowties (various colors or patterns)
- Fabric for background squares (contrasting color)
Cutting Chart
Background fabric: 366 (2.5″ squares)
Print fabric: 366 (2.5″ squares) and 366 (1.5″ squares)
Border fabric: – 3″ x WOF and 2.5″ by WOF in background fabric, 5.5″ x WOF charcoal gray fabric, and 2.5″ left over print squares for outside corners of border.
Step 1: Fabric Selection
Choose fabrics that complement each other and suit your style. For the bowties, opt for a variety of colors or patterns, while the background squares should be a solid contrasting color. This will ensure that the bowties stand out. This is the perfect scrap buster so get into your fabric stash and use as many colors as possible.
Step 2: Cutting Fabric
Using a rotary cutter, cutting mat, and quilting ruler, cut the bowtie fabrics into squares. For each bowtie, you’ll need two background squares (2.5″ x 2.5″), two print squares (2.5″ x 2.5″) and two print squares (1.5″ x 1.5″).

Step 3: Creating Bowties
Draw a diagonal line from corner to corner on the wrong side of all the 1.5″ squares. This will be your sewing line when you take to the sewing machine. You could also skip this step and use diagonal seam tape as your guide. Line the 1.5″ print square up in one corner of the 2.5″ background square. Sew on the diagonal line using 1/4 inch seam allowance, right sides of fabric facing each other.

Step 4: Assembling Bowties
Press with iron. Place your quilt ruler’s 1/4″ seam allowance line on the diagonal line you just sewed and trim away the excess fabric. Press with iron.

Lay out per the picture below, sew the top units together to form a row and repeat for the bottom units. Nest your seams where they connect. Use sewing pins to pin in place. Press with iron. Now sew row 1 to row 2, using 1/4″ seam allowance. Press with iron. Bowtie unit complete.

Step 5: Make Quilt Blocks
You will need four bowtie units to make one bowtie block. See picture below for layout instructions. Arrange the blocks into seven rows with 6 bowtie blocks in each. Move the blocks around until you like the color distribution.

Pro tip: take a picture with your cell phone in black and white. You want your colors evenly distributed if possible. Also try to keep like colors from touching from block to block. Experiment with different block layouts until you find the design you love. Once satisfied, sew the squares together row by row.
Step 6: Adding Borders
For a polished look, add borders to your quilt top. There are three borders in this quilt. Cut strips of fabric for the borders per the cutting chart above and sew them to the edges of the quilt. Pressing with iron as you go.

First border is 3″ white background fabric. Attach this first. Second border is the 5.5″ charcoal gray, attach this next. Final border is the 2.5″ white background with leftover fabric scraps in two of the quilt corners. On the longer side of the quilt there is 25″ of printed fabric, on the shorter side there is 23″.
Step 7: Layering and Backing
Create a quilt sandwich by layering the quilt top, batting, and backing fabric. Pin the layers together and quilt as desired. This could be simple straight-line quilting, free-motion quilting, or any other design of your choice. For more info on basting, check out How to Baste a Quilt: Beginner Spray Basting Tutorial or How to Sandwich a Quilt Step-By-Step Tutorial. Want an interesting backing for your quilt, check out my post on simple pieced quilt backings here.
Step 8: Quilting
You can opt for straight line quilting, free motion quilting, or any other quilting design that inspires you. For more info, check out How to Machine Quilt With Walking Foot for Beginners or How to Sew a Quilt Together – Quilting for Beginners.
Step 9: Binding
Trim the excess batting and backing fabric. Attach the binding to the edges of the quilt using a sewing machine. Fold the binding over to the back and hand stitch in place. Make double fold binding using 2.5″ x WOF strips with Charcoal Grey fabric until it’s long enough to fit around entire quilt. Sew strips together to form one long continuous strip. For more info, check out How Wide to Cut Quilt Binding and Make Easy Strips and How to Join Quilt Binding Ends, Beginner Series
Step 9: Finishing Touches
Give your quilt a final press and inspect for any loose threads. Your bow tie quilted square throw is now ready to add a touch of handmade warmth to your home.
Get the digital pattern here
Are you ready to make one for yourself? Grab the digital pattern without all the ads.
SAVE THIS PIN FOR LATER!

This post contains ads and affiliate links, which means I make a small commission at no extra cost to you. While the ads are annoying, it helps keep this blog going. See my full disclosure here.
ABOUT SEW NIKKI
If this is your first time stopping by, welcome! I’m Nikki, a maker obsessed with quilting, crochet, and all things fabric. Here, you’ll find easy-to-follow patterns, helpful tutorials, and plenty of inspiration for your next handmade project. Grab your fabric (or yarn), and let’s create something beautiful together!

Hope you make this really sweet bow tie quilt pattern free using these classic quilt blocks. This is such an adorable bowtie quilt with so many different options for how you can change the look depending on what techniques you use. Adding sashing and corners completely changes the look.
Here’s a quilt that is over 40 years old, made for me when I was a teen or tween by my great grandma berry. This quilt is deteriorating but made with old clothing, sheets, feed sacks, not sure what else. It’s a keepsake.

Smaller squares look a bit different from slightly larger squares, pick your favorite way and size by experimenting now that you know the quilt math for this block. You could also do larger bowtie units with a plain block in between to layout your quilt.
So many different options make this a favorite block and offers easy ways to use scrap fabric to make a beautiful quilt.
Follow me on social media (Pinterest, Instagram, Facebook and Twitter) so you get notifications when I post new patterns and tutorials.
Want to learn how to crochet? Then check out this post, How to Learn How to Crochet – Guide for Beginners.