Edge to Edge Quilting Designs for Home Machines
When most people hear the phrase edge to edge quilting designs, they immediately picture a massive longarm machine, pantographs, laser guides, and a dedicated quilting studio. And while longarm quilting is amazing, it’s absolutely not the only way to quilt edge to edge.
If you quilt on a regular home sewing machine, this post is for you.
Today I’m showing you a simple, realistic method for creating edge to edge quilting designs on a home machine using chalk, a ruler, and straight-line quilting. No free motion quilting, hand quilting or following seam lines. Just clean straight line quilting that runs corner to corner and completely ignores your quilt top design.

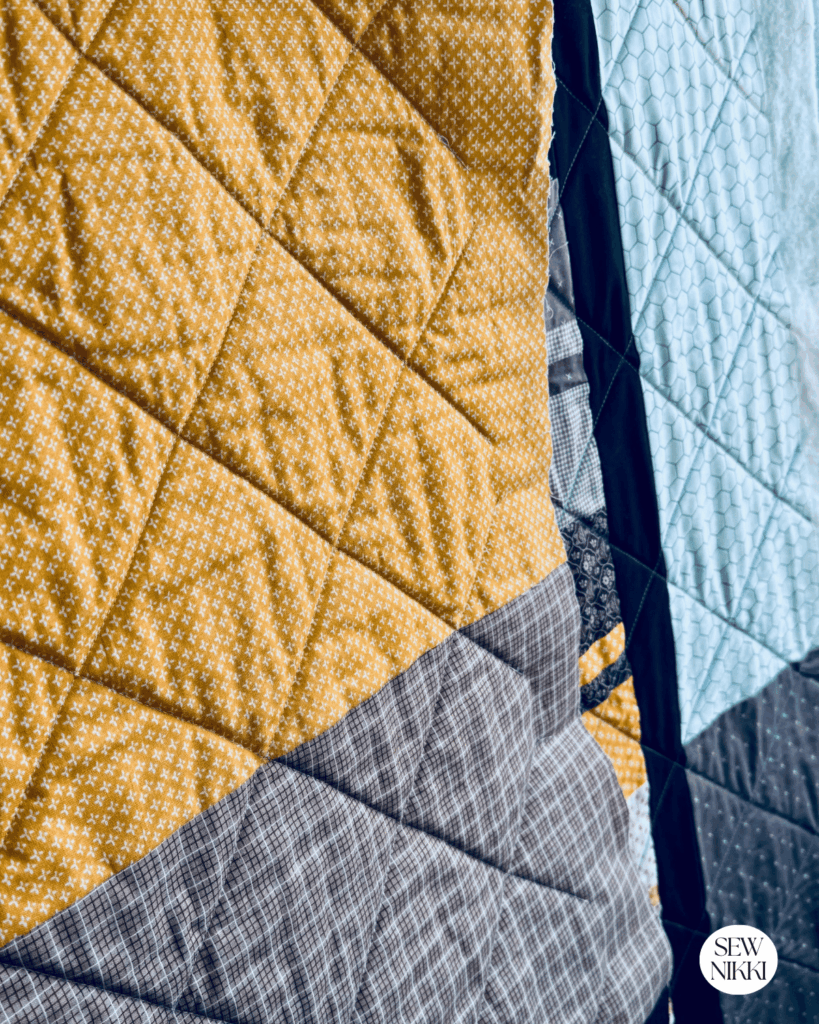
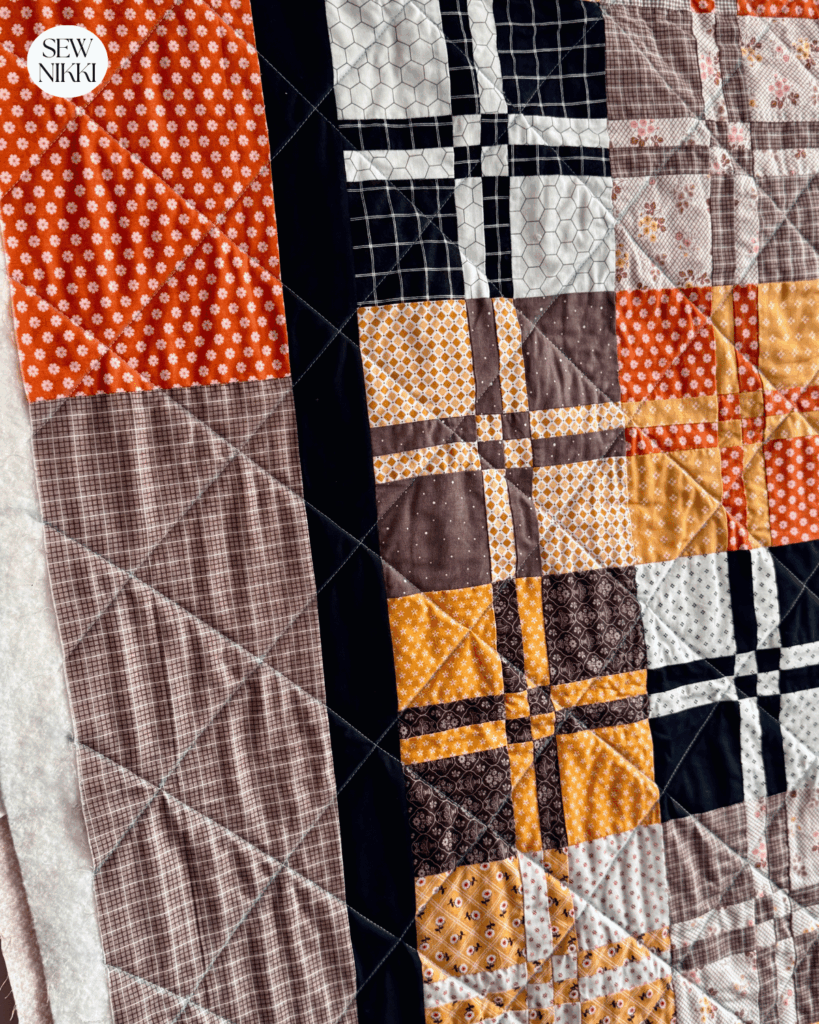
I’m quilting the Bella Disappearing Four Patch quilt, and because the blocks are small (about 8.5″ square untrimmed), following seam lines would have been overwhelming and honestly… not cute. Instead, I chose a diagonal crosshatch grid, spaced 4 inches apart, and I’m obsessed with how it turned out.
Let me walk you through exactly how to do this on your own quilt using your domestic machine. No digital quilting design needed, just a ruler and some chalk.
What Is Edge to Edge Quilting Patterns?
Edge to edge quilting pattern simply means the quilting design runs continuously across the entire quilt, from one edge to the other, without stopping or changing to match individual blocks.
Instead of quilting inside the quilt top design, you quilt over it, treating the quilt like one big canvas.
This approach:
- Creates a cohesive overall texture
- Beginner friendly
- Great on modern or traditional quilts
- Perfect when blocks are small or busy
Longarm quilters often use pantographs for edge to edge designs, but on a home machine, grid quilting is one of the easiest and cleanest ways to get the same effect. No digital patterns required.
Why I Ignored the Quilt Block Design (On Purpose)
I’ll be honest, this part was mental more than technical. Ever since I started quilting, I always picked quilt patterns that I knew could be quilted with straight lines and mostly following seam lines. So ignoring the blocks was rough at first but I’m happy with the quilting. It will look even better when it bound and washed.
The Bella Disappearing Four Patch quilt has a lot going on. The disappearing layout creates small seams that are very close together and straight line quilting following the seam lines would have meant:
- Stitching lines extremely close together
- Constant stopping and pivoting
- Visual clutter instead of texture
- Squares in the blocks didn’t line up from row to row do quilt through center of them
So I had to tell my brain to stop looking at the blocks.
Instead of quilting the pattern, I just focused on how far apart I wanted my quilting lines.
Once I figured that out, everything else got easier. My start point was corner of quilt and stop point was opposite corner of quilt going diagonally.
Choosing Your Grid Spacing
This is the most important decision you’ll make and just make sure you follow your batting’s info on how far your stitch lines need to be for your brand of batting.
For this quilt, I chose:
- 4 inches apart
- Quilted diagonally
- In both directions to form a crosshatch pattern
Why 4 inches?
- Wide enough to avoid stiffness
- Close enough to add texture
- Easy to measure and mark
- Works well for smaller quilt blocks
If you’re quilting something denser or smaller, you could go down to 3″. For a drapier quilt, 5″ works too. There’s no wrong answer, just be consistent.
Supplies You’ll Need
You do not need fancy tools for this.
Here’s what I used:
- Long quilting ruler which you should have
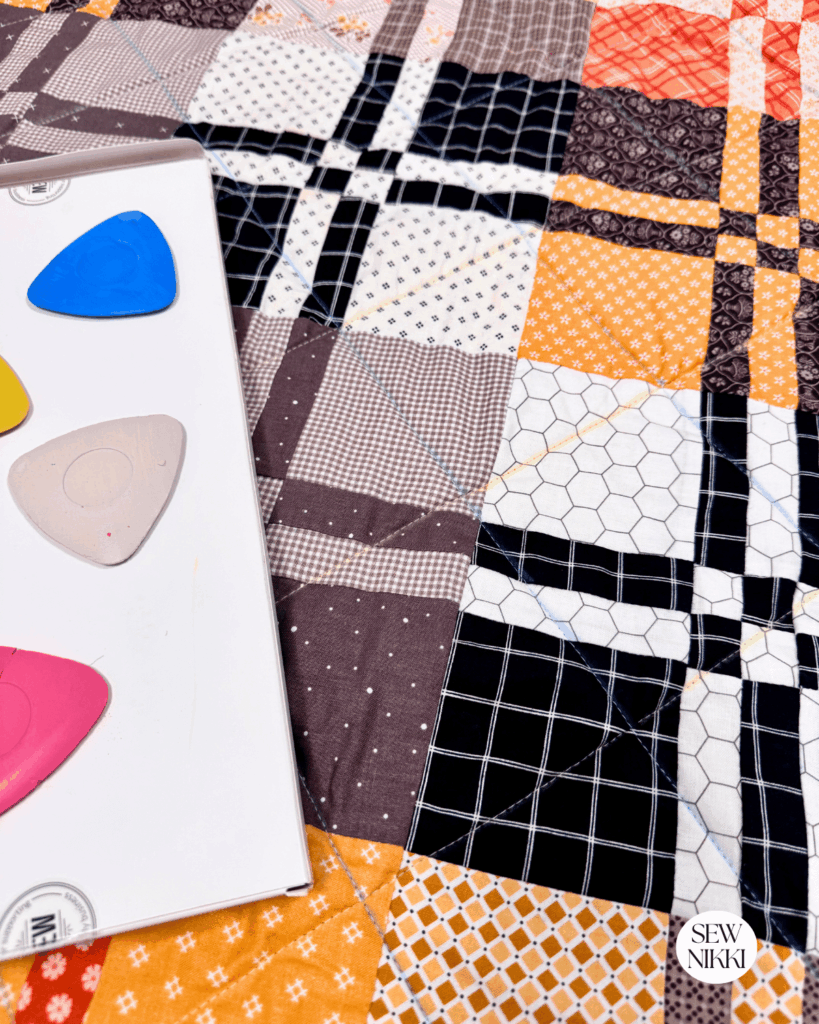
- Tailor’s chalk (I used multiple colors)
- Fully basted quilt (spray or pins both work)
Optional alternatives:
- Painter’s tape
- Lightweight masking tape
I prefer chalk because it:
- Brushes off easily
- Doesn’t leave residue
- Lets you see lines clearly on different fabrics
If you want more quilt marking tool options, this guide from Suzy Quilts is helpful.
MAKE SURE YOU CHECK THIS OUT!
Grab a copy of my free Quilt Planning Journal. It’s filled with graph paper and note pages to help you design at least 4 quilt or sewing projects! Pin in fabric swatches, photos of your finished quilts and enjoy your creative process!
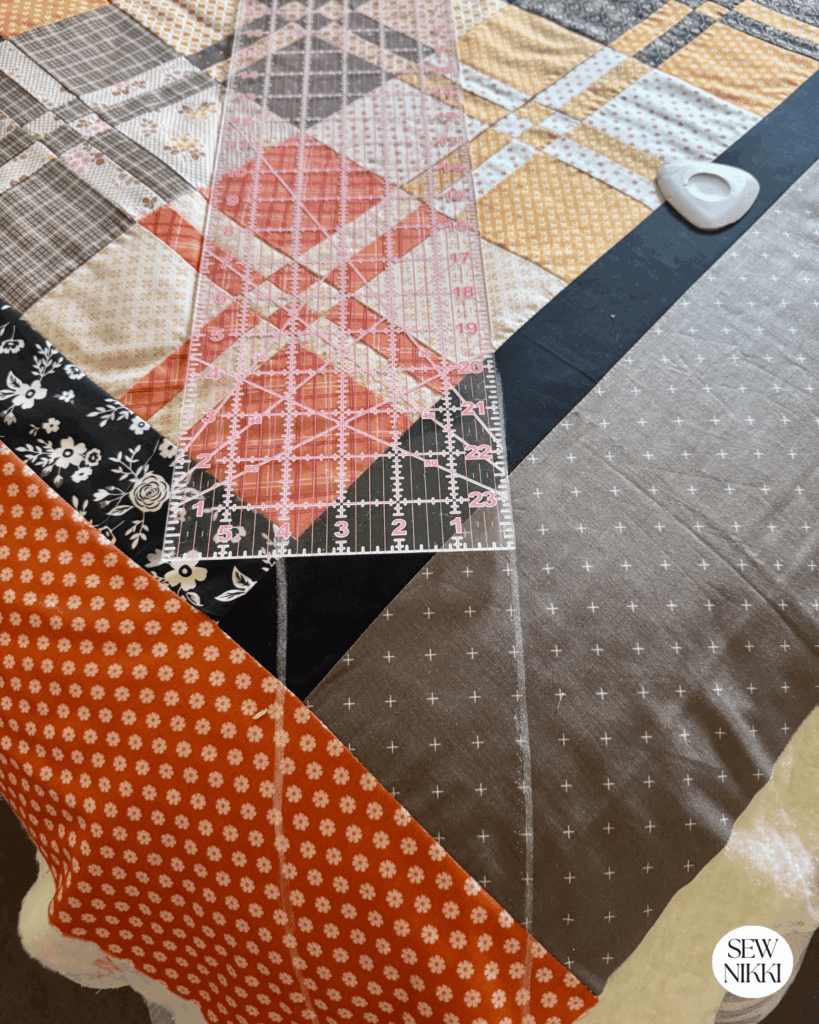
Step 1: Mark the First Diagonal Line
Lay your quilt flat on your bed or clean floor and start on one corner.
Using your long ruler, draw a diagonal line from:
- Top left corner → bottom right corner
OR - Top right corner → bottom left corner
This first line is your anchor. My quilt was hanging over the end of my bed so I lifted the quilt to mark the first few lines because I was lazy and didn’t want to move it to a flat surface. You do want to have straight lines so adjust quilt so you can mark a nice line with your chalk.
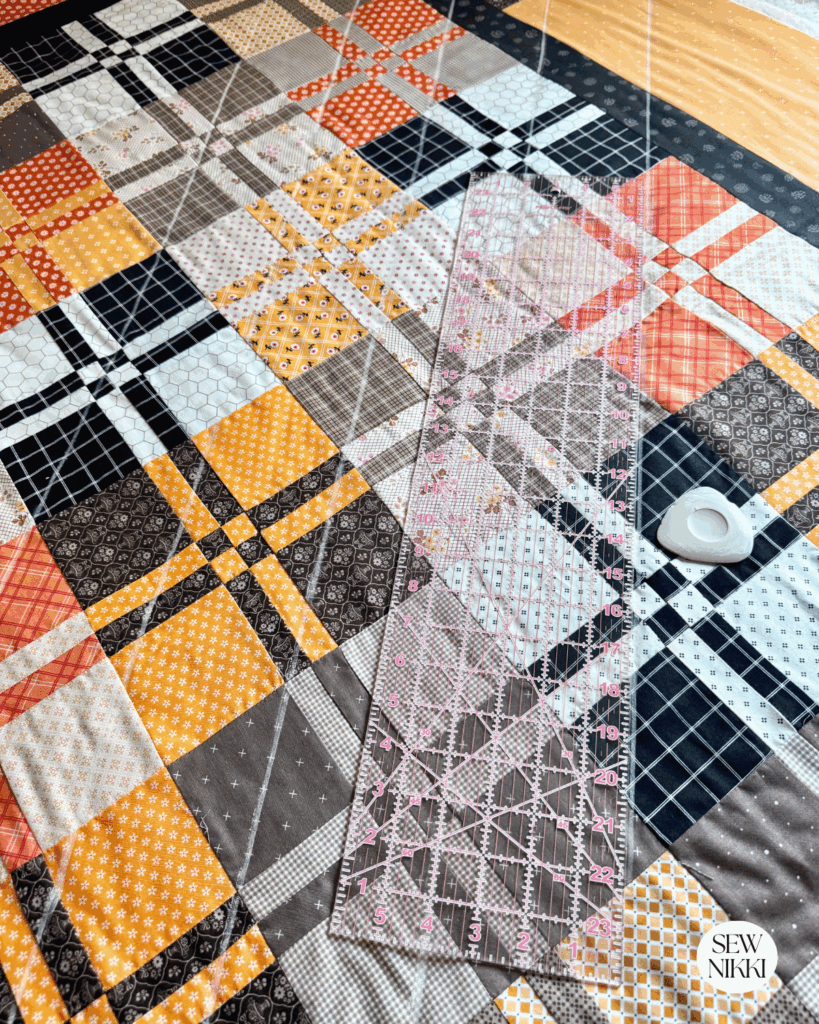
Step 2: Mark Parallel Lines Every 4 Inches
Once your center diagonal line is marked:
- Place your ruler parallel to that line
- Measure 4 inches from the original line
- Draw the next line
- Repeat across the entire quilt
Make sure you can see the chalk too. My tailors chalk comes in 4 difference colors and I started with white but couldn’t see it on the low volume fabrics. So switched to yellow and then to blue. It also comes in red and is linked up above from Amazon.
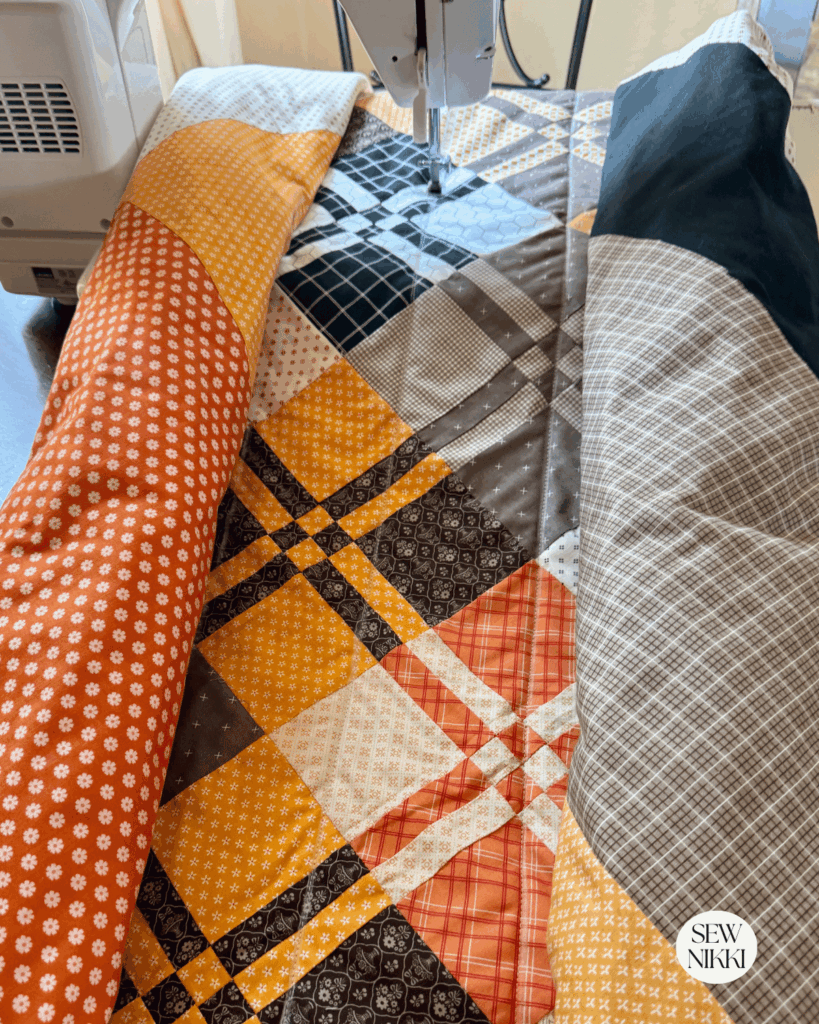
Step 3: Quilt All Lines in One Direction
This is key for smooth quilting.
Before you rotate your quilt:
- Quilt every line going the same direction
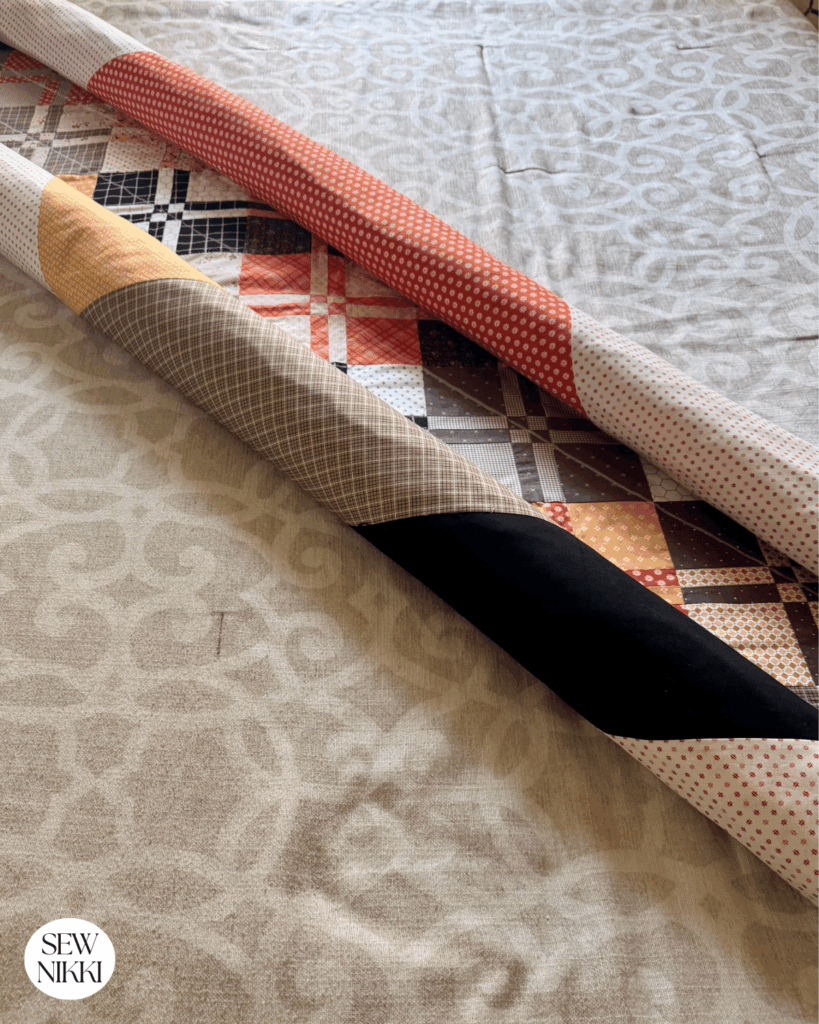
- Roll and unroll your quilt to fit under your sewing machine throat as you go
- Start in the center and work outward
- Then turn it around and finish the other side
This helps prevent puckers and keeps everything square.
For home machine quilting tips, this straight line quilting tips tutorial from WeAllSew is a great resource.
I’m using a 3 stitch length but yours may vary depending on what batting you use. I’m using Hobbs Heirloom Premium Cotton Batting. It has 80 percent cotton and 20 percent polyester and so far it’s nice and soft with a little puff before washing.
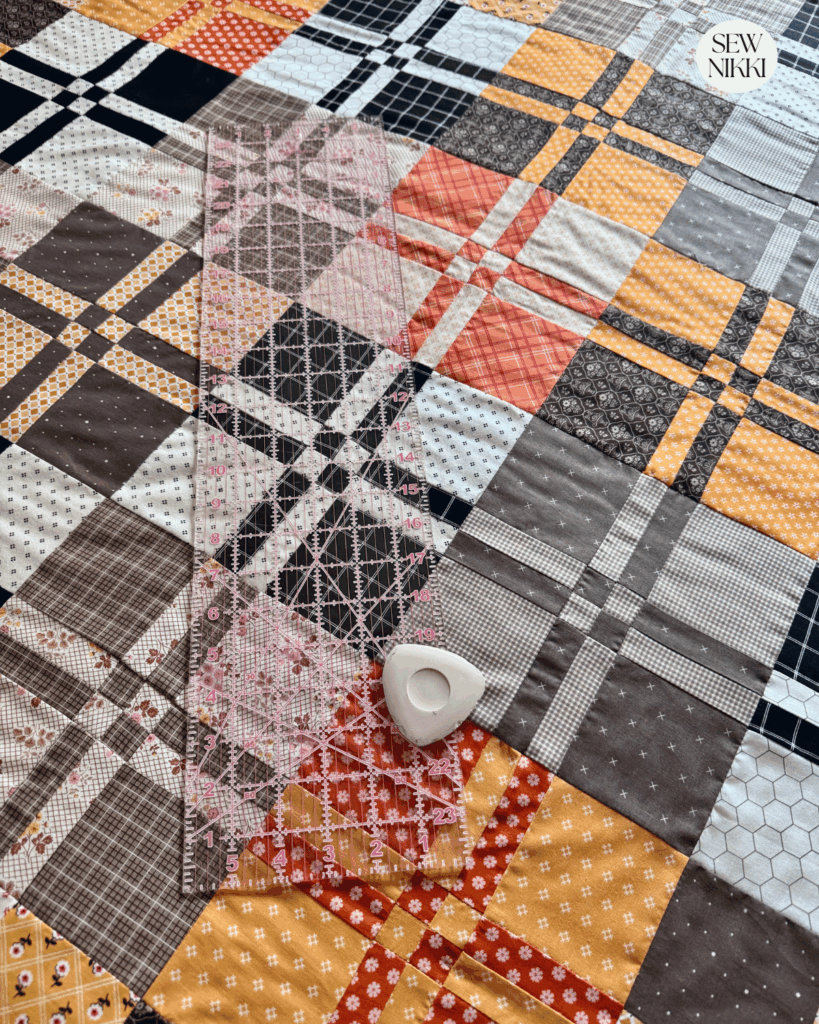
Step 4: Rotate and Repeat for Crosshatch
Once the first direction is quilted:
- Lay quilt on bed or clean floor again
- Mark diagonal lines in the opposite direction
- Make sure your horizontal line is even before marking your final grid lines spaced 4″ apart
- Quilt them the same way
This creates a square crosshatch pattern that looks amazing and I will be using this edge to edge quilting design again.

Edge to Edge Quilting Designs & Finishing
I always spray baste my quilts using my king size bed as a table of sorts. It’s better than putting it on the floor, but use what you have because what works for one person doesn’t work for another.
For my batting, I tried a new one based on what others are using and it’s an 80/20 cotton/Polyester one from Hobbs. I’ve never used a part cotton and part polyester so was excited to try. Hobbs is also a new brand for me and I just ordered it on Amazon, super easy. This batting was a joy to use, quilted really easy on my domestic machine and is soft put with some puff. Can’t wait to wash it.
If this is your first time here, my web site has has free patterns and lots of quilt tutorials to walk you through every step in the quilt making process. If you need more detailed information on basting, machine quilting or binding then make sure you check those out.
Want Digital Patterns?
No problem, I got you. You can get PDF digital patterns in my shops. Perfect when you want the pattern but without all the ads.
You May Also Like
Can you make quilts on a regular sewing machine?
Shop the Sample Fabrics
Here’s a list of some of the fabrics used in this quilt if you are wondering and would like to buy.
Lori Holt and Riley Blanket Fabrics: Hometown Holiday (Main Background Fabric Latte but looks like Orange and secondary pink background), Bee Backgrounds Orange (another background fabric), Prairie Yellow Rose, Besties, Midnight Meadow by My Minds Eye (center square), Bee Basics and Backgrounds, A Gentler Time, Prim Brown Plaid, Bee Cross Stich Brown.
Save This Project
Pin this tutorial so you can come back to it later or use it whenever you need a quick gift or a weekend sewing project.

More Resources
Here are some YouTube videos to see how to do edge to edge quilting on domestic machine and on a longarm machine.
SewVeryEasy – Shows you how to do edge to edge quilting but doing it on the backing side of your quilt.
Embroidery Library – Shows edge to edge quilting on embroidery machine quilting.
Why This Works So Well for Small Quilt Blocks
This method is especially perfect if:
- Your quilt blocks are under 9″
- The design is busy
- You don’t want to stitch in the ditch
- You don’t free motion quilt
- You want beautiful quilting results
- Chalk comes off in washing machine
- Cross hatch allover patterns looks amazing
By ignoring the blocks entirely, the quilting:
- Calms the design
- Adds texture without clutter
- Feels intentional and modern
Can You Really Do Edge to Edge Quilting at Home?
Absolutely.
Edge to edge quilting is not about the machine — it’s about the plan.
With:
- A ruler
- Chalk or tape
- Even spacing
You can create professional looking results without a longarm quilting machine. You can make the entire quilt from start to finish on your home sewing machine.
Edge to Edge Quilting Designs
The hardest part of this process wasn’t the quilting , it was letting go of the quilt top design.
Once I stopped trying to “match” the blocks and focused on spacing, everything clicked. The result is clean, modern, and honestly one of my favorite finishes I’ve done on a home machine. This would be even easier on a table runners and other small quilting projects.
If you’ve been nervous to try edge to edge quilting without a long arm, this is your sign.
Etsy Shop
For digital patterns on sewing, crochet and quilts plus handmade items too please visit SewNikkiCo. New arrivals for handmade items coming soon along with new designs in the works.
This includes the digital Bella Disappearing Four Patch quilt pattern, plus other designs that pair perfectly with straight line machine quilting.
ABOUT SEW NIKKI
If this is your first time stopping by, welcome! Your place for free crochet, sewing and quilt patterns for beginner to intermediate skill levels. Want a digital pattern? We have those too! Plus tutorials to walk you through how to make each item from start to finish.
Follow me on social media (Pinterest, Instagram, Facebook and Twitter) so you get notifications when I post new patterns and tutorials.
Looking for your next quilt project? Then head on over to my free “Pattern Index”. It’s a page dedicated to all of my free patterns separated by categories for crochet, sewing and quilting.
If you prefer an ad-free printable version, head over to my shop and browse the Digital Patterns. These are instant digital downloads you print yourself.
This post contains ads and affiliate links, which means I make a small commission at no extra cost to you. While the ads may seem annoying, it helps keep this blog going. See my full disclosure here.