Magic 8 Half Square Triangles: Two Easy Methods
When making half square triangles for a quilt there are two main techniques I use: the Magic 8 half square triangles and standard two at a time method. Both of these methods produce accurate HSTs, but I choose one or the other depending on how many I need and on whether or not I want identical fabric combinations.
Magic 8 HSTs are the simplest method for producing a large number of HSTs at once, and I prefer the two-at-a-time technique when I’m using scrap fabrics or when I want more variety in my quilt designs.
What are magic 8-half square triangles?
Magic 8 half square triangles are created by joining two large squares of fabric, drawing diagonal seams across the squares, and then cutting the completed piece into eight half square triangle sections.
Rather than creating two HSTs from two starting squares, you should make eight.
This time saving method is great when making quilt blocks that need many HSTs in the same color combination, my Bear Paw quilt block is a ideal project for using the Magic 8 HSTs since it calls for a large number of matching units.
The only drawback is that the same two fabrics give you eight HSTs. This is useful when you need identical HST blocks, but it is not always what you want in the case of a scrappy quilt.
MAKE SURE YOU CHECK THIS OUT!
After you read this post, make sure you also check out Learn How to Quilt for Absolute Beginners. It’s jam packed with information to make your first quilt. It also has links and resources that are so helpful when you’re first learning. There’s lots of free quilt patterns that are great for beginners and all skill levels too. So make sure you check this out, seriously don’t forget!
I made a free Quilting for the Seasons Calendar to help you plan your quilts around holidays and special occasions. It gives you a simple starting point for deciding when to begin a seasonal quilt so you are not trying to figure it out at the last minute. Print it and keep it in your sewing room, planner or quilt notebook.
Magic 8 HST Cheat Sheet
The Magic 8 method involves a straightforward formula: first of all, decide on the size you want your HST to be after it has been trimmed.
Add a half inch to that size to leave yourself some room for trimming, and then double the number you’ve obtained to find the size of your starting squares.
Finished HST size + 1/2″ × 2 = starting square size
For example, if you want a 3″ trimmed HST, add 1/2″:
3″ + 1/2″ = 3.5″
Then double 3.5″:
3.5″ × 2 = 7″
So, for eight 3″ trimmed half square triangles, start with:
Two 7″ squares of fabric
After you have sewn and cut the pieces, press them and then cut each HST to 3.5″ leaving the finish untrimmed. When the HST has been sewn into the quilt it will measure 3″ finished.
Magic 8 HST Math Chart
| Trimmed HST Size | Starting Squares |
|---|
| 2″ | 5″ |
| 2½” | 6″ |
| 3″ | 7″ |
| 3½” | 8″ |
| 4″ | 9″ |
| 4½” | 10″ |
| 5″ | 11″ |
| 5½” | 12″ |
| 6″ | 13″ |
This chart gives you lots of wiggle room for trimming your HSTs. If you are really good at making HSTs then you can deduct 1/2″ from each of the starting squares.
The extra half inch allows you to trim your HSTs accurately rather than attempting to make them perfect right away on the sewing machine, and that extra amount of fabric is worth having.
How to Make Magic 8 Half Square Triangles
Step 1: Cut Your Starting Squares
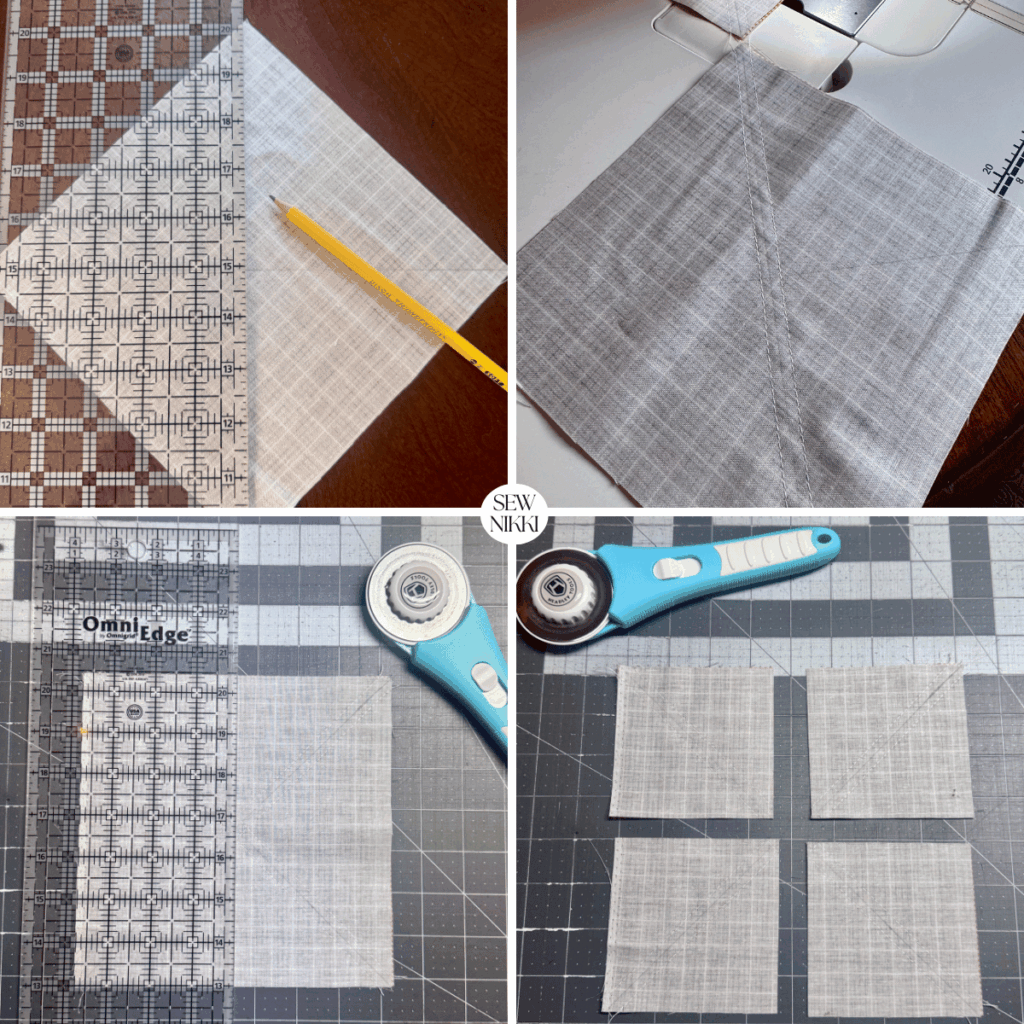
First step is to take the Magic 8 formula and cut out two squares, one of which should be made from your lighter fabric and the other from your darker fabric.
Put the two fabric squares together with their right sides facing one another.
Align all four sides and corners; a few pins can be used to keep everything in place.
Step 2: Draw the Diagonal Lines
On the wrong side of the lighter fabric, use a fabric marker and a quilting ruler to draw a diagonal line from one corner to the opposite corner.
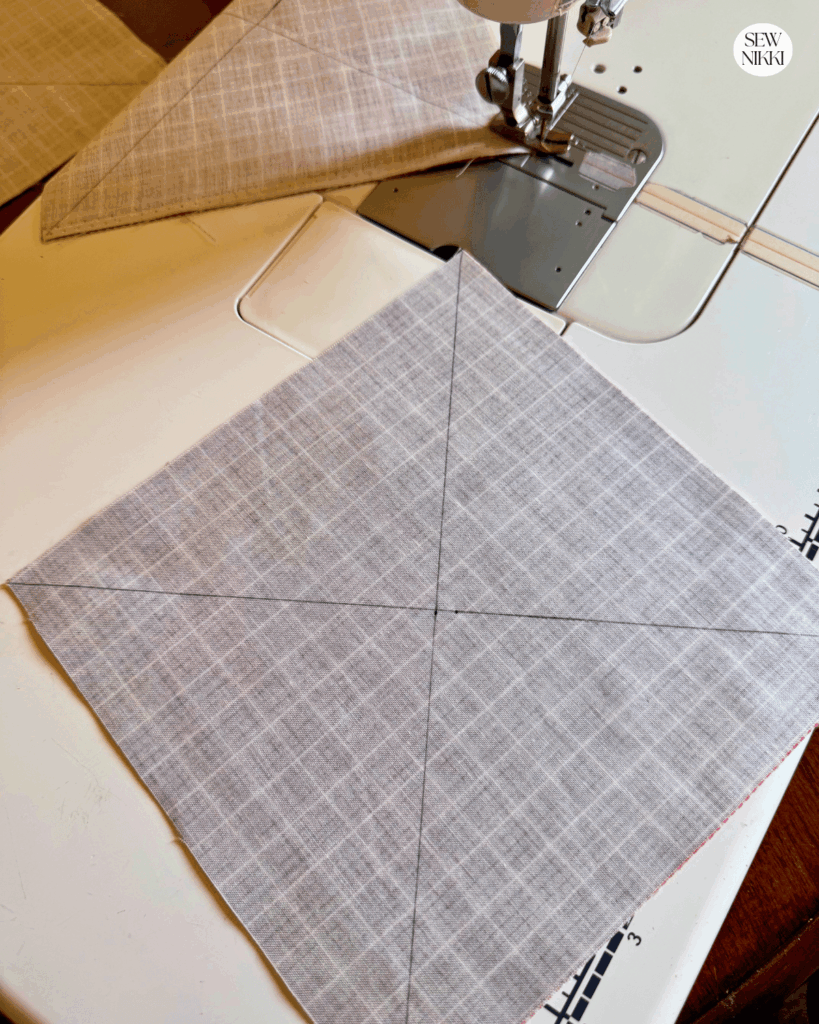
Also draw a diagonal line from the opposite corner to the other corner.
You should see an X that covers the whole square.
The lines that are drawn serve as the sewing lines and cutting lines for your eight HSTs.
Step 3: Sew on Both Sides of the Lines
Add a seam allowance of a quarter of an inch to each of the diagonal lines on both sides.
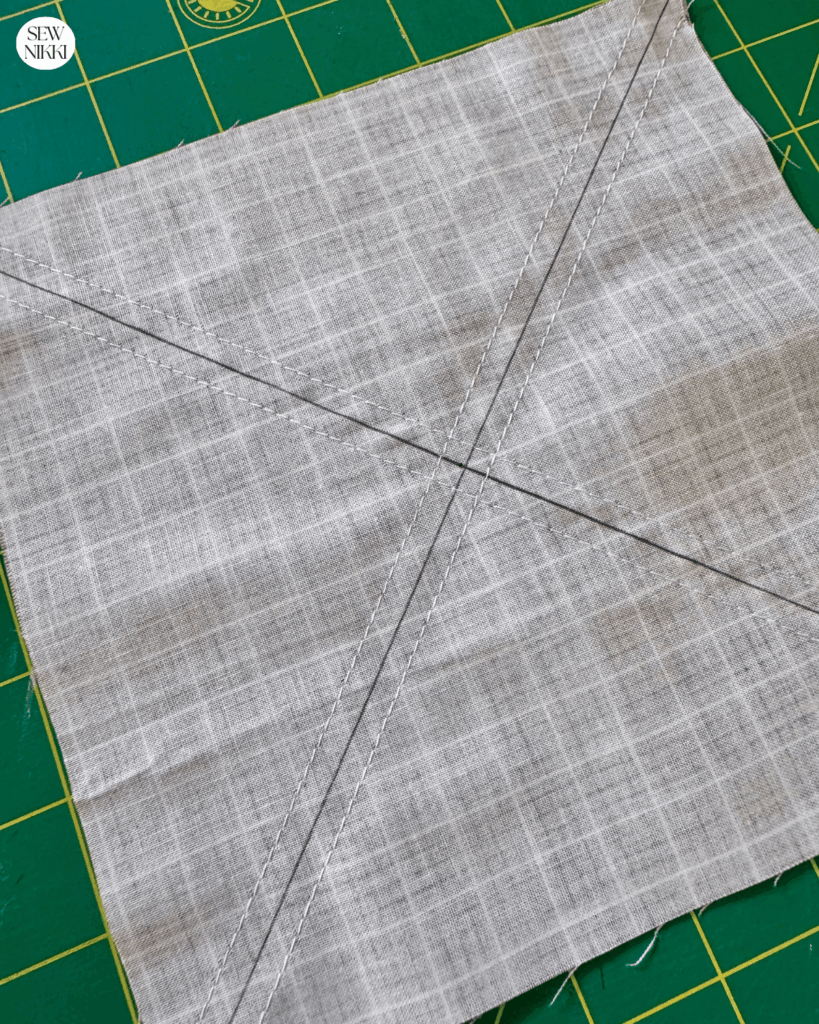
Take your time in doing this, as accurate sewing lines will result in more accurate HSTs.
I use a seam marker that is one quarter of an inch thick to make sure that my needle is in the right position before I begin sewing.
Step 4: Cut the HSTs Apart
It’s now time to take your Magic 8 unit apart.
Cut the block in half horizontally and then vertically using your rotary cutter, quilting ruler and cutting mat.
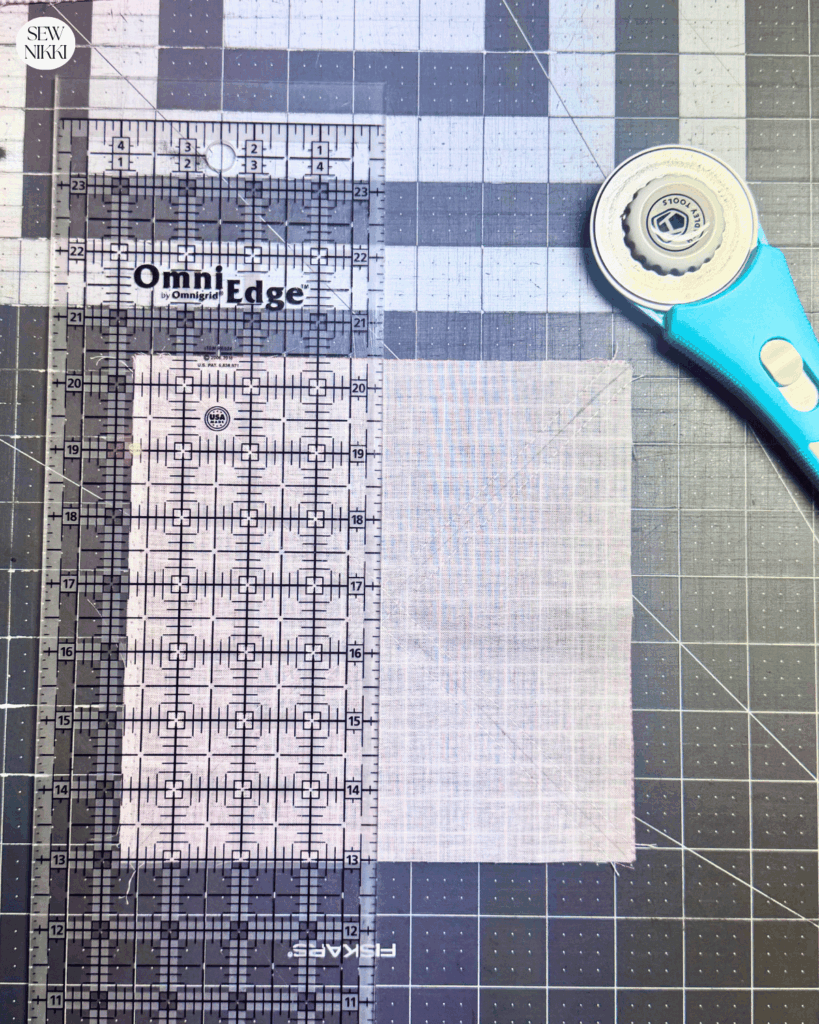
Then cut along the diagonal marked lines, not the sewing lines.
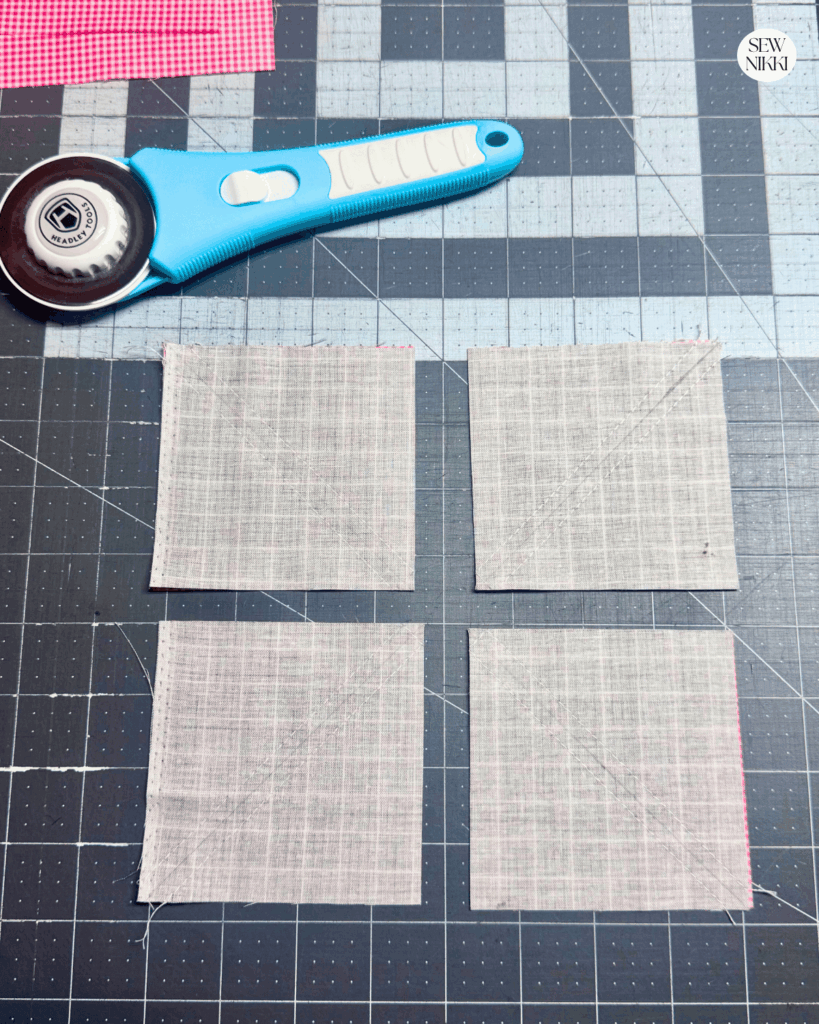
You are going to have eight units in the shape of half-square triangles.
Make sure that your cutting lines are straight and take care to avoid stretching the fabric when you are cutting it. The bias edges may shift a bit after the HSTs have been separated.
Step 5: Press and Trim
Open the two half-square triangle units and press.
Normally I press the seam allowance towards the darker fabric, but you could alternatively press the seams open.
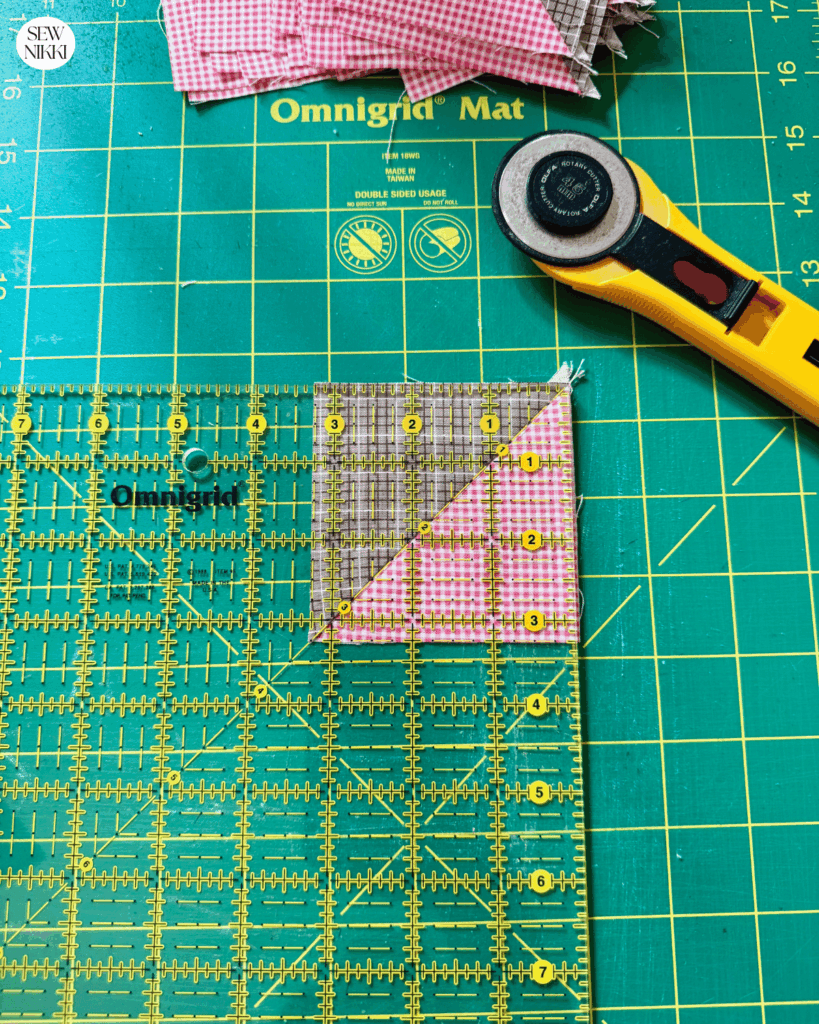
Press each unit quickly with a hot iron. Now cut your HSTs to the required finished size using a square ruler or a special ruler.
It is this stage that converts slightly faulty HSTs into accurate HSTs.
The Two at a Time HST Method
The reason why the two-at-a-time basic method is the basic one that most quilters learn first is good.
It is simple, easy to use, and works very well with scrap fabrics.
With this method, begin by using two squares of fabric; the size of these squares will be determined by the size you want for the finished product and by how much extra you would like to have for trimming.
Put the fabric squares together with the right sides touching each other.
Step 1: Draw a Diagonal Line
On a corner of the fabric square that is incorrect, draw a diagonal line from one corner to the opposite corner using a fabric marker.
Here is your sewing line.
Step 2: Sew
Sew on both sides of the diagonal lines using a 1/4″ seam allowance.
Make sure that your sewing is consistent throughout from start to finish.
Step 3: Cut
Cut along the diagonal line using your rotary cutter and quilting ruler.
You currently have two half-square triangle units.
Step 4: Press and Trim
Open up the half-square triangle unit and give it a quick press with iron before you trim each unit. Use square quilting ruler and trim to finished size.
Now you have two accurate HST units. Full tutorial with pictures on how to make two at a time HSTs.
The Magic 8 and the Two at a Time HSTs
Both methods have their place when it comes to quilting, and I employ the two at a time method whenever I am using scrap fabrics or when I don’t want there to be a great deal of duplication in my fabrics.
By taking two pieces out of my supply and making two half-square triangles, I will then be able to use two entirely different fabrics for the next pair. This means that I will have a great deal more variety.
When I need a lot of HSTs in the same color way, I use the Magic 8 method.
| Method | HSTs Made | Best For |
|---|
| Magic 8 | 8 | Lots of matching HSTs |
| Two at a time | 2 | Scrap quilts and variety |
| Magic 8 | 8 identical combinations | Bear Paw and repeated quilt blocks |
| Two at a time | 2 | Mixing different fabrics |
For instance, when I am making a Bear Paw quilt block which requires a number of half-square triangles from the same light and dark fabrics, Magic 8 is an ideal solution.
When I am making a scrappy quilt and each combination of fabrics can be different, I generally limit myself to using only two at a time.
Which of the HST methods should you choose?
There isn’t one method that is best for every kind of quilting project. They are just different methods of making the same basic quilt unit.
When a quilt pattern requires a large number of half square triangles in the same fabric combination, use Magic 8 half square triangles. Magic 8 method works great for the Bear Paw block, star blocks and quilt designs that have repeated HST units.
When dealing with scraps, with a Layer Cake, or if you just do not want eight half square triangles made from the same two fabrics, use the two at a time method.
It’s nice to know different methods of making things when you are a quilter. Plus it’s fun to switch things up and keep it interesting.
Do you need a specialty ruler?
You won’t need any special rulers in order to make half square triangles. A standard square ruler, a rotary cutter and a cutting mat work great.
There are special rulers which do make trimming quicker, however. A square ruler having a clear diagonal line makes it simple to centre the diagonal seam of the half-square triangle and to trim each side accurately.
When you’re looking for quilting supplies, check out my Resource page with links to each product.
If You’re New Here
I’m really glad you found your way here.
If you’re new to quilting, then welcome. The learning curve is fast, and yes, you will face challenges. But I’ve got you. If I can do it, so can you!
Here’s where to go next:
- Learn to Quilt Page – every step of making and finishing a quilt
- Free Pattern Index – all my free patterns in one place
- Digital, ad-free patterns – clean, printable, and beginner-friendly
My blog is built for the home sewist and quilter who wants to make a quilt from start to finish all by themselves. Take a full tour of this blog so you know your way around. Subscribe to the newsletter so you don’t miss out on new patterns or tutorials. And follow me on social media (Pinterest, Instagram, Facebook and Tik Tok).
Resources You May Like
- How to Make Half Square Triangles for Beginners
- Easy Half Square Triangle Patterns
- Bear Paw Quilt Block Pattern
- How to Resize a Quilt Block & Make It Bigger
About Sew Nikki
I am a California quilter who loves making quilts without making quilting feel harder than it needs to be. Here at Sew Nikki, I share free quilt block tutorials, quilting tips, beginner projects, free patterns, and digital quilt patterns.
I believe quilts do not have to be perfect to be worth making. Sometimes a point is a little off or a seam does not line up exactly. That is part of quilting.
This post contains ads and affiliate links, which means I make a small commission at no extra cost to you. See my full disclosure here.