Giant Granny Square Quilt Pattern (Intermediate)
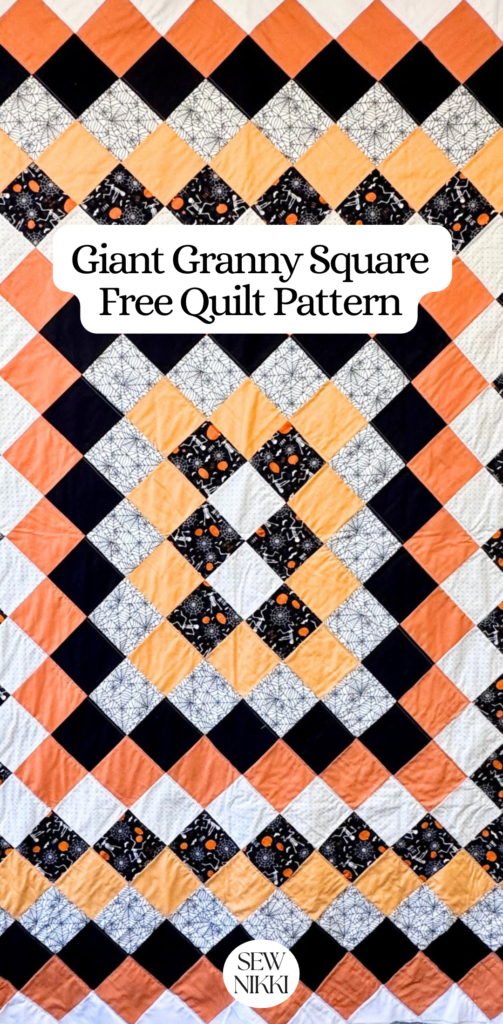
The Giant Granny Square Quilt Pattern is a fun way to turn simple square blocks (charm squares) into a gorgeous quilt. This quilt uses 5″ fabric squares arranged on point to create a giant granny square block design. It has the look of a classic granny square, but instead of crochet, you are sewing together pieces of fabric.
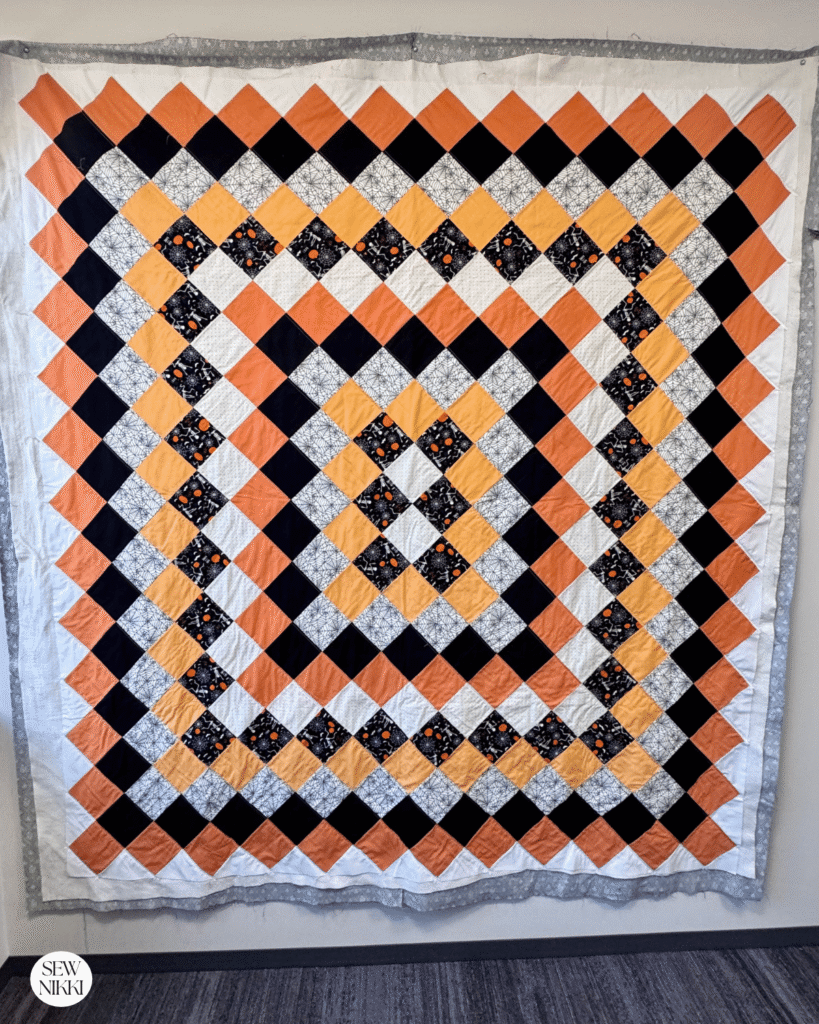
For this scrappy version with Halloween fabrics, I chose six different fabrics and used two rounds of each fabric to create the square pattern. You can use a planned color palette, a favorite fabric collection, or pull fabrics from your fabric stash. It is a fantastic way to use charm squares and make a great scrap buster quilt.
This is a free quilt pattern in this blog post, and you can also purchase the printable digital pattern in my shop.
The finished quilt top measures 79 x 84 inches, making it a nice size full/double bed quilt.
MAKE SURE YOU CHECK THIS OUT!
After you read this post, check out Learn How to Quilt for Absolute Beginners. It’s jam packed with information to make your first quilt. It also has links and resources that are so helpful when you’re first learning. There’s lots of free quilt patterns that are great for beginners and all skill levels too. So make sure you check this out, seriously don’t forget!
I made a free Quilting for the Seasons Calendar to help you plan your quilts around holidays and special occasions. It tells you when to begin a seasonal quilt so you can use it when the season arrives. Print it and keep it in your sewing room, planner or quilt notebook.
Fabric Requirements for the Giant Granny Square Quilt
This quilt uses six fabrics arranged in rounds. I started with a low volume print, followed by two colored fabrics. I repeated this same contrast with the remaining fabrics to create the granny square design.
You can use charm squares, cut your own 5″ squares from fat quarters, or use fabric yardage which is what I always do.
My two Halloween prints are also by Riley Blake My Minds Eye but two different lines. The black with skeletons is Bad to the Bone line and the spiderweb fabric is from Sophisticated Halloween line. The other low volume beige with gold is by Riley Blake Ivy Reese by Deena Rutter. Kona Black and unfortunately I got both shades of orange from discount rack and don’t know the exact colors. Got both in person at InnGathering in Costa Mesa, CA.
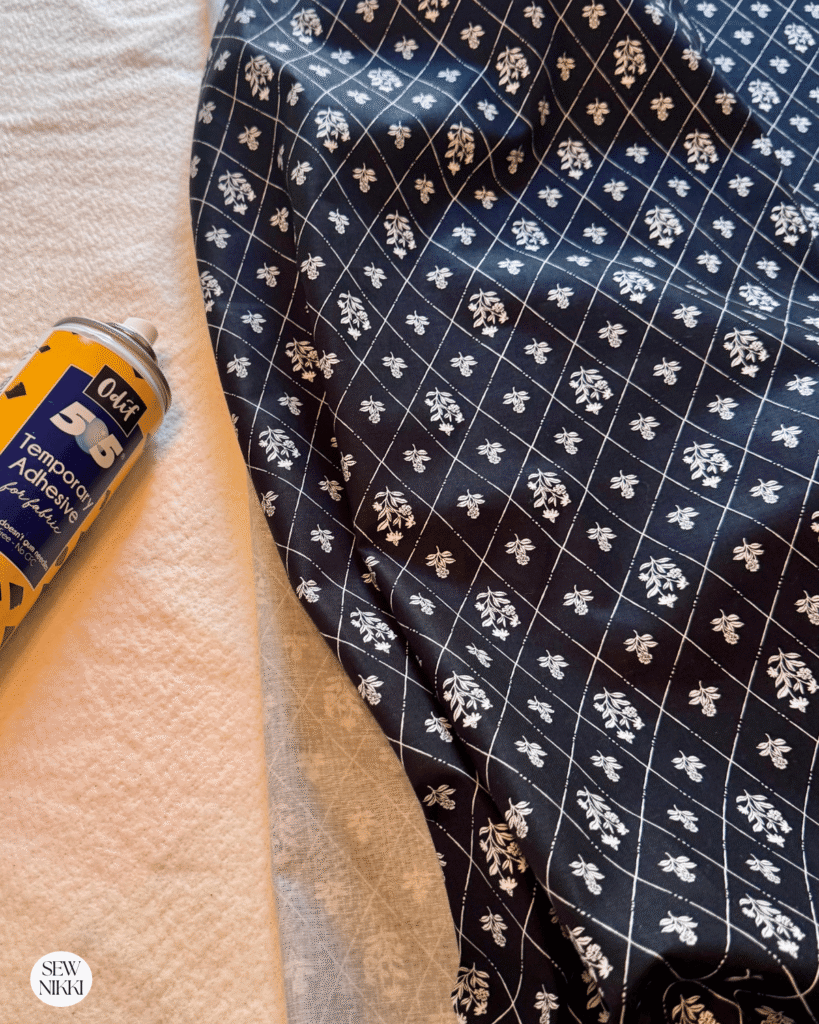
You will also need 4.5 yards of fabric for the backing (standard 44″ width). I picked up this brand new fabric from Riley Blake Moonlit Trellis by My Minds Eye and actually paid $12.98/yard because it was so beautiful and really made my Halloween colored quilt look gorgeous. Got this yesterday at M&L Fabrics in Anaheim, CA.
Fabric placement
- Fabric A: Low volume print. Rows 1 and 7 (Riley Blake Ivy Reese by Deena Rutter)
- Fabric B: Halloween print. Rows 2 and 8 (Riley Blake Bad to the Bone by My Minds Eye)
- Fabric C: Solid light orange. Rows 3 and 9
- Fabric D: Low volume spiderweb print. Rows 4 and 10 (Riley Blake Sophisticated Halloween by My Minds Eye)
- Fabric E: Solid black. Rows 5 and 11 (Kona Black)
- Fabric F: Solid dark orange. Rows 6 and the bottom left and upper right corner squares
Number of squares needed
The following fabric requirements include the squares used for the quilt top and the setting triangles and corner triangles. My quilt dimensions are 79″ x 84″.
| Fabric | 5 inch squares | 5.5 inch squares |
|---|---|---|
| Fabric A | 28 | 23 |
| Fabric B | 36 | |
| Fabric C | 44 | |
| Fabric D | 52 | |
| Fabric E | 60 | |
| Fabric F | 68 |
You can get approximately 56 to 60 five inch squares from one yard of fabric.
This quilt pattern uses a 1/4″ seam allowance for all sewing portions.
Cutting the Setting Triangles
This quilt is set on point, so you will need setting triangles to square up the sides and quarter triangles for the four corners.
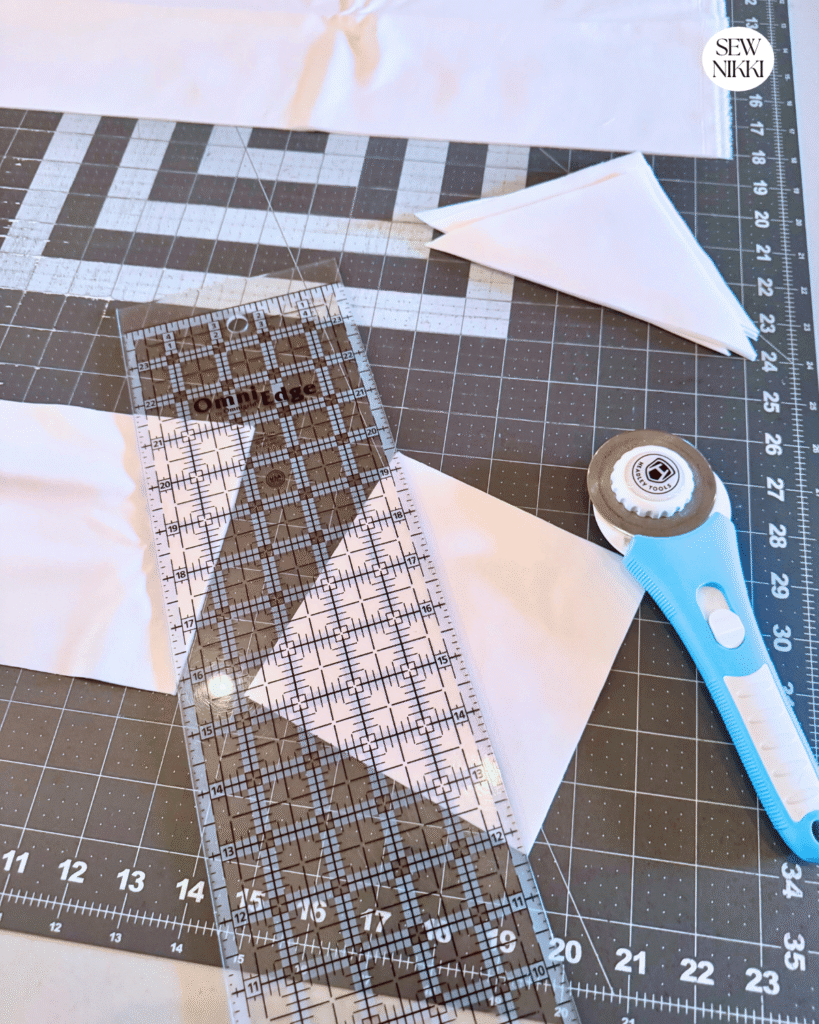
Take your 23 squares measuring 5.5 inches.
- Set one square aside for the corner triangles.
- Cut the remaining 22 squares in half diagonally. These will be your setting triangles for both ends of the rows.
- Take the last square and cut it in half diagonally in both directions to create four quarter triangles for the corners.
Set these pieces aside until you are ready to attach them to the quilt rows.
Get the digital pattern.
You can get the digital pattern without ads here.
Giant Granny Square Quilt Pattern
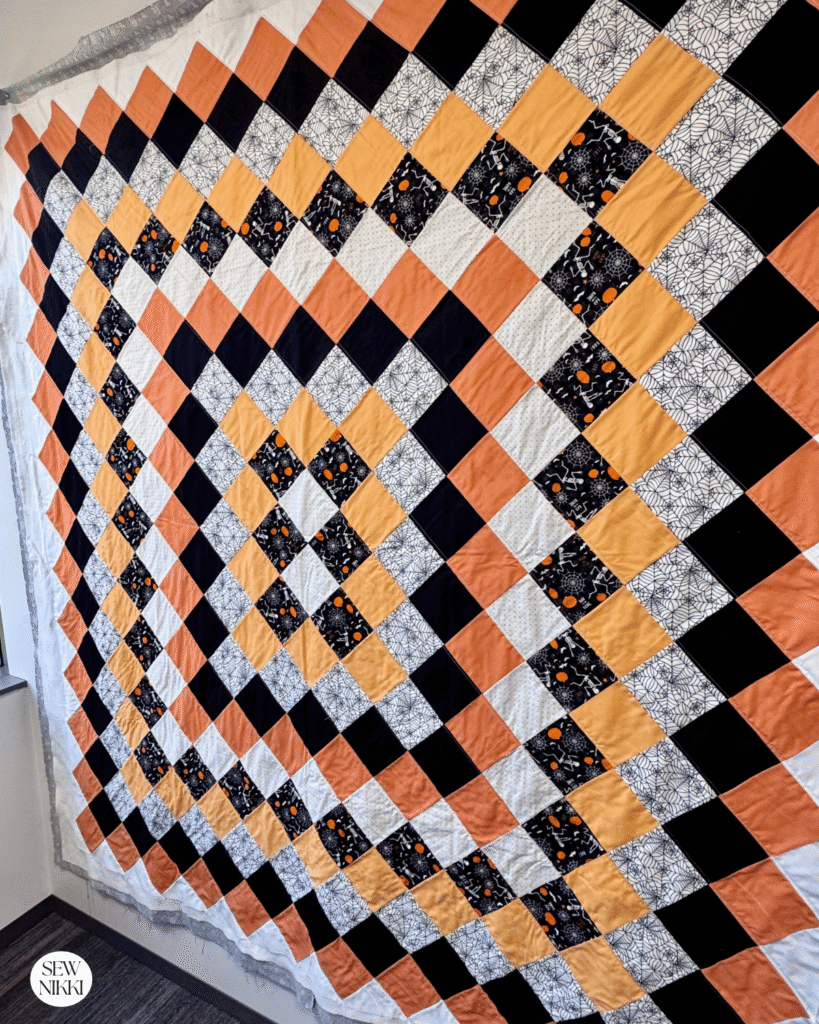
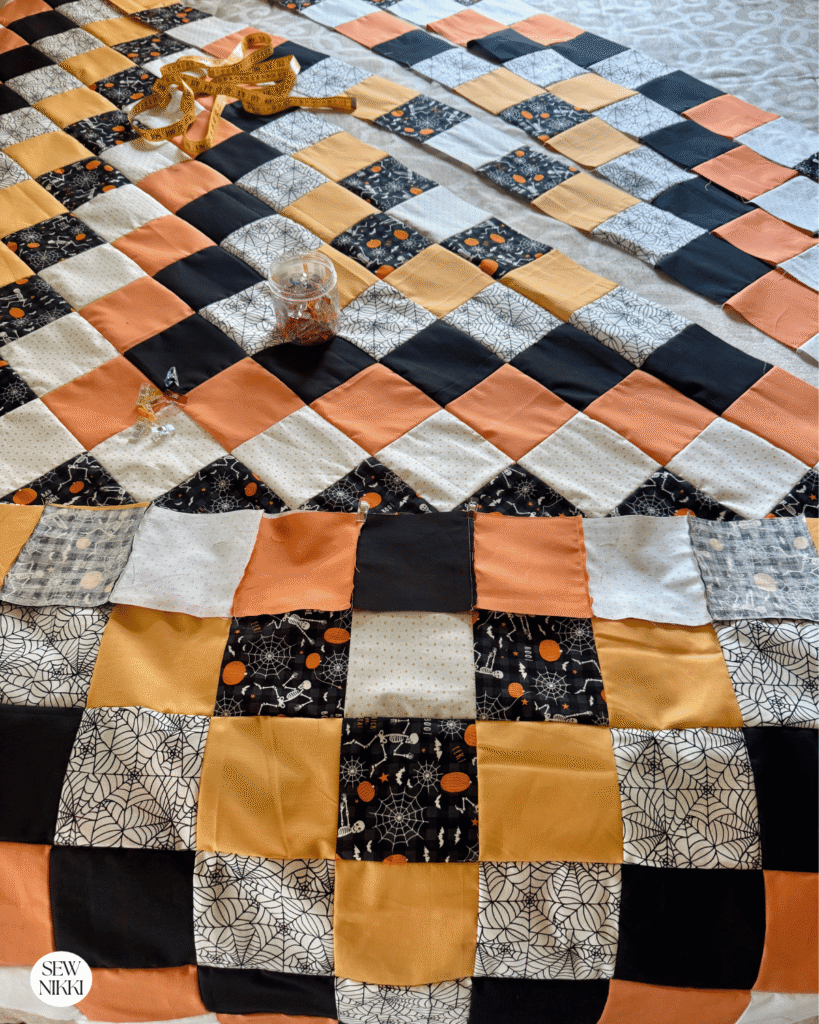
Step 1: Lay Out Your Granny Square Quilt Blocks
Start by laying out your quilt on a large flat surface. Begin with the two center squares set on point.
Next, take your second fabric and place squares around all four sides of the center squares. Continue adding squares in rounds, following the fabric placement and layout in the photos.
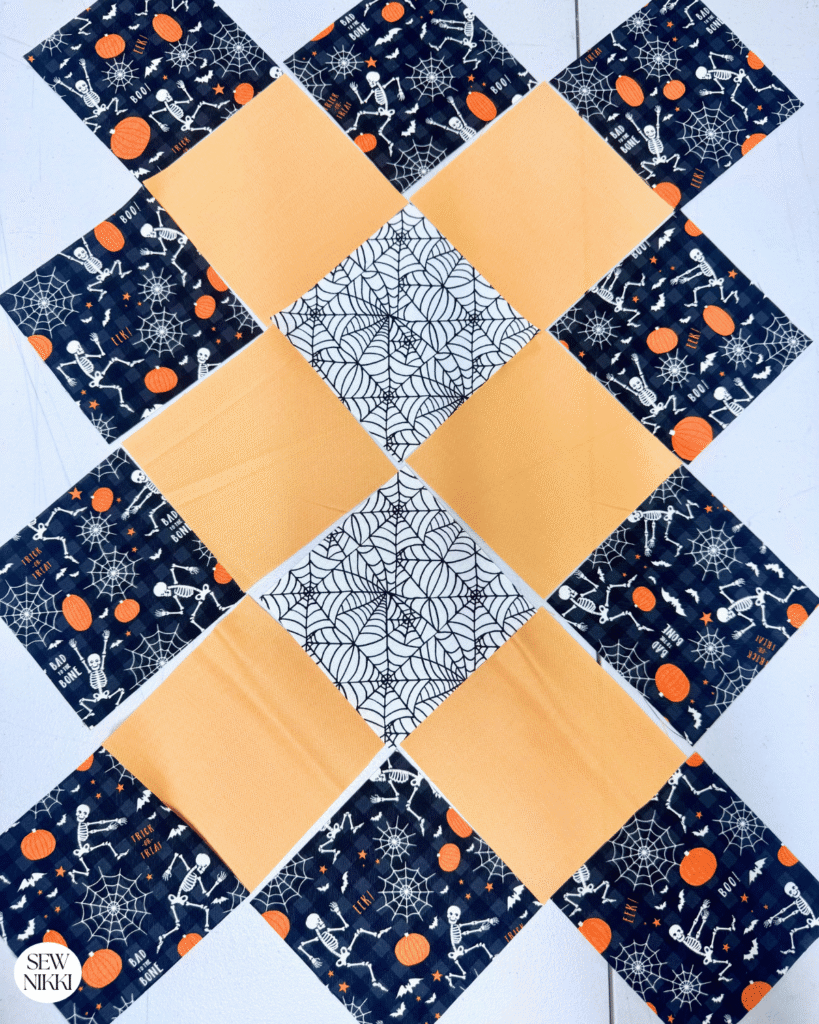
Each new round increases the design by four squares. Continue adding your fabrics in the same order until all six fabrics have been used twice.
The key to this square pattern is keeping your color placement consistent. I started with a low volume print, followed by two colored fabrics, and repeated that contrast throughout the quilt.
Step 2: Sew the Rows Together
Once you are happy with your layout, sew the squares together one row at a time, working diagonally across the quilt.
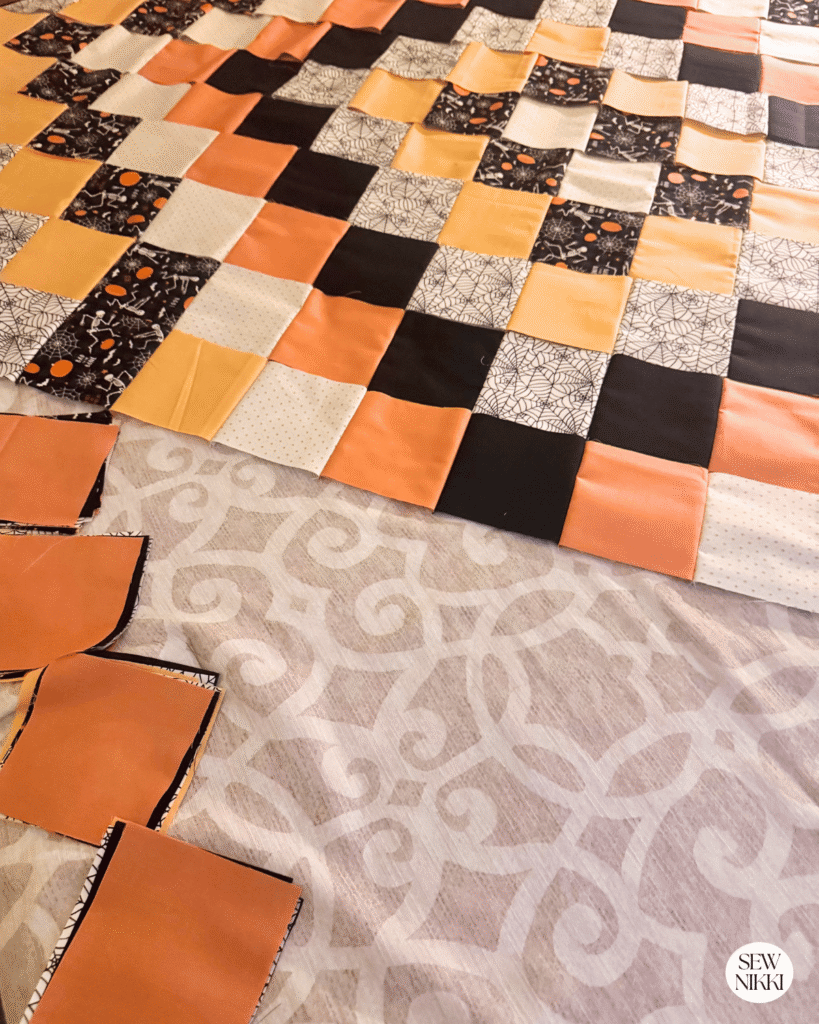
Follow your layout carefully so you keep the correct color placement and granny square pattern.
Save the setting triangle until after you sew your rows together. It’s easier to do it this way so you can make sure they are facing the correct way.
Step 3: Add the Setting Triangles
Attach a setting triangle to both ends of the row. Pay attention to how you position the triangles so they create a straight edge along the sides of the quilt.
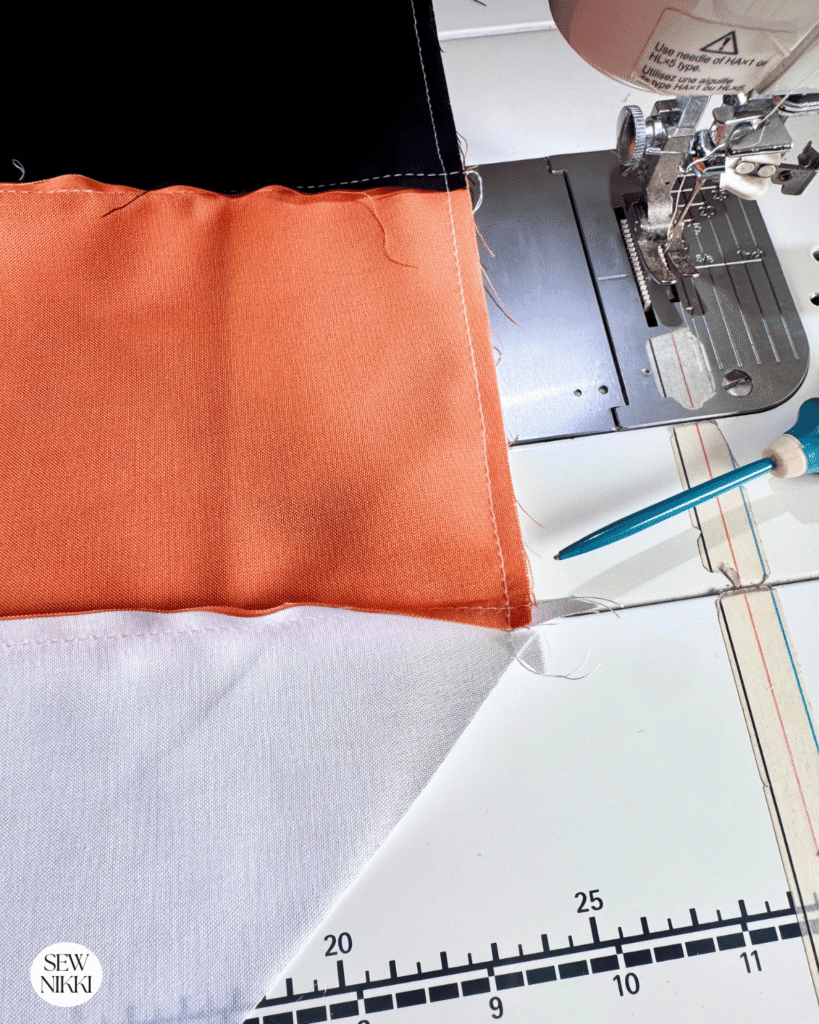
Remember to include the solid orange corner squares at the lower left and upper right corners. These also need setting triangles and count as rows in your layout.
You should have 22 rows plus the two corner rows, for a total of 24 rows. If your layout does not have 24 rows, go back and check that you haven’t missed a corner square.
Step 4: Sew the Quilt Rows Together
This is the trickiest part of the Giant Granny Square Quilt Pattern.
I like to sew the quilt together in two halves. Start at the lower left corner and sew the rows together until you reach the middle row. This creates one large triangle.
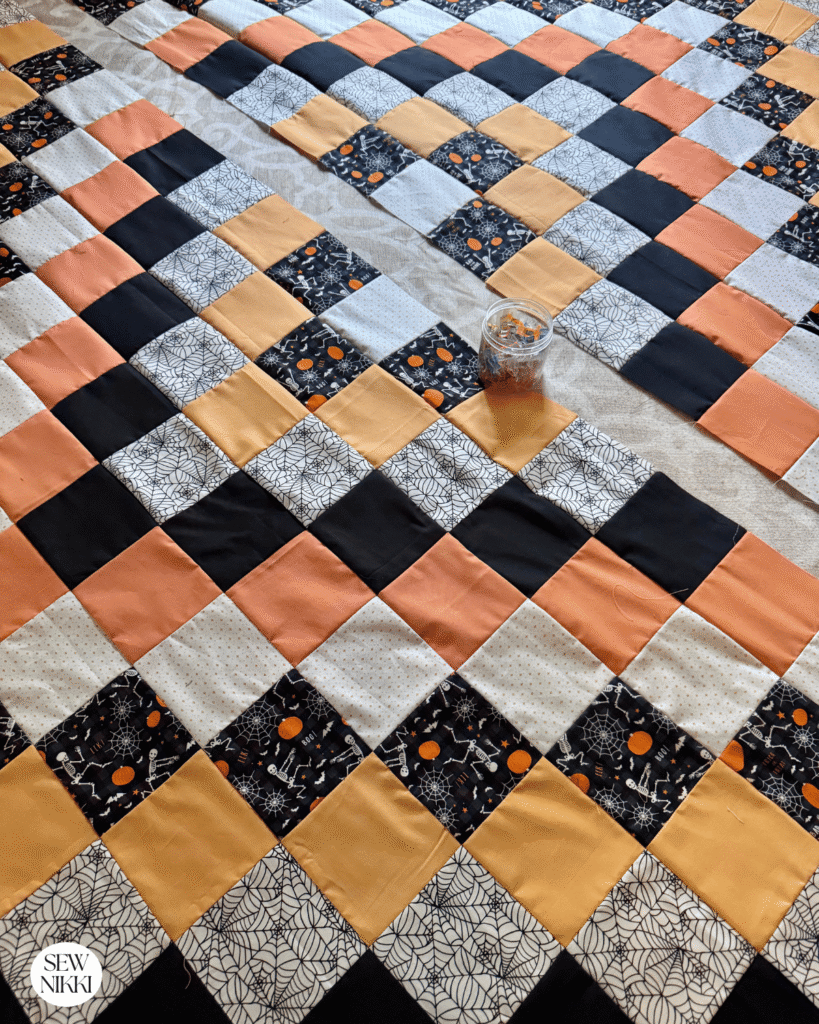
Next, start at the upper right corner and sew the remaining rows together until you reach the second middle row.
Once both halves are finished, sew them together to complete the quilt top.
You can also sew the rows together in a different order if that works better for you. There is no right or wrong way to assemble the quilt.
One important tip is to make sure you sew through the middle of the setting triangles at the ends of the rows. This helps keep everything lined up properly. Take your time with this part and refer to the photos as you work.
Step 5: Square Up the Quilt Corners
Once all the rows are joined together, add the four quarter triangles to the corners of your quilt.
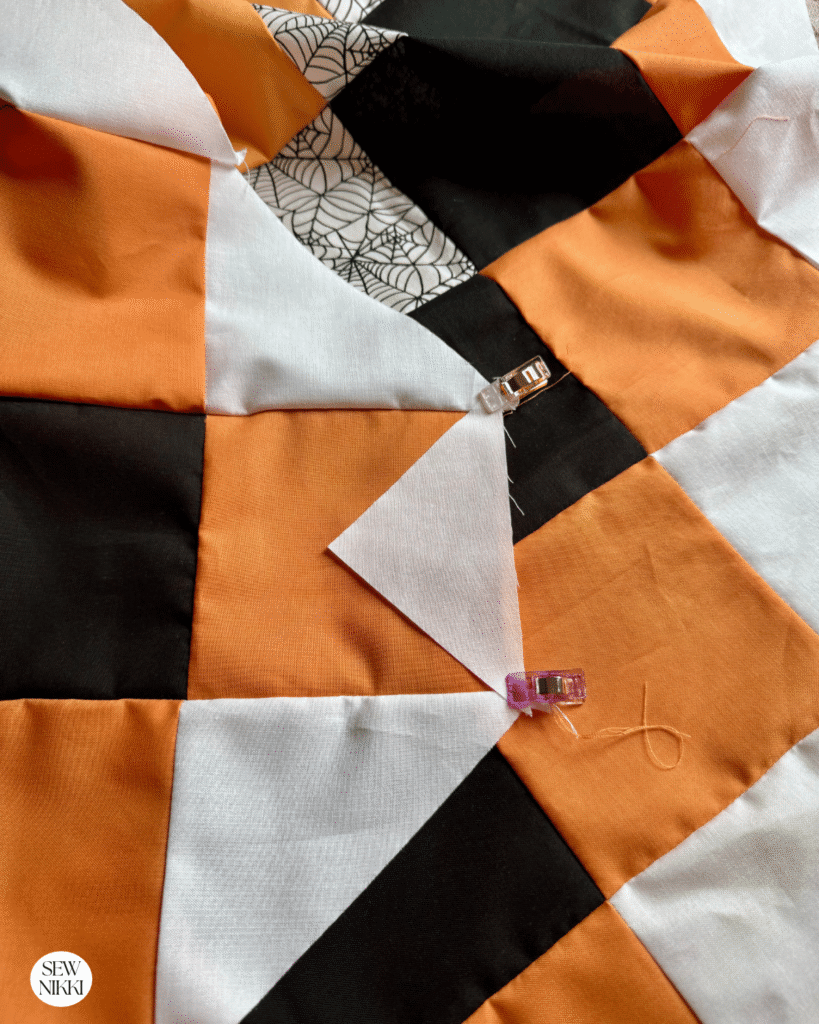
These pieces fill in the corners and give you the straight edges needed to square up your finished quilt top.
Your Giant Granny Square Quilt top is now ready for backing fabric, batting, and quilting.
More Digital Quilt Patterns
If you enjoy square quilt patterns and scrappy projects, take a look at my other quilt patterns.


Free Giant Granny Square Quilt Pattern
You can follow the free quilt pattern and instructions right here in this blog post for this gorgeous quilt. If you prefer a printable version with the fabric requirements and quilt layout, the digital pattern is also available in my Etsy shop.
If You’re New Here
I’m really glad you found your way here. If you’re new to quilting, then welcome. The learning curve is fast, and yes, you will face challenges. But I’ve got you. If I can do it, so can you!
Here’s where to go next:
- Learn to Quilt – helps beginners grasp the basics without making quilting seem complicated
- Free Pattern Index – free patterns that are suitable for beginners and intended to help you develop your skills while at the same time making something that you will actually want to use
- Digital Patterns – To make quilting easy so you spend less time concerned about doing it right and more time actually quilting
My blog is built for the home sewist and quilter who wants to make a quilt from start to finish all by themselves. Take a full tour of this blog so you know your way around. Subscribe to the newsletter so you don’t miss out on new patterns or tutorials. And follow me on social media (Pinterest, Instagram, Facebook and Tik Tok).
ABOUT SEW NIKKI
If this is your first time stopping by, welcome! Your place for free crochet, sewing and quilt patterns for beginner to intermediate skill levels. Want a digital pattern? We have those too! Plus tutorials to walk you through how to make each item from start to finish.
Follow me on social media (Pinterest, Instagram, Facebook and Twitter) so you get notifications when I post new patterns and tutorials.
This post contains ads and affiliate links, which means I make a small commission at no extra cost to you. See my full disclosure here.