DIY Sewing Tutorial: How to Make a Denim Beach Bag
Learn how to sew a beach bag that is easy to make and uses recycled denim with a fabric lining. I love a fun sewing project that uses up what you have on hand. You will need two pairs of denim jeans, fusible interfacing and fabric for the lining. This DIY beach bag is a little beauty, sturdy and holds all your beach essentials. Step-by-step detailed instructions below.

For this project, we are keeping it really really basic. This is a simple tote bag and a quick sewing project. No fuss, just clean and straight forward to get out the door and to the beach!
The bottom of the bag is boxed off and can stand up on its own. You will need to use foam fusible interfacing to achieve this. But I’ll walk you through it and give you all the info on how to use and where to buy.
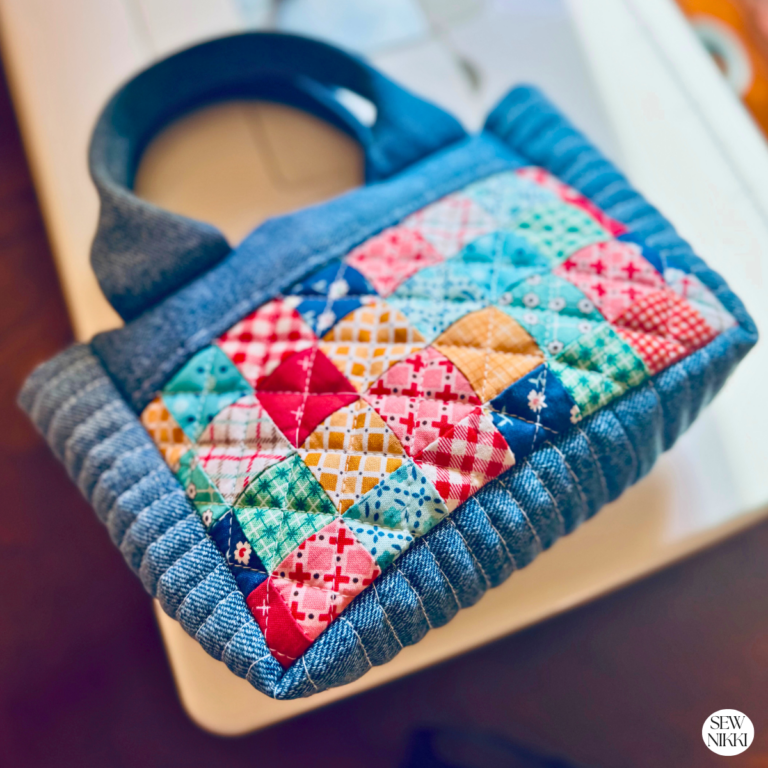
The outside of the bag gets all it’s charm from the denim patchwork. Consider using jeans that are slightly different in color to give it more personality. Or just use what you have like I did. This denim handbag needs about 3 pairs of jeans and one yard of fabric for lining.
My lining is made with little fabric scraps sewn together into strips, then into rows to form fabric. But you can use any fabric you like. It’s a durable bag and looks great at the beach.
MAKE SURE YOU CHECK THIS OUT!
After you read this post, make sure you also check out my tutorial on how to make a handbag with recycled jeans. And my most popular post on how to make heat proof denim potholders with pockets! I use mine almost every day and love them. So make sure you check this out, seriously don’t forget! Also, if you know how to crochet then check out my free pattern for a cell phone crossbody purse.
Grab a copy of my Quilt Planning Journal, filled with graph paper and some note pages to help you design at least 4 quilts or sewing projects! I have been using mine for a little while and already I am jotting down ideas as I see them and reminders about websites where I have seen some ‘must have’ fabric, so I think this can be so much more than just a design book. Pin in fabric swatches, photos of your finished quilts and enjoy your creative process!
How to Sew a Beach Bag – Instructions
Before diving into this sewing project, gather the following materials:
- Old jeans: Raid your closet or visit thrift stores for denim jeans in good condition. You will need 3 pairs of jeans for the bag and straps.
- Fabric for lining: 2 – 18″ x 18″ pieces of lining fabric of your choice.
- Interfacing: One yard of Pellon FF78F1 Flex-Foam 1-sided fusible stabilizer. This give the bag is great sturdy construction, the bag stands up on it’s own.
- Sewing supplies: Ensure you have a sewing machine, scissors, pins, thread, and other basic sewing tools on hand.
Prepare Your Jeans
Start by deconstructing your jeans with fabric scissors. Cut off the legs of the jeans. You can also cut open the seams to lay the denim flat for easier cutting and sewing.
Cut two denim strips for the bag handles (2 – 5.5″ x 25″). Cut the patchwork pieces for the bag. First cut the fabric into 5″ strips, then sub-cut into 5″ squares.
Assemble Bag Pieces
Chain piece two squares together, wrong sides facing each other using 1/4 inch seam allowance. To add some interest, I cut a few squares in half and added them randomly to the blocks. I also cut some of the strips in half and played around some more until I like the patchwork pattern.

The finished panels, two for each side of the bag, were 18″ x 18″ when done. I apologize, but I don’t have the exact piece information for each panel as I created it as I went along. Here are some pictures of each panel to hopefully help you assemble.
Add Interfacing
Iron the interfacing to each panel. Read the instructions provided. You will find the sticky side of the Pellon, place the wrong side of the panel onto it. Then take a piece of parchment paper and move it around until you have secured the interfacing to each panel. You will need your iron set to the hottest setting with steam. Hold in place for 15 seconds then move to the next section until it’s secured.

With a rotary cutter or scissors, cut a 4″ square on the bottom edge in each corner of both panels. Sew the panels together with a straight line stitch, place wrong sides facing each other and sew down both sides and bottom using 1/2 inch seam allowance. Pro tip: Denim and foam interfacing is thick so adjust your stitch length and pressure foot tension up as needed to get this under your presser foot and needle plate.
Now box the corners by bending each corner so the touch and sewing a straight line with 1/2 inch seam allowance.
Make Bag Handles
Take the two denim strips for the bag handles (2 – 15 3/4″ x 5″). Working with one strip at a time, fold the two sides inward by one third. Then fold one side on top of the other. Sew along the right edge of the strip to finish using 1/4 inch seam allowance. Ends will have raw edges, don’t worry about that. The raw edge of strap will be sewn over so you won’t see it when this is all done.

Attach handles to the outside of the bag. Do one side at a time. Mark 4″ from the left side of the front of the outside bag and .5″ from top edge. Sew handles onto units by using 1/4 inch seam allowance, backstitching when you start and finish. Repeat for right side by marking the 4″ from the right side of the bag and .5″ from the top of the bag, secure with straight stitch. Now repeat for the other side of the bag.
Prepare Lining
Take two pieces of fabric lining that is the same as one finished bag panel. It should be 18″ x 18″ but measure again and cut two pieces to match bag panel dimensions. No interfacing is needed for the lining.

Now cut a 4″ square in both corners of the bottom of the pieces. Place the two lining pieces of lining together, right sides facing each other and attach with 1/2 inch seam allowance. Sew along the long sides and bottom but not the corners. Make sure you leave a 5 or 6″ opening on one side to turn out the bag. Then box the corners the same way you did the bag.
Assemble Bag
Turn the exterior of the bag inside out, right sides together with wrong side facing out. Place the lining, right side out, into the bag and line each side up with the bags side seam on both sides. Pin in place, then find the bag center on both sides and pin or clip in place. Finally pin the remaining until it’s secure. The handles should be inside the bag, in between the bag and the lining facing towards the bottom of the bag. Stitch around the top hem of the bag using 1/2 inch seam allowance.

Turn the bag right side out through the opening in the lining and press the seams to create a crisp finish. Through the opening in the lining, turn the bag right side out. Sew the lining opening closed.
Top stitch around the top edge of the bag to reinforce the seams and add a professional touch. Make sure you use 1/2 inch seam allowance for this entire project due to the bulk of the denim and foam interfacing. All done!

How to Sew a Beach Bag – BEGINNER SUPPLIES
Here are some quilting tools and supplies I recommend. I make a small commission if you purchase through the links, this helps to support this free content. For more info, check out Supplies for Beginners (Best Tools To Start).
Rotary Mat Cutting Mat (Self-Healing Mat)
28 mm Rotary Cutter Replacement Blades
45 mm Rotary Cutter with Sharp Blade (start with this one)
45 mm Rotary Cutter Replacement Blades (start with this one)
60 mm Rotary Cutter Replacement Blades
4.5″ Square Ruler for half square triangles
12.5″ Square Ruler for blocks
SAVE THIS PIN FOR LATER!

This post contains ads and affiliate links, which means I make a small commission at no extra cost to you. While the ads are annoying, it helps keep this blog going. See my full disclosure here.
How to Sew a Beach Bag – Tips and Advice
The hardest part of making any kind of bag is understanding the basic sewing concepts. Knowing when to place the bag and lining on the wrong side of the fabric or the right one is the trickiest for me but gets easier with practice. Which direction to insert the bag lining, how to turn bag inside out, which way to place the layers of fabric so everything ends up where you want it. It’s easy to get turned around but with practice and this tutorial, you will have no problem at all.

There are so many ways you can construct a bag. You can have pockets in the lining or not. End of the strap can be sewn on the outside of the bag or sewn into the bag so it’s not visible. Strap piece can be made of fabric, denim, canvas or leather. Outside of bag can be quilted or sewn onto interfacing pieces to make it more sturdy.
You can add snaps, ties, buttons or zipper closure or leave it open. options are endless. Do you want the bag to have exterior pockets or the inside of the bag to have pockets? Do you want the bottom of the bag to be square and sit on it own or not? The possibilities are endless, it’s fun to have so many options and to learn how to do them all.
About Sew Nikki
Welcome to Sew Nikki! Your place for free crochet, sewing and quilt patterns for beginner to intermediate skill levels. Want a digital pattern? We have those too! Plus tutorials to walk you through how to make each item from start to finish.
I hope you try this and make your very own beach bag. You don’t need much stuff to make this tote bag. It’s a nice large tote that will hold up to wear and tear for sure. Denim is such a sturdy bag fabric and a perfect little coastal tote. Everyone at the beach will want one!
Follow me on social media (Pinterest, Instagram, Facebook and Twitter) so you get notifications when I post new patterns and tutorials.
Want to learn how to crochet? Then check out this post, How to Learn How to Crochet – Guide for Beginners.


So cute! My friend is going to take this idea to her sewing group.
Super cool project! These would make great Christmas gifts!
Wow! Love this!