Circle Quilt Block Pattern Made with Acrylic Templates
Looking for an easy circle quilt block pattern that you can use for just about any project? This free pattern uses acrylic circle templates to create perfect curved blocks every time. Whether you want to make a full size quilt, a table runner, or even placemats, this simple block is versatile, beginner friendly, and quick to sew.
Now when you first learn how to sew, everything is a straight line. Why? I think it’s much easier than sewing on a curve and less stressful. But straight lines are traditional and modern quilts tend to have circular elements. Maybe I’m the last one to try sewing circles, maybe not. If you have never made these, let me show you how.
When you piece the circle to the backing, your brain is going to push back and say it’s impossible. It’s not, it really does work. Just take your time pinning and line everything up, sew slowing until you really have this mastered.
Why Use Acrylic Templates for Quilting?
If you’ve ever tried cutting circles with paper templates or freehand, you know how tricky it can be. That’s where acrylic templates come in. They:
- Give you precise, consistent cuts every time.
- Save time since you can rotary cut around them.
- Last forever (unlike paper).
- Work perfectly for curved quilt blocks.
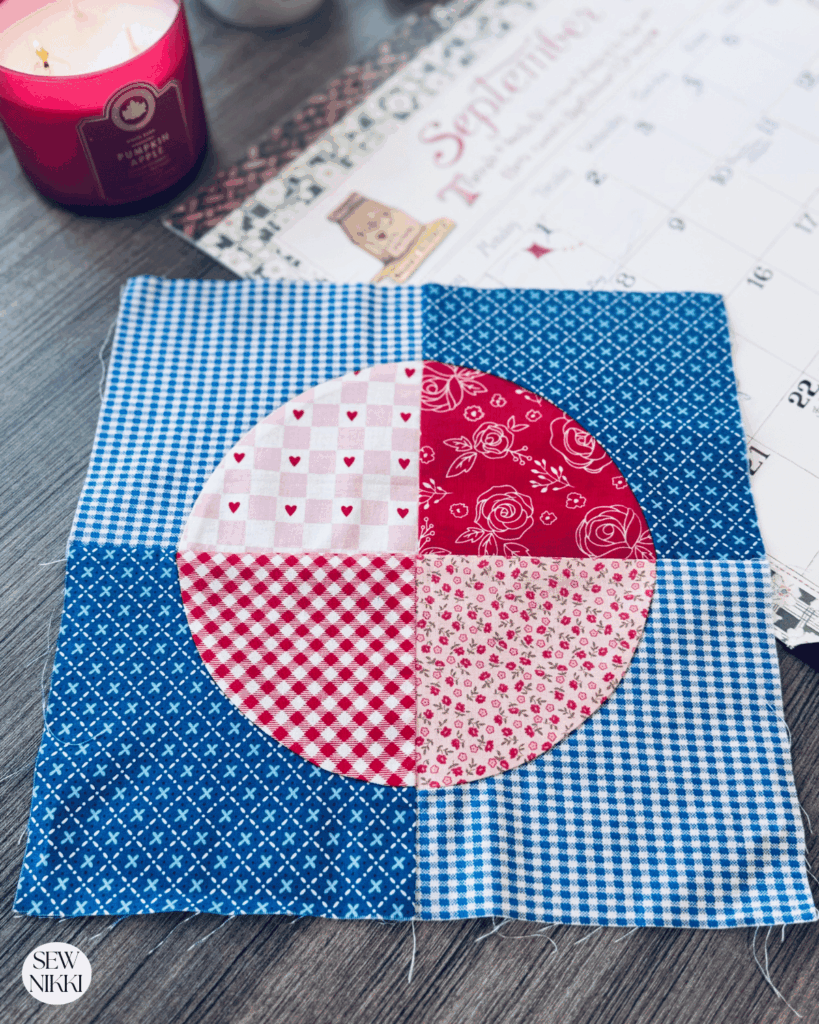
The set I’m using comes with three different circle template sizes. For this quilt pattern, I’ll be using the 6″ quarter circle template, which creates a 12.5″ unfinished quilt block once you join four pieces together.
These template are for inset circles. It will be a square block with an inner circle for clarification.
Understanding the Quarter Circle Templates
These acrylic templates aren’t full circles—they’re quarter circles, sometimes called Drunkard’s Path templates. That means you’ll need four quarter-circle units to make one full circle quilt block.
Each quarter circle is sewn into a background square. When four are joined together, they form a complete circle inside a square block.
👉 Example: Using the 6″ quarter circle template, four sewn units create a 12.5″ x 12.5″ unfinished block.
This design gives you endless options. You can sew your quarter circles all facing the same way to make perfect circles, or rotate them for fun secondary patterns. You can make half circles with rotating quarter circles to create another design. Or you could use these for stunning quilt borders.
Adjusting the Background Fabric for Different Block Sizes
One of the best features of these templates is that the background template has adjustment lines. By shifting where you cut the background piece, you can increase or decrease the amount of background fabric around your quarter circle.

- More background fabric = larger block with smaller circles.
- Less background fabric = smaller block with bigger circles.
This adjustment changes both the size of the quarter circle unit and the full circle block.
Free Circle Quilt Block Pattern
Here’s the best part: this quilt block is as simple as cut, sew, press, repeat. You can make as many blocks as you want to size your project exactly how you like.
Materials Needed
- Acrylic quarter circle template set (I’m using the 6″)
- Rotary cutter and cutting mat
- Quilting cotton fabric in at least two contrasting colors
- Sewing machine with 1/4″ foot
- Pins or clips
- Iron and pressing mat
Cutting Instructions
- Choose two fabrics: one for the circle (inner curve), one for the background.
- Use the 6″ quarter circle acrylic template to cut four curved pieces.
- Cut four matching background units using the template’s outside curve (adjust if desired).
Sewing the Quarter Circle Units
Here’s exactly how I sew these curved pieces:

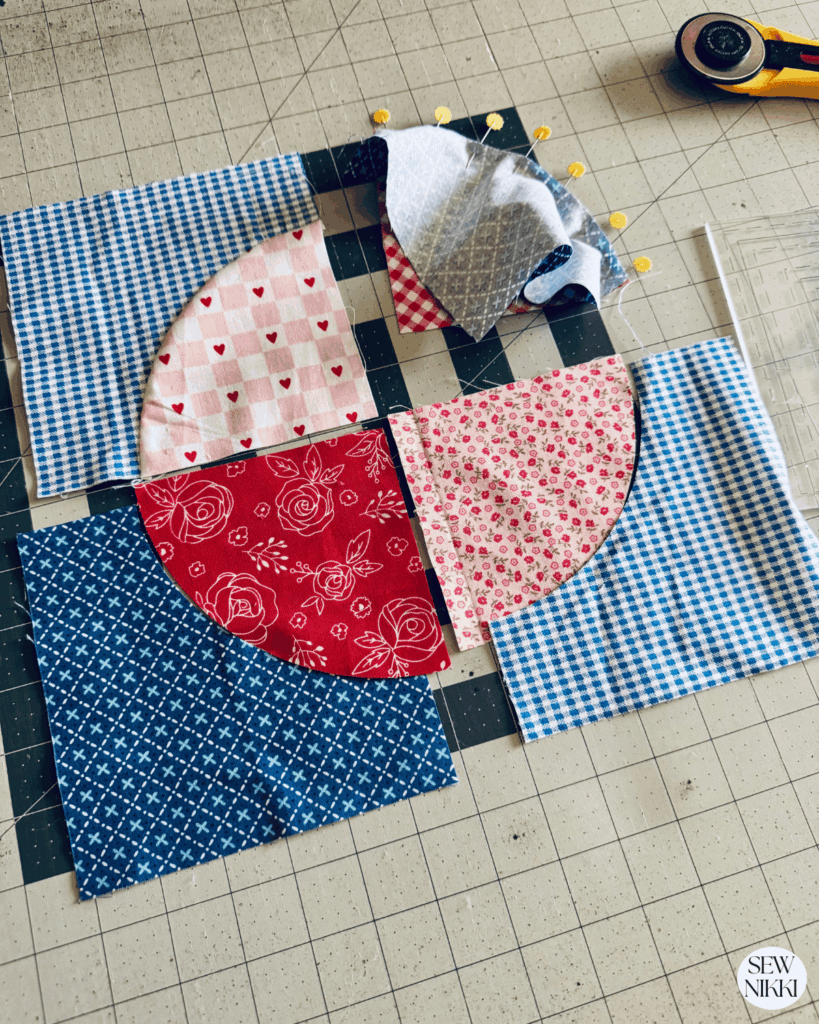
- Lay out your pieces so you can see how the circle will fit into the background.
- Flip the quarter circle on top of the background piece, right sides together.
- Pin the ends first — align the two edges of the curve flush with the background square and pin them in place.
- Slowly pin around the curve — working from the left to the right, ease the fabric until the quarter circle matches the curve of the background. Add pins along the way to keep it secure.
- Sew with a 1/4″ seam allowance — take it to your sewing machine and stitch slowly along the curve, making sure the bottom fabric doesn’t wrinkle up. Remove pins as you go (never sew over them).
Repeat until you have four quarter circle units.
Now if you are like me, you just go for it and try to figure it out on your own. But if you need to see to learn, here are some helpful video tutorials:
- Shabby Chic – How to Use the Drunkard’s Path Templates (YouTube)
- Steven Jones – How to Sew Curves (YouTube)
- Sewing Report – How to Sew Curves + Corners on a Sewing Machine for Beginners (YouTube)
Assembling the Full Circle Quilt Block

- Lay out your four quarter circle units so the curves form a complete circle.
- Sew the first row — join two quarter circle units together, nesting at the seams. Do the same for the second row.
- Join the rows — sew the two rows together, again nesting the seams for a clean match.
- Pressing tip: I don’t press anything until the entire block is sewn together. Then I give it a final press to keep the circle smooth.
Makes 12.5 x 12.5 inch squares (untrimmed). Just finger press as you are making the unit and press with iron when full circle block is done.
Get the digital pattern.
Get the instant download pattern for the circle quilt block here.
Quilt Layout Ideas
One of the best things about this pattern is its flexibility. Depending on how many blocks you make, you can create:

- A full-size quilt – great for showcasing bold fabrics.
- A table runner – line up 3–5 blocks in a row.
- Placemats – use a single block for each placemat.
- Wall hangings – make a small cluster of blocks to create modern art for your walls.
Since each block is 12.5″, you can quickly calculate your finished quilt size. For example:
- 9 blocks (3×3 layout) = ~36″ square (baby quilt)
- 20 blocks (4×5 layout) = ~48″ x 60″ (lap quilt)
- 30 blocks (5×6 layout) = ~60″ x 72″ (throw quilt)
Tips for Sewing Perfect Circle Quilt Blocks
- Use plenty of pins or clips when attaching curves.
- Sew slowly and let the fabric ease naturally.
- Wait to press until the whole block is complete for smoother results.
- Trim blocks after pressing to keep them perfectly square if needed.
Wrap Up
This free circle quilt pattern proves that curved piecing doesn’t have to be complicated. With the help of acrylic quarter circle templates, you can easily create modern circle blocks that look polished and professional. And with the ability to adjust the background fabric, you can change block sizes to suit any project. There are so many different patterns you can make with these templates!

Start small with placemats or go big with a full quilt, the choice is yours. Either way, you’ll love how simple and fun these circle quilt blocks are to make.
Now that you know how to make the circle block, you can try to make your own full circle quilt pattern. You will be sewing straight lines and turning your work to make the curved edges. Fat quarters would work great for this project, charm squares would work for the 6″ quarter circle shape only. You will have a lot of waste.
I truly believe this is something that an confident beginner skill level could do. Just make sure your bottom layer fabric doesn’t get crinkles and keep it flat. To make a half circle, just make two quarter circle blocks and sew them together. These would look great for a fancy quilt border too.
More Quilt Blocks to Try
If you like making quilt blocks, try making these beauties below:
ABOUT SEW NIKKI
If this is your first time stopping by, welcome! I’m Nikki, a maker obsessed with quilting, crochet, and all things fabric. Here, you’ll find easy-to-follow patterns, helpful tutorials, and plenty of inspiration for your next handmade project. Grab your fabric (or yarn), and let’s create something beautiful together!
This post contains ads and affiliate links, which means I make a small commission at no extra cost to you. While the ads may seem annoying, it helps keep this blog going. See my full disclosure here.


This is such a beautiful pattern! Your tutorial on the circle pattern is awesome! Thanks for breaking it down for us “want-to-be” quilters!
Hi Penny – you’re the sweetest and you should learn to quilt but maybe that would distract you from all your Florida travels so maybe not.
I love your step-by-step guide to sewing circles! Its so easy to follow. I’m a seamstress in my working life, and I actually really enjoy sewing circular patterns. But I’ve never tried making a quilt that way. Sounds so cool. And I love those acrylic templates. They seem super helpful. I do hope to get to make some more quilts sometime, and will have to try this. Thanks so much for sharing!
I’m a want to be seamstress! Sewing is so much fun. Thanks for your kind words.
How inspiring! I’ve never tried quilting with curved seams before, this helps!
They are pretty easy, you need to try them for sure!
I think I’m finally ready to jump into circles!
Yes girl, you got this!
Such a beautiful quilting pattern! Thank you for the tips and inspiration! I’ve never made a quilt, but your advice helps make it a possibility for me!
This step by step is wonderful. Saving for when I start actually sewing!