How to Hand Quilt Without a Hoop – Quilting Tutorial
Finishing my hockey jersey quilt forced me to finally learn how to hand quilt without a hoop, and I honestly avoided it for way too long. I had a large quilt, bulky layers of fabric, and zero patience for a quilting hoop or handheld hoops. So I skipped it and figured it out the practical way.

This post walks you through exactly how to hand quilt without a hoop, what actually matters, what doesn’t, and how to get good results without overthinking it. This is a beginner friendly tutorial, but I’m going to give you the straight truth so you don’t waste time.
Why I Skipped the Quilting Hoop (And You Probably Can Too)
Here’s the deal. A quilting hoop or embroidery hoop is helpful, but it’s not the most important part of hand quilting. The most important part of hand quilting is controlling your stitch length and getting through all the layers of the quilt cleanly.
I was working on a hockey jersey quilt with bulky emblems, thick backing fabric, and uneven layers of the quilt. A round hoop or sorts of hoops would have made it harder, not easier.
So I skipped it. And guess what? It worked.
Was it perfect? No.
Did it make a big difference in finishing my quilt? Yes.
If you’re working on a large quilt, larger quilts, or even a baby quilt with bulky spots, sometimes no hoop is actually the better option.

My Setup for This Hand Quilting Project
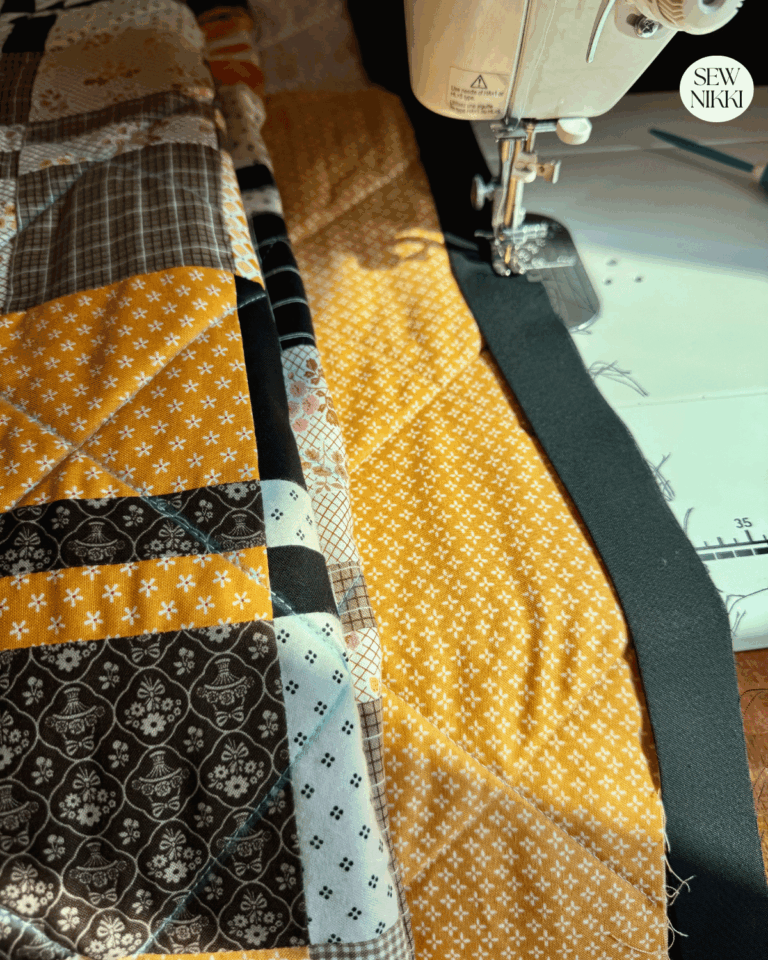
This particular project was already partially done with machine quilting on my sewing machine. I used straight lines across most of the quilt top and left the jersey blocks for hand quilting.
👉 If you need help with that part, check out:
- How to Quilt on a Regular Sewing Machine
- How to Sew a Quilt Together
- Selecting Quilt Backing Fabric for Your Quilt Top
Once I washed and dried the quilt (yes, I always do), I realized I still had 15 blocks with zero stitching through the layers of fabric.
That’s not optional. Your quilt needs stitching through all layers of a quilt or it will fall apart over time.
So hand quilting it was.
Get This Freebie!
Grab this Quilt Planning Journal. It’s filled with graph paper and note pages to help you design at least four quilt or sewing projects! Pin in fabric swatches, photos of your finished quilts and enjoy your creative process!
What You’ll Need (Keep It Simple, Not Fancy)
You do not need a full hand quilting kit from a quilt shop. You just need the right supplies that work for you.

Basic Supplies:
- Before we get started on this hand quilting project, make sure you have the right supplies:
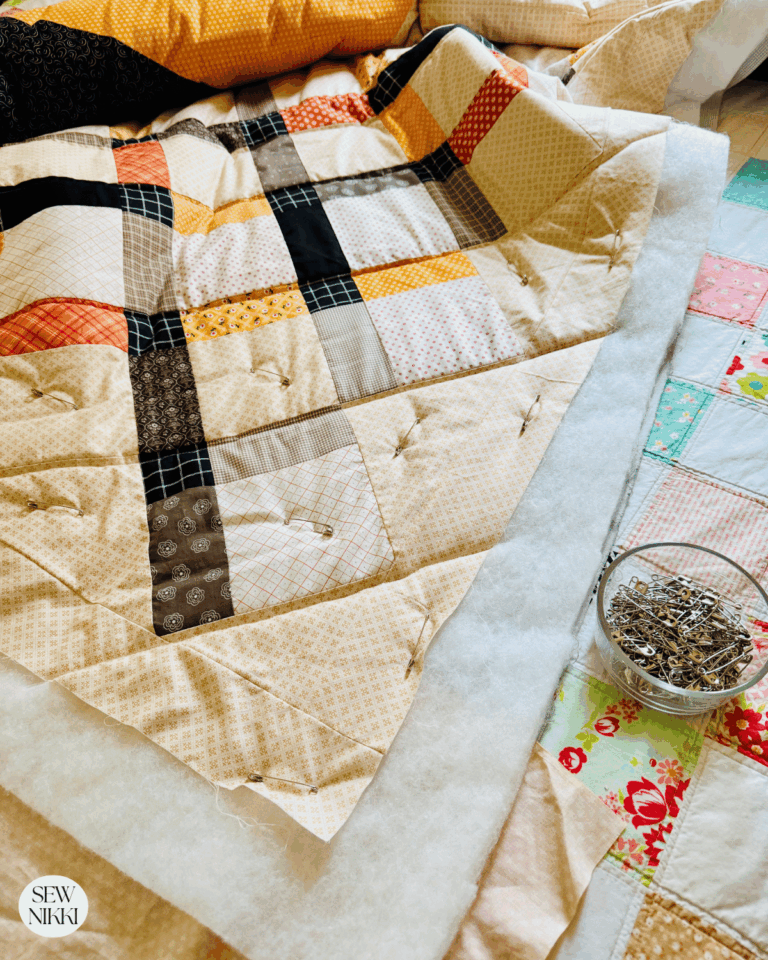
- Basted quilt sandwich (top, batting, and backing)
- Embroidery needles (between size 9-12 are good choices)
- Embroidery floss (cotton thread, hand quilting thread is stronger and coated for ease)
- Steele or leather thimbles (to protect your fingers)
- Needle puller (to help grip the needle)
- Marking tools (washable marker or tailor’s chalk)
- Thread wax (to wax thread so it slides through layers of the quilt)
- Scissors
👉 Watch this video tutorial by Stitch With Rachel if you need to see how it’s done.
Step by Step: How to Hand Quilt Without a Hoop
1. Start With a Proper Quilt Sandwich
You need all layers of the quilt secured. That means your quilt top, batting, and backing fabric are already basted together.
If your layers shift, your stitching will look messy on the back of the quilt.
Flat surface helps here. I used my sewing machine table, but your lap works too for smaller projects.
2. Mark Your Quilting Design
Use a washable marker or tailor’s chalk and lightly mark your quilting design on the top of the quilt.
For my hockey quilt, I followed the edge of each emblem using straight lines and a continuous line approach.
Keep it simple:
- Straight lines
- Smooth line curves
- Outline shapes
This is not the time to get fancy if it’s your first quilt.
3. Thread Your Needle (Without Losing Your Mind)
Use a needle with an eye of the needle you can actually see. A small eye sounds great until you try threading it.
- Pull your thread through
- Tie a knot at the thread tail
- Keep thread length manageable
If your thread is too long, it tangles. Every time.
4. Start Your First Stitch (This Is Where It Clicks)
Insert the tip of the needle into the quilt top only first, then bring it up where your line starts. This hides your knot between the layers of fabric.
Push the needle down through all layers of the quilt.

Your underneath hand (bottom hand) helps guide the needle tip back up. Your top hand controls the stitch.
You’re creating a running stitch:
- Down through the layers
- Back up
- Repeat
This is where your stitch length matters.
5. Focus on Uniform Stitches (Not Perfect Ones)
Look, your stitches will not be perfect at first.
You’re aiming for:
- Uniform stitches
- Even spacing
- Clean line of stitches
Big stitches (big stitch quilting) are easier for beginners. Smaller stitches take more control and more time.
Both look good. Just pick one and stick with it.
6. Use the Right Hand Position
This part matters more than any hoop ever will.
- Top hand pushes the needle down
- Bottom hand (underneath hand) pushes it back up
- Your middle finger and underneath finger help guide the motion

Add a slight tug to keep your stitches snug but not tight.
If you pull too hard, your quilt puckers. If you don’t pull enough, your stitches look loose.
Small changes here make a big difference.
7. Keep Moving Across the Quilt
Work in sections:
- One block at a time
- Move across your quilt top
- Don’t try to handle the entire large quilt at once
This is why smaller projects feel easier.
But yes, you can absolutely do this on larger quilts.
8. Finish Your Thread Cleanly
When you run out of thread:
- Tie a knot close to the fabric
- Push the needle into the quilt and travel between layers of the quilt
- Bring it out a few inches away
- Clip it
Now your knot is hidden inside your handmade quilt.
Clean and professional.
Helpful Tips That Matter
- Comfort matters. Sit somewhere you can stay for a long time
- Use leather thimbles if you can find them. Way better than metal
- Try different sizes of embroidery needles until one feels right
- Thicker thread like perle cotton gives you bold stitches
- Keep your quilt on a flat surface when possible
- Don’t rush. This is a relaxing pastime, not a race
👉 Bonus tip from hand quilting pros like Sharon Schamber — control comes from your hands, not your tools.

When You Should Skip the Hoop
Skip the quilting hoop when:
- You’re working around bulky areas like old t shirts or emblems
- You have a thick layer or multiple layers of fabric
- Your quilt is too big to comfortably fit in quilt hoops
- You just don’t want to deal with it
Use a hoop when:
- You want tiny, traditional quilting stitches
- You’re working on a small project or baby quilt
- You like the tension it gives
There are different ways to quilt. This is just one that works.
More Resources From Sew Nikki
If you want to get better fast, don’t stop here.
Check these out next:
- Choosing the Perfect Thread Color for Quilting
- Precuts vs. Yardage Fabric
- How Many Yards of Fabric Do You Need for a Quilt
These will help you move into your next steps and next project with confidence.
How to Hand Quilt Without a Hoop
Hand quilting without a hoop is not harder. It’s just different.
Your first stitch will feel awkward. Your quilting stitches might look uneven. You might have a hard time keeping a smooth line. That’s normal.

But once it clicks? It’s honestly one of the most relaxing parts of quilting.
Try it on a small project first. Then move up to a large quilt or a particular piece that needs it.
And if your stitches aren’t perfect? Good.
That’s how you know it’s actually handmade.
Save This Pin!

If You Are New Here
If you are brand new to quilting, start here:
👉 Learn How to Quilt for Absolute Beginners
It walks you through the full process, from your first quilt to finishing your final product without feeling overwhelmed.
Here’s where to go next:
- Free Pattern Index – all my free patterns in one place
- Digital, ad-free patterns – clean, printable, and beginner-friendly
- Learn to Quilt Page – every step of making and finishing a quilt
My blog is built for the home sewist and quilter who wants to do it all themselves. With a nice but basic sewing machine and realistic expectations.
About Sew Nikki
Hey, I’m Nikki. I’m a self taught quilter who learned everything the hard way by watching videos, making mistakes, and figuring out what actually works in real life. I work in a small space, I don’t overcomplicate things, and I focus on helping everyday quilters get good results without fancy tools.
Follow me on social media (Pinterest, Instagram, Facebook and Twitter) so you get notifications when I post new patterns and tutorials.
Looking for your next quilt project? Then head on over to my free “Pattern Index”. It’s a page dedicated to all of my free patterns separated by categories for crochet, sewing and quilting.
If you prefer an ad-free printable version, head over to my shop and browse the Digital Patterns. These are instant digital downloads you print yourself.
This post contains ads and affiliate links, which means I make a small commission at no extra cost to you. While the ads may seem annoying, it helps keep this blog going. See my full disclosure here.