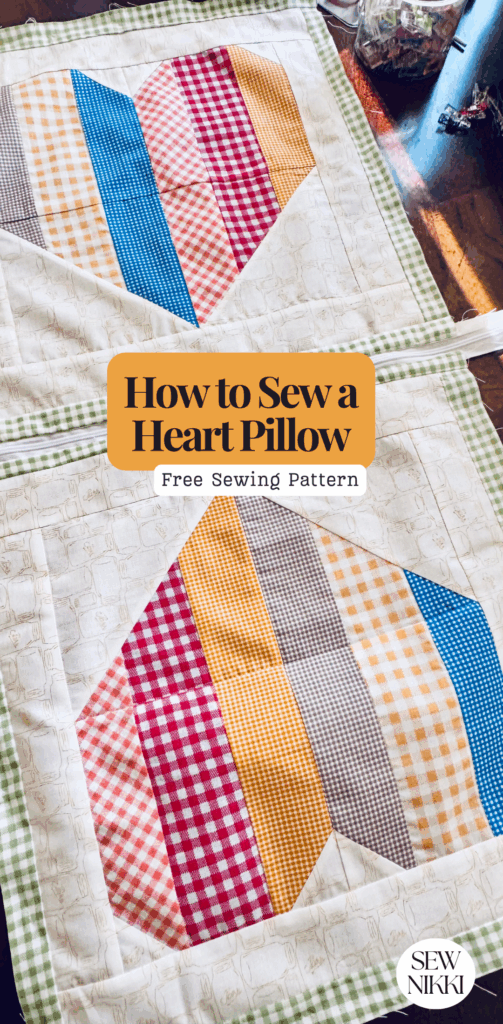
How to Sew a Heart Quilt Block Pillow Sewing Pattern
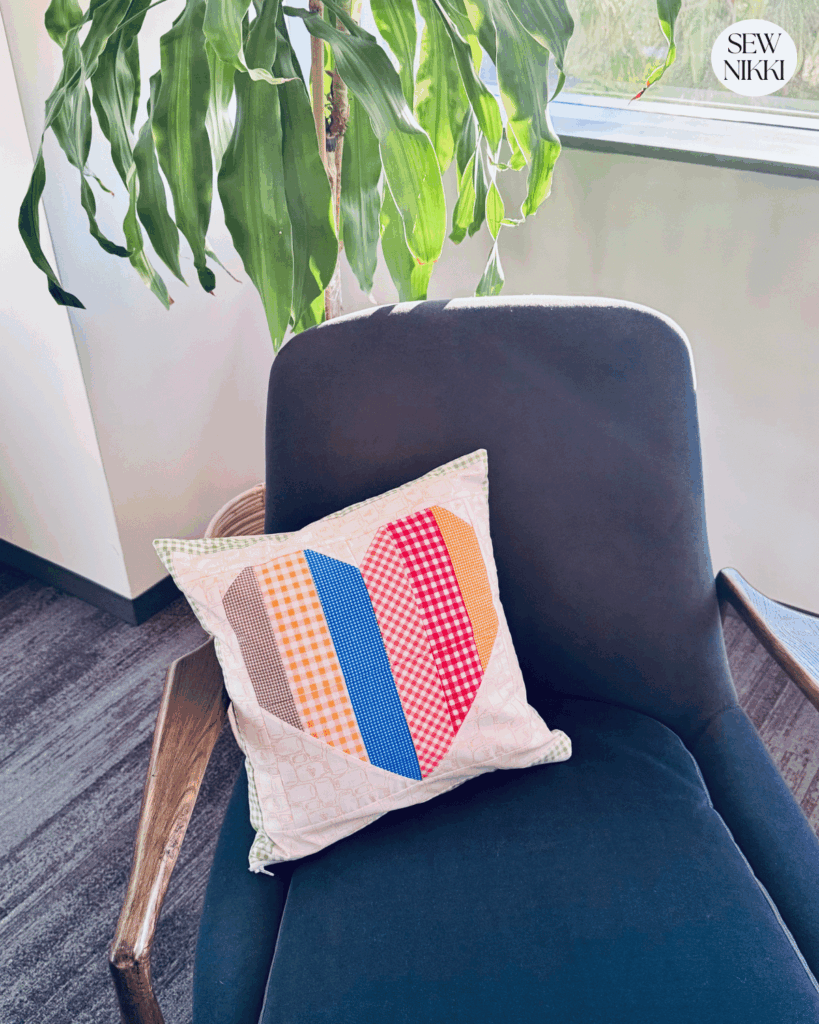
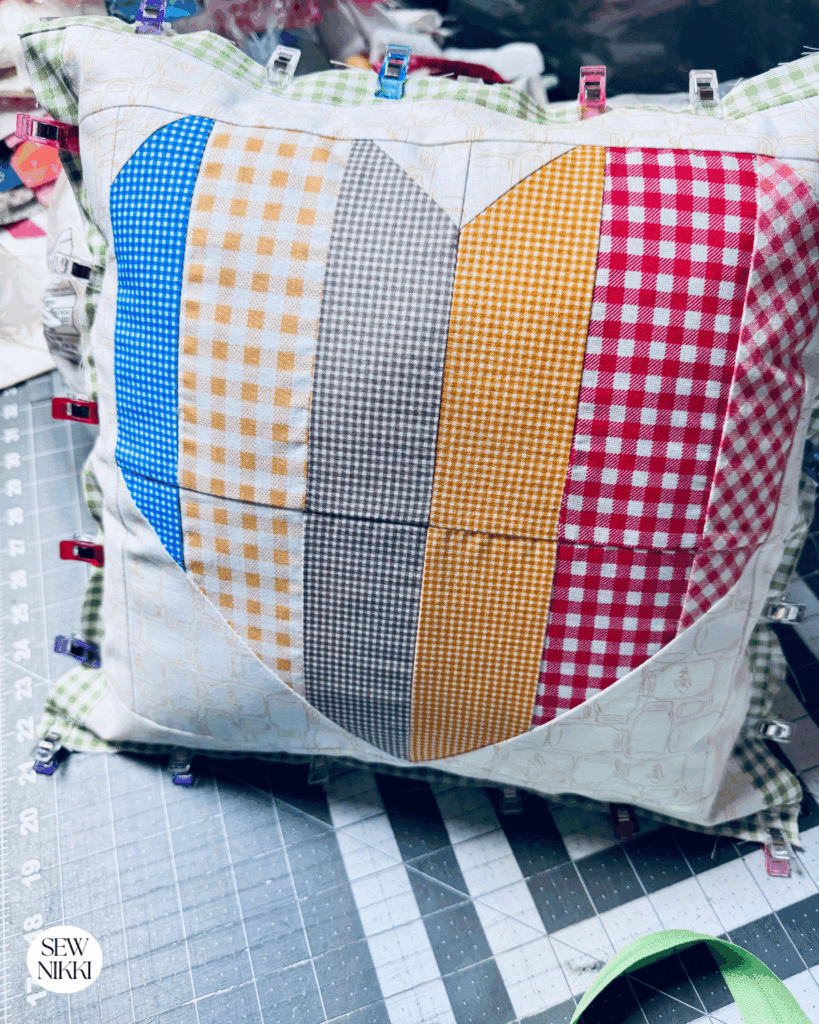
Today I’m sharing how to sew a heart quilt block pillow and giving you the free sewing pattern. If you love quilting but want a project you can actually finish in a weekend, this heart quilt block pillow is it. This pillow uses patchwork strips sewn into a heart quilt block, making it perfect for scrap busting, stash fabrics, or using what you already have on hand. You can follow along with the free pattern instructions in this post, or grab the digital pattern in my shop if you prefer a printable PDF. Finished pillow measures 14″ x 14″, pillow insert required.
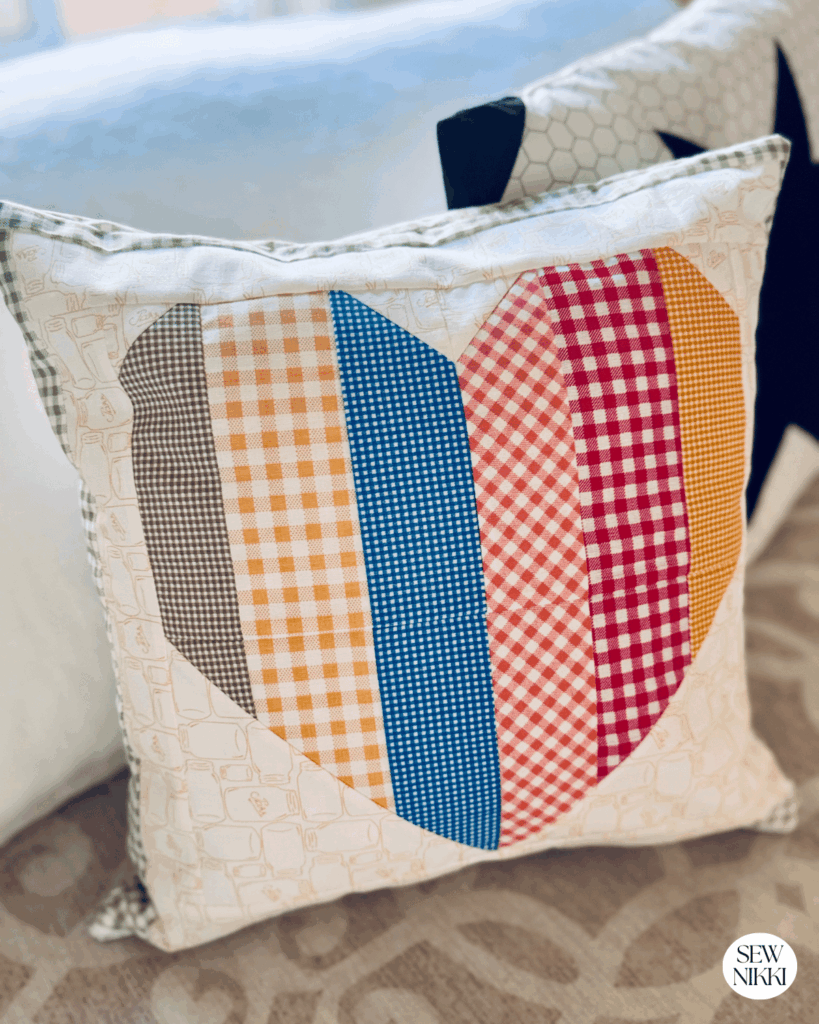
I’m using plaid fabrics from my stash for this pillow, which not only gives it a cozy, handmade look but also helps reduce waste. You can absolutely swap in solids, florals, or any prints you love as this pattern is very forgiving.
In this tutorial, I’ll walk you through every step, from cutting strips to sewing the heart quilt blocks, adding borders, installing a zipper, and finishing the pillow.
Why Make a Heart Quilt Block Pillow?
A quilt block pillow is a great way to:
- Try a new quilt block without committing to a full quilt
- Use up fabric scraps and stash fabrics
- Add seasonal or cozy decor to your home
- Make a meaningful handmade gift
- Want to learn how to sew a heart
- Use orphan quilt blocks
This heart quilt block pillow uses simple straight seams, no curves, and standard quilting techniques. It’s perfect for confident beginners and intermediate sewists.
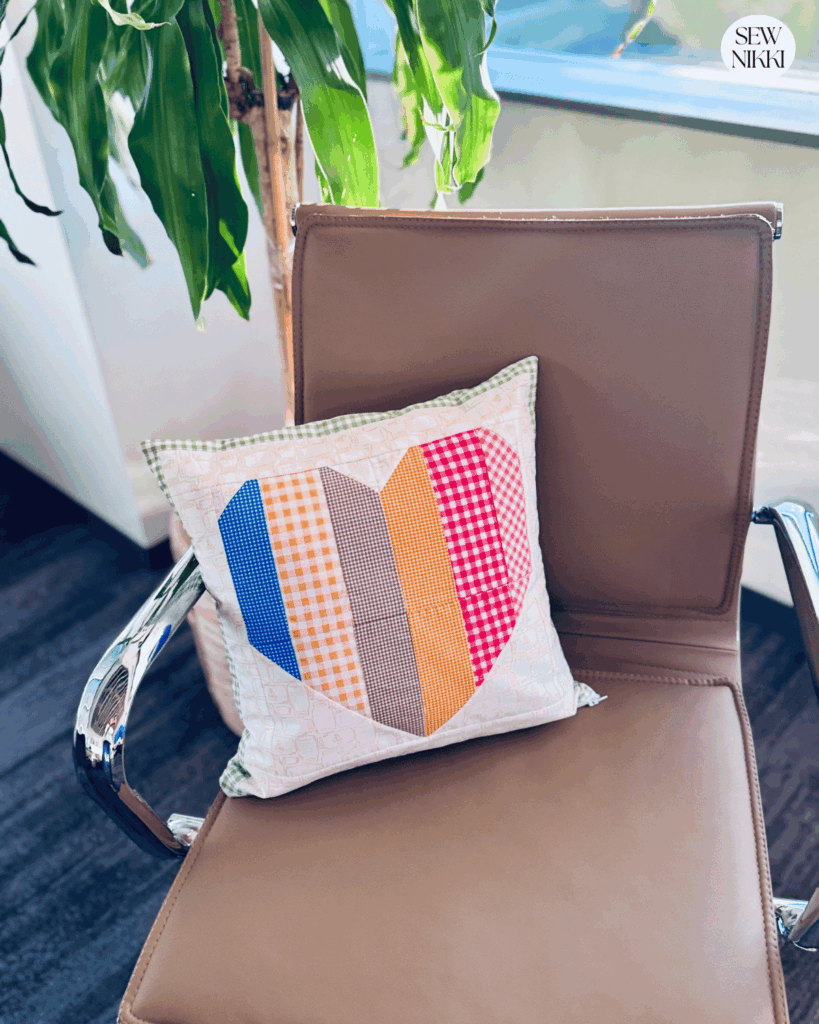
Even if this is your first pillow cover or your first time working with a zipper, you will find this easy to do. You can keep it really simple or make it fancy, you have so many options. You can change the vibe in your living room or bedroom by adding a simple pillow.
If it gets dirty, just unzip the pillow cover and throw it into the wash. You can make lots of different sizes, just make sure your pillow cover is the same size as your pillow insert or an inch small. This will make a fuller pillow when the form insert is slightly larger than the cover.
MAKE SURE YOU CHECK THIS OUT!
After you read this post, make sure you also check out Learn How to Quilt for Absolute Beginners. It’s jam packed with information to make your first quilt. It also has links and resources that are so helpful when you’re first learning. There’s lots of free quilt patterns that are great for beginners and all skill levels too. So make sure you check this out, seriously don’t forget!
Make sure you grab a copy of my free Quilt Planning Journal. It’s filled with graph paper and note pages to help you design at least four quilt or sewing projects! Use it to jot down ideas, fabrics, patterns and inspiration all in one place. Or create your own patterns and share with others. Pin fabric swatches, photos of your finished quilts and enjoy your creative process!
How to Sew a Heart Block Pillow
Fabric Pieces & Supplies
Fabric
- 6 fabrics for the striped patchwork heart
- Cut 2.5″ x 20″ strips from each fabric
- Background fabric
- At least 1/4 yard (for blocks and borders)
- Print fabric for outer border
- Scraps or 1/2 yard is plenty
Sewing Supplies
- 14″ pillow form
- 14″ zipper (nylon coil or standard zipper)
- Sewing machine
- Rotary cutter, ruler, cutting mat
- Iron and ironing board
- Pencil
- Pins or sewing clips
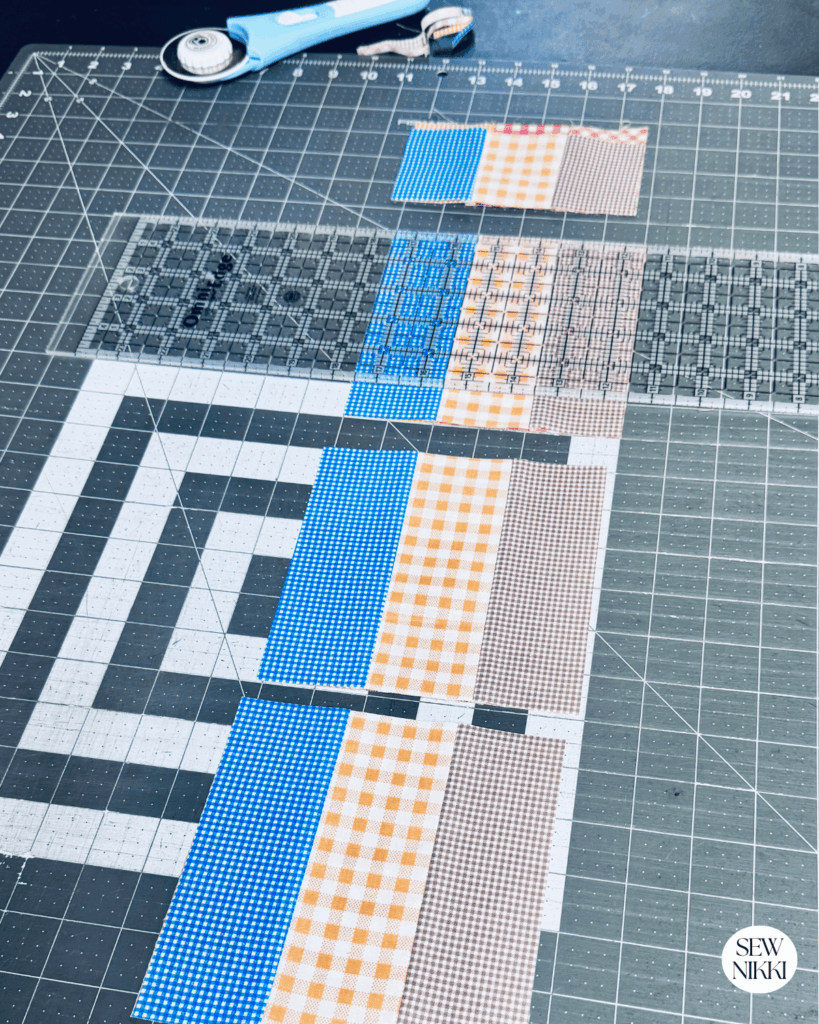
Step 1: Sew the Patchwork Strips
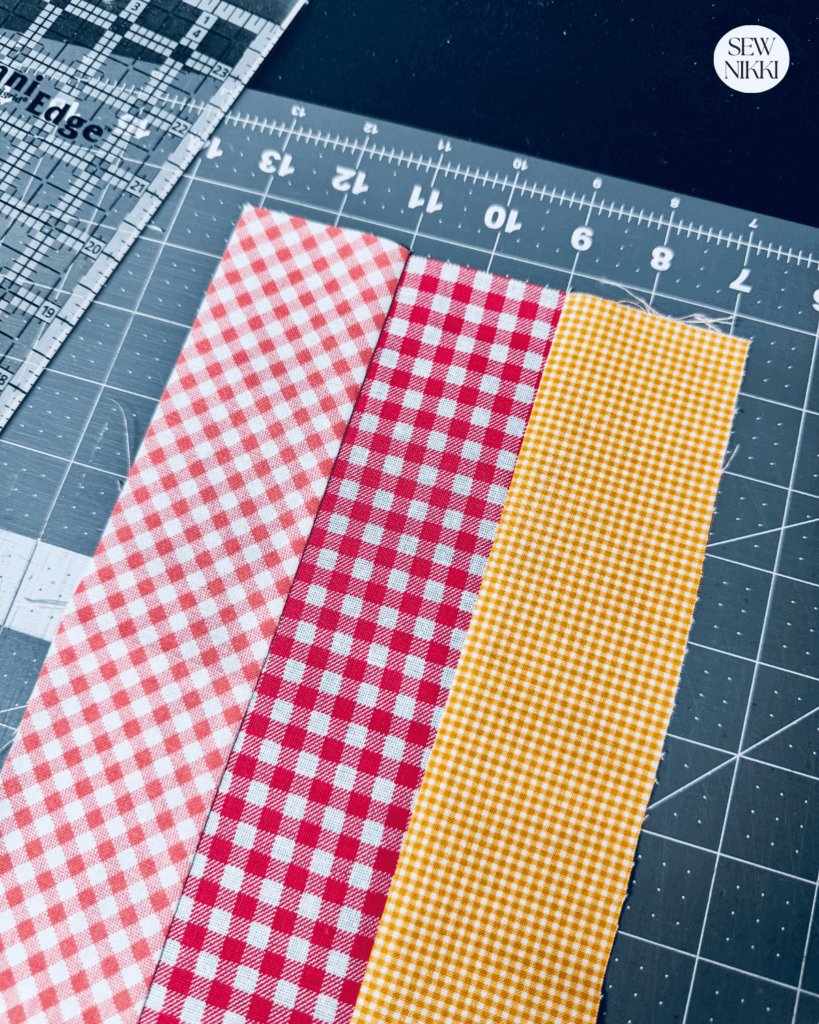
The first step is to dig through your fabric stash to find backing fabric and 6 pieces of fabric long enough and wide enough for the patchwork strips. Using different fabric from your stash can be challenging so to make things more cohesive and coordinated, try finding a fabric theme and pick accordingly. Plaid was my theme with a low volume backing fabric.

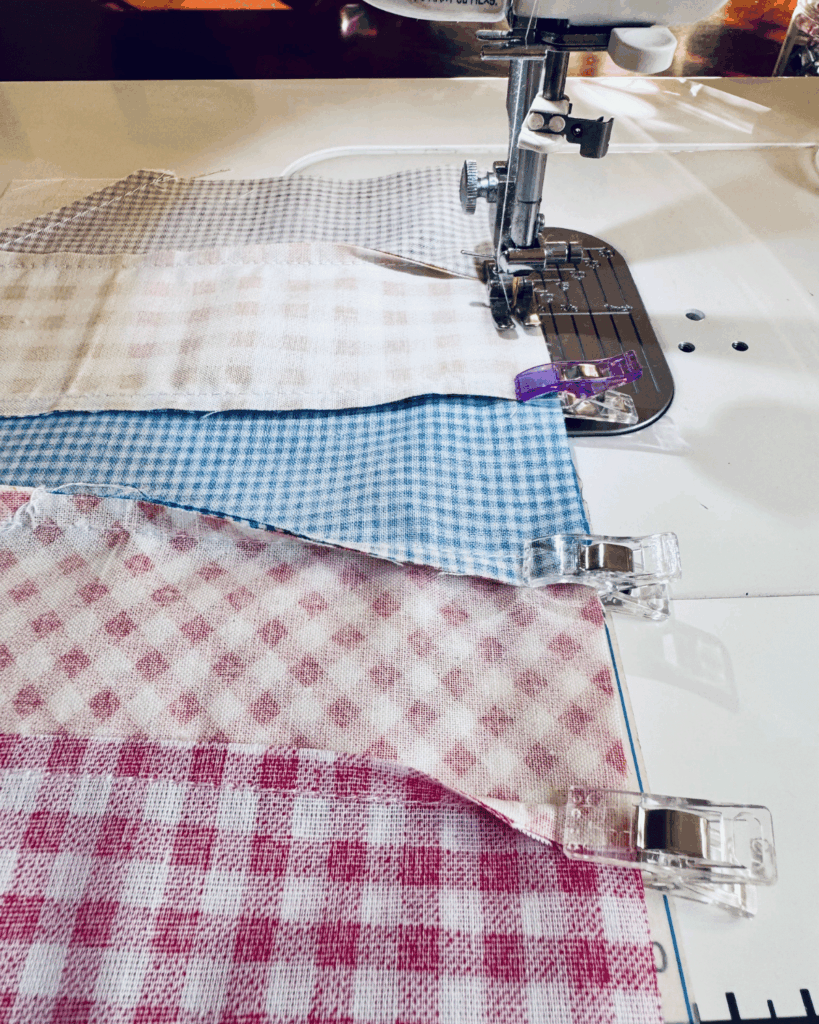
Take your six 2.5″ x 20″ strips.
- Sew three strips together using a ¼” seam allowance.
- Sew the remaining three strips together the same way.
- Press seams with an iron (pressing to one side is fine).
You should now have two long patchwork strip units.
Step 2: Trim Patchwork Strips to Size
Next step is to take both strip sets to your cutting mat.
- Trim each strip unit to 6″ wide.
- Line up the center seam with the grid on your cutting mat.
- You should have about ¼” to trim off each side—trim evenly.
- Repeat for the second strip unit.
Step 3: Subcut into Blocks
- Stack the two trimmed strips right sides together.
- Trim one short edge to create a clean, straight edge.
- Subcut into 6″ x 6″ blocks.
You will end up with 6 total blocks, all measuring 6″ x 6″.
These patchwork blocks will form the heart shape.
Step 4: Cut Background Squares
From your background fabric, cut:
- 2 squares measuring 6″ x 6″
These will be used to create the bottom point of the heart using half square triangles.
Step 5: Create the Bottom of the Heart (Half Square Triangles)
- Lay one background square right sides together on top of the bottom heart squares (use the layout photo as reference).
- Draw a diagonal line on the background fabric, following the direction shown in the layout.
- Sew ¼” on both sides of the drawn line.
- Cut directly on the line to create 4 half square triangles.
- Press open with an iron.
- Do not trim at this stage.
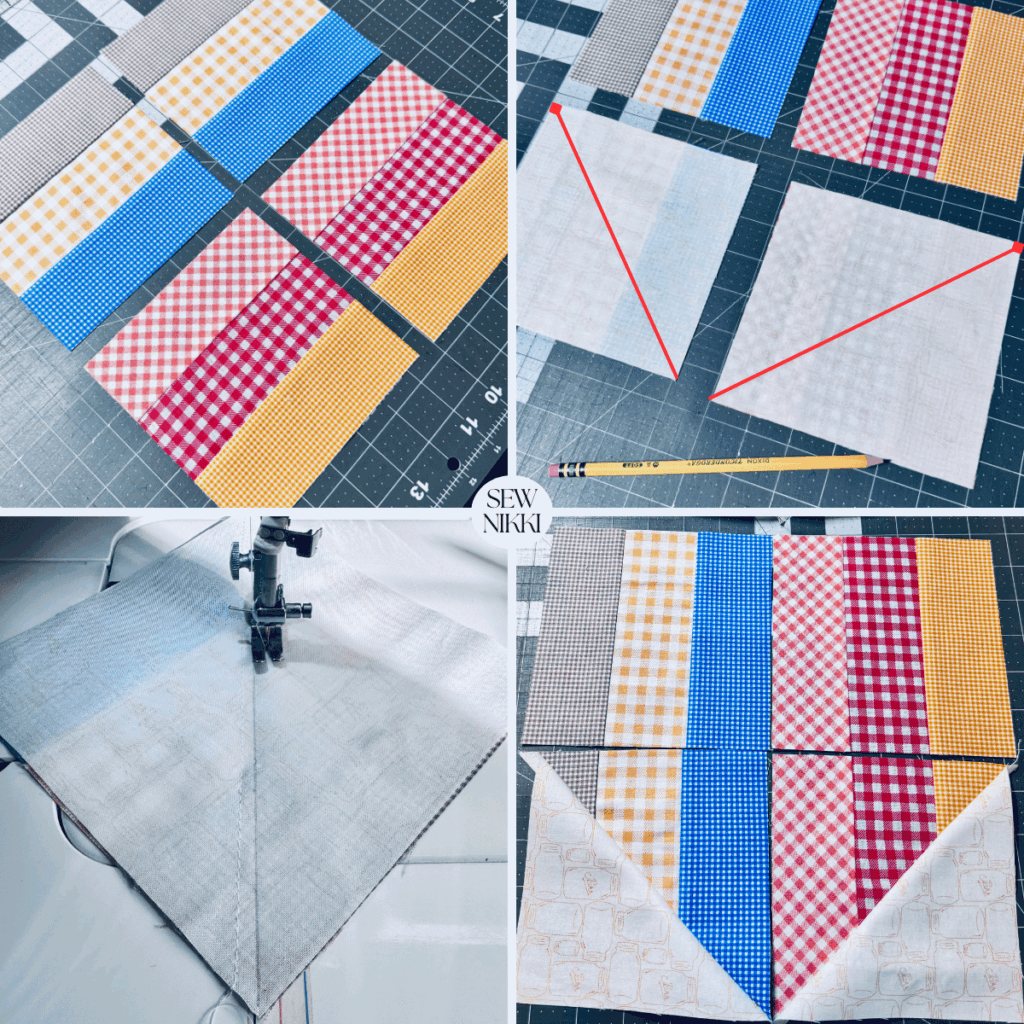
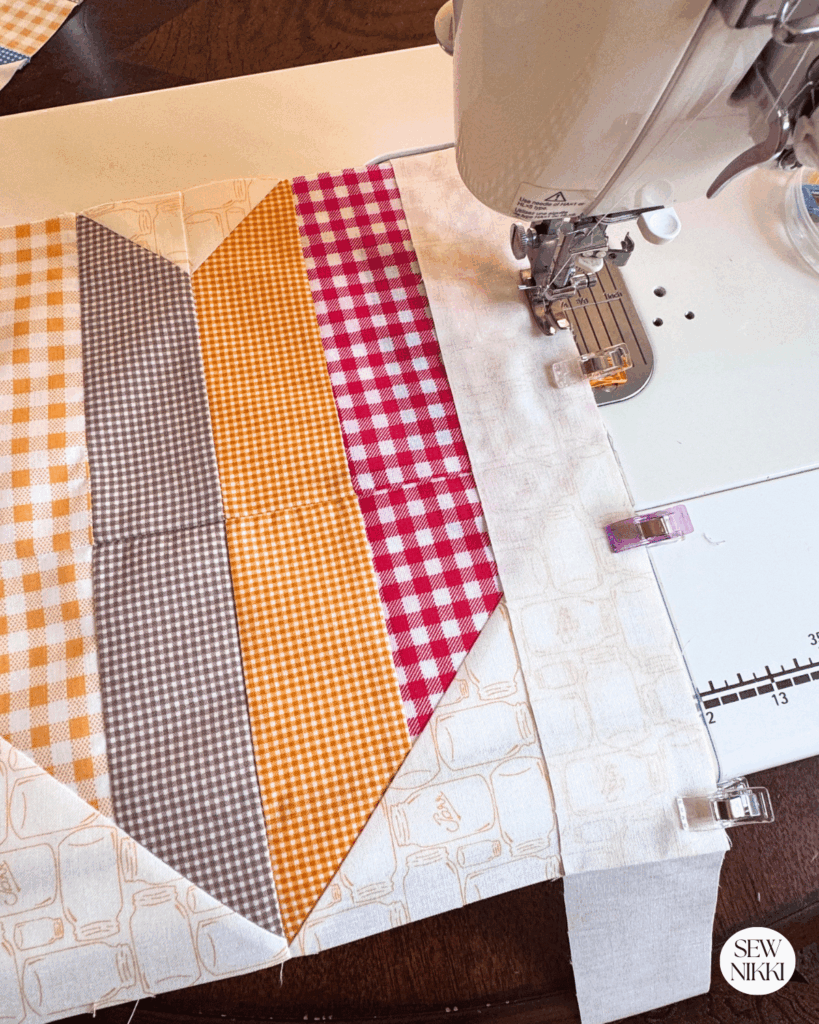
Step 6: Layout Two Heart Quilt Blocks
You’ll now create two identical heart quilt blocks:
- One for the front pillow panel
- One for the back pillow panel
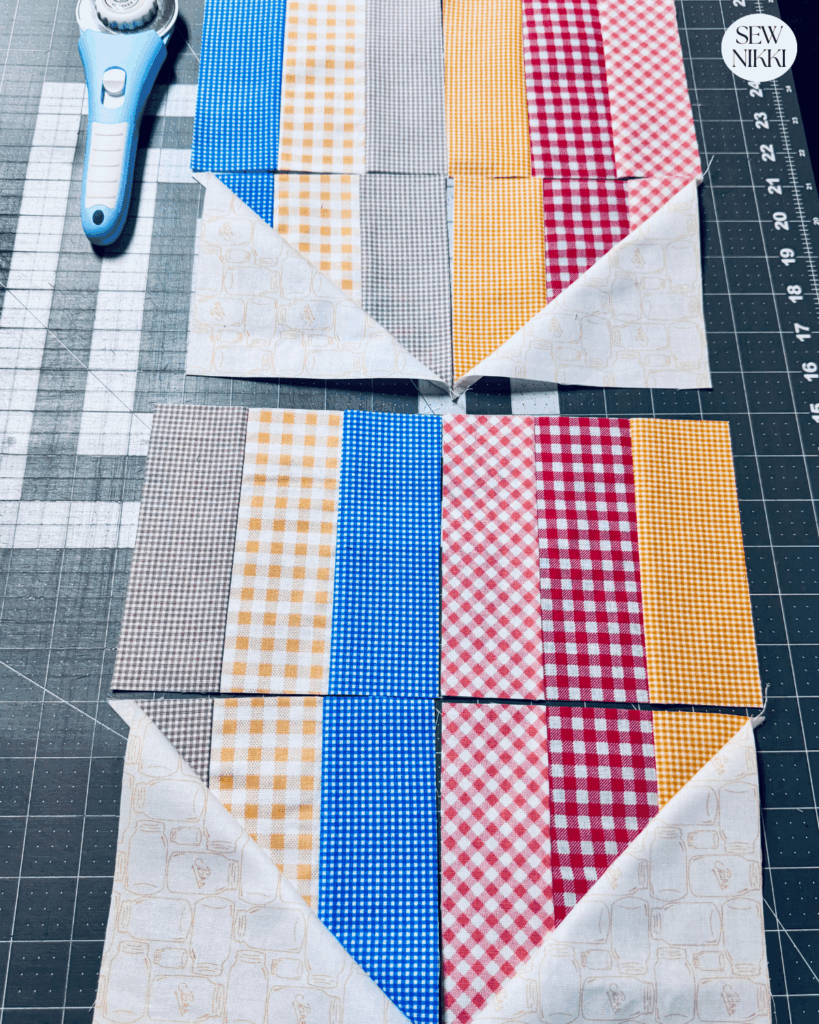
Lay out your blocks using the reference photo:
- Patchwork blocks form the heart shape
- HSTs create the bottom point
Step 7: Snowball the Top Corners of the Heart
Cut:
- 8 background squares measuring 2″ x 2″
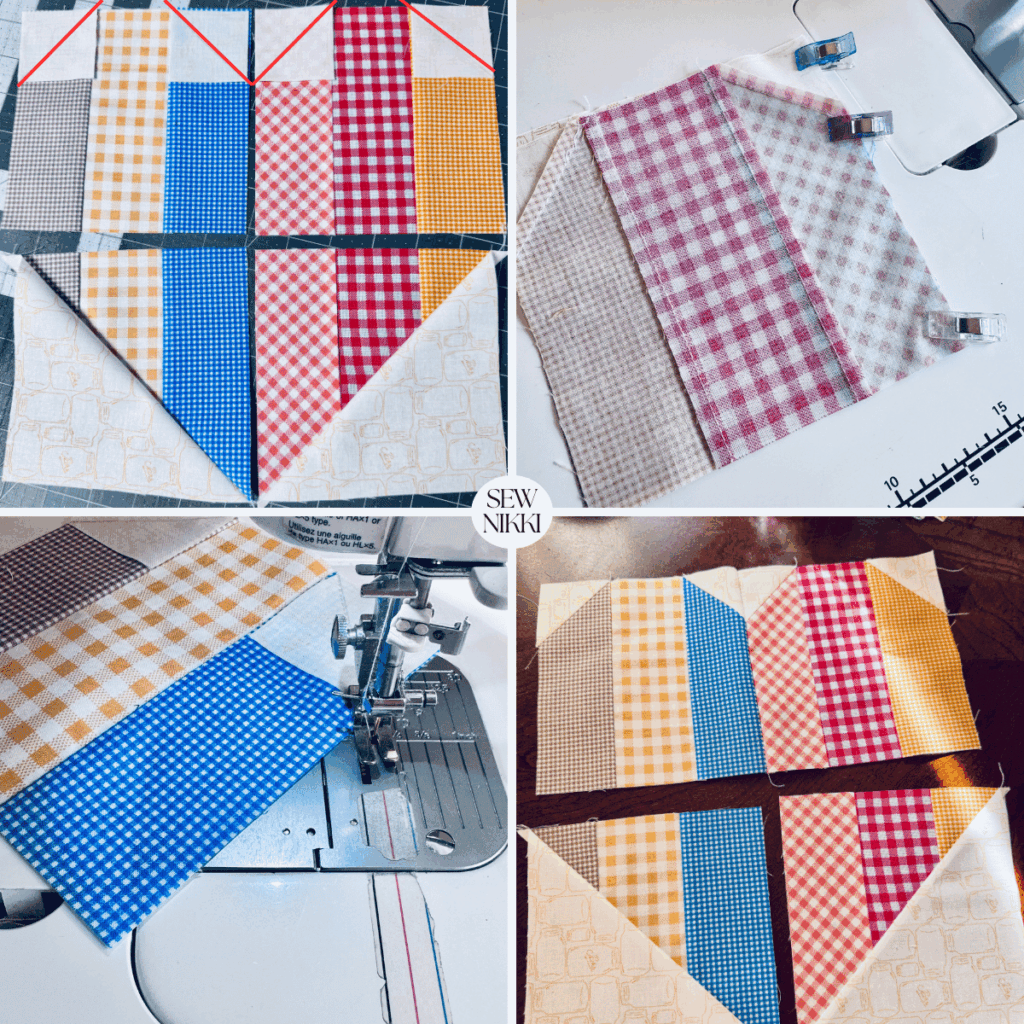
- Place one square face down on each upper corner of the heart blocks.
- Draw a diagonal line on each square.
- Sew directly on the line.
- Trim excess fabric, leaving a 1/4″ seam allowance.
- Press open.
Repeat for all four top heart squares on both heart blocks.
Step 8: Sew the Heart Quilt Blocks
- Sew the rows together, nesting seams where possible.
- Sew the bottom row together first.
- Join the rows using a 1/4″ seam allowance.
- Press the block well.
Once assembled, trim each heart quilt block to 12″ x 12″.
Step 9: Add Borders
First Border (Background Fabric)
- Cut 2″ wide background strips
- Sew to both sides first
- Then sew to the top and bottom
- Press seams
Second Border (Print Fabric)
- Cut 1.5″ wide strips
- Sew to sides, then top and bottom
- Press as you go
Trim each pillow panel to 15.25″ x 15.25″.
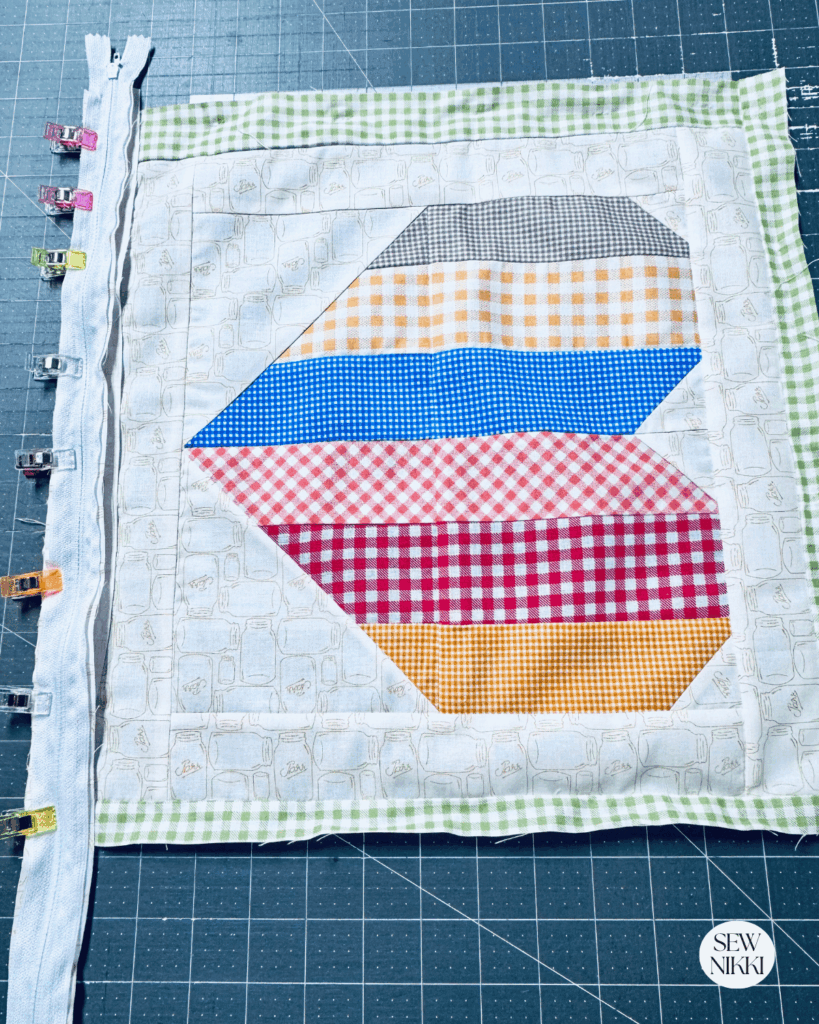
Step 10: Add the Zipper
Front Pillow Cover
Lay one pillow square right side up with its top edge facing you because we want the zipper on the bottom of the pillow. Place the zipper face down along that edge. The edge for the zipper tape should align with the fabric’s raw edge. Clip or pin the zipper after placing it. Note: The wrong side of the zipper will be facing you, the zipper pull will be all the way to the left.
If using a zipper foot, sew the zipper to the fabric, or using a regular foot, sew near the zipper teeth. Backstitch right at the beginning which secures the seam. The end of the seam is also made secure.
I prefer using a longer zipper than my pillow projects. This gives me wiggle room to play with and is the easiest method for beginners. Pin or clip the zipper to the fabric. Sew the zipper to the fabric using a zipper foot if you have one, or a regular foot sewn close to the zipper teeth. Backstitch at the beginning and end.

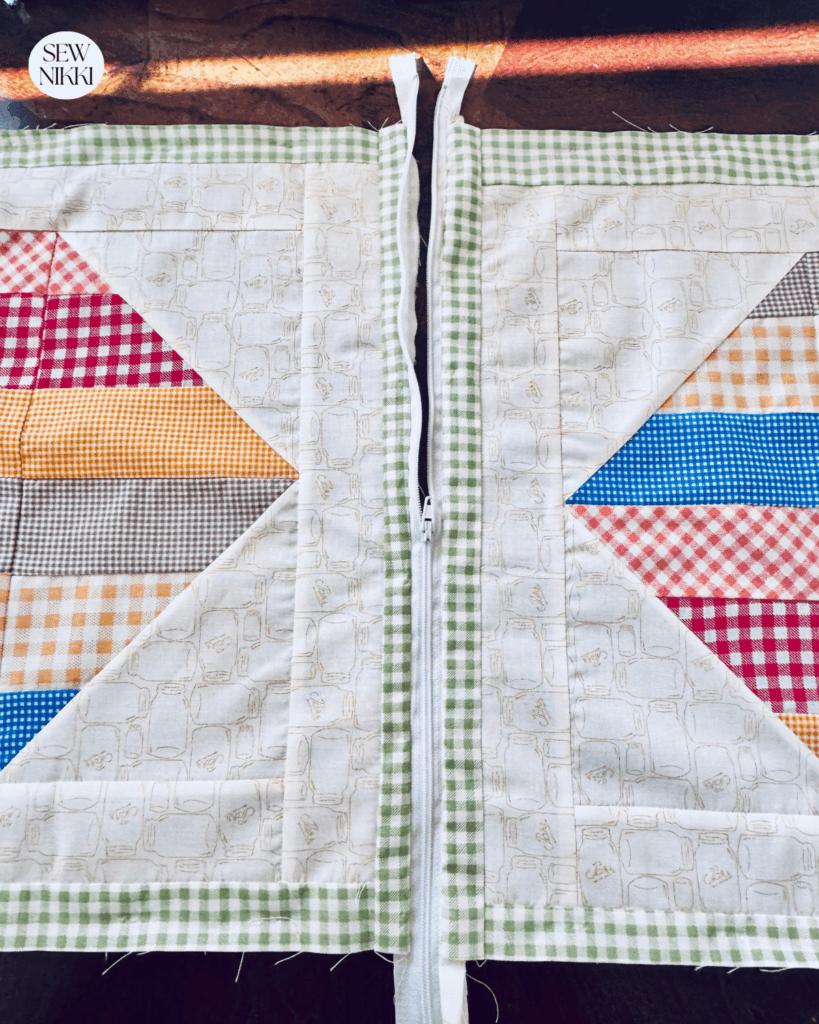
Back Pillow Cover
Now we need to attach the zipper to the back of the pillow cover. Lay the right side of the back cover onto top of the right side of the front cover and zipper. Align your pillow pieces so they line up directly on top of one another. Pin in place with pins or clips.

Sew it like the first side; keep your seam as close to the the zipper teeth as possible. Press with iron before joining sides, pressing both fabric pieces away from the zipper.
This is a simple, clean zipper method without fabric tabs. If you would like to have a more polished zipper, please see how to sew a zipper post for detailed instructions to add fabric zipper ends to your zipper.
Step 11: Finish the Pillow
Open zipper to halfway or almost all the way to the right side of the cover before you sew the sides together. If you don’t open the zipper before sewing around the sides, you won’t be able the turn the pillow cover inside out. This is a very important step, don’t forget to open that zipper.
Next step is to sew all the way around the other side of the pillow along the sides and bottom then turning right side out. We will be sewing straight lines using a normal stitch length of 2.5 with the presser foot adjustment half way down. I like to sew a 1/4 inch seam allowance.
Step 12: Turn and Press
Trim the sides of the zipper that are excess. You don’t need them anymore. Turn the pillow cover right side out through the zipper opening. Shape the corners with use of a chopstick or point turner. Press the seams flat. This will give a clean finish to it.
Step 13: Insert the Pillow Form
Close it using its zip then put your pillow form in the zip opening. Your 14 inch cover will have a nice full shape with a 14 inch insert.
You don’t need to worry about raw edges on the inside of your pillow cover. Just wash on gentle cycle cold water in the washing machine with the zipper pulled close. Make sure you use 1 Shout Color Catcher sheet in the first wash to catch any fabric that may bleed. Tumble dry low or air dry to prevent shrinkage.
Get the digital pattern.
Get the instant download pattern here.
Save This Project
Pin this tutorial so you can come back to it later or use it whenever you need a quick gift or a weekend sewing project.
More Sewing Projects
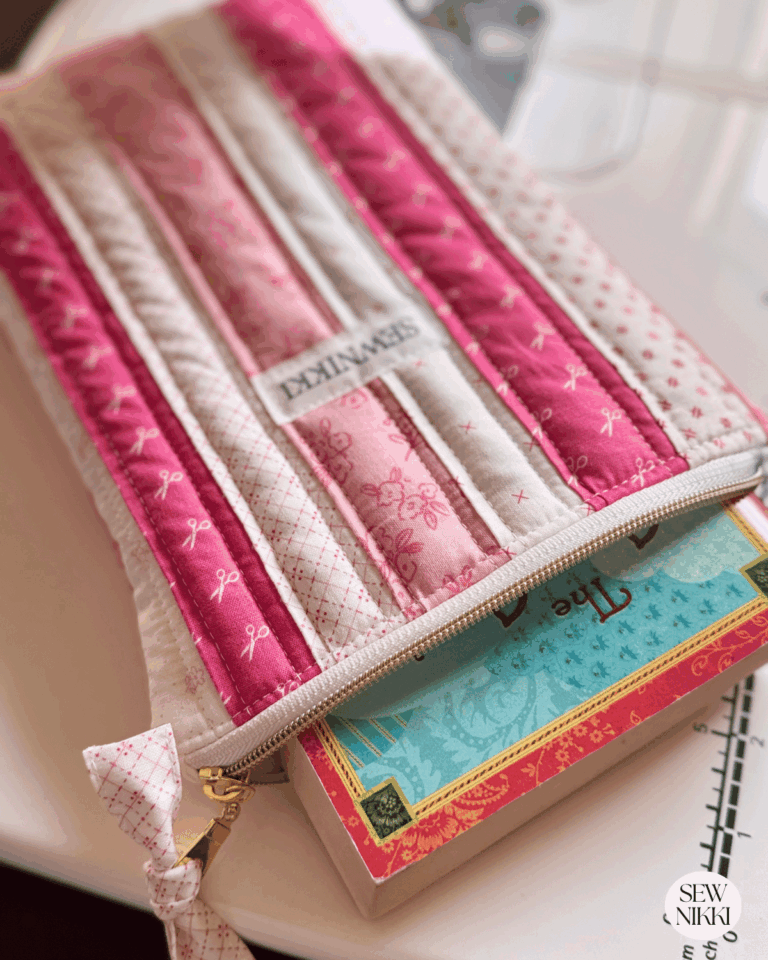
Sawtooth Star Zippered Pillow Cover
Helpful Resources
Spoonflower – how to sew a zipper on a pillow cover video tutorial.
Bernina International – how to sew piping around a pillow cover video tutorial.
Frequently Asked Questions
What size pillow does this pattern make?
This pattern finishes at approximately 14.5″ x 14.5″ and fits a 14″ pillow form.
Can I use different fabrics instead of plaids?
Absolutely. Scraps, solids, florals, or themed fabrics all work well.
Is this project beginner friendly?
Yes! If you’re comfortable sewing straight seams and using a zipper foot you can make this pillow.
Do I need the digital pattern?
No, the full instructions are in this post. The digital pattern is optional for printing and convenience.
How to Sew a Heart Block Pillow
This heart quilt block pillow is a perfect mix of sewing and home decor. It’s scrap friendly, beginner approved, and makes a beautiful handmade Valentine’s Day decor for your home or a thoughtful gift.
I hope this project helps you use what you have and enjoy the process. It’s the perfect sewing project when you want something done under 2 hours.
After making this pillow, I realized there is a different way I could have sewn the heart block together to eliminate the seam line through the center of the heart. However, this would have required more fabric which I did not have in plaid prints. Leave a comment below if you know how to make this block without the seam line.
ABOUT SEW NIKKI
Welcome to Sew Nikki! Your place for free crochet, sewing and quilt patterns for beginner to intermediate skill levels. Want a digital pattern? We have those too! Plus tutorials to walk you through how to make each item from start to finish.
I love my beautiful pillow, I’m going to be making a ton of these. Tag me @sewnikki6 in the event that you make one, so that I can see just how yours turned out. Happy Sewing!
Follow me on social media (Pinterest, Instagram, Facebook and Twitter) so you get notifications when I post new patterns and tutorials.
Looking for your next quilt project? Then head on over to my free “Pattern Index”. It’s a page dedicated to all of my free patterns separated by categories for crochet, sewing and quilting.
If you prefer an ad-free printable version, head over to my shop and browse the Digital Patterns. These are instant digital downloads you print yourself.
This post contains ads and affiliate links, which means I make a small commission at no extra cost to you. See my full disclosure here.


This is so cute! And the instructions are great! I’m excited to make one.
What a great stash buster! I think this would be so cute for my girls’ room to have coordinating pillows on their beds.
Oh, I love this pattern! It looks so pretty and thank you for the free pattern and instructions. That’s awesome. I love that it’s so quick to make too. I often don’t have time or room in my tiny place to keep a long project going, but this I can see myself finish. Love it!
This is so cute! Ive been wanting to learn how to sew but its so intimidating to me. You made this project look so simple that a newbie like me could figure it out. Thanks!!
The pillow is beautiful! Your instructions are so detailed and helpful that even a novice can sew a heart quilt block pillow. Love it!
What an adorable project!
This is SO CUTE! Perfect for a beginner like me, thank you!
Very cute!!! I need to get out my fabric scrap basket!