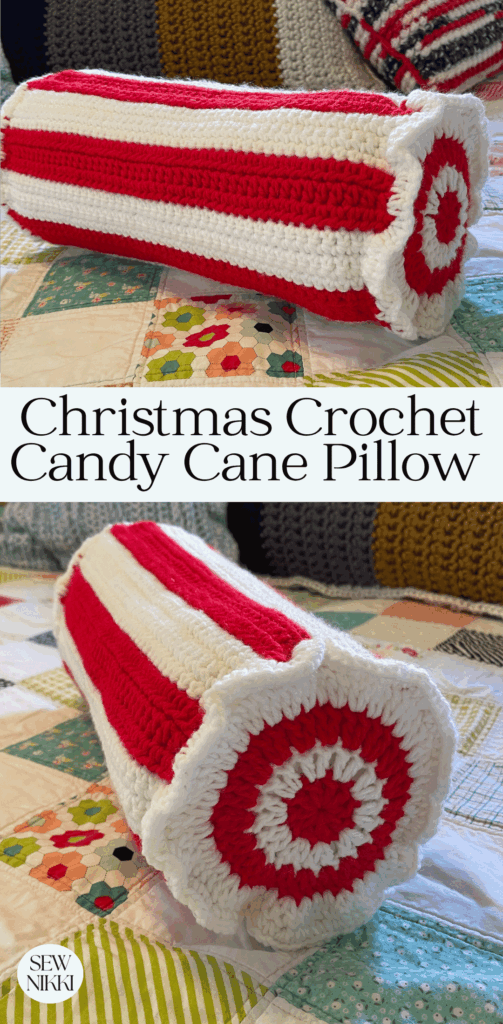
How to Make Candy Cane Pillow – Crochet Pillow Patterns
Today I’m going to walk you through the steps of how to make the candy cane pillow with the crochet pillow patterns below. There is a pattern for the body and a pattern for the ends. You join them all around a neck roll pillow insert to make this little beauty.
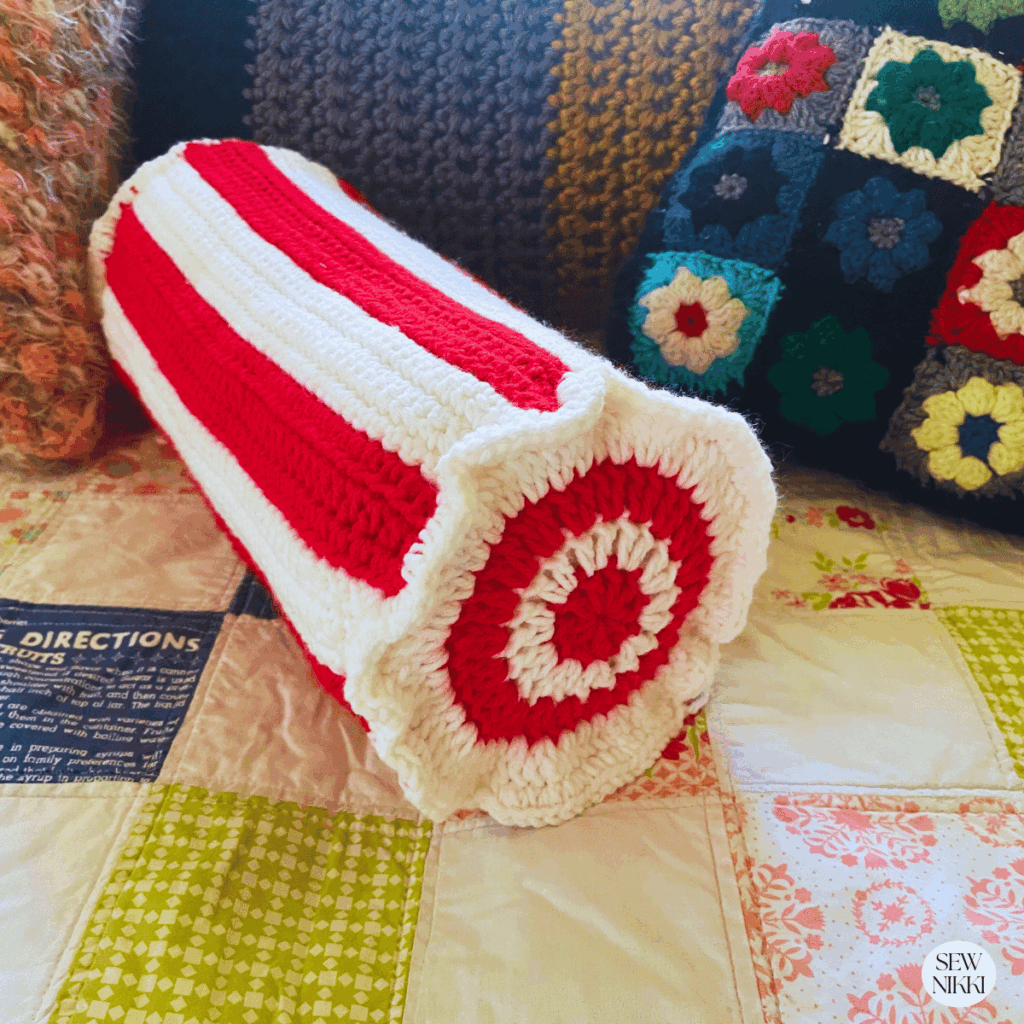
This crochet pillow pattern is inspired by Christmas. I created this pattern with beginner friendly stitches that won’t be boring to make. There are four stitches in this pattern – slip stitch, single crochet, double crochet and half double crochet. Below are the materials you will need.
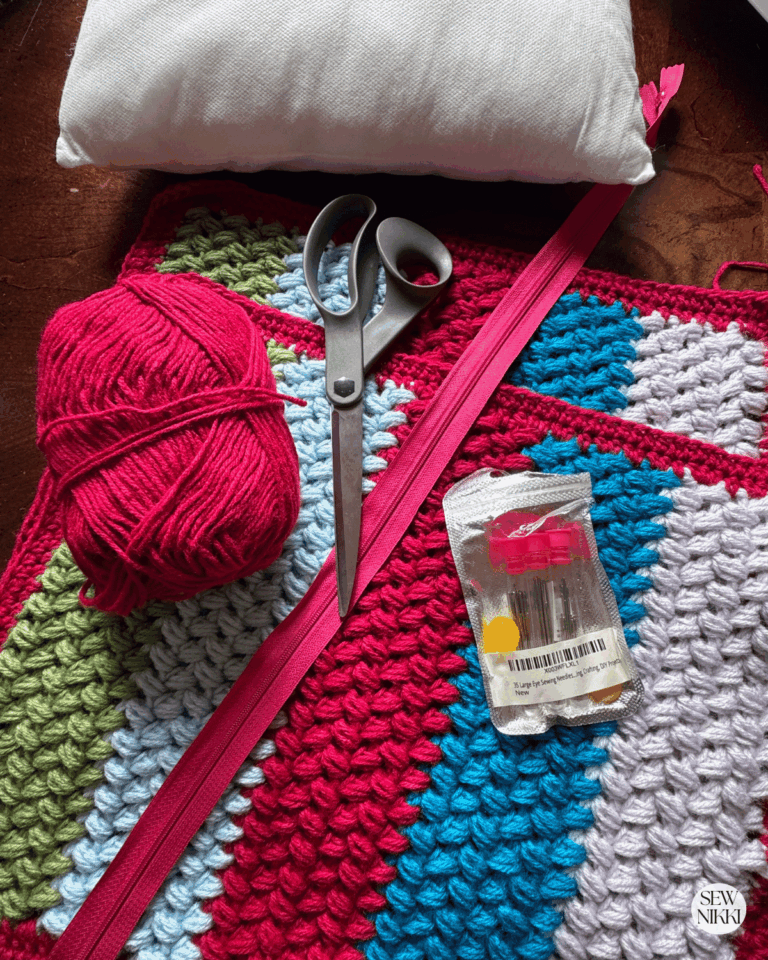
Materials Needed
I like to make projects that you can easily find at your local craft store or online. This project can be completed over a weekend and makes a really great Christmas gift.
You will need 2 skeins of 4 ply yarn, G or H crochet hook, yarn needle and lumbar pillow insert. I’ve listed the products that I used below but you can use any 4 ply yarn you want. The package will tell you what the ply is on the label, look for the number 4:
- 1 skein white 4 ply yarn – Caron One Pound (White)
- 1 skein red 4 ply yarn – Caron One Pound (Scarlet)
- 1 Neck Roll Pillow Insert 14 inches by 5 inches
- 1 crochet hook – size G
- 1 yarn needle
Make sure you check this out!
After you read this post, make sure you also check out Learn To Crochet for Absolute Beginner’s. It’s jam packed with even more information, links and resources that are so helpful when you’re first learning. It also has a section with free patterns that are great for beginners. So make sure you check this out, seriously don’t forget!
Grab the Shell Stitch Afghan crochet pattern, my free gift to you when you subscribe to my newsletter. Click the link below for your copy.
Here are some of my favorite YouTube channels for crochet that have tutorials for the all the stitches mentioned in this pattern. Note for beginners: UK stitches have different names than US stitches. All of these are UK channels so pay special attention to her stitch terminology. If you like one of these channels better than the other, just search their channels for the stitch tutorial you are looking for. Once you are comfortable on all the stitches, let’s get into the free pattern below.
Bella Coco – Half Double Crochet Tutorial
Blossom Crochet – Double Crochet Tutorial
Happy Berry Crochet – Half Double Crochet Tutorial
Make Sure You Check This Out!
After you read this post, make sure you also check out Learn To Crochet for Absolute Beginner’s. It’s jam packed with even more information, links and resources that are so helpful when you’re first learning. It also has a section with free patterns that are great for beginners. So make sure you check this out, seriously don’t forget!
Grab the Shell Stitch Afghan crochet pattern, my free gift to you when you subscribe to my newsletter. Click the link below for your copy.
Candy Cane Crochet Pillow Free Pattern
I created this fun pattern that doesn’t just use one boring stitch the whole way through. Pattern is in US terminology, not UK.
Pattern Abbreviations (US):
sc = single crochet
dc = double crochet
hdc = half double crochet
Pattern Info
For this pattern you will crochet one body cover and two end covers for a total of 3 pieces. Once all 3 pieces are done, you will crochet on the outside of cover to attach.
Body Cover
Row 1: (White Yarn) make a slip knot, chain 49 sc, chain 1, turn.
Rows 2 – 6: (White Yarn) sc in each stitch for a total of 49, chain 1, turn. Repeat 4 times but in the last stitch in row 6, change yarn to Scarlet, then chain 1, turn.
Row 7: (Scarlet Yarn) slip stitch in each stitch, chain 2, turn.
Rows 8-10: (Scarlet Yarn) hdc in each slip stitch for a total of 49, chain 2, turn. Repeat 2 times but in the last stitch in row 10, change yarn to White, then chain 1, turn.
Row 11: (White Yarn) slip stitch in each stitch, chain 1, turn.
Having fun yet?
Rows 12 – 16: (White Yarn) sc in each stitch for a total of 49, chain 1, turn. Repeat 4 times but in the last stitch in row 16, change yarn to Scarlet, then chain 1, turn.
Row 17: (Scarlet Yarn) slip stitch in each stitch, chain 2, turn.
Rows 18-20: (Scarlet Yarn) hdc in each slip stitch for a total of 49, chain 2, turn. Repeat 2 times but in the last stitch in row 20, change yarn to White, then chain 1, turn.
Row 21: (White Yarn) slip stitch in each stitch, chain 1, turn.
Rows 22 – 26: (White Yarn) sc in each stitch for a total of 49, chain 1, turn. Repeat 4 times but in the last stitch in row 26, change yarn to Scarlet, then chain 1, turn.
Row 27: (Scarlet Yarn) slip stitch in each stitch, chain 2, turn.
Rows 28-30: (Scarlet Yarn) hdc in each slip stitch for a total of 49, chain 2, turn. Repeat 2 times but in the last stitch in row 30, change yarn to White, then chain 1, turn.
Row 31: (White Yarn) slip stitch in each stitch, chain 1, turn.
Rows 32 – 36: (White Yarn) sc in each stitch for a total of 49, chain 1, turn. Repeat 4 times but in the last stitch in row 36, change yarn to Scarlet, then chain 1, turn.
Isn’t this an easy pattern?
Row 37: (Scarlet Yarn) slip stitch in each stitch, chain 2, turn.
Rows 38-40: (Scarlet Yarn) hdc in each slip stitch for a total of 49, chain 2, turn. Repeat 2 times but in the last stitch in row 40, change yarn to White, then chain 1, turn.
Row 41: (White Yarn) slip stitch in each stitch, chain 1, turn.
Rows 42 – 46: (White Yarn) sc in each stitch for a total of 49, chain 1, turn. Repeat 4 times but in the last stitch in row 46, change yarn to Scarlet, then chain 1, turn.
Row 47: (Scarlet Yarn) slip stitch in each stitch, chain 2, turn.
Rows 48-50: (Scarlet Yarn) hdc in each slip stitch for a total of 49, chain 2, turn. Repeat 2 times but in the last stitch in row 50, change yarn to White, then chain 1, turn.
Row 51: (White Yarn) slip stitch in each stitch, chain 1, turn.
Rows 52: (White Yarn) sc in each stitch for a total of 49, chain 1, pull yarn through stitch to form know to tie off.
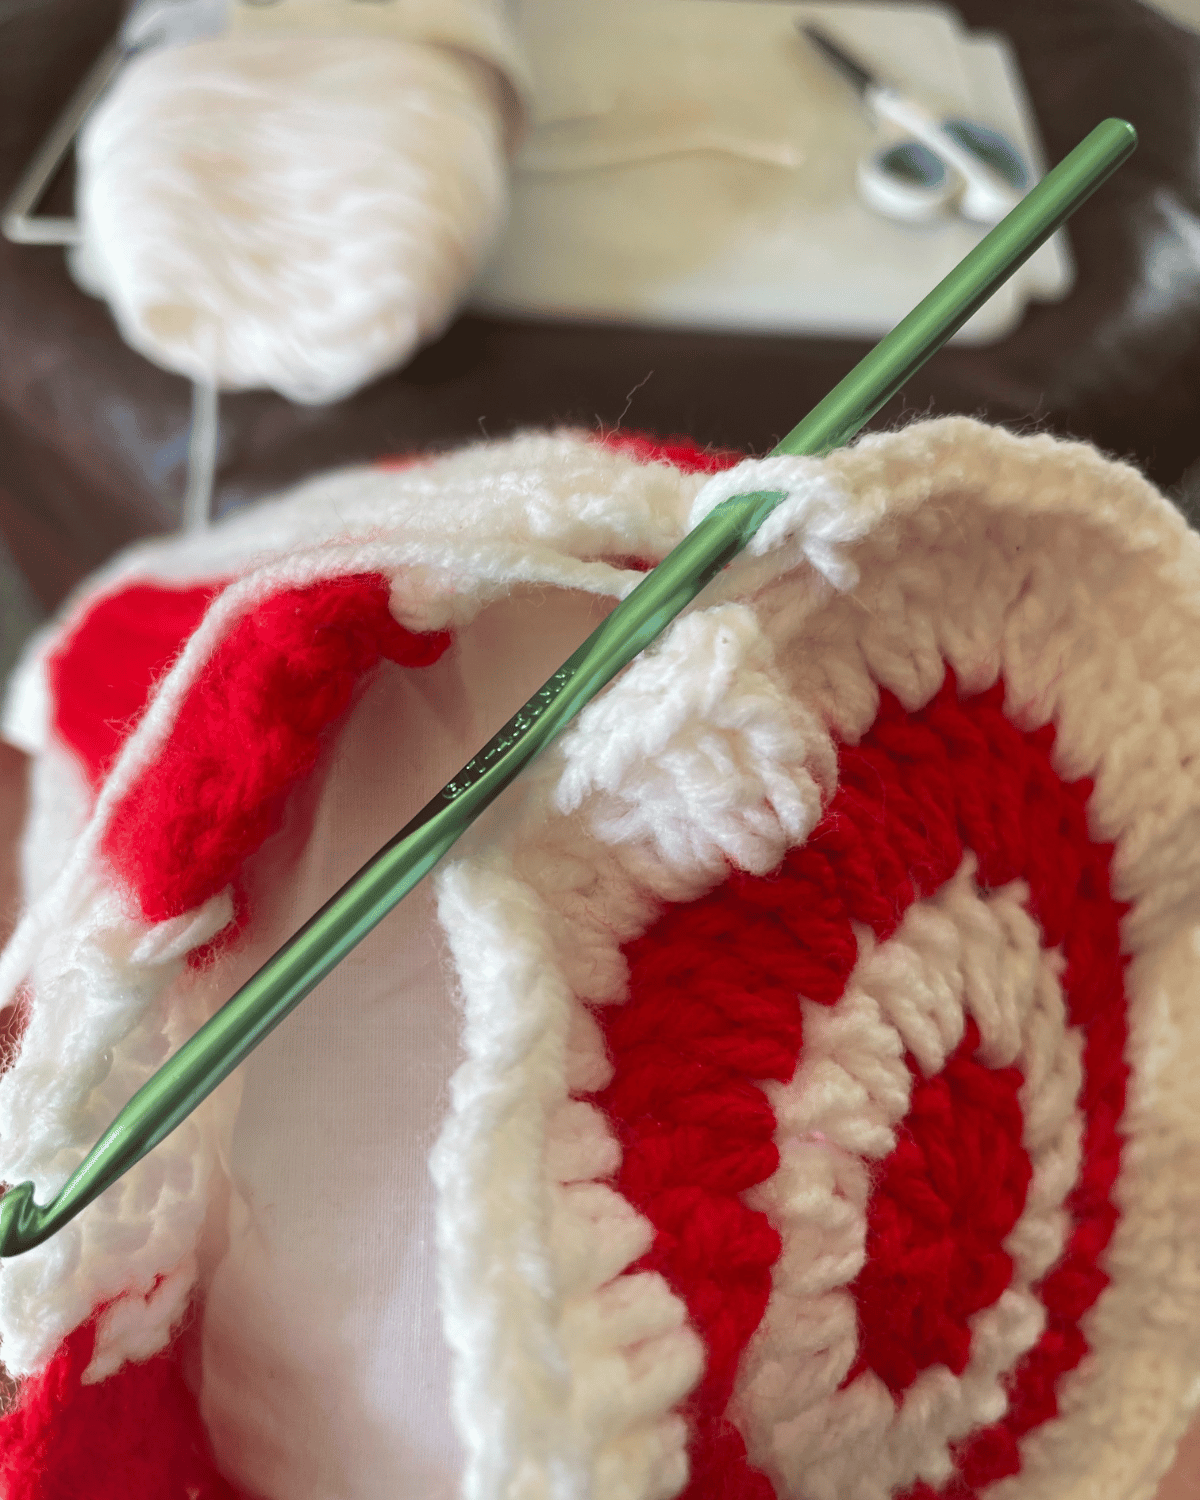
Turn Body Over
Turn the completed body cover onto the wrong side (the side with seams showing). Line up white crocheted ends and connect by crocheting sc through both stitches on both ends connecting them together. Slide hook under stitch on one row and then under stitch on second row. Pull yarn through, yarn over pull through. Tie off at end of row. Your body pillow cover is all done.
End Covers
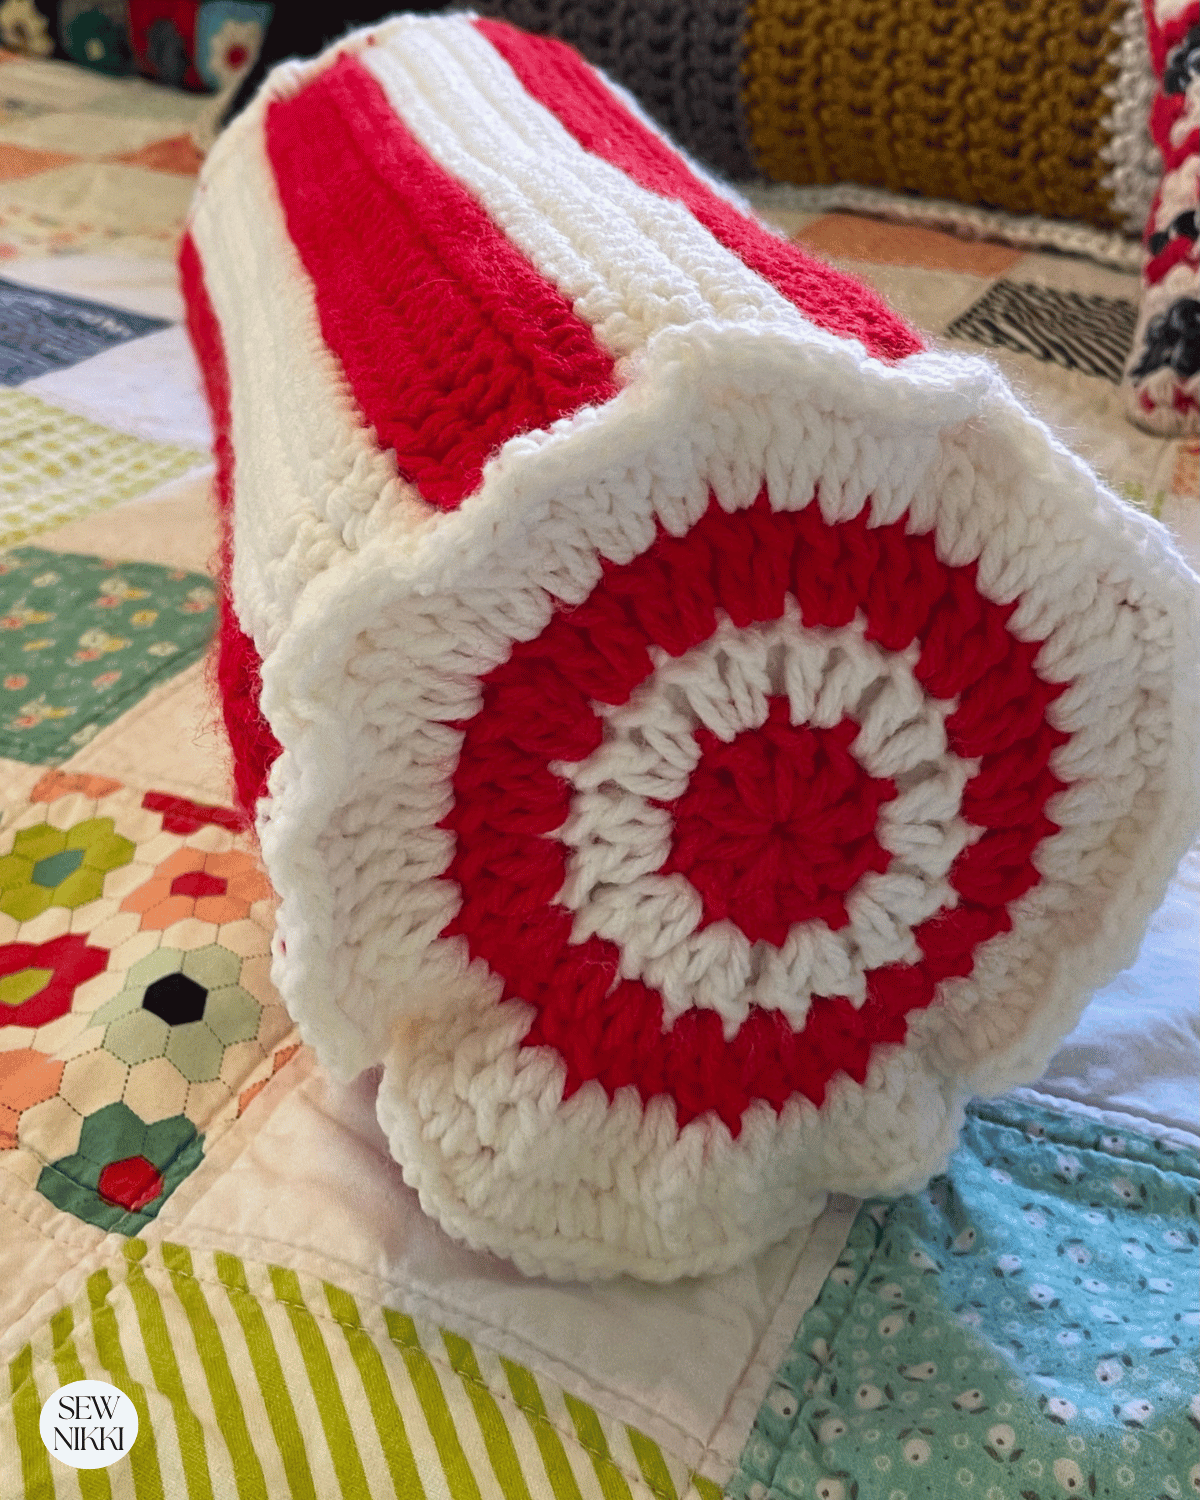
Row 1: (Scarlet Yarn) make a slip knot, chain 3 sc, slip stitch into first stitch for form a circle. Chain 2 (this is your first dc), find the hole in the center of the circle and chain 9 dc’s for a total of 10 dc’s. Slip stitch into the top of the first dc then tie off and cut yarn.
Row 2: (White Yarn) make a slip knot and chain into the top of one of the red dc stitches, chain 2 (this is your first dc), dc into the same stitch. Place 2 dc’s into each stitch for a total of 20 dc’s. Slip stitch into the top of the first dc, tie off and cut yarn.
Row 3: (Scarlet Yarn) make a slip knot and chain into the top of one of the white dc stitches, chain 2 (this is your first dc), dc into the same stitch. Place 2 dc’s into each stitch for a total of 40 dc’s. Slip stitch into the top of the first dc, tie off and cut yarn.
Row 4: (White Yarn) make a slip knot and chain into the top of one of the red dc stitches, chain 2 (this is your first dc), dc into the same stitch. Place 2 dc’s into each stitch for a total of 80 dc’s. Slip stitch into the top of the first dc and tie off.
Make two end covers. When you have made two end pillow covers, they are all done.
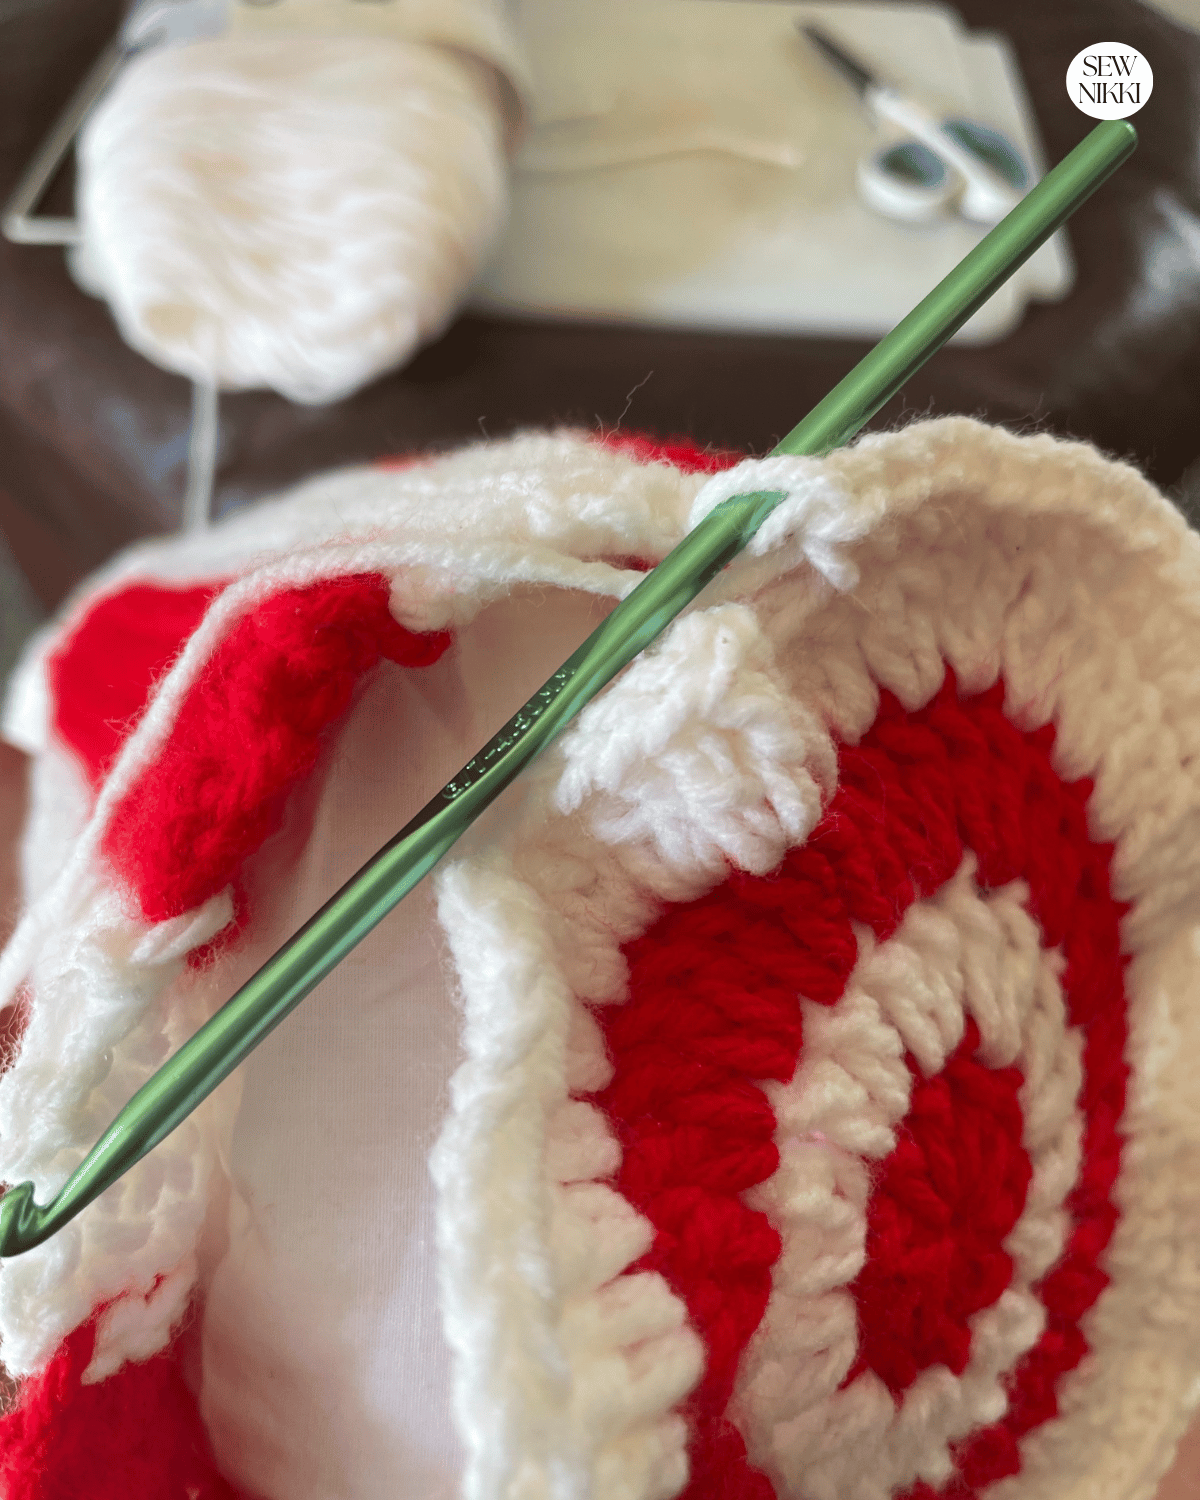
Assembly
Step 1: Stuff the pillow insert into the finished body cover.
Step 2: Hold the pillow between your knees with one end facing you. Lay down one circle end cover. Take your white yarn and make a slip knot. Connect the body cover and end cover together by using sc in the same method you connected the body cover ends together. Slip your hook under the end cover and then into the body cover edge, pull yarn through and complete a sc, do this all the way around until the end cover is attached to the body cover.

Step 3: Repeat step 2 with the other end cover.
Step 4: Weave any loose yarn ends into the pillow cover with yarn needle.
Get the digital pattern.
Just download and print the pattern here.
If You’re New Here
I’m really glad you found your way here.
If you’re new to crochet, then welcome. Learning to crochet can feel a little overwhelming at first, but it gets easier with every stitch. You’ll make mistakes, frog a few projects, and learn new techniques along the way. That’s all part of the process. If I can do it, so can you.
Here’s where to go next:
Learn to Crochet – guide for beginners
Free Pattern Index – all my free crochet patterns in one place
Digital, ad-free patterns – clean, printable, and beginner friendly
My blog is built for crocheters who want to learn new skills and make beautiful projects from start to finish. Take a look around so you can find your way through the site, subscribe to the newsletter so you never miss a new pattern or tutorial.
More Crochet Tutorials
These tutorials pair perfectly with this market bag crochet pattern:
- Bean Crochet Stitch Tutorial and Pillow Pattern
- Granny Handbag with Lining
- Flower Market Bag
- Crochet Sleeves Pattern for T-Shirts
- Weekender Bag with Leather Straps
- Modern Stripes Pillow
- Americana Pillow
- Lumbar Pillow
ABOUT SEW NIKKI
Welcome to Sew Nikki. Your place for free crochet, sewing and quilt patterns for beginner to intermediate skill levels. Want a digital pattern? We have those too! Plus tutorials to walk you through how to make each item from start to finish.
For more crochet tutorials and patterns, check out The Pattern Index.
Follow me on social media (Pinterest, Instagram, Facebook and Twitter) so you get notifications when I post new patterns and tutorials.
This post contains ads and affiliate links, which means I make a small commission at no extra cost to you. See my full disclosure here.


Thanks for sharing, Nikki. Such cute projects.
Hi Linda – thank you so much.
What a great project! Thanks for sharing.
Thank you Denise!
I love the design for your candy cane crochet pillow! My grandmother crocheted her whole life and we all have blankets to remember her by. I wish I had a talent for crocheting! Such a wonderful craft.
I’m glad you something that your grandma made for you, cherish it always!
Great project for Christmas! Your pattern looks fairly easy to follow which is helpful for a newbie like me. Thanks for sharing!
My mother in law is big into making crocheted items as her Christmas gifts and I’ve had a pillow before but I may ask for a set of these for our couch to notch things up