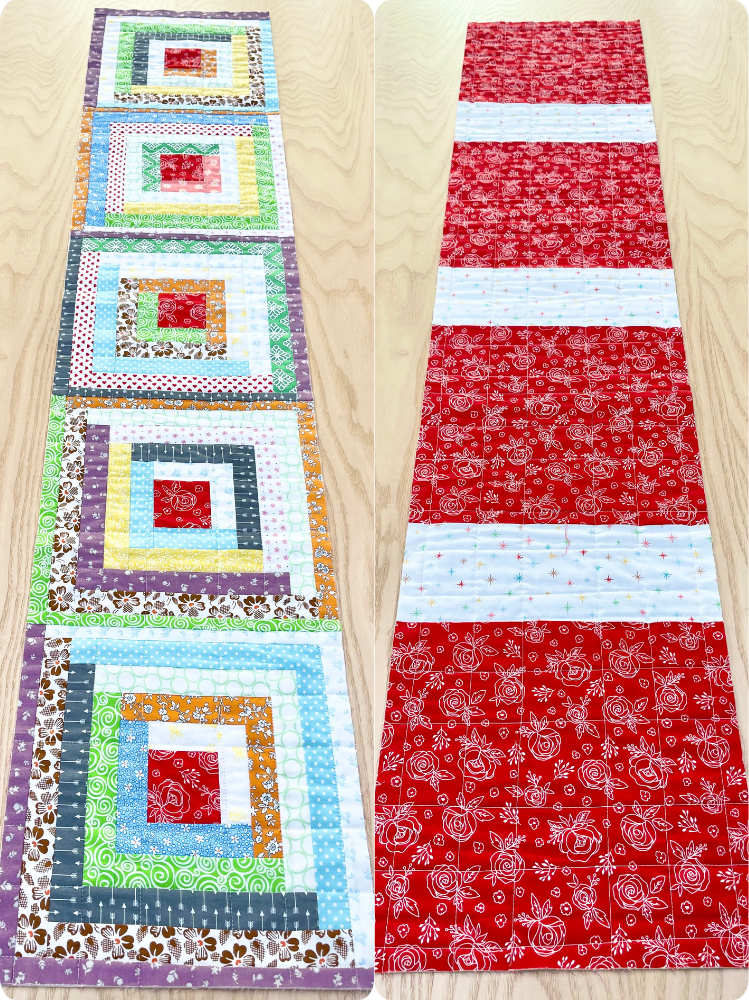
Log Cabin Quilt Pattern – Table Runner
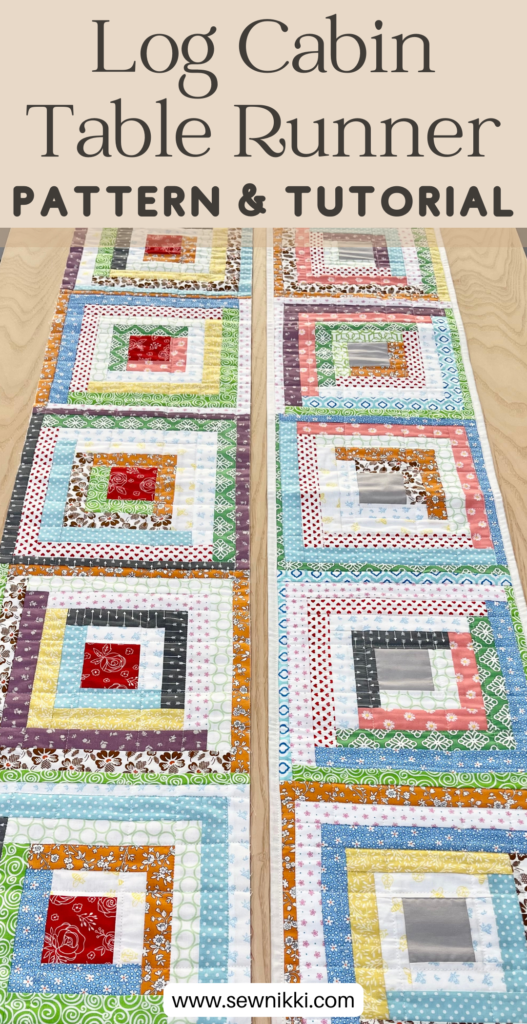
Today I’m sharing my traditional log cabin table runner quilt pattern. Finished size measures 60″ by 12″ and is made with 5 – 12″ finished blocks. Add a pretty pieced quilt backing, quilt it up, add some single fold binding and you have yourself a beautiful log cabin table runner! This log cabin variation of the traditional log cabin block is basically the same but instead of starting with two small squares and sewing them together, you start with a larger center square. The block construction is the same for each basic log cabin quilt block. Start with a center and build around it with strips.
In this tutorial, you will learn how to make the perfect log cabin quilt block. The finished block size will measure 12″ trimmed. I’ll give you the pattern and instructions to make the block and then show you different ways you can turn those blocks into a finished quilt. Not only can you make a quilt with the finished blocks, you can also make table runners, pillows, shower curtains, market bags or handbags. Every quilter should learn how to make the classic log cabin block. If you are a beginner quilter, I’m happy to walk you through the steps!
Traditional log cabin quilt pattern
The traditional log cabin quilt block starts with a square in the center. For the center of the block, a red square was used to represent “the heart of the home” or “hearth of the home”. Fabric strips are then added one by one to the sides of the center square. The strips of fabric where dark strips on the first two sides, then light fabric strips on the remaining two sides. Splitting the block in half with a light side and a dark side.
For my own log cabin quilt, I used scrap strips to give it a more scrappy look. Not paying any attention to keeping lighter fabrics on one half of the block and darker fabrics on the other half. I also used light grey for the center block and it was a beautiful quilt. The easiest quilts for me personally are the ones where I don’t have to think too much on the arrangement of the blocks!
MAKE SURE YOU CHECK THESE OUT!
After you read this post, make sure you also check out Learn How to Quilt for Absolute Beginners. It’s jam packed with information to make your first quilt. It also has links and resources that are so helpful when you’re first learning. There’s lots of free quilt patterns that are great for beginners and all skill levels too. So make sure you check this out, seriously don’t forget!
Make sure you grab a copy of my free Quilt Planning Journal. It’s filled with graph paper and note pages to help you design at least 4 quilt or sewing projects! Use it to jot down ideas, fabrics, patterns and inspiration all in one place. Or create your own patterns and share with others. Pin in fabric swatches, photos of your finished quilts and enjoy your creative process!
Traditional Log Cabin Quilt Block
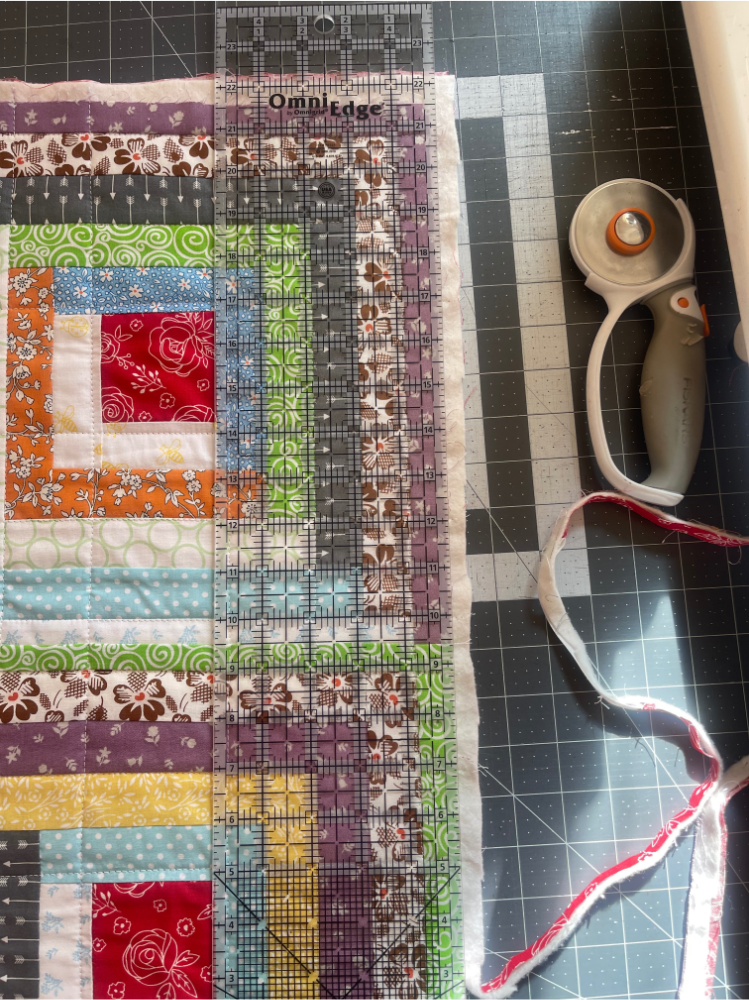
Cutting Fabric
Begin by cutting the fabric into the required pieces using the rotary cutter, cutting mat, and quilting ruler. For each log cabin block, you’ll need strips of varying lengths for the logs and a square for the center.
- Logs: Cut assorted color strips that are 1.5″ by WOF. Cut to desired length before attaching strip to block.
- Center Square: Cut a 3″ square for the center of each block.

Sewing the Log Cabin Blocks
- Start with the 3″ by 3″ center square.
- Add a 1.5″ strip to the first side of the block or center piece using a 1/4″ seam allowance. Press seam open when done.
- Continue adding strips (always turning the block in the same direction), alternating colors and increasing in length, until you achieve the desired block size (12″ finished).
- Use a 12″ square quilting ruler to square up each block.
- Repeat these steps until you have 5 log cabin blocks, all 12″ finished (trimmed).
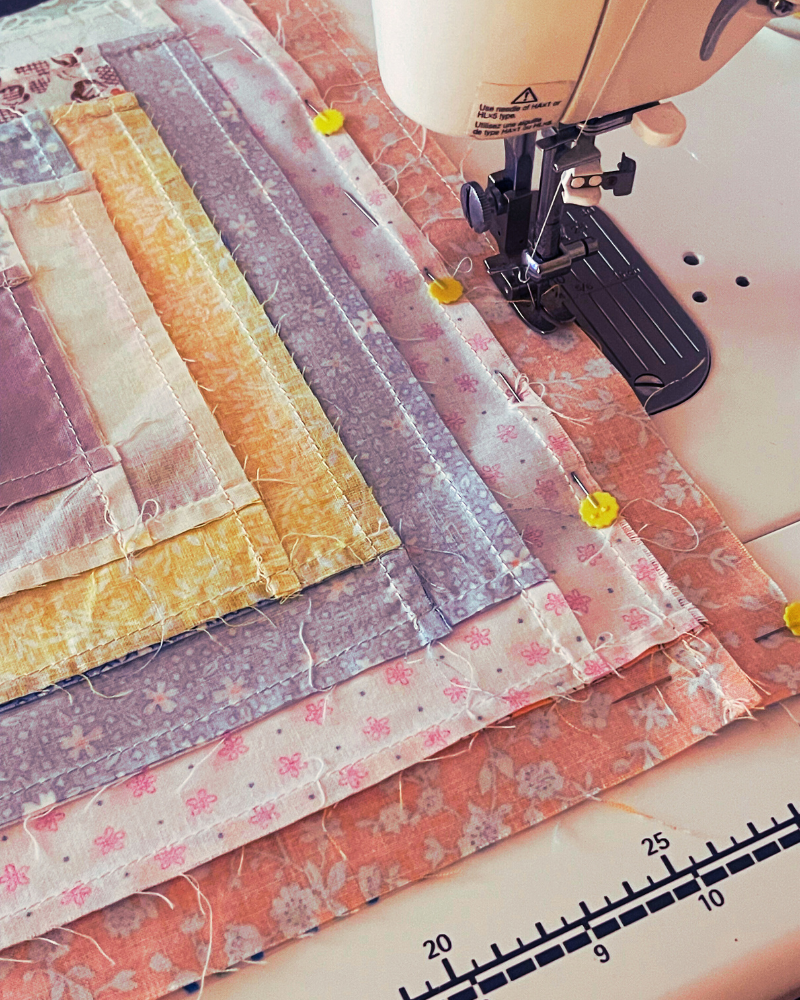
Layout and Attaching Blocks
- Lay out the five blocks in the arrangement you like. Make sure you like the color placement.
- Attach blocks together using a 1/4″ seam allowance until you have formed a row.
- Press everything when done.
Adding Sashing and Cornerstones (Optional layout)
- Cut 16 – 2.5″ x 12″ strips for sashing.
- Sew sashing strips between the log cabin blocks to create a row. There will be a strip at the beginning, end and in between each block.
- Cut 12 – 2.5″ x 2.5″ cornerstones from the chosen fabric and place them at the intersections of the sashing. Cornerstones should be same width as sashing.
- Attach sashing strips on the top of table runner and below the table runner.
- Pin the cornerstones at each intersection or seam line to ensure everything lines up smoothly.
- Do not iron sashing strip before attaching. Press everything when done.
Pieced Quilt Backing

- You can use any backing fabric you like but here are instructions to make the pieced backing in my photos.
- Take five pieces of fabric and cut 5 – 12.5″ squares.
- Layout the squares in the arrangement you like. Make sure you like the color placement.
- Attach the blocks together using a 1/4″ seam allowance until you have formed a row.
- This is your pieced backing for the table runner.
- Press with iron when done.
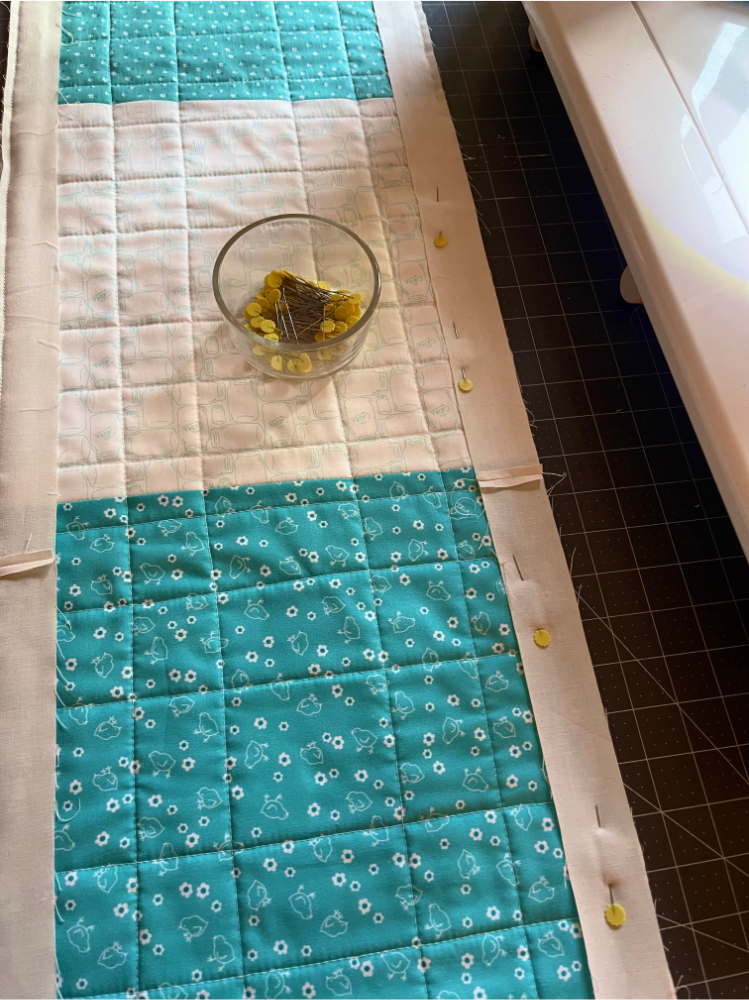
Basting Quilt
- Layer the quilt top with batting and backing fabric.
- Baste the layers together with 505 Adhesive Spray Baste or curved quilting safety pins.
- Line up the quilt top and the backing fabric so that the seams from both line up.
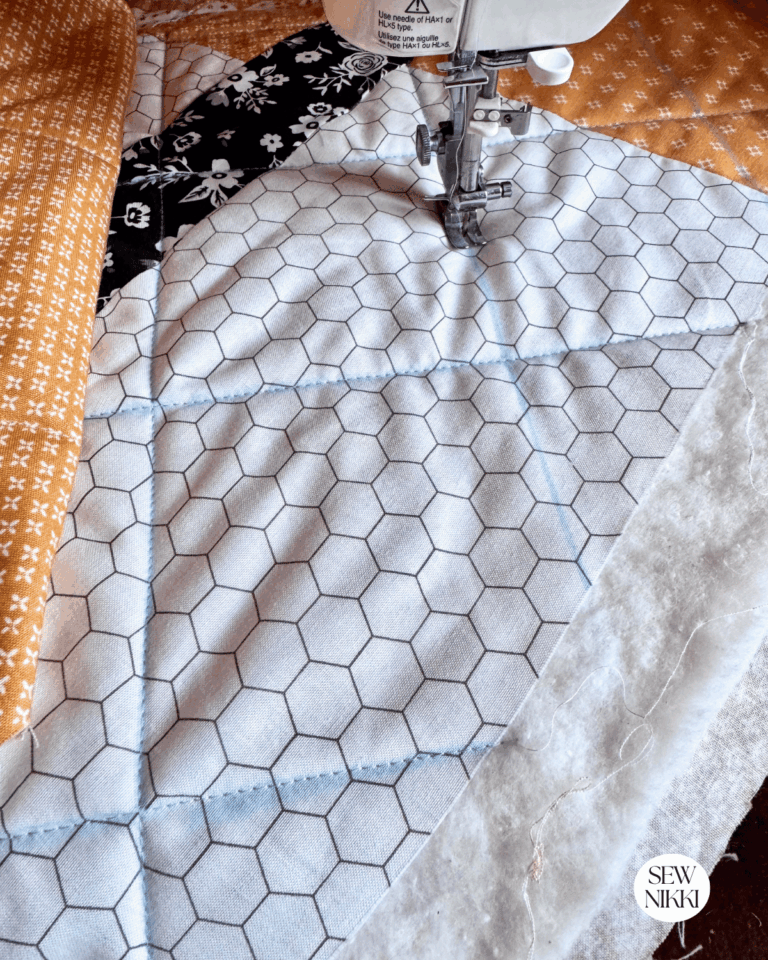
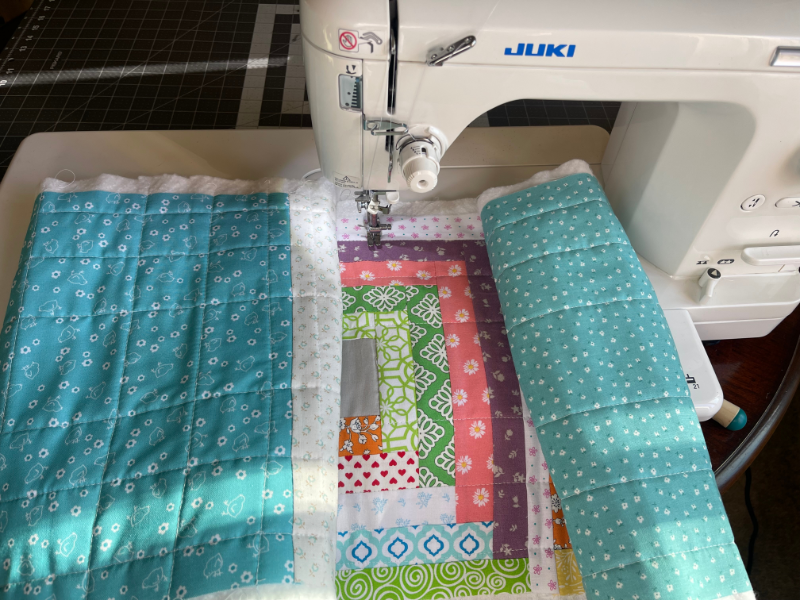
Quilting on Domestic Sewing Machine

- Quilt as desired, try straight line stitches with your walking foot. Sewing 1/4 inch away from the center square the two more straight lines next to the outer log and a straight line stitch in between both of those quilting lines.
- Repeat this for both sides of block, both horizontally and vertically until done.
- You can opt for straight line quilting, free motion quilting, or any other quilting design that inspires you.
Square Up Quilt
- Trim excess batting and backing using rotary cutter, quilting straight line ruler and cutting mat.
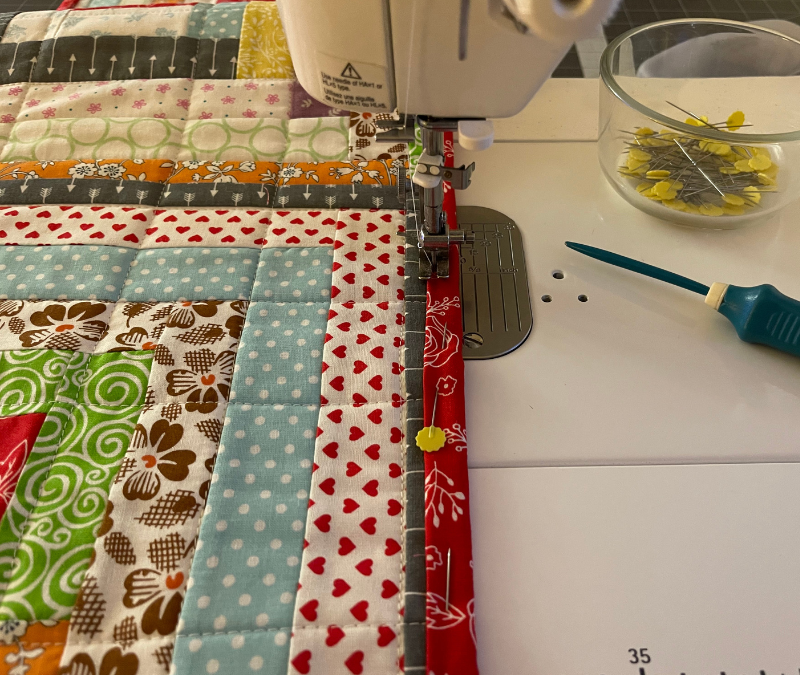
Attaching Binding to Finish Quilt
- Bind the edges of the quilt using your walking foot and straight lines.
- Make single fold binding using 1.5″ x WOF strips until it’s long enough to fit around the table runner.
- Sew strips together to form one long continuous strip.
- Attach to the back of the quilt first, then press with iron.
- Flip quilt over and finish attaching the binding to the front of the quilt until done. You need to fold the binding in half and then over once more. Pin in place and attach with a 1/4″ seam allowance.
Get the digital pattern.
Get the instant download pattern from my shop here.
More Table Runners You May Like
Save This Pin for Later!
This post contains ads and affiliate links, which means I make a small commission at no extra cost to you. See my full disclosure here.
ABOUT SEW NIKKI
Welcome to Sew Nikki! Your place for free crochet, sewing and quilt patterns for beginner to intermediate skill levels. Want a digital pattern? We have those too! Plus tutorials to walk you through how to make each item from start to finish.
Follow me on social media (Pinterest, Instagram, Facebook and Twitter) so you get notifications when I post new patterns and tutorials.
Want to learn how to crochet? Then check out this post, How to Learn How to Crochet – Guide for Beginners.