How To Make Crochet Baby Blanket
How to make crochet baby blanket. Free crochet baby blanket pattern. Tutorial on how to make a baby blanket from start to finish.
Here’s a gorgeous baby blanket with simple pattern that uses basic stitches. Easy blanket to make for beginners. This easy crochet baby blanket with free crochet pattern uses basic crochet stitches to make up the perfect gift for a baby girl or boy. This is a great choice if your skill level is a beginner. This simple and easy baby blanket consists of single crochet stitches with different colors staggered randomly throughout.
This quick and easy beginner crochet baby blanket can be completed over a weekend while you watch your favorite Netflix series. The pattern, if you really want to call it a pattern, is made up of single crochet stitches in your desired length and width while randomly changing out yarn colors giving it a staggered look.
Now before we even get to making the baby blanket, let me tell you everything that I do when starting a new crochet project. This “how to” from start to finish will be something that you will automatically do every time you start a new baby blanket or any other crochet project.
MAKE SURE YOU CHECK THIS OUT!
Are you an absolute beginner and you want to learn crochet? After you read this post, make sure you check out Learn To Crochet for Absolute Beginner’s. It’s jam packed with even more information, links and resources that are so helpful when you’re first learning. It also has a section with free patterns that are great for beginners. So make sure you check this out, seriously don’t forget!
Grab the Shell Stitch Afghan crochet pattern, my free gift to you when you subscribe to my newsletter. Click the link below for your copy.
How To Make Crochet Baby Blanket – Follow These Steps
- Pick Pattern
- Yarn/Hook Selection
- Wash It
- Gift It or keep for your baby!
How To Make Crochet Baby Blanket – Pick Pattern
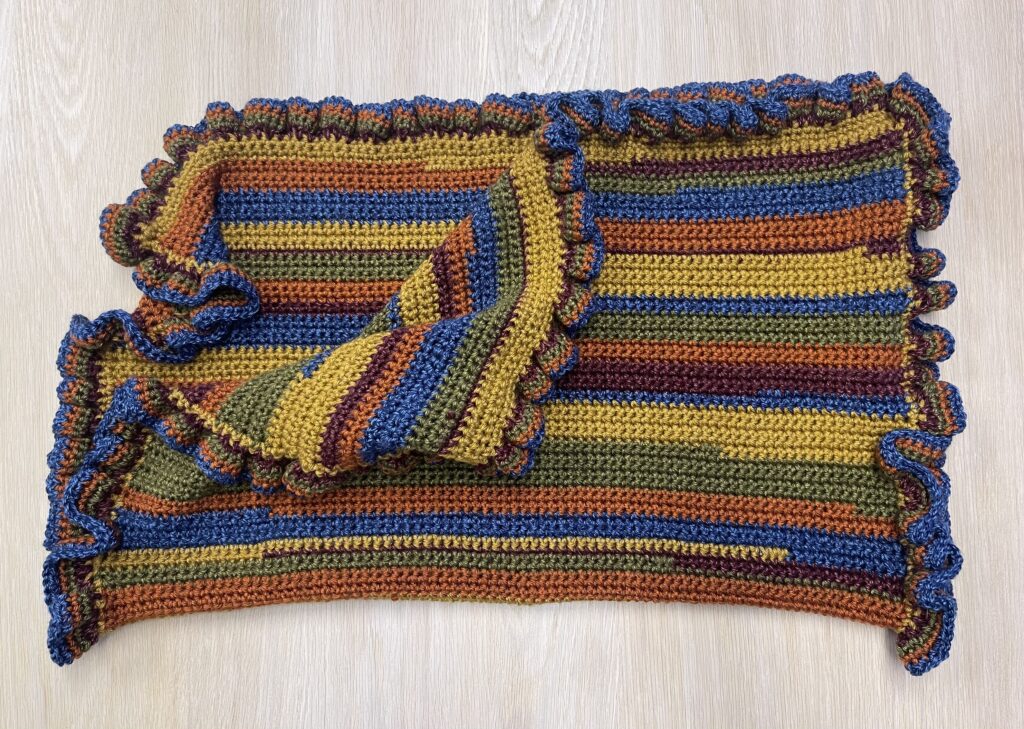
This easy crochet baby blanket pattern uses a single crochet stitch for the entire blanket. The single crochet is the easiest stitch and the pattern is created when you change yarn colors randomly which creates a staggered and uneven look. The finishing touch is a ruffled border but you can add any border style you want.
Colors Give It The Staggered Effect
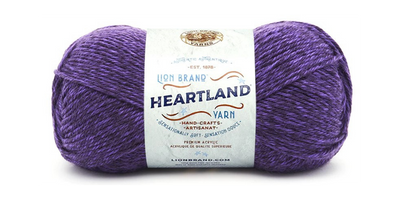
Since color changes make up the staggered stitch, it is important to have multiple skeins of yarn in different colors. I was able to worsted weight yarn from Lions Brand’s Heartland collection in the fall colors I was looking for. I had enough yarn from these 5 skeins to make this beautiful blanket and the border.
Different Blanket Sizes
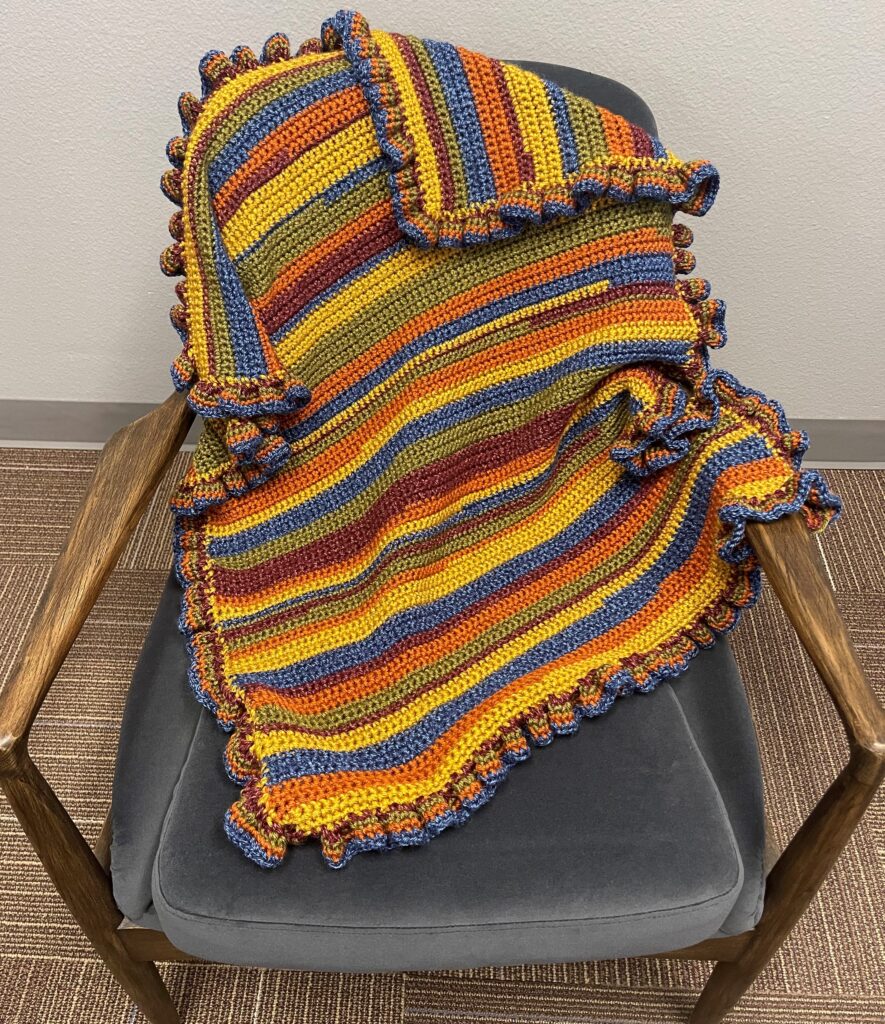
This blanket would look great in different sizes, it would be great for a throw hung over a chair too. The single crochet is the best crochet stitch for a beginner. You don’t need to gauge swatch for blankets, only for clothing patterns. You could also change the border from a ruffle to a shell stitch. If you need help with different crochet stitches, check out a video tutorial by some of these wonderful YouTubers.
HopefulHoney – Crochet Stitch Tutorials
Hooked by Robin – Patterns and Crochet Stitch Tutorials
Bella Coco – Pattern and Crochet Stitch Tutorials
Some crochet stitches use up more yarn because of the texture and depth of the stitch. The puff stitch or popcorn stitch are two examples. If you use one of these two stitches in a project, plan on using almost double the amount of yarn. Always buy enough yarn to finish your project.
Creating Crochet Patterns
I always make up my patterns for each crocheted baby blanket. Typically I will use a colored yarn and a bright white yarn to have build blocks of rows and give it character. Generally I will buy 2 skeins of each color yarn and have leftover yarn but this may vary depending on the brand you use and size of the skein. This quick and easy beginner crochet baby blanket will use 5 different colors all using single crochet so 5 skeins.
Free and easy baby blanket crochet patterns are available online, just search for free crochet patterns and be specific. Google “free crochet baby blanket patterns” and just see how many are there or refer to my Top 40 Free Crochet Website and to find your next free pattern. You can also purchase patterns on Etsy and many other online resources. Crochet patterns can also be purchased at most craft stores in the crochet section or book section.
Yarn Selection
Not all yarn is created equal, that’s a fact! Best yarn is the one that you can afford, has the colors you want, is soft and has enough skeins for your project. The best yarns for baby blankets are acrylic yarns. Save your cotton yarn for market bags and potholders. This project will take 5 skeins for this pattern. The brand used was Lion Brand Heartland Yarn in Badlands, Olympic, Canyonlands, Rocky Mountain and Hot Springs. This is a medium worsted weight acrylic yarn that retails for around $7.00 each but was on sale for $4.89.
Heartland Yarn is a 4 or Medium weight yarn. Weight refers to the thickness of the yarn and medium is the perfect weight for baby blankets that will last. Heartland Yarn is a 4 or Medium weight yarn. Weight refers to the thickness of the yarn and medium is the perfect weight for baby blankets because it’s durable and will hold up in the wash.
Best Yarn For Crochet Baby Blankets
The type of yarn that is best for baby blankets is acrylic yarn (4 on package). I have never made a handmade baby blanket out of cotton yarns, bulky-weight yarn, chunky yarn or thinner yarns. I always grab a thicker 4 ply yarn. Baby Bernat Blanket yarn is 3 ply and a thinner yarn, too thin for me. If you want to use a bulky yarn, that would work too. Just use the size hook that is specified on the yarn package.
Hook Selection
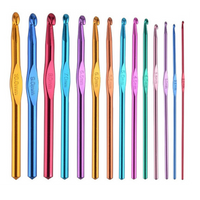
The yarn or skein will have the hook size you need listed on the product. Typically the medium or 4 weight skeins use a size H, I or J hook but it varies by each yarn brand. Do not confuse the crochet hook size with the knitting needle size on the package. You can tell the difference because crochet uses one hook and knitting used two needles. Look for the picture of one hook.
There are lots of hooks ranging from plastic, aluminum or wood. Some are padded grips but the one I use is aluminum because the hook doesn’t get stuck in my yarn and is easy to use (see photo). Find the one you like and get the size hook specified for the skein you are buying.
Washing Instructions
Machine wash cold on the gentle cycle by itself with a little soap. I just use regular laundry detergent but you could also opt for baby detergent that is allergy free, fragrance free too. Tumble dry on low cycle for about 15 or 20 minutes. Do not add bleach and do not iron. Blanket will be soft and fluffy, ready to snuggle up a baby or for baby to snuggle with it.
Gift It
This perfect baby blanket makes such a great baby shower gift. Depending on the size you made it, the finished blanket could be a crib blanket, car seat carrier blanket or toddler blanket.
As always, my goal is to make something handmade (with love) and be happy with the finished product so it can be gifted to a friend, family member or really nice co-worker! If you already have a process that you follow, congratulations! Maybe you saw something new above and have decided to incorporate it in your next crochet project.
I hope you make this simple baby blanket for an upcoming baby shower. Handmade baby blankets make adorable baby gifts. I would love to hear what your process is too, please comment down below.
How To Make Crochet Baby Blanket – Materials Needed
Here are the items used to make this crochet blanket.
Badlands – Lion Brand Heartland Yarn
Olympic – Lion Brand Heartland Yarn
Canyonlands – Lion Brand Heartland Yarn
Rocky Mountain – Lion Brand Heartland Yarn
Hot Springs – Lion Brand Heartland Yarn
This post contains ads and affiliate links, which means I make a small commission at no extra cost to you. While the ads are annoying, it helps keep this blog going. See my full disclosure here.
Staggered Crochet Baby Blanket Pattern
Instructions
This baby blanket follows an easy stitch pattern. There are no double crochet stitches, only single crochet stitches. It uses single crochet stitches only and that’s why it is such an easy pattern. Chain stitch in single crochets until you have your desired width. At the end of row, chain one and turn, then repeat row until you have the desired baby blanket size. For this blanket, the height should measure more than the width. Change out colors as often as you like to obtain the look you are going for.
Changing Colors
If you change colors before the end of a row, you can single or double knot the ends right under the stitch you are about to complete. You will need to weave in the tails when your are done with the blanket. I tried to stitch over my yarn ends but the ends kept peeking through the rows which you don’t want.
To make a colorful blanket without the staggered rows just change your yarn at the end of the rows. In this blanket I really wanted an uneven cut up effect so some colors I didn’t even chain for an entire row. Other colors I did up to 5 rows but no more than than since I was using 5 colors and it’s only a baby blanket. Weave in the tail with a yarn needle before beginning the border.
Ruffled Border Instructions
To make the ruffled border you will be crocheting around the edge of the entire blanket so on the shorter sides (height) you will have stitches to insert your hook into but you will need to insert your hook on the longer sides (length) into the edge making your own row. Make one single crochet then chain one, single crochet, chain one, repeat until you get to the end then slip stitch. The extra stitch after your single crochet stitch causes the ruffle.
Change yarn to a new color but this time you only have to single crochet in each stitch, slip stitch when you get to the first stitch of that color. Change colors and repeat until done. I only used four colors because I didn’t have enough mustard (yellow) yarn to make it all around.
More baby blankets to check out:
SAVE THIS PIN FOR LATER!
Get the digital pattern.
Get the instant download pattern from my shop here.
About Sew Nikki
Welcome to Sew Nikki! Your place for free crochet, sewing and quilt patterns for beginner to intermediate skill levels. Want a digital pattern? We have those too! Plus tutorials to walk you through how to make each item from start to finish.
Follow me on social media (Pinterest, Instagram, Facebook and Twitter) so you get notifications when I post new patterns and tutorials.
Want to learn how to quilt? Then check out this post, Learn How to Quilt for Absolute Beginner’s.
This post contains ads and affiliate links, which means I make a small commission at no extra cost to you. While the ads are annoying, it helps keep this blog going. See my full disclosure here.


I love it! I am always looking for great free crochet patterns and I love ruffles! Thanks for sharing!
Thanks Tricia!
This is so amazing Nikki! I literally just said to my coworker last week that I want to give this a whirl- such a cute blanket and love love the edges! Love the blog!!
Thanks Lisa! I see you got my letter, you made my day. Nikki