“Iris Stitch” Baby Blanket Crochet Pattern Free
If you’re looking for a soft, airy, and totally beginner friendly blanket pattern, the Iris Stitch is it. This stitch gives off a lacy texture that looks fancy but is seriously easy to crochet. I’m sharing a free baby blanket crochet pattern below, plus instructions to make it in any size you want.

Why You’ll Love the Free Baby Blanket Crochet Pattern
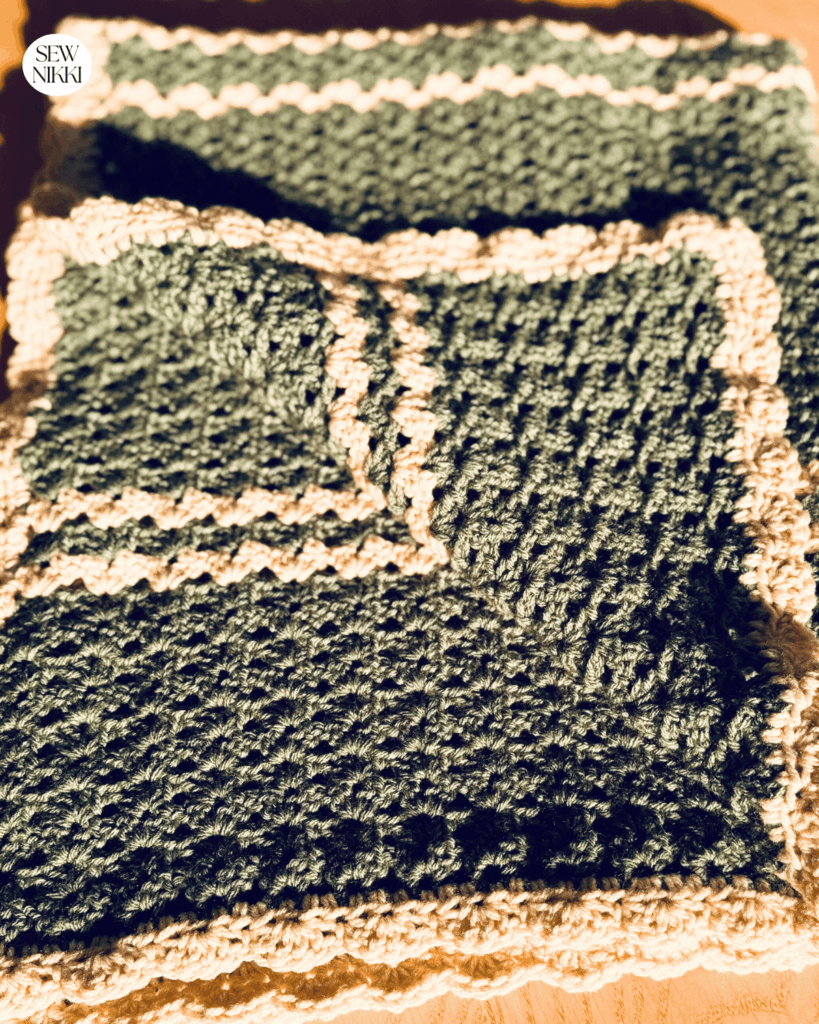
Most of my classic baby blanket patterns have rows of SC stitch or DC stitches. Very basic and sometimes boring if you make the pattern over and over again. This blanket uses the beautiful Iris Stitch in a one row repeat to create beautiful texture and still uses those two main crochet stitches. The Iris Stitch has a light, open feel that works perfectly for baby blankets, spring throws or even bed size afghans.
Pattern Details
Skill Level: Easy
Stitch Used: Iris Stitch (made with 2DC, CH1, 2DC in same stitch)
Hook Size: H/8 (5.0 mm)
Yarn: Any medium weight (worsted #4) yarn
Sample Size: 34.5″ x 41″ baby blanket (crib blanket)
Make sure you check this out!
After you read this post, make sure you also check out Learn To Crochet for Absolute Beginner’s. It’s jam packed with even more information, links and resources that are so helpful when you’re first learning. It also has a section with free patterns that are great for beginners. So make sure you check this out, seriously don’t forget!
Grab the Shell Stitch Afghan crochet pattern, my free gift to you when you subscribe to my newsletter. Click the link below for your copy.
Gauge
Approx. 4 Iris stitch repeats = 4 inches
(But don’t stress about it, this pattern is flexible and can easily be adjusted by chaining more or fewer stitches.)
Additional Notes
- Repeat row 2 until done.
- Each “Iris” is made of (2 dc, ch 1, 2 dc) in the same stitch or space.
- Always work each Iris into the ch-1 space from the previous row, not between stitches.
- You can make the blanket wider or narrower by chaining in multiples of 4 + 3.

How to Adjust to Any Blanket Size
The best part about this pattern is how easily you can resize it. Here’s the secret: just chain in multiples of 4, then add 3 extra chains. I always make the length of my blankets slightly larger than the width of the blankets. The foundation row is your width. So make that starting chain whatever width you want in multiples of 4 and then add 3 at the end. Keep crocheting rows until the blanket measures the length you want. That’s it!
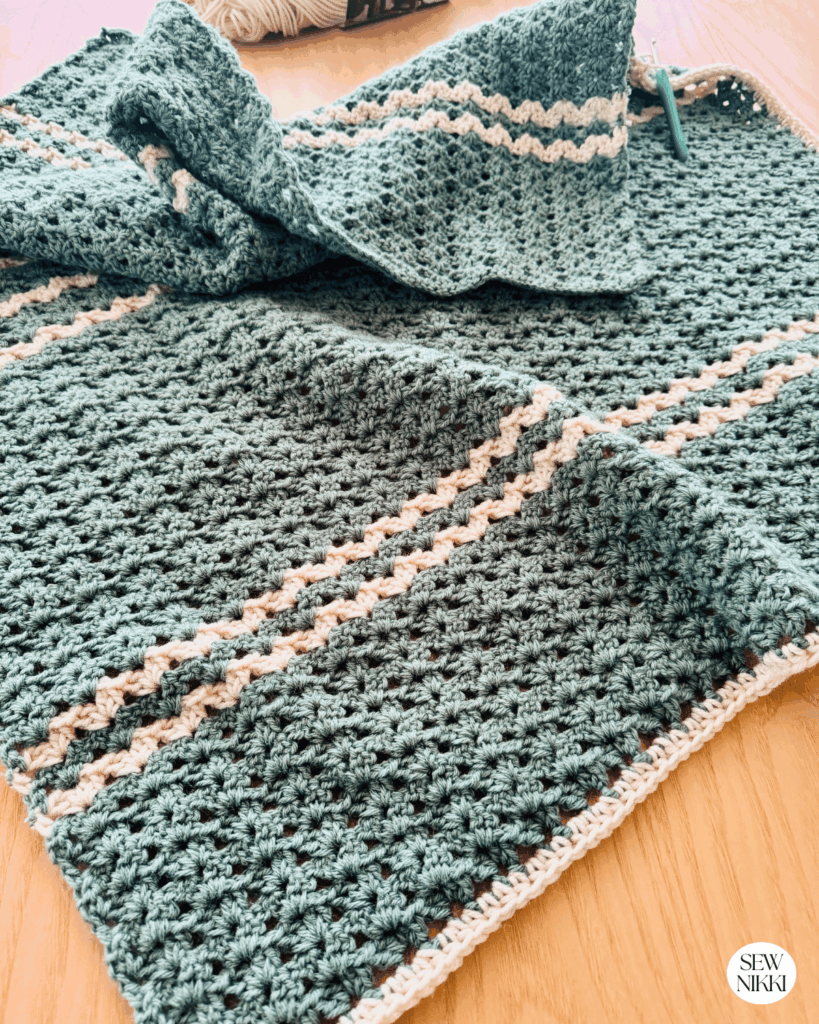
Iris Stitch – Baby Blanket Crochet Pattern Free
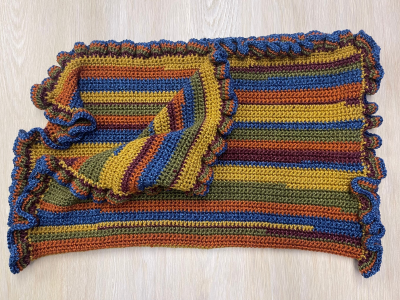
For this classic crochet baby blanket pattern, I used one primary color and an accent color. Acrylic yarn used Red Heart Super Saver Jumbo Light Sage (2 skeins) and Caron One Pound Off White (1 skein).
Abbreviations
CH – chain
DC – double crochet
HDC – Half-double crochet
ST(S) – stitch(es)
CH SP – chain space (the space created by a chain 1 in the previous row)
SK – skip
SL ST – slip stitch
Foundation Chain (sage): CH 167, turn work.
Rows
R1 (sage): DC in 5th CH from hook, (skip 3, 2DC-CH1-2DC)*. Repeat to end. 2DC in last CH, CH 1, turn.
R 2-10 (sage): DC first CH from hook. 2DC-CH1-2DC in each CH SP from the Iris Stitch from the previous row. DC in last CH, CH 1, turn.
R11 (off white): DC first CH from hook. 2DC-CH1-2DC in each CH SP from the Iris Stitch from the previous row. DC in last CH, CH 1, turn.
R12 (sage): DC first CH from hook. 2DC-CH1-2DC in each CH SP from the Iris Stitch from the previous row. DC in last CH, CH 1, turn.
R13 (off white): DC first CH from hook. 2DC-CH1-2DC in each CH SP from the Iris Stitch from the previous row. DC in last CH, CH 1, turn.

R14-29 (sage): DC first CH from hook. 2DC-CH1-2DC in each CH SP from the Iris Stitch from the previous row. DC in last CH, CH 1, turn.
R30 (off white): DC first CH from hook. 2DC-CH1-2DC in each CH SP from the Iris Stitch from the previous row. DC in last CH, CH 1, turn.
R31-32 (sage): DC first CH from hook. 2DC-CH1-2DC in each CH SP from the Iris Stitch from the previous row. DC in last CH, CH 1, turn.
R33 (off white): DC first CH from hook. 2DC-CH1-2DC in each CH SP from the Iris Stitch from the previous row. DC in last CH, CH 1, turn.
R34-35 (sage): DC first CH from hook. 2DC-CH1-2DC in each CH SP from the Iris Stitch from the previous row. DC in last CH, CH 1, turn.
R36 (off white): DC first CH from hook. 2DC-CH1-2DC in each CH SP from the Iris Stitch from the previous row. DC in last CH, CH 1, turn.
R37-53 (sage): DC first CH from hook. 2DC-CH1-2DC in each CH SP from the Iris Stitch from the previous row. DC in last CH, CH 1, turn.
R54 (off white): DC first CH from hook. 2DC-CH1-2DC in each CH SP from the Iris Stitch from the previous row. DC in last CH, CH 1, turn.
R55 (sage): DC first CH from hook. 2DC-CH1-2DC in each CH SP from the Iris Stitch from the previous row. DC in last CH, CH 1, turn.
R56 (off white): DC first CH from hook. 2DC-CH1-2DC in each CH SP from the Iris Stitch from the previous row. DC in last CH, CH 1, turn.
R57-67 (sage): DC first CH from hook. 2DC-CH1-2DC in each CH SP from the Iris Stitch from the previous row. DC in last CH, CH 1, turn.
Weave in tails before doing the easy two round border.
Border
R68 (off white): HDC around the entire blanket making sure you place 3HDC in each corner. SL ST into the starting HDC.
R69 (off white): CH 3 – 3DC in the same stitch. (SK 1, SC, SK 1, 4DC same stitch)*. Repeat all the way around the border. Do not place extra stitches in the corner like the previous row. SL ST into the base of the beginning shell stitch. Fasten off and weave in ends.
Get the digital pattern.
Get the instant download pattern from my shop here.
More Resources
If you would like to watch a video tutorial on the Iris Stitch, this is a good one from Spotted Horse Design over on YouTube.
Here’s another video tutorial by Bag-O-Day Crochet on how to do the Iris Stitch.
You May Also Like
All of these crochet blanket patterns are free and can be made into any size blanket from baby to large blanket. You can also download the digital patterns too.
Free Granny Ripple Crochet Blanket
Free Moss Stitch Crochet Baby Blanket
Retro Wave Stitch Crochet Blanket
SAVE THIS POST FOR LATER
This post contains ads and affiliate links, which means I make a small commission at no extra cost to you. While the ads are annoying, it helps keep this blog going. See my full disclosure here.
ABOUT SEW NIKKI
Welcome to Sew Nikki. Your place for free crochet, sewing and quilt patterns for beginner to intermediate skill levels. Want a digital pattern? We have those too! Plus tutorials to walk you through how to make each item from start to finish.
I hope you enjoy making this easy pattern with this fun stitch. Try switching up your yarn weight, color scheme, or hook size to totally change the look.
Want more free crochet blanket patterns? Check out my other projects in the free Pattern Index. All crochet patterns are beginner friendly and have a digital download available.
Follow me on social media (Pinterest, Instagram, Facebook and Twitter) so you get notifications when I post new patterns and tutorials.


This is beautiful and perfect for a beginner like me – thank you!!!
So excited to start this project! I’ve been in a pattern draught recently. A perfect fall project!
Such a pretty pattern and that blanket looks beatiful! I’ll need to get me some yarn and hang out with a crochet needle for a while. This would be a perfect gift for my new granddaughter :). Thanks so much for sharing this, I love it!
Wow, this blanket is beautiful! I might have to get started early on a baby blanket for someone, just to try it out.
This is such a gorgeous blanket! Thank you so much for the step by step guide!
This is so beautiful! Maybe I’ll be brave enough to crochet a blanket for my newest little one.
This is such a cute project and it doesn’t look too complicated (I never tried crochet). Thanks for sharing, great winter project 🙂
This is so gorgeous! I love beautiful baby blankets & this would make the perfect gift!
Love this! And thank you for linking the Beginner’s Guide since I’m a newbie to crocheting! I used to knit when my daughter was young, but interested in trying to crochet.
How darling! Can’t believe this pattern is free— thank you!