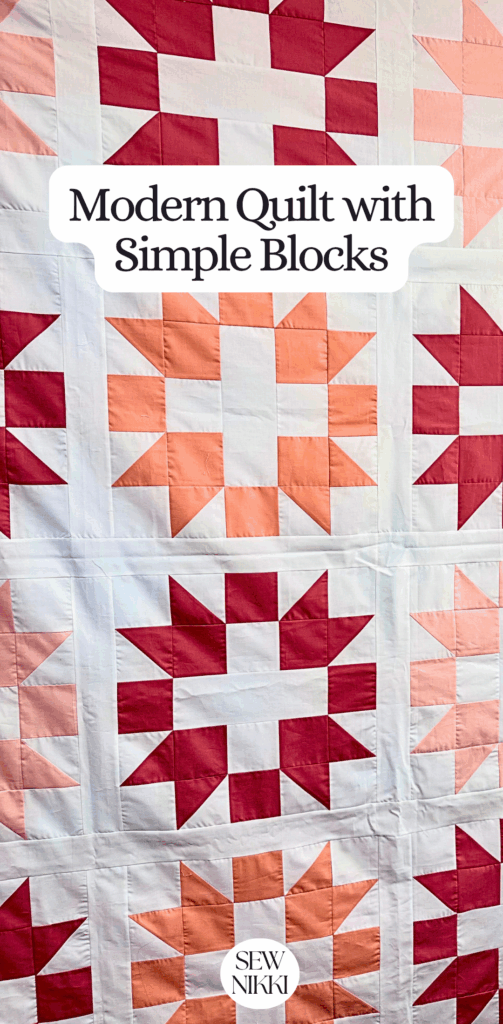
Modern Sisters Choice Quilt Pattern
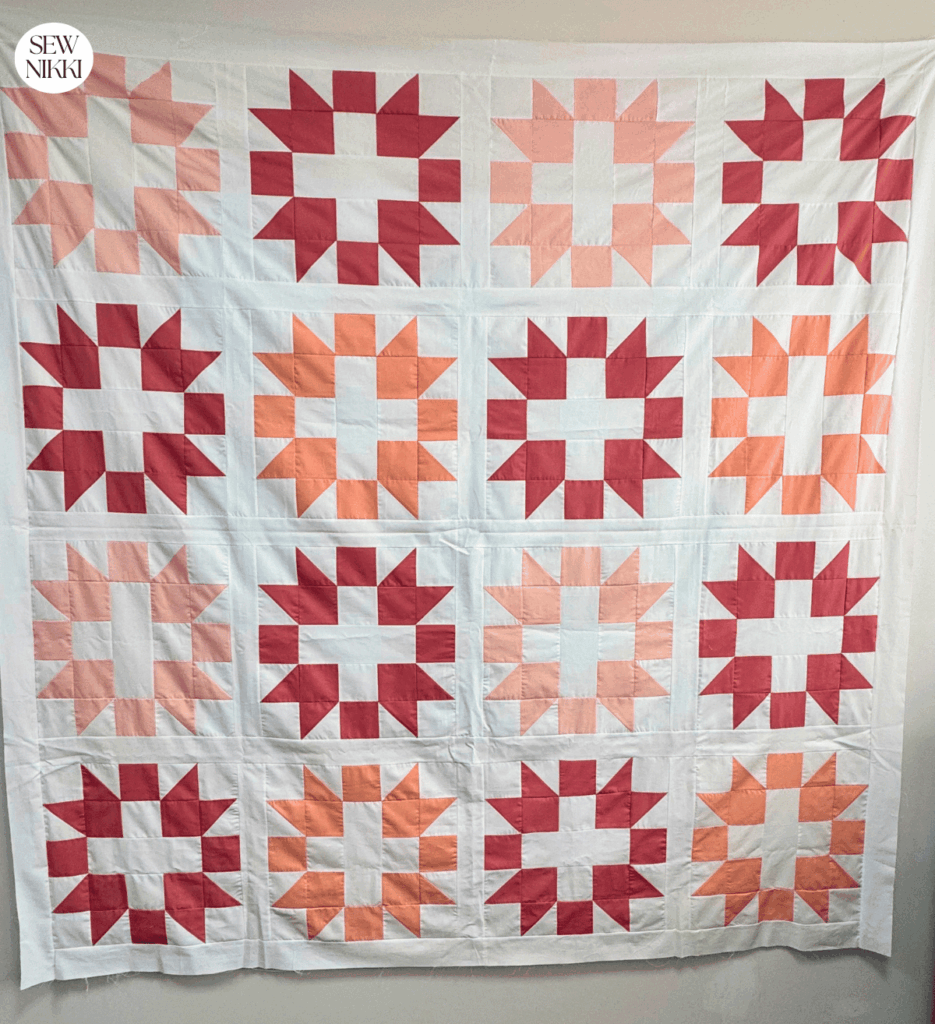
If you want a quilt that looks classic but still feels fresh, this Sisters Choice Quilt Pattern is a solid pick. It has that old school layout but when you use modern solids like I did, it completely changes the vibe.
This version uses off white as the base with soft pink and peach tones for the blocks. It is simple piecing, bigger blocks, and no complicated layout. This is the kind of quilt you can sit down and actually finish. Finished quilt measures 86″ x 86″. Digital pattern available in my shop.
Fabric Requirements for Sisters Choice Quilt Pattern
This quilt finishes at full/queen or a generous throw size with 18 large blocks set in a clean grid layout.
Fabrics used:
- Moda Bella Solids in Bubble Gum
- Moda Bella Solids in Coral Rose
- Moda Bella Solids in Peach
- Moda Bella Solids in Off White
Yardage:
- Off white: 5 yards
- Coral Rose: 1.75 yards
- Bubble Gum: 1 yard
- Peach: 1 yard
- Backing fabric: 6 yards
Quilt Layout and Block Size
This quilt is made with:
- 4 rows
- 4 blocks per row
- 16 total blocks
Each block measures 18 inches untrimmed.
You will use:
- 4 inch squares
- Half square triangles made from 4.5 inch squares and trimmed to 4 inches
Sashing and borders are cut at 3 inches for a clean frame around each block and without any cornerstones.
MAKE SURE YOU CHECK THIS OUT!
Grab a copy of my free Quilt Planning Journal. It’s filled with graph paper and note pages to help you design at least 4 quilt or sewing projects! Pin in fabric swatches, photos of your finished quilts and enjoy your creative process!
Modern Sister’s Choice Quilt Pattern
How to Make a Sisters Choice Quilt Block
This block is a mix of squares and half square triangles. Once you get the rhythm down, it moves fast.
Step 1: Cut Your Fabric
For each block, cut:
From off white:
- 6 squares at 4 inches
- 4 squares at 4.5 inches
- 1 strip at 4 inches by 11.25 inches
From your color fabric:
- 8 squares at 4 inches
- 4 squares at 4.5 inches
You will need to make 16 blocks total. 4 Bubble Gum, 4 Peach, and 8 Coral Rose.
Finished quilt size measures around 86″ x 86″.
Step 2: Make Half Square Triangles
Take your 4.5 inch squares and pair one off white with one colored square.
Draw a diagonal line on the back of the off white square.
Sew 1/4″ seam allowance on each side of that line.
Cut down the center and press open.
Trim each unit down to 4 inches.
You will need 8 half square triangles per block.
If you need a refresher on this method, this video from Homemade Emily Jane walks through it clearly.
Step 3: Lay Out the Block
Arrange your pieces into a 5 by 5 grid as shown in the photo below.
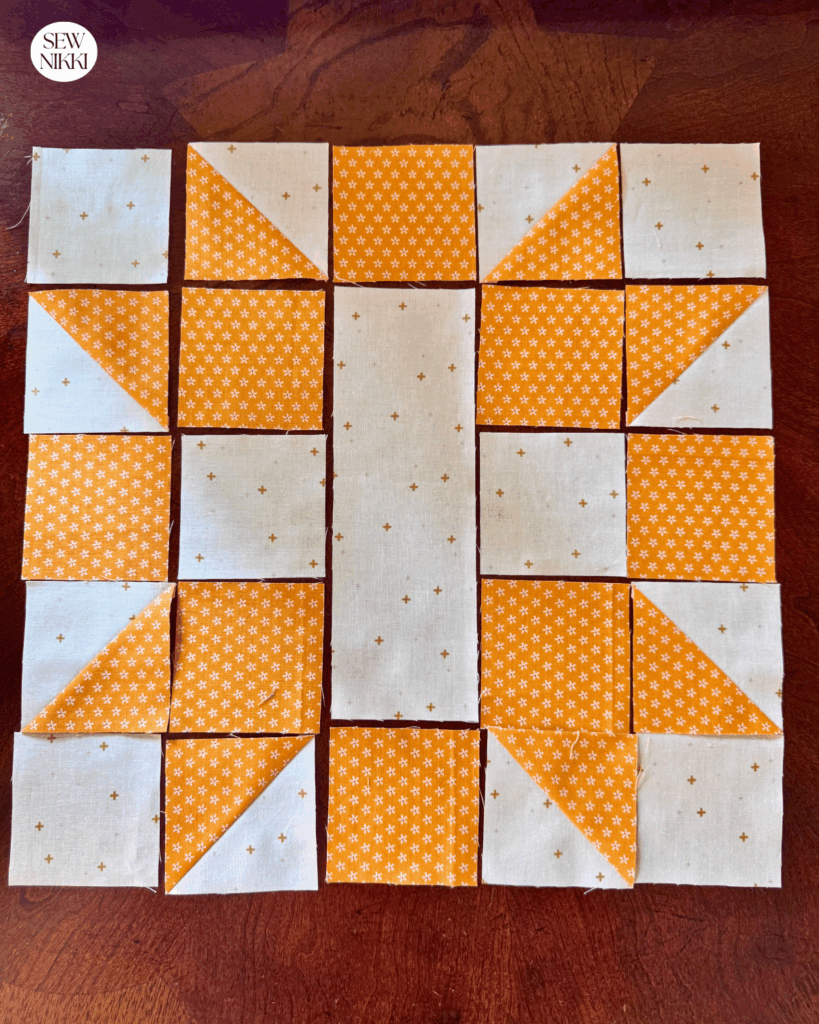
Make sure your half square triangles are rotated correctly so they face inward.
Step 4: Sew the Block
Sew each row together.
Press seams in alternating directions so your rows nest.
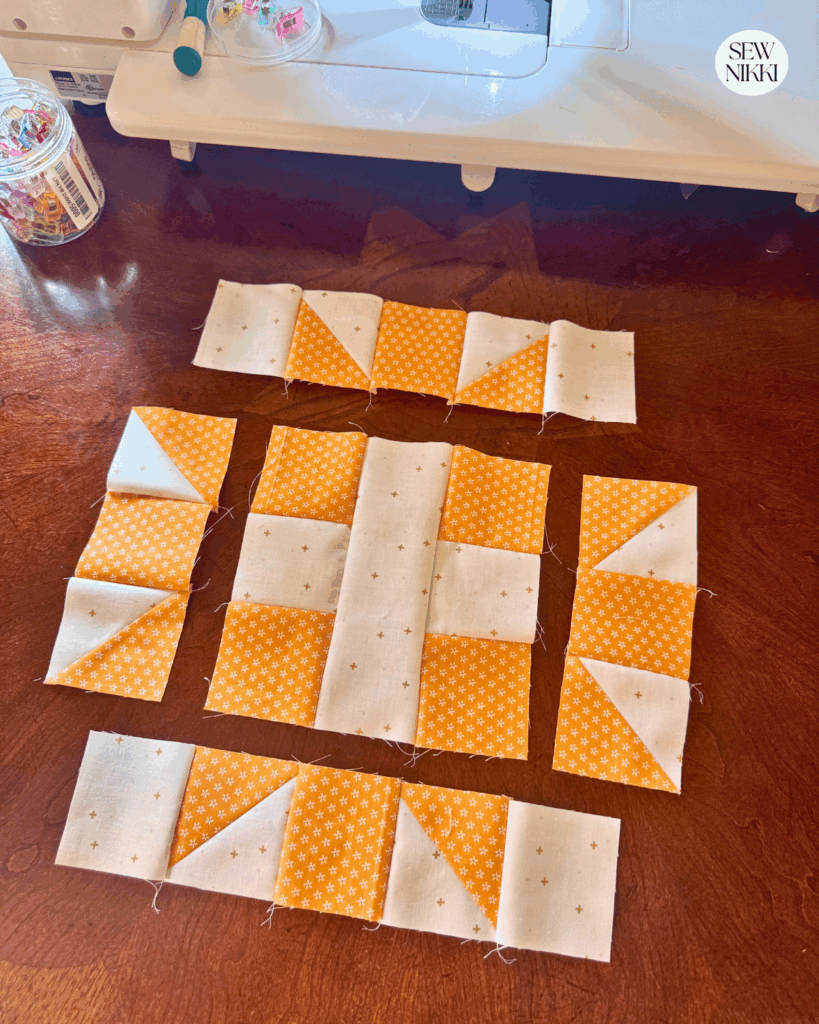
Sew the rows together to complete the block.
Your untrimmed block should measure close to 18 inches.
I cleaned up each block but don’t square it up. You can if you like but I kept on going with quilt assembly with my untrimmed blocked.
Assembly for Sisters Choice Quilt Pattern
Once your 16 blocks are finished, it is time to put everything together.
Row one is pink, coral rose, pink, coral rose.
Second row is coral rose, peach, coral rose, peach.
Third is pink, coral rose, pink, coral rose.
Final row is coral rose, peach, coral rose, peach.
Step 1: Cut Sashing
Cut your off white fabric into:
- 3 inch wide strips by width of fabric (should be around 44″)
You will need:
- 12 vertical sashing strips cut to 18 inches
- 5 horizontal sashing strips that go before, in between and after each row
- 2 long vertical sashing strips to finish the sides of the quilt

Step 2: Sew Rows
Sew your blocks into rows of 4.
Add vertical sashing strips between each block in the row.
Press seams toward the sashing.
Step 3: Join Rows
Sew horizontal sashing strip between each row.
Each horizontal sashing strip requires two strips sewn together so get the correct length. When attaching strip to the row, nest seam in with a sashing seam from the middle of the row you are attaching it to.
Keep everything lined up so your blocks stay straight.
Take your time here. This is where quilts can start to shift if you rush it.
Adding Side Borders
Borders are cut at 3 inches wide.
Join two strips together using 1/4″ seam allowance. Pin to one side of quilt starting at on end, do not nest seam on the side borders.
These are the longest strips you will need but two strips sewn together will work with about 1.5″ left over.
Get the digital pattern.
Get the instant download pattern here.
Finishing the Quilt
Once your quilt top is done:
- Add batting and backing
- Quilt using straight lines or a simple grid
- Bind using your favorite method
If you want a simple straight line quilting video, here’s a good one from American Patchwork and Quilting.
White batting is recommended whenever you have a quilt with a lot of white fabric, like this one. I’ll be using White Hobb’s 80/20 Cotton Batting for this quilt. I’m still testing out battings and have heard good things about this one.
Tips for a Clean Finish
- Use spray starch on your solid fabrics to keep everything crisp
- Trim your half square triangles carefully so your points match
- Press, do not iron, to avoid stretching
- Stick with a consistent seam allowance
More Quilt Patterns You Might Like
If you like this style, here are a few more from my site:
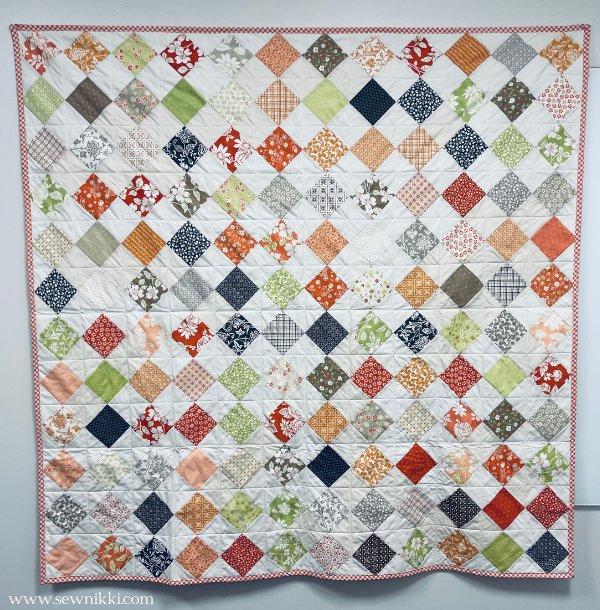
Sisters Choice Block Quilt Pattern
This is such an easy quilt to make and I’ll definitely be using less small prints and more solid fabrics very soon.
Big blocks mean fewer seams.
Simple layout means less stress.
And using solids keeps it modern without trying too hard.
If you are an intermediate quilter who wants something clean and reliable, this one works.
If You’re New Here
I’m really glad you found your way here.
If you’re new to quilting, then welcome. The learning curve is fast, and yes, you’ll hit challenges. But I’ve got you.
Here’s where to go next:
- Free Pattern Index – all my free patterns in one place
- Digital, ad-free patterns – clean, printable, and beginner-friendly
- Handmade goodies – because sometimes you just want it finished
- Learn to Quilt Page – every step of making and finishing a quilt
My blog is built for the home sewist and quilter who wants to do it all themselves. With a nice but basic sewing machine and realistic expectations.
ABOUT SEW NIKKI
If this is your first time stopping by, welcome! Your place for free crochet, sewing and quilt patterns for beginner to intermediate skill levels. Want a digital pattern? We have those too! Plus tutorials to walk you through how to make each item from start to finish.
Follow me on social media (Pinterest, Instagram, Facebook and Twitter) so you get notifications when I post new patterns and tutorials.
Looking for your next quilt project? Then head on over to my free “Pattern Index”. It’s a page dedicated to all of my free patterns separated by categories for crochet, sewing and quilting.
If you prefer an ad-free printable version, head over to my shop and browse the Digital Patterns. These are instant digital downloads you print yourself.
This post contains ads and affiliate links, which means I make a small commission at no extra cost to you. While the ads may seem annoying, it helps keep this blog going. See my full disclosure here.


Love this star pattern, it would be so beautiful with all the vintage prints I’ve saved. Thanks for sharing your creativity!
This is gorgeous! It reminds me of the quilts my great grandmothers made and passed down 🥰
So beautiful! My husband’s grandmother was a quilter. We have several of her quilts as do each of our children. I’d love to learn.
This is so cute! It is going to be the perfect next sewing project.
So pretty! I think quilts are beautiful. One of my goals is to learn quilting!!
So beautiful! Love this pattern!
I love how detailed these instructions are! I haven’t ever done any quilting myself but this looks easy enough to follow that I could actually make it as a beginner. Thank you for sharing!
Thank you for this explanation – and in addition, your work is positively beautiful!